2013 VOLKSWAGEN TRANSPORTER remote control
[x] Cancel search: remote controlPage 44 of 486
m Due to the current legislation on the Israel W market, the acoustic warning signals are de-activated there.
m The alarm will be triggered again if a person W gains access to the same or a different se-cured zone after the alarm has been switched off. For example, if the tailgate is opened after a door had been opened.
m The anti-theft alarm will not be activated if W the vehicle is locked from the Inside using the central locking button @.
m If you unlock the driver door mechanically us-L!J ing the vehicle key, only the driver door is un-locked, and not the whole vehicle. The SAFELOCK mechanism on all doors is not deactivated and the central locking button is not activated until you switch on the ignition (however the doors will not be unlocked).
m The anti-theft alarm will not function correctly W if the vehicle battery is weak or discharged.
m lt is not possible to include the trailer in the W anti-theft alarm system.
81f·01U
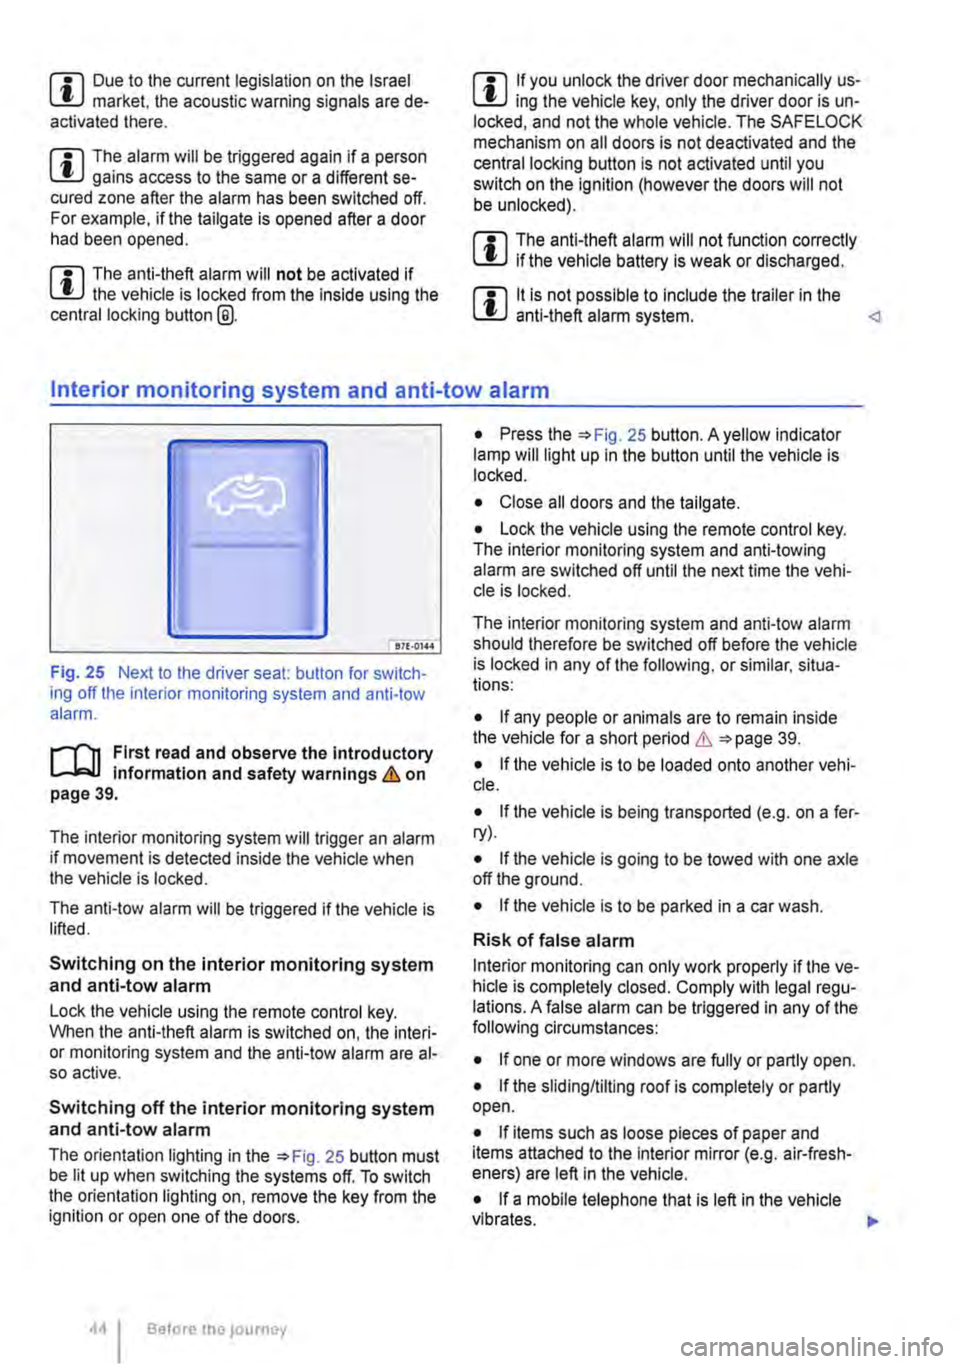
Fig. 25 Next to the driver seat: button for switch-ing off the interior monitoring system and anti-tow alarm.
r-f"n First read and observe the introductory information and safety warnings & on page 39.
The interior monitoring system will trigger an alarm if movement is detected inside the vehicle when the vehicle is locked.
The anti-tow alarm will be triggered if the vehicle is lifted.
Switching on the interior monitoring system and anti-tow alarm
Lock the vehicle using the remote control key. When the anti-theft alarm is switched on, the interi-or monitoring system and the anti-tow alarm are al-so active.
Switching off the interior monitoring system and anti-tow alarm
The orientation lighting in the =>Fig. 25 button must be lit up when switching the systems off. To switch the orientation lighting on, remove the key from the ignition or open one of the doors.
Before the journey
• Press the =>Fig. 25 button. A yellow indicator lamp will light up in the button until the vehicle is locked.
• Close all doors and the tailgate.
• Lock the vehicle using the remote control key. The interior monitoring system and anti-towing alarm are switched off until the next time the vehi-cle is locked.
The interior monitoring system and anti-tow alarm should therefore be switched off before the vehicle is locked in any of the following, or similar, situa-tions:
• If any people or animals are to remain inside the vehicle for a short period & =>page 39.
• If the vehicle is to be loaded onto another vehi-cle.
• If the vehicle is being transported (e.g. on a fer-ry).
• If the vehicle is going to be towed with one axle off the ground.
• If the vehicle is to be parked in a car wash.
Risk of false alarm
Interior monitoring can only work properly if the ve-hicle is completely closed. Comply with legal regu-lations. A false alarm can be triggered in any of the following circumstances:
• If one or more windows are fully or partly open.
• If the slidingflilting roof is completely or partly open.
• If items such as loose pieces of paper and items attached to the Interior mirror (e.g. air-fresh-eners) are left in the vehicle.
• If a mobile telephone that is left in the vehicle vibrates. 11>-
Page 47 of 486
Function
Opening the sliding door from the outside
Opening the sliding door from the inside
Closing the sliding door
Action
Pull the outside handle of the unlocked sliding door and open the door fully.
Pull the inside handle CD of the unlocked sliding door and open the door fully.
Pulling the inside or outside door handle and push the sliding door using a little force to close it. Make sure that the sliding door is properly closed.
IL
850-0043 .--87£..0147
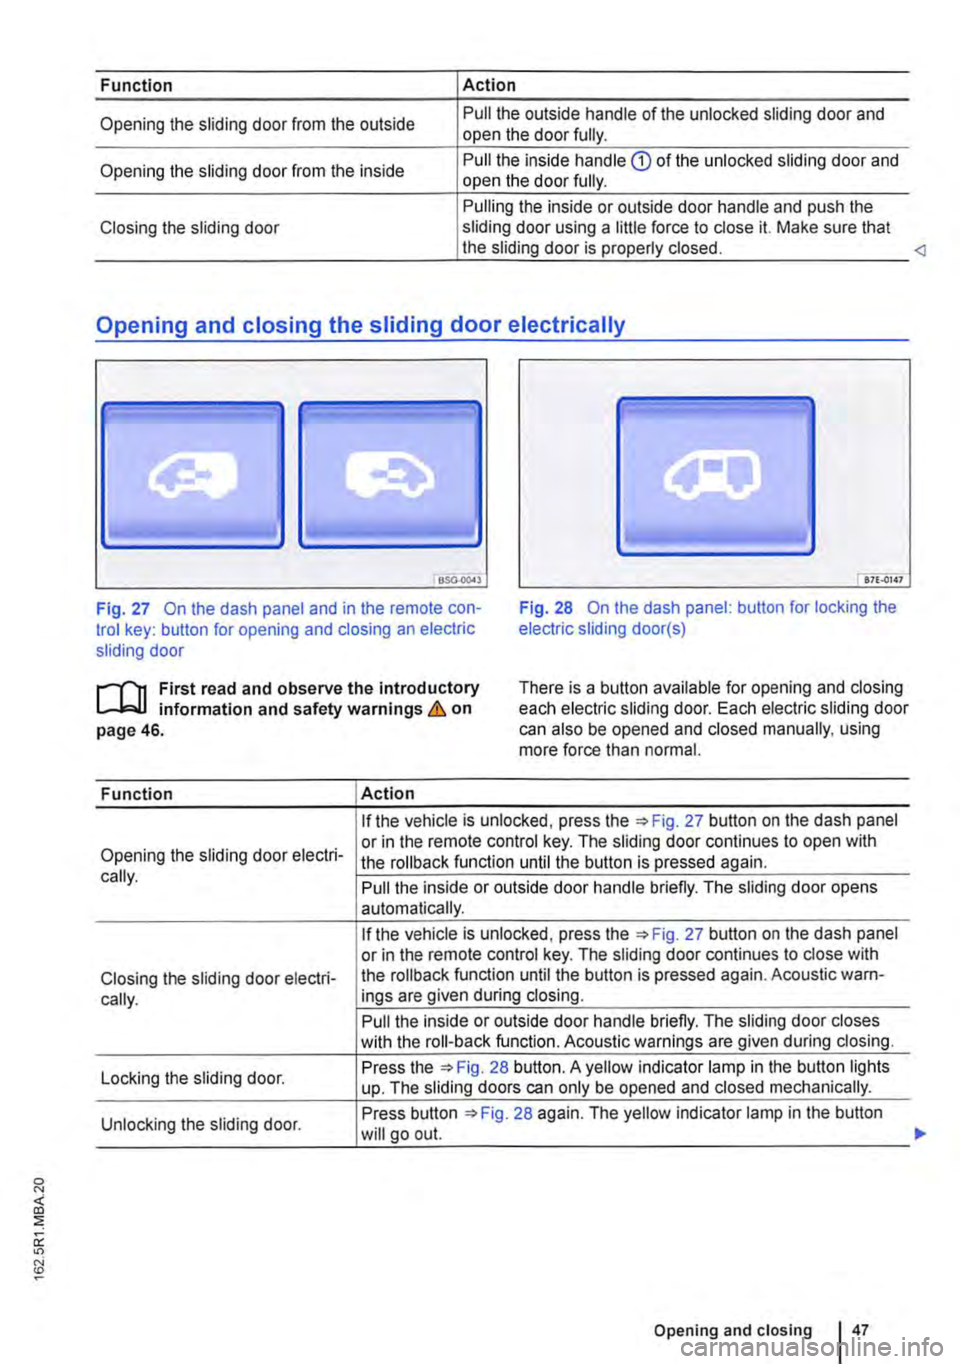
Fig. 27 On the dash panel and in the remote con-trol key: button for opening and closing an electric sliding door
Fig. 28 On the dash panel: button for locking the electric sliding door(s)
.--m First read and observe the introductory l-J,::JJ information and safety warnings & on page 46.
There is a button available for opening and closing each electric sliding door. Each electric sliding door can also be opened and closed manually, using more force than normal.
Function Action
If the vehicle is unlocked, press Fig. 27 button on the dash panel
Opening the sliding door electri-or in the remote control key. The sliding door continues to open with the rollback function until the button is pressed again. cally. Pull the inside or outside door handle briefly. The sliding door opens automatically.
If the vehicle is unlocked, press the 27 button on the dash panel or in the remote control key. The sliding door continues to close with
Closing the sliding door electri-the roll back function until the button is pressed again. Acoustic warn-
cally. ings are given during closing.
Pull the inside or outside door handle briefly. The sliding door closes with the roll-back function. Acoustic warnings are given during closing.
Locking the sliding door. Press the 28 button. A yellow indicator lamp in the button lights up. The sliding doors can only be opened and closed mechanically.
Unlocking the sliding door. Press button 28 again. The yellow indicator lamp in the button will go out.
Opening and closing I 47
...
Page 57 of 486
• Close all windows and doors.
• Pull up the button for the window and hold it in this position for at least one second.
• Let go of the button then pull it up again and hold it in this position. One-touch opening and closing is now ready for operation.
The one-touch function can be restored for individ-ual windows or for several windows at the same time.
Convenience opening and closing
There are three different ways of opening and clos-ing all electric windows simultaneously when the ignition is switched off:
• Press and hold the locking or unlocking button in the remote control key.
• To interrupt this function, let go of the locking or unlocking button.
• OR: hold the vehicle key in the driver door lock cylinder in either the locking or the unlocking posi-tion until all windows are either opened or closed.
• To interrupt this function, turn the vehicle key in the opposite direction.
• OR: after switching the ignition off and opening the driver and front passenger doors, push or pull the@ button in the required direction for at least two seconds.
During convenience closing, first the windows and then the sliding/tilting roof will be closed.
A WARNING
Careless or unsupervised use of the electric windows can cause serious Injuries.
• The electric windows should only be opened or closed when you are sure that no-body is in their operating area.
• Never leave children or people requiring assistance alone In the vehicle when the ve-hicle is locked. The windows can no longer be opened In an emergency.
• Always take all vehicle keys with you ev-ery time you leave the vehicle. The windows can still be operated using the buttons sever-al minutes after the Ignition has been switch-ed off, provided that the driver door and front passenger door are not opened.
m One-touch opening and closing and the roii-L!J back function will not work if there is a fault in the electric windows. Go to a qualified workshop.
l"""l'l1 First read and observe the Introductory l-J,a,IJ Information and safety warnings & on page 55.
The roll-back function for the electric windows can reduce the risk of Injuries when the windows are closing :) &. If the one-touch closing function for a window does not work because it is stiff or is being obstructed, the window will automatically open again.
• Check to see why the window has not closed.
• Try to close the window again.
• If the window is again prevented from closing within approximately 10 seconds of the first at-tempt because it is stiff or obstructed, the automat-ic closing function is switched off for approximately 10 seconds.
• If the window is still obstructed, the window stops at this point. To close the window without the roll-back function, press the button again within 1 0 seconds :) &.
Closing the window without the roll-back function
• Try to close the window again within approxi-mately 10 seconds by holding the button. The roll-back function will be deactivated for a small section of the path of the closing window.
• If the closing procedure takes longer than ap-proximately 10 seconds, the roll-back function will be reactivated. The window will then stop again if it is stiff or meets another obstacle.
• Please go to a qualified workshop if the window still cannot be closed.
A WARNING
Closing the electric windows without the roll-back function could lead to severe Injuries.
• Always take care when closing electric windows. 11>
Opening and closing
Page 93 of 486
A DANGE;R (Continued) --
• No other people, animals or objects may be carried between the occupants of the front seats and the alrbag deployment zone. Make sure that children and passengers also keep to this rule.
• Do not attach any objects, e.g. mobile nav-igation devices, to the windscreen above the front alrbag on the front passenger side.
• Do not cover or stick anything on the steering wheel hub or the soft plastic surface of the alrbag unit In the dash panel on the front passenger side, and do not modify them In any way.
A WARNING
The front alrbags are deployed In front of the steering wheel "*Fig. 71 and dash panel '*Fig. 72.
• When driving, always hold the steering wheel with both hands on the outside of the ring at the 9 o'clock and 3 o'clock positions.
• Adjust the driver seat so that there is at least 25 cm between your breastbone and the hub of the steering wheel. Contact a qualified workshop if your physical build makes this Impracticable.
• Adjust the front passenger seat so that the distance between the passenger and the
__ ____
Switching the front passenger front airbag on and off manually using the
key-operated switch
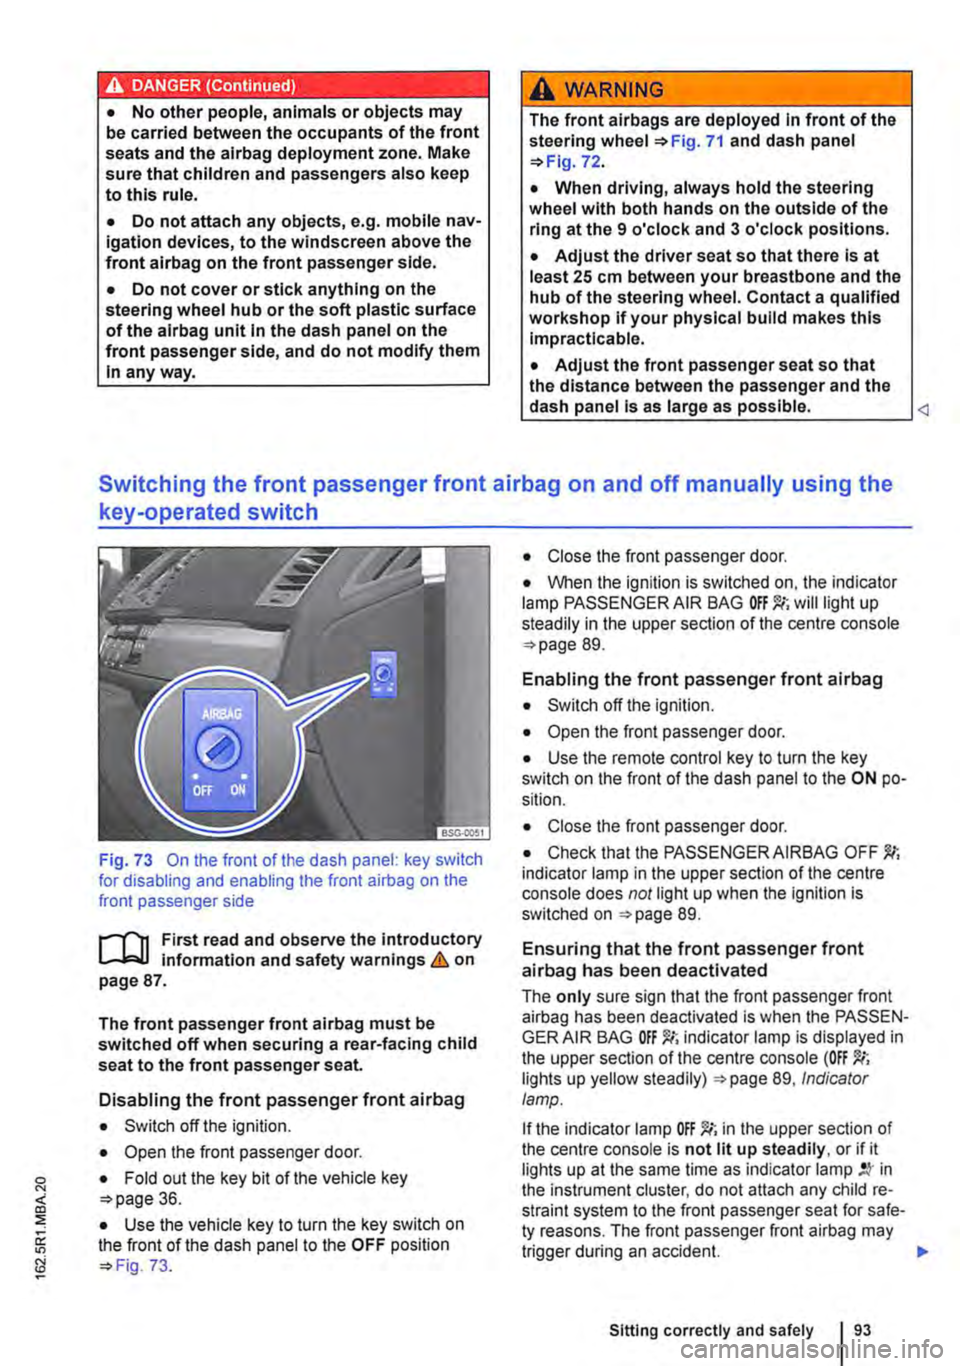
Fig. 73 On the front of the dash panel: key switch for disabling and enabling the front airbag on the front passenger side
l""'rn First read and observe the introductory L-J,::.U information and safety warnings&. on page 87.
The front passenger front airbag must be switched off when securing a rear-facing child seat to the front passenger seat.
Disabling the front passenger front airbag
• Switch off the ignition.
• Open the front passenger door.
• Fold out the key bit of the vehicle key o>page 36.
• Use the vehicle key to turn the key switch on the front of the dash panel to the OFF position o> Fig. 73.
• Close the front passenger door.
• When the ignition is switched on, the indicator lamp PASSENGER AIR BAG will light up steadily in the upper section of the centre console o> page 89.
Enabling the front passenger front airbag
• Switch off the ignition.
• Open the front passenger door.
• Use the remote control key to turn the key switch on the front of the dash panel to the ON po-sition.
• Close the front passenger door.
• Check that the PASSENGER AIRBAG OFF indicator lamp in the upper section of the centre console does not light up when the Ignition is switched on =>page 89.
Ensuring that the front passenger front airbag has been deactivated
The only sure sign that the front passenger front airbag has been deactivated is when the PASSEN-GER AIR BAG indicator lamp is displayed in the upper section of the centre console (OFF lights up yellow steadily) =>page 89, Indicator lamp.
If the indicator lamp OFF )!(; in the upper section of the centre console is not lit up steadily, or if it lights up at the same time as indicator lamp in the instrument cluster, do not attach any child re-straint system to the front passenger seat for safe-ty reasons. The front passenger front airbag may trigger during an accident.
Sitting correctly and safely
Page 165 of 486
A DANGER (Continued)
• 230-volt socket with inverter switch:
CD
-Do not plug adapters or extension ca-bles into the 230-volt socket. Otherwise the built-in child lock will disengage and power will be supplied to the socket.
• Observe the operating instructions for any device that you plug into the socket.
• Never exceed the maximum power rating as this could damage the whole vehicle electrical system.
• Only use accessories that have been ap-proved in accordance with valid guidelines concerning electromagnetic compatibility.
CD
• Never feed electricity Into the socket.
• Do not plug any heavy devices or connec-tions, such as mains adapters, directly Into the socket.
• Only connect devices to the socket with a voltage that matches the voltage of the socket.
• 230-volt socket with inverter switch:
-Do not connect any lights which use neon tubes.
-With electrical devices that require a high level of current In the start phase, the built-In excess current switch will prevent the de-vice from being switched on. If this hap-pens, disconnect the device from the power supply and reconnect after waiting approxi-mately 10 seconds.
m Unshielded devices can cause interference W with radio reception and vehicle electronics.
[Q) Introduction
This chapter contains information on the following subjects:
Components ......... .
Folding the LCD screen out and in
DVD player ..
Controls on the LCD screen ...
Remote control ..
Settings on the LCD screen Settings on the DVD player
Care and protection
166
167 167
168
169
170 171
Use a suitable screen cleaner for cleaning the screen Be careful not to scratch the screen when cleaning it.
A WARNING
Improper use of the rear seat entertainment system could cause short-circuits, fire and serious Injuries.
• Protect the rear seat entertainment system against moisture and damp.
A WARNING
Objects that are loosely placed in the vehicle or not properly secured could be flung through the interior and cause injuries during a sudden driving or braking manoeuvre, or in the event of an accident.
• Always stow the remote control units and headsets securely In the stowage compart-ments.
A WARNING
Accidents and Injuries can occur If the driver Is distracted.
• Never allow use of the rear seat entertain-ment system to distract you from what Is happening on the road.
• Comply with legal regulations .
• Select volume settings that allow signals from outside the vehicle (such as emergency services sirens) to be easily heard at all times.
Practical equipment 165
Page 166 of 486
A WARNING
LCD screens contain liquid crystal, which can escape if the screen is broken. The fluid could cause irritation to the skin, eyes and respiratory organs.
• The escaping fluid could cause irritation to the skin, eyes and respiratory organs, es-pecially in people who suffer from asthma or similar illnesses. Immediately ensure that there is a sufficient supply of fresh air and get out of the vehicle. If this is not possible, open all of the windows and doors.
• If fluid gets Into your eyes or onto your skin, Immediately wash the affected area with lots of water for at least 15 minutes and con-suit a doctor.
• If fluid gets onto shoes or clothing, wash immediately with lots of water for at least 15 minutes. Clean shoes and clothes thoroughly before wearing them again.
• If fluid is swallowed, Immediately rinse the mouth out with lots of water for at least 15 minutes. Do not Induce vomiting unless In· structed to do so by a doctor. Seek medical assistance immediately.
A WARNING
Opening a DVD player's housing can lead to injuries from invisible laser radiation.
Components
,...-('n First read and observe the introductory L-Wl Information and safety warnings & on page 165.
The rear seat entertainment system is made up of the following components:
1661 Before the journey
A WARNING (Continued)
• DVD players should only be repaired by a qualified workshop.
CD
The LCD screen can be damaged If it is not handled properly.
• Always fold the LCD screen completely open or shut.
• The LCD screen Is not a "touchscreen". Do not touch or press the surface of the LCD screen.
• Do not expose the LCD screen to direct sun-light or intensive ultraviolet light for long peri-ods. This could damage the screen.
CD
Cleaning agents containing solvents can dam-age the LCD screen.
• Use cleaning agents that do not contain sol-vents such as petrol or turpentine to clean the LCD screen.
r:(jh The LCD screen contains mercury. Dispose I!!S of the LCD screen in accordance with legal requirements.
m The rear seat entertainment system only W works if the temperature inside the vehicle is between -1s•c (+S.F) and +so•c (+140.F). At temperatures outside this range, you will not be able to switch the rear seat entertainment system on. If switched on, it will switch off automatically.
• Infrared remote control unit '*page 169.
m Two sets of infrared headphones are deliv-l!J ered with the rear seat entertainment system.
Page 167 of 486

Folding the LCD screen out and in
Fig. 131 In the headliner: folding the LCD screen out
r-111 First read and observe the introductory L-b.U information and safety warnings & on page 165.
DVD player
r-111 First read and observe the introductory L-b.U information and safety warnings & on page 165.
Keep liquids away from the DVD player & in In-troduction on page 165. If you spill liquid on the DVD player, switch it off immediately and consult a Volkswagen Commercial Vehicles dealership.
High humidity can cause condensation in the DVD player and damage the reading head.
Do not place a DVD or CD in the DVD player if condensation has formed in it. Instead, switch the DVD player on and allow it to dry for around an hour.
To ensure excellent, high-quality CD or DVD repro-duction, only use COs or DVDs that are clean and undamaged.
Please do not stick any labels onto the DVDs or COs.
Always stow unused DVDs or COs securely in the vehicle.
Never expose DVDs or COs to direct sunlight.
Inserting a CD or DVD
• Push the CD or DVD into the slot at the side with the printed side facing upwards until the disc is pulled in automatically
Folding the LCD screen out
• Before folding out. make sure that there is enough space to do so.
• Press the button 131 G) and carefully fold the LCD screen downwards by hand as far as the in Introduction on page 166.
Folding the LCD screen in
• Carefully fold the LCD screen upwards until it clicks into in Introduction on page 166.
CD
Inserting or removing COs or DVDs incorrectly can damage the DVD player.
• Insert or remove the CD or DVD into or out of the slot at right angles to the side of the player, making sure that the CD or DVD does not become jammed in the slot.
• "Special shape COs" may not be inserted. They can damage the player.
• Do not insert COs or DVDs with adhesive la-bels on them Into the DVD player. The label could become detached from the CD or DVD and damage the drive mechanism.
m The DVD player may be unable to play cer-L!J tain COs, DVDs and file formats. For more in-formation on compatible COs, DVDs and file for-mats, contact a Volkswagen Commercial Vehicles dealership.
Page 169 of 486
Remote control
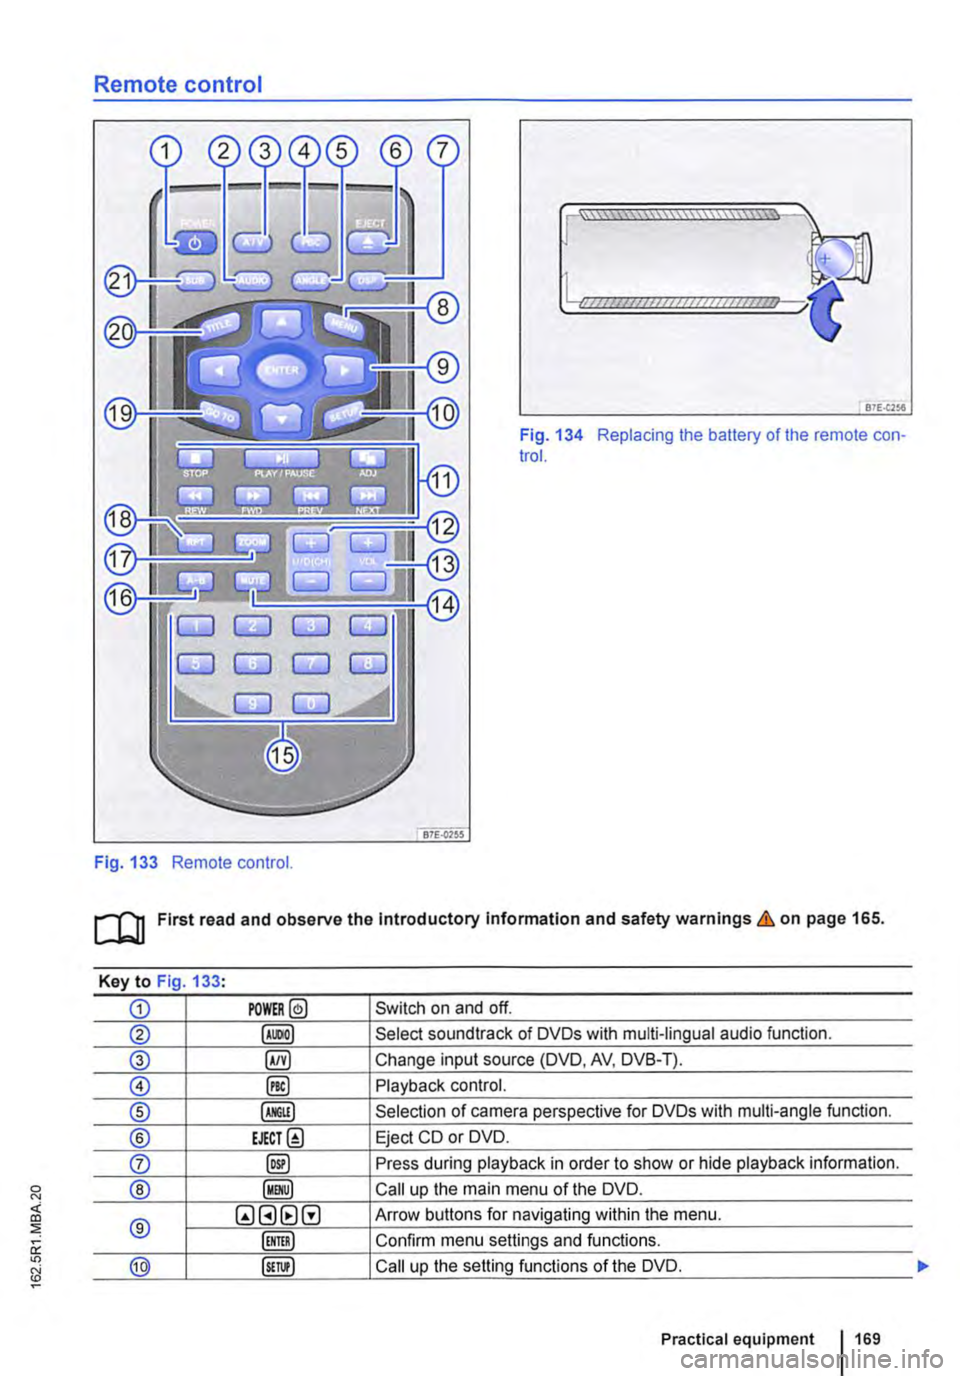
Fig. 133 Remote control.
[::::::::::::::::::::::vm
81£.(256
Fig. 134 Replacing the battery of the remote con-trol.
[QJ First read and observe the Introductory Information and safety warnings & on page 165.
Key to Fig 133·
CD POWER@ Switch on and off.
@ Select soundtrack of DVDs with multi-lingual audio function.
® §) Change input source (DVD, AV, DVB-T).
0 @) Playback control.
® Selection of camera perspective for DVDs with multi-angle function.
® EJECT@ Eject CD or DVD.
0 @) Press during playback in order to show or hide playback information.
® Call up the main menu of the DVD.
® QGHtlG Arrow buttons for navigating within the menu.
Confirm menu settings and functions.
@ Call up the setting functions of the DVD.
Practical equipment 169