Page 138 of 400

138 2-2. Instrument cluster
■Indicators
The indicators inform the driver of the operating state of the
vehicle’s various systems.
*1: These lights turn on when the engine switch is turned to the “ON”
position to indicate that a system check is being performed. They
will turn off after the engine is started, or after a few seconds. There
may be a malfunction in a system if a light does not come on, or if
the lights do not turn off. Have the vehicle inspected by your Toyota
dealer.
*2: The light flashes to indicate that the system is operating.
Turn signal indicator
(P. 130)
(if equipped)
Cruise control indicator
( P. 158)
Headlight high beam
indicator ( P. 146)
(if equipped)
Cruise control “SET”
indicator ( P. 158)
(if equipped)
Front fog light indicator
(P. 148)*1,2
Slip indicator ( P. 163)
Low engine coolant
temperature indicator
Indicates the engine
coolant temperature is
cool.*1VSC OFF indicator
(P. 164)
*1“TRAC OFF” indicator
(P. 163)
(if equipped)
Engine immobilizer/
alarm system indicator
(P. 72, 74)*1“AIR BAG ON” indicator
( P. 92)
*1Eco Driving Indicator
Light ( P. 115)*1“AIR BAG OFF” indica-
tor (P. 92)
(vehicles with an automatic transmission)
Shift position and shift
range indicator
(P. 127)
(vehicles with an automatic transmission)
Page 140 of 400
140
2-2. Instrument cluster
Multi-information display
Changing the displayItems displayed can be switched
by pressing the display change
button.
The multi-information display presen ts the driver with a variety of
driving-related data.
● Odometer ( P. 141)
● Trip meter ( P. 141)
● Trip information ( P. 141)
Displays driving range, fuel
consumption and other cruis-
ing-related information.
● Eco Driving Indicator Light
customization (vehicles with
an automatic transmission)
( P. 143)
Page 143 of 400

143
2-2. Instrument cluster
2
When driving
■
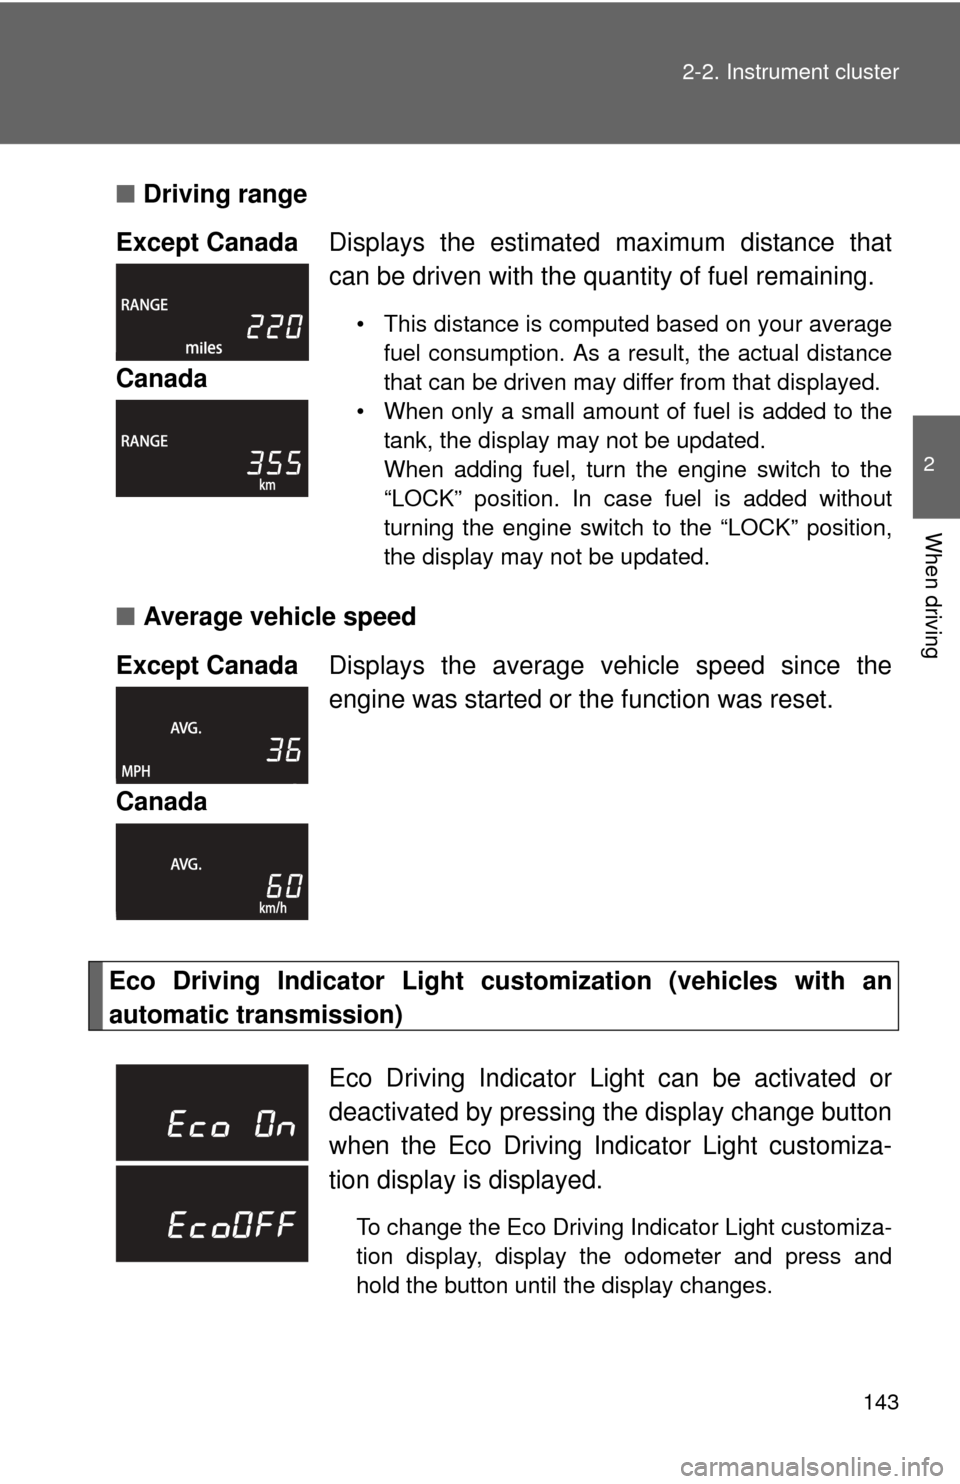
Driving range
■ Average vehicle speed
Eco Driving Indicator Light cu stomization (vehicles with an
automatic transmission) Except Canada
Displays the estimated maximum distance that
can be driven with the quantity of fuel remaining.
• This distance is computed based on your average
fuel consumption. As a result, the actual distance
that can be driven may differ from that displayed.
• When only a small amount of fuel is added to the tank, the display may not be updated.
When adding fuel, turn the engine switch to the
“LOCK” position. In case fuel is added without
turning the engine switch to the “LOCK” position,
the display may not be updated.
Canada
Except Canada Displays the average vehicle speed since the
engine was started or the function was reset.
Canada
Eco Driving Indicator Light can be activated or
deactivated by pressing t he display change button
when the Eco Driving Indicator Light customiza-
tion display is displayed.
To change the Eco Driving Indicator Light customiza-
tion display, display the odometer and press and
hold the button until the display changes.
Page 173 of 400
173
2-5. Driving information
2
When driving
Selecting tire chains
Use the correct tire chain size when mounting the tire chains.
Chain size is regulated for each tire size. Side chain
3 mm (0.12 in.) in diameter
Cross chain
4 mm (0.16 in.) in diameter
Regulations on the use of tire chains
Regulations regarding the use of ti re chains vary depending on loca-
tion and type of road. Always chec k local regulations before installing
chains.
■ When driving the vehicle
Accelerate the vehicle slowly and drive at a reduced speed suit-
able to the road conditions.
■ When parking the vehicle (in the winter time or in the cold
latitudes)
Park the vehicle and move the shift lever to P (vehicles with an
automatic transmission) or 1 or R (vehicles with a manual trans-
mission) without setting the parking brake. The parking brake
may freeze up, preventing it from being released. If necessary,
block the wheels to prevent in advertent sliding or creeping.
Page 181 of 400

181
2-5. Driving information
2
When driving
●
Crosswinds and rough roads will adversely affect handling of your
vehicle and trailer, causing sway . Periodically check the rear to
prepare for being passed by large trucks or buses, which may
cause your vehicle and trailer to sway. If swaying occurs, firmly grip
the steering wheel, reduce speed immediately but gradually, and
steer straight ahead. Never increase speed. If you make no
extreme correction with the stee ring or brakes, your vehicle and
trailer will stabilize.
● Take care when passing other vehicles. Passing requires consider-
able distance. After passing a vehicle, do not forget the length of
your trailer, and be sure you hav e plenty of room before changing
lanes.
● To maintain engine braking efficiency and charging system perfor-
mance when using engine braking, do not use the transmission in
D (vehicles with an automatic transmission) or 5 (vehicles with a
manual transmission).
● Due to the added load of the trailer, your vehicle’s engine may
overheat on hot days (at temperatures over 85°F [30°C]) when
driving up a long or steep grade. If the high engine coolant temper-
ature warning light flashes or co mes on overheating, immediately
turn off the air conditioning (if in use), pull your vehicle off the road
and stop in a safe place. ( P. 334)
Page 182 of 400

182 2-5. Driving information
●Always place wheel blocks under both the vehicle and the trailer
wheels when parking. Apply the parking brake firmly, and put the
transmission in P (vehicles with an automatic transmission) or in 1
or R (vehicles with a manual transmission). Avoid parking on a
slope, but if unavoidable, do so only after performing the following:
Apply the brakes and keep them applied.
Have someone place wheel bloc ks under both the vehicle and
trailer wheels.
When the wheel blocks are in place, release the brakes slowly
until the blocks absorb the load.
Apply the parking brake firmly.
Shift into P (vehicles with an automatic transmission) or 1 or R
(vehicles with a manual transmission) and turn off the engine.
● When restarting after parking on a slope:
With the transmission in P (vehi cles with an automatic trans-
mission) or the clutch pedal (vehicles with a manual transmis-
sion) depressed, start the e ngine. On vehicles with an
automatic transmission, be su re to keep the brake pedal
pressed.
Shift into a forward gear. If reversing, shift into R.
Release the parking brake (also brake pedal on vehicles with
an automatic transmission), and slowly pull or back away from
the wheel blocks. Stop and apply the brakes.
Have someone retrieve the blocks.
Page 187 of 400
187
2-5. Driving information
2
When driving
Dinghy towing (vehicles with an automatic transmission)
NOTICE
■To avoid serious damage to your vehicle
Do not tow your vehicle with the four wheels on the ground.
Your vehicle is not designed to be dinghy towed (with 4 wheels on
the ground) behind a motor home.
Page 216 of 400

216 3-5. Other interior features
CAUTION
Observe the following precautions.
Failure to do so may cause the driver’s floor mat to slip, possibly interfering
with the pedals while driving. An unexpectedly high speed may result or it may
become difficult to stop the vehicle, leading to a serious accident.
■When installing the driver’s floor mat
●Do not use floor mats designed for other models or different model year
vehicles, even if they are Toyota Genuine floor mats.
● Only use floor mats designed for the driver’s seat.
● Always install the floor mat securely using the retaining hooks (clips) pro-
vided.
● Do not use two or more floor mats on top of each other.
● Do not place the floor mat bottom-side up or upside-down.
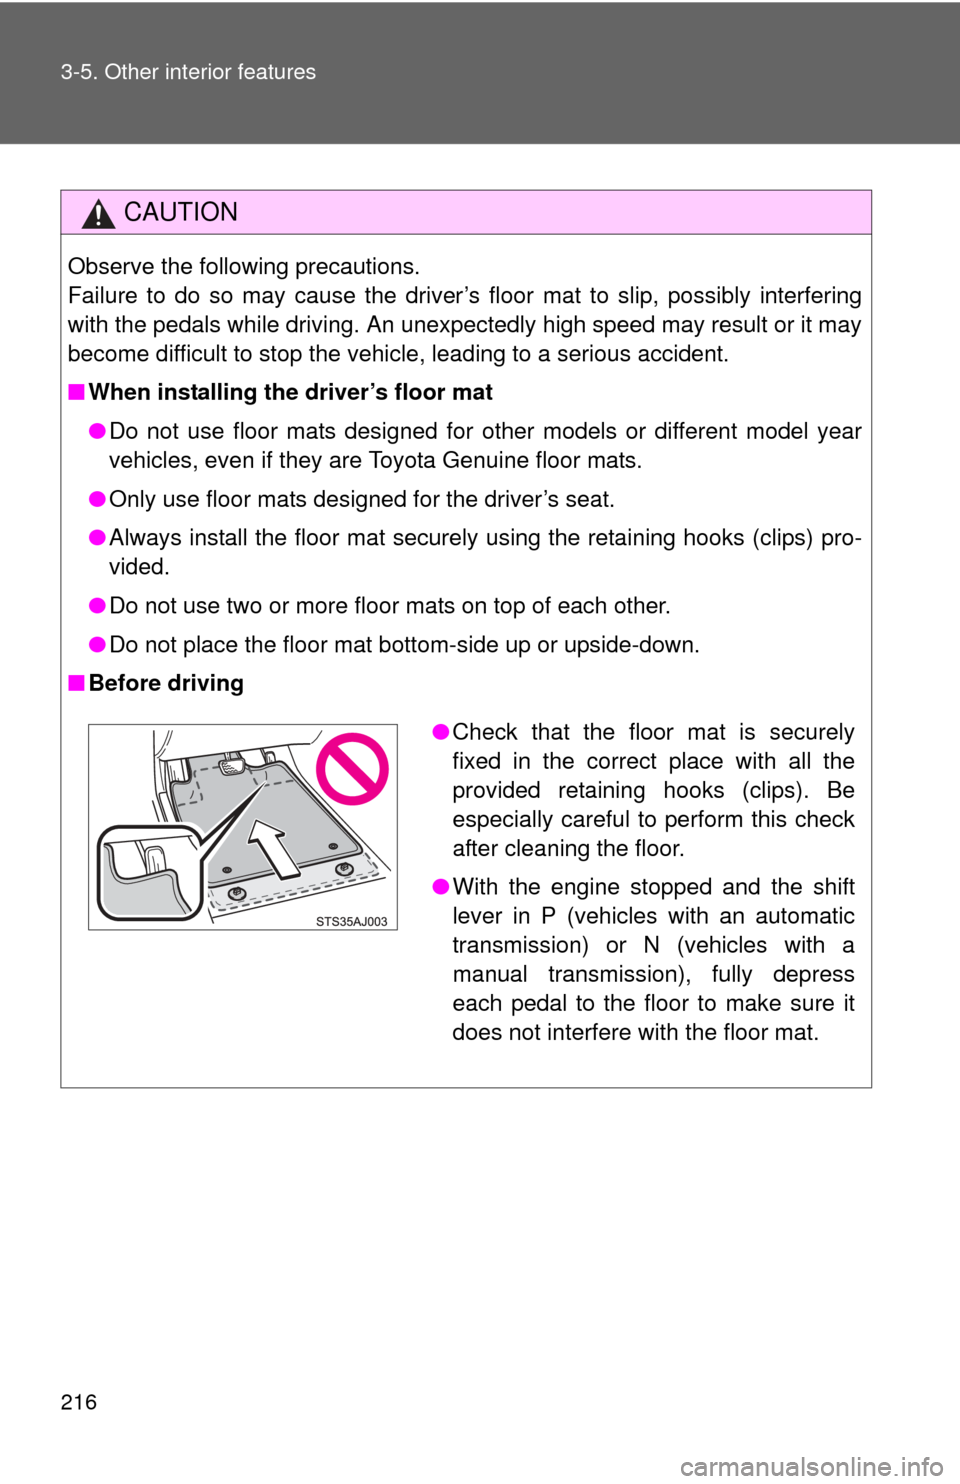
■ Before driving
●Check that the floor mat is securely
fixed in the correct place with all the
provided retaining hooks (clips). Be
especially careful to perform this check
after cleaning the floor.
● With the engine stopped and the shift
lever in P (vehicles with an automatic
transmission) or N (vehicles with a
manual transmission), fully depress
each pedal to the floor to make sure it
does not interfere with the floor mat.