Page 70 of 752
70
1-3. Adjustable components (seats, mirrors, steering wheel)
Driving position memor y (driver’s seat)
: If equipped
Your preferred driving position (the position of the driver’s seat,
steering wheel and outside rear view mirrors) can be entered into the
computer’s memory and recalle d with the touch of a button.
Two different driving positions can be entered into memory.
■ Entering a position into memory
Check that the shift lever is set in P.
Turn the engine switch to the ON position.
Adjust the driver’s seat, steering wheel, and outside rear
view mirrors to the desired positions.
While pushing the SET button,
push button “1” or “2” until the
signal beeps.
If the selected button has
already been preset, the previ-
ously recorded position will be
overwritten.
■Recalling the memorized position
Check that the shift lever is set in P.
Turn the engine switch to the ON position.
Push button “1” or “2” to recall
the desired position.
Page 167 of 752

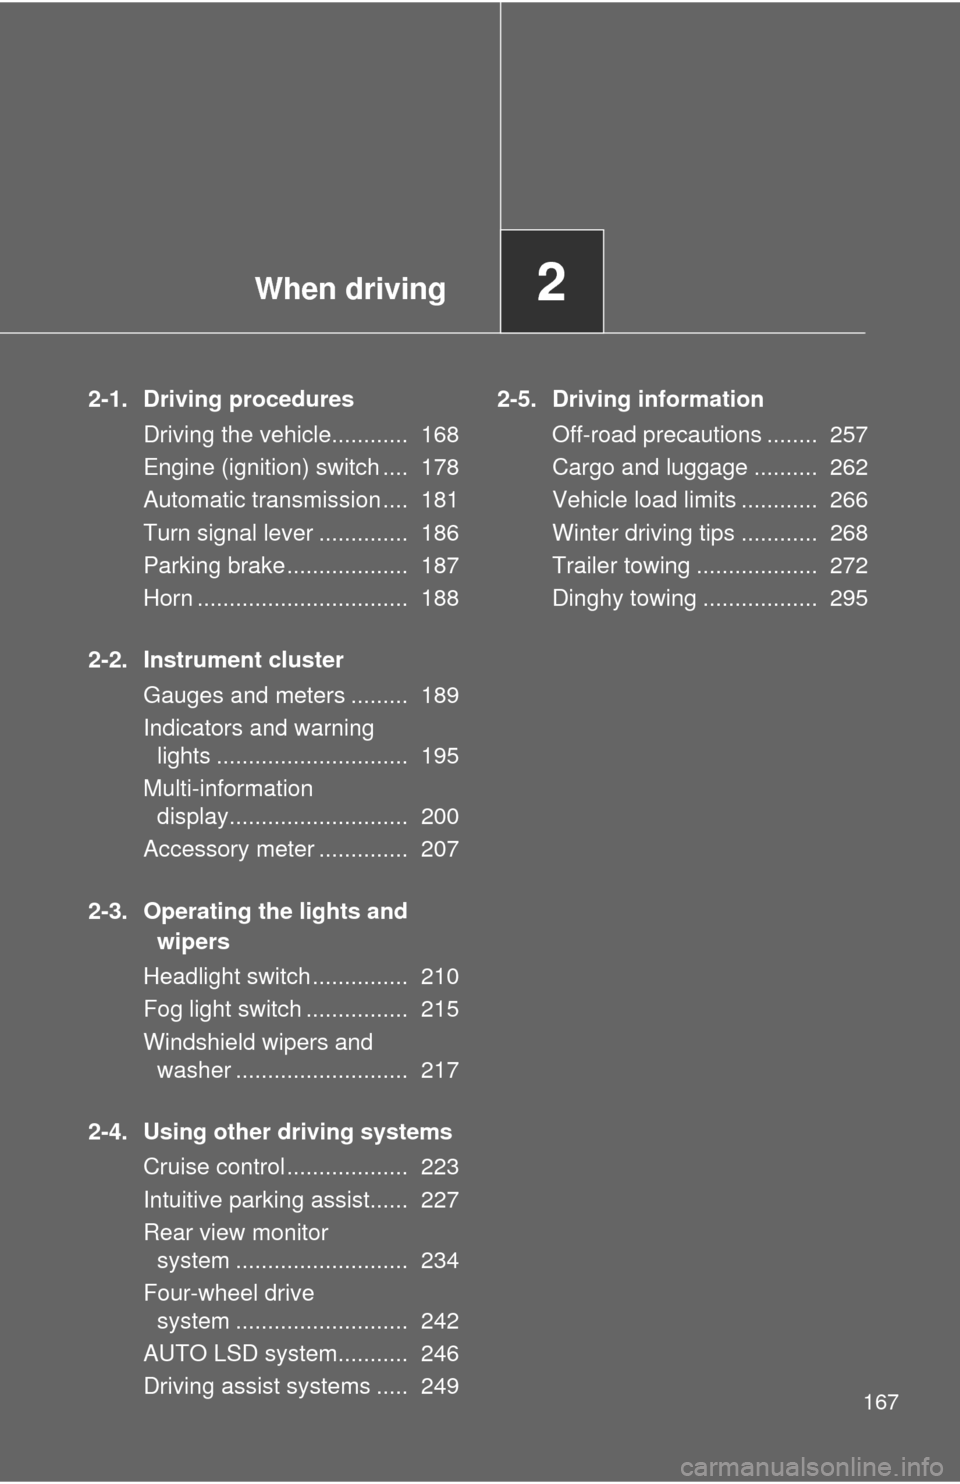
When driving2
167
2-1. Driving proceduresDriving the vehicle............ 168
Engine (ignition) switch .... 178
Automatic transmission .... 181
Turn signal lever .............. 186
Parking brake ................... 187
Horn ................................. 188
2-2. Instrument cluster Gauges and meters ......... 189
Indicators and warning lights .............................. 195
Multi-information display............................ 200
Accessory meter .............. 207
2-3. Operating the lights and wipers
Headlight switch ............... 210
Fog light switch ................ 215
Windshield wipers and washer ........................... 217
2-4. Using other driving systems Cruise control ................... 223
Intuitive parking assist...... 227
Rear view monitor system ........................... 234
Four-wheel drive system ........................... 242
AUTO LSD system........... 246
Driving assist systems ..... 249 2-5. Driving information
Off-road precautions ........ 257
Cargo and luggage .......... 262
Vehicle load limits ............ 266
Winter driving tips ............ 268
Trailer towing ................... 272
Dinghy towing .................. 295
Page 186 of 752
186
2-1. Driving procedures
Tur n signal lever
■Turn signals can be operated when
The engine switch is in the ON position.
■ If the indicators flash faster than usual
Check that a light bulb in the front or rear turn signal lights has not burned
out.
Left turn
Right turn
Move and hold the lever
partway to signal a lane
change.
The left hand signal will flash
until you release the lever.
Move and hold the lever
partway to signal a lane
change.
The right hand signal will flash
until you release the lever.
Page 197 of 752
197
2-2. Instrument cluster
2
When driving
■
Indicators
The indicators inform the driver of the operating state of the
vehicle’s various systems.
Turn signal indicator
(P. 186)
(Canada)
Tail light indicator
( P. 210)
Headlight high beam
indicator ( P. 212)*1AUTO LSD indicator
(P. 246, 251)
(If equipped)
Security indicator
(P. 115, 117)*1,7
RSCA OFF indicator
( P. 134)
Shift position and shift
range indicators
(P. 181)
TRAC OFF indicator
( P. 251, 252, 253)
*1AIR BAG ON indicator
(P. 135)
*1AIR BAG OFF indicator
(P. 135)
(If equipped)
Cruise control indicator
(P. 223)
(4WD models)
4HI indicator ( P. 242)
*1,5
Slip indicator
( P. 247, 250)
(4WD models)
4LO indicator ( P. 242)
*1
VSC OFF indicator
(
P. 246, 251, 252, 253)
*1
(If equipped)
TOW HAUL indicator
(P. 184)
(U.S.A.)
Headlight indicator
(P. 210)
Page 213 of 752

213
2-3. Operating the lights and wipers
2
When driving
■
Guide to dial settings
Loading conditionControl switch position
Towing Hitch
(Towing
package) Payload Regular Cab Double Cab CrewMax
Standard Long Standard Long Short
None None 0 0 0 0 0
None Maximum
load 32323
Maximum load None 4 3 3 2 3
■ Daytime running light system (if equipped)
●To make your vehicle more visible to other drivers, the front turn signal
lights turn on automatically whenever the engine is started and the park-
ing brake is released. Daytime running lights are not designed for use at
night.
● Compared to turning on the headlights, the daytime running light system
offers greater durability and consumes less electricity, so it can help
improve fuel economy.
■ Headlight control sensor (vehicles with automatic light control system)
The sensor may not function properly if
an object is placed on the sensor, or any-
thing that blocks the sensor is affixed to
the windshield.
Doing so interferes with the sensor
detecting the level of ambient light and
may cause the automatic headlight sys-
tem to malfunction.
Page 330 of 752

330 3-2. Using the audio system
■If XM® Satellite Radio does not operate normally
If a problem occurs with the XM
® tuner, a message will appear on the dis-
play. Refer to the table below to identify the problem, and take the suggested
corrective action.
ANTENNA or
CHECK
ANTENNA The XM
® antenna is not connected. Check
whether the XM® antenna cable is attached
securely.
There is a short-circuit in the antenna or the sur-
rounding antenna cable. See a Toyota certified
dealer.
UPDATING You have not subscribed to XM
® Satellite Radio.
The radio is being updated with the latest encryp-
tion code. Contact XM
® Satellite Radio for sub-
scription information. When a contract is canceled,
you can choose the “CH000” and all free-to-air
channels.
The premium channel you selected is not autho-
rized. Wait for about 2 seconds until the radio
returns to the previous channel or “CH001”. If it
does not change automatically, select another
channel. If you want to listen to the premium chan-
nel, contact XM
® Satellite Radio.
NO SIGNAL The XM
® signal is too weak at the current location.
Wait until your vehicle reaches a location with a
stronger signal.
LOADING The unit is acquiring audio or program information.
Wait until the unit has received the information.
OFF AIR
or
CHANNEL OFF AIR The channel you selected is not broadcasting any
programming. Select another channel.
-----
There is no song/program title or artist name/fea-
ture associated with the channel at this time. No
action needed.
Page 518 of 752
518 3-8. Other interior features
■Reprogramming a button
The individual HomeLink
® buttons cannot be erased but can be
reprogrammed. To reprogram a button, follow the programming
instructions.
Operating the HomeLink®
Press the appropriate HomeLink® button. The HomeLink® indicator
on the HomeLink® transceiver should turn on.
The HomeLink® continues to send a signal for a maximum of 20 seconds
as long as the button is pressed.
Reprogramming a HomeLink® button
Press and hold the desired HomeLink
® button. After 20 seconds, the
HomeLink® indicator light will start flashing slowly. Keep pressing the
HomeLink® button and then follow the “Programming HomeLink® (for
U.S.A. owners)” instructions. ( P. 514)
Erasing the entire HomeLink® memory (all three programs)
Press and hold down the 2 out-
side buttons for 10 seconds until
the indicator flashes.
If you sell your vehicle, be sure to
erase the programs stored in the
HomeLink
® memory.
Page 583 of 752

583
4-3. Do-it-yourself maintenance
4
Maintenance and care
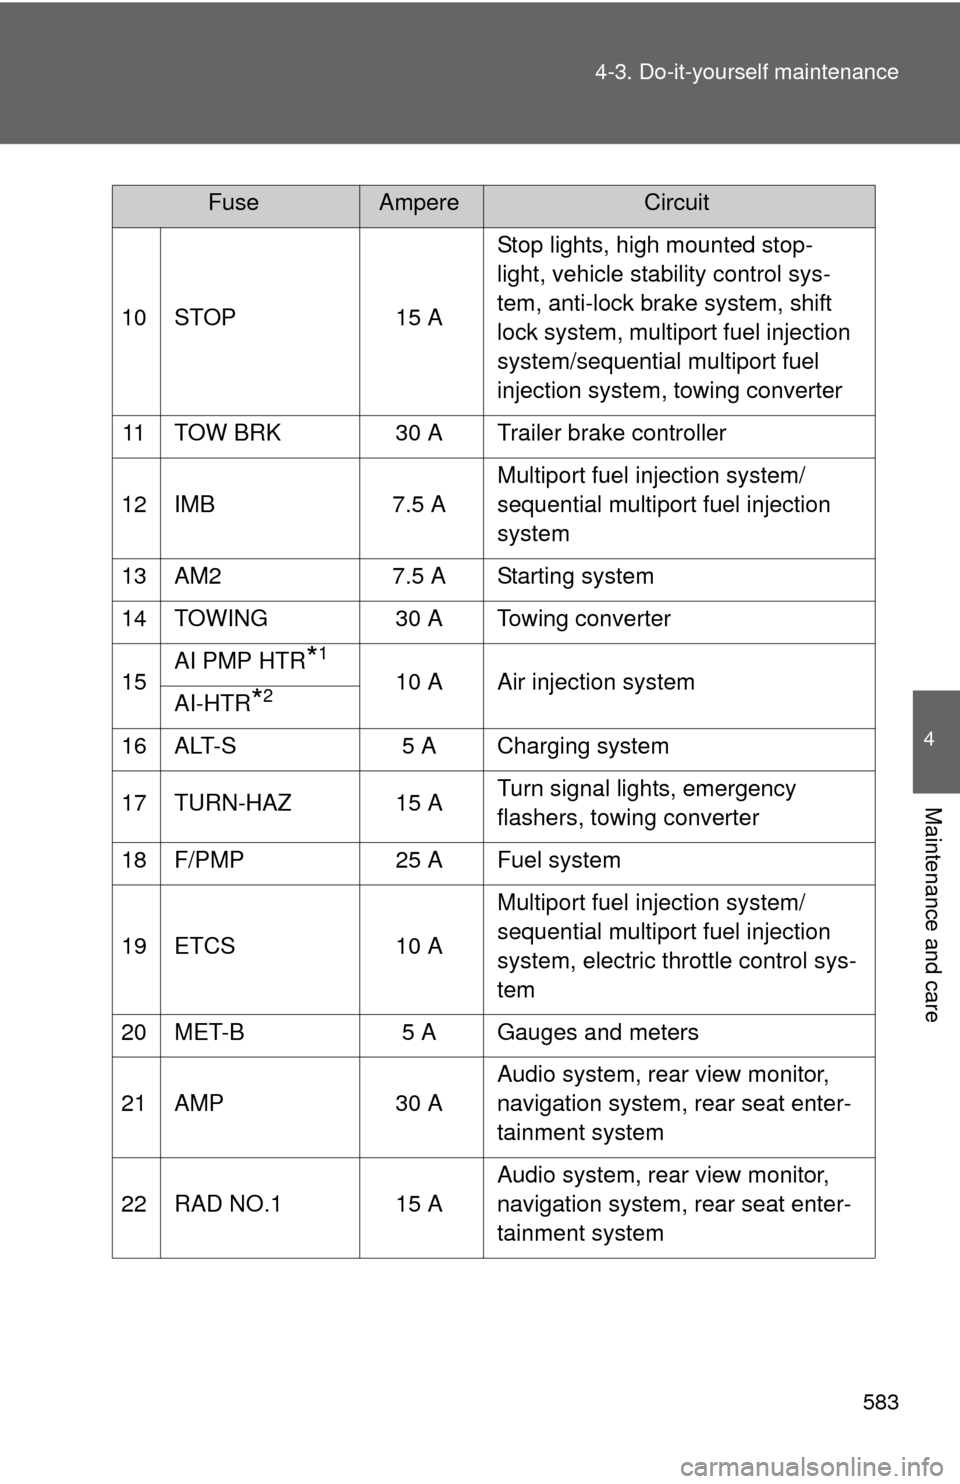
10 STOP
15 AStop lights, high mounted stop-
light, vehicle stability control sys-
tem, anti-lock brake system, shift
lock system, multiport fuel injection
system/sequential multiport fuel
injection system, towing converter
11 TOW BRK 30 A Trailer brake controller
12 IMB 7.5 AMultiport fuel injection system/
sequential multiport fuel injection
system
13 AM2 7.5 A Starting system
14 TOWING 30 A Towing converter
15 AI PMP HTR
*1
10 A Air injection system
AI-HTR*2
16 ALT-S 5 A Charging system
17 TURN-HAZ 15 A Turn signal lights, emergency
flashers, towing converter
18 F/PMP 25 A Fuel system
19 ETCS 10 AMultiport fuel injection system/
sequential multiport fuel injection
system, electric throttle control sys-
tem
20 MET-B 5 A Gauges and meters
21 AMP 30 AAudio system, rear view monitor,
navigation system, rear seat enter-
tainment system
22 RAD NO.1 15 A Audio system, rear view monitor,
navigation system, rear seat enter-
tainment system
FuseAmpereCircuit