Page 423 of 520

5
When trouble arises
423
5-2. Steps to take in an emergency
■If the tire pressure warning system is inoperative
The tire pressure warning system will be disabled in the following condi-
tions:
(When the condition be
comes normal, the system will work properly.)
●If tires not equipped with tire pressure warning valves and transmit-
ters are used.
●If the ID code on the tire pressure warning valves and transmitters is
not registered in the tire pressure warning computer.
●If the tire inflation pressure is 73 psi (500 kPa, 5.1 kgf/cm2 or bar) or
higher.
The tire pressure warning system may be disabled in the following condi-
tions:
(When the condition be comes normal, the system will work properly.)
●If electronic devices or facilities using similar radio wave frequencies
are nearby.
●If a radio set at similar frequencies is in use in the vehicle.
●If a window tint that affects the radio wave signals is installed.
●If there is a lot of snow or ice on the vehicle, in particular around the
wheels or wheel housings.
●If non-genuine Toyota wheels are used (Even if you use Toyota
wheels, the tire pressu re warning system may not work properly with
some types of tires.)
●If tire chains are used.
●If a large metallic object which can interfere with signal reception is
put in the luggage compartment.
■If the tire pressure warning light frequently comes on after blinking
for 1 minute
If the tire pressure warning light frequently comes on after blinking for 1
minute when the “POWER” switch is turned to ON mode, have it
checked by your Toyota dealer.
■ Customization that can be co nfigured at Toyota dealer
The vehicle speed linked seat belt reminder buzzer can be disabled.
(Customizable features P. 500) However, Toyota recommends that the
seat belt reminder buzzer be operational to alert the driver and front passen-
ger that the seat belts are not fastened.
Page 440 of 520
440 5-2. Steps to take in an emergency
Have the malfunction repaired immediately.After taking the specified steps to correct the suspected problem,
check that the warning message and light turn off.
Interior buzzerExterior buzzerWarning messageDetailsCorrection procedure
Once
(Comes on for 10 seconds.)
(Flashes) The electronic
key is not
detected when
attempting to
start the EV
system.
Confirm
the loca-
tion of the
electronic
key.
Once 3 times (Flashes)An open door
other than the
driver’s door is
closed while the
electronic key is
outside the
detection range
and the
“POWER”
switch is in
ACCESSORY
or ON mode.
Confirm
the loca-
tion of the
electronic
key.
Page 442 of 520
442 5-2. Steps to take in an emergency
Once
(Flashes)An open door
has been
closed and the
“POWER”
switch has been
turned twice to
the ACCES-
SORY mode
from off.
Press the
“POWER”
switch
while
depress-
ing the
brake
pedal.
(Flashes)Indicates that
the steering
lock has not
released within
3 seconds of
pressing the
“POWER”
switch.
Press the
“POWER”
switch
again while
turning the
steering
wheel with
the brake
pedal
depressed.
Interior
buzzerExterior buzzerWarning messageDetailsCorrection procedure
Page 444 of 520

444 5-2. Steps to take in an emergency
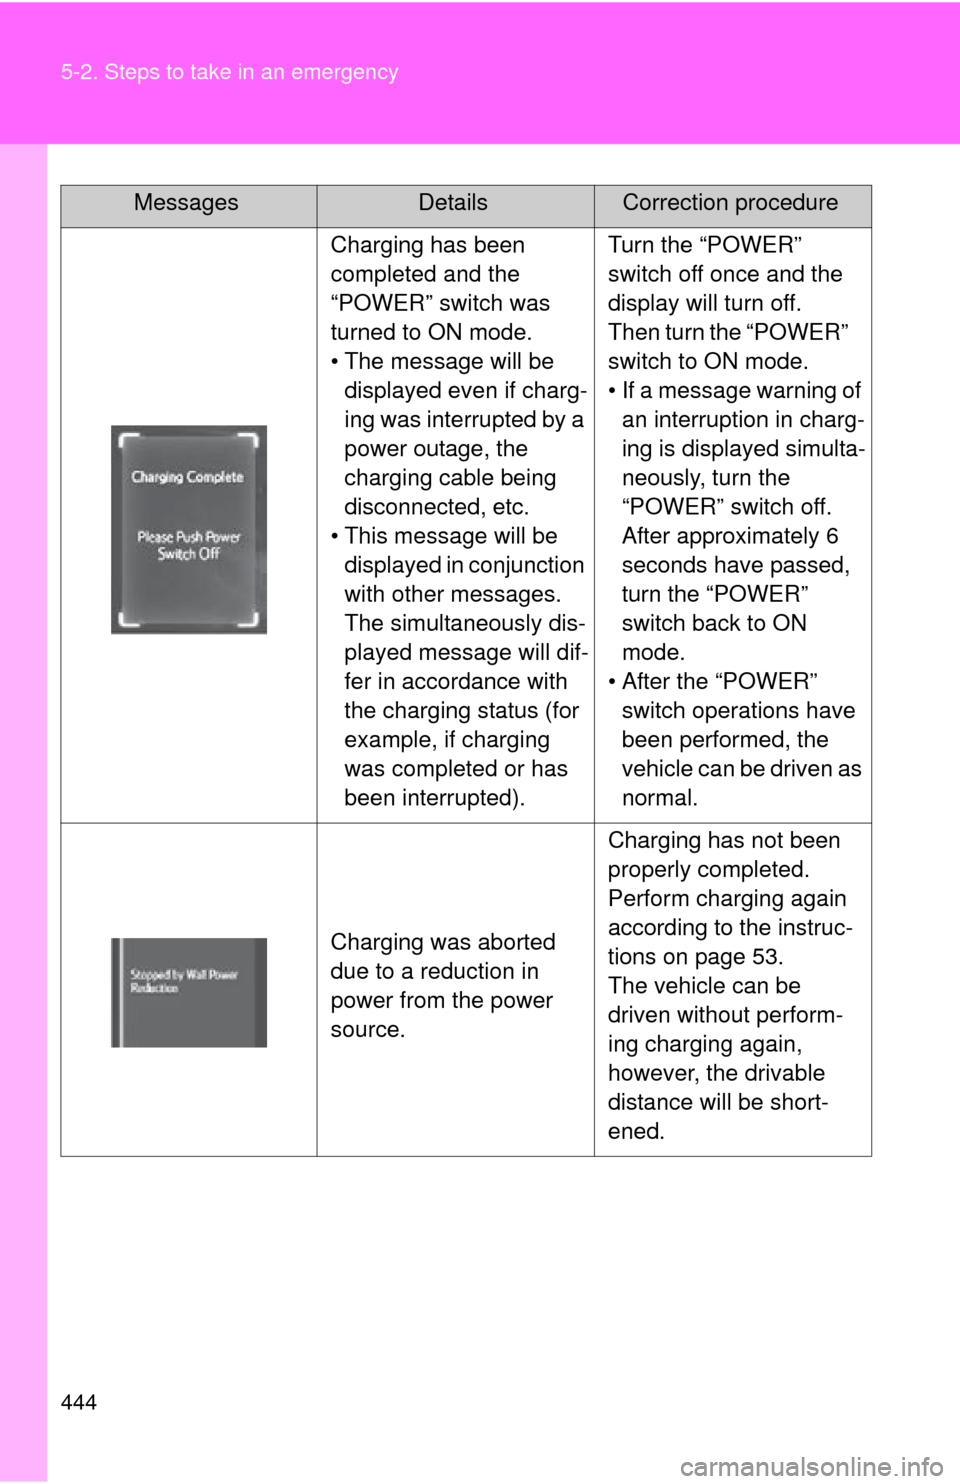
Charging has been
completed and the
“POWER” switch was
turned to ON mode.
• The message will be displayed even if charg-
ing was interrupted by a
power outage, the
charging cable being
disconnected, etc.
• This message will be displayed in conjunction
with other messages.
The simultaneously dis-
played message will dif-
fer in accordance with
the charging status (for
example, if charging
was completed or has
been interrupted).Turn the “POWER”
switch off once and the
display will turn off.
Then turn the “POWER”
switch to ON mode.
• If a message warning of an interruption in charg-
ing is displayed simulta-
neously, turn the
“POWER” switch off.
After approximately 6
seconds have passed,
turn the “POWER”
switch back to ON
mode.
• After the “POWER” switch operations have
been performed, the
vehicle can be driven as
normal.
Charging was aborted
due to a reduction in
power from the power
source.
Charging has not been
properly completed.
Perform charging again
according to the instruc-
tions on page 53.
The vehicle can be
driven without perform-
ing charging again,
however, the drivable
distance will be short-
ened.
MessagesDetailsCorrection procedure
Page 446 of 520

446 5-2. Steps to take in an emergency
* For more information regarding safety systems, see page 88.
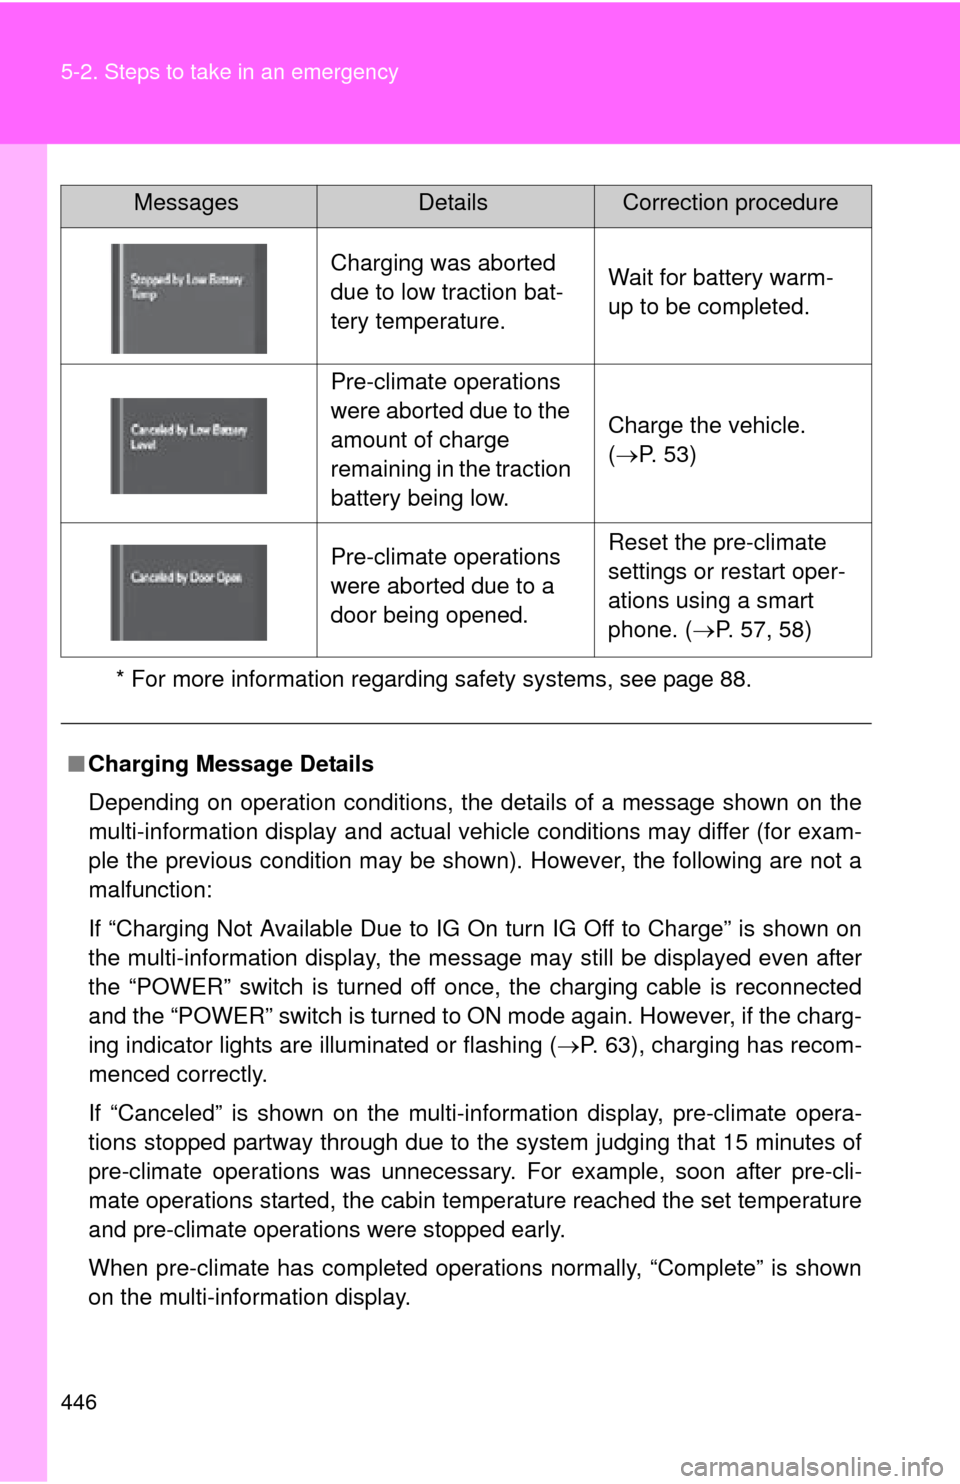
Charging was aborted
due to low traction bat-
tery temperature.Wait for battery warm-
up to be completed.
Pre-climate operations
were aborted due to the
amount of charge
remaining in the traction
battery being low.
Charge the vehicle.
(P. 53)
Pre-climate operations
were aborted due to a
door being opened.Reset the pre-climate
settings or restart oper-
ations using a smart
phone. ( P. 57, 58)
■ Charging Message Details
Depending on operation conditions, the details of a message shown on the
multi-information display and actual vehicle conditions may differ (for exam-
ple the previous condition may be shown). However, the following are not a
malfunction:
If “Charging Not Available Due to IG On turn IG Off to Charge” is shown on
the multi-information display, the message may still be displayed even after
the “POWER” switch is turned off once, the charging cable is reconnected
and the “POWER” switch is turned to ON mode again. However, if the charg-
ing indicator lights are illuminated or flashing ( P. 63), charging has recom-
menced correctly.
If “Canceled” is shown on the multi-in formation display, pre-climate opera-
tions stopped partway through due to the system judging that 15 minutes of
pre-climate operations was unnecessary . For example, soon after pre-cli-
mate operations started, the cabin temperature reached the set temperature
and pre-climate operations were stopped early.
When pre-climate has completed operations normally, “Complete” is shown
on the multi-information display.
MessagesDetailsCorrection procedure
Page 466 of 520
466 5-2. Steps to take in an emergency
Emergency start functionWhen the EV system does not start, the following steps can be used
as an interim measure to start the EV system if the “POWER” switch
is functioning normally. Set the parking brake.
Set the “POWER” switch to the ACCESSORY mode.
Push and hold the “POWER” switch for about 15 seconds
while depressing the brake pedal firmly.
Even if the EV system can be st arted using the above steps, the sys-
tem may be malfunctioning. Have th e vehicle checked by your Toyota
dealer.
■ The interior lights and headlights do not turn on, or the horn
does not sound.
One of the following may be the cause of the problem:
●One or both of the 12-volt ba ttery terminals may be discon-
nected.
● The 12-volt battery may be discharged. ( P. 470)
Contact your Toyota dealer if the problem cannot be repaired, or if
repair procedures are unknown.
STEP 1
STEP 2
STEP 3
Page 469 of 520
5
When trouble arises
469
5-2. Steps to take in an emergency
To change “POWER” switch modes:
Within 10 seconds of the buzze
r sounding, release the brake
pedal and press the “POWER” switch. Modes can be changed
each time the switch is pressed. ( P. 202)
To start the EV system:
Press the “POWER” switch within 10 seconds of the buzzer
sounding, keeping the brake pedal depressed.
In the event that the EV system still cannot be operated, contact your
Toyota dealer.
■ Stopping the EV system
Set the parking brake, push the P position switch and press the “POWER”
switch as you normally do when stopping the EV system.
■ Replacing the key battery
As the above procedure is a temporary measure, it is recommended that the
electronic key battery be replaced immediately when the battery is depleted.
(P. 383)
STEP 3
Page 471 of 520
5
When trouble arises
471
5-2. Steps to take in an emergency
Start the engine of the second vehicle. Increase the engine
speed slightly and maintain that level for approximately 5
minutes to recharge the 12-v
olt battery of your vehicle.
Open and close any of the door s of your vehicle with the
“POWER” switch off.
Maintain the engine speed of the second vehicle and start
the EV system of your vehicle by turning the “POWER”
switch to ON mode.
Make sure the “READY” indicator comes on. If the indicator
does not come on, contact your Toyota dealer.
Once the EV system has started, remove the jumper cables
in the exact reverse order from which they were connected.
Once the EV system starts, hav e the vehicle inspected at your
Toyota dealer as soon as possible.STEP 3
STEP 4
STEP 5
STEP 6
STEP 7