Page 589 of 704
566
5-2. Steps to take in an emergency
PRIUS PHV_OM_OM47787U_(U)
If you have a flat tire
A puncture caused by a nail or screw passing through the tire
tread can be repaired temporarily using the emergency tire punc-
ture repair kit. (The kit contains a bottle of sealant. The sealant
can be used only once to temporarily repair one tire without
removing the nail or screw from the tire.) After temporarily repair-
ing the tire with the kit, have the tire repaired or replaced by your
To y o ta d e a l e r.
■Before repairing the tire
●St op the veh i cle in a safe place on a hard, flat surface.
●Set the parking brake.
●Shift the shift position to P.
●St op the hyb rid system.
●Turn on the emergency flashers.
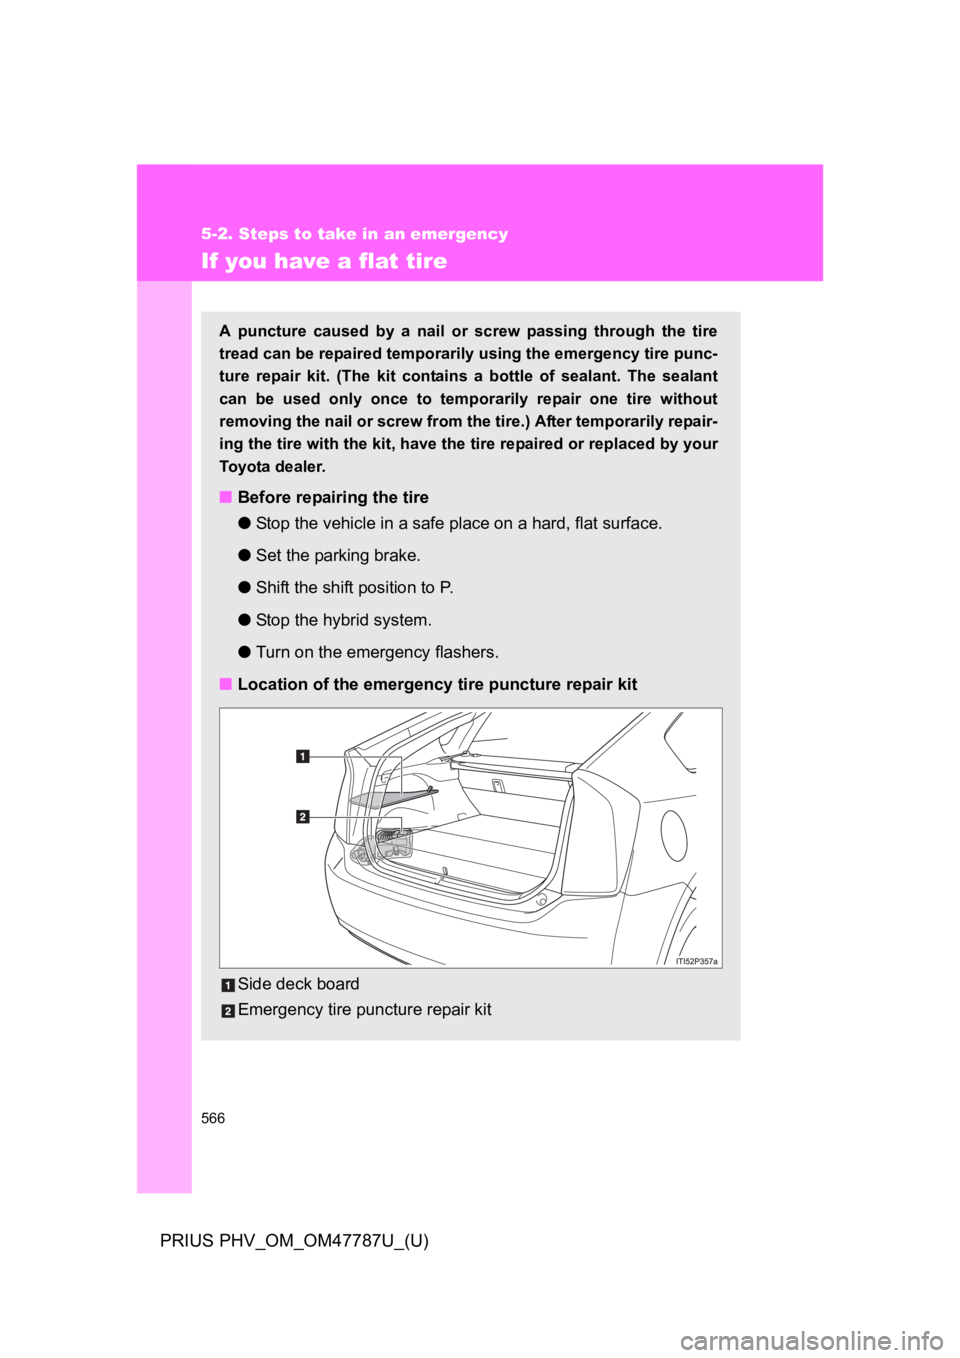
■Location of the emergency tire puncture repair kit
Side deck board
Emergency tire puncture repair kit
Page 612 of 704
5
When trouble arises
589
5-2. Steps to take in an emergency
PRIUS PHV_OM_OM47787U_(U)
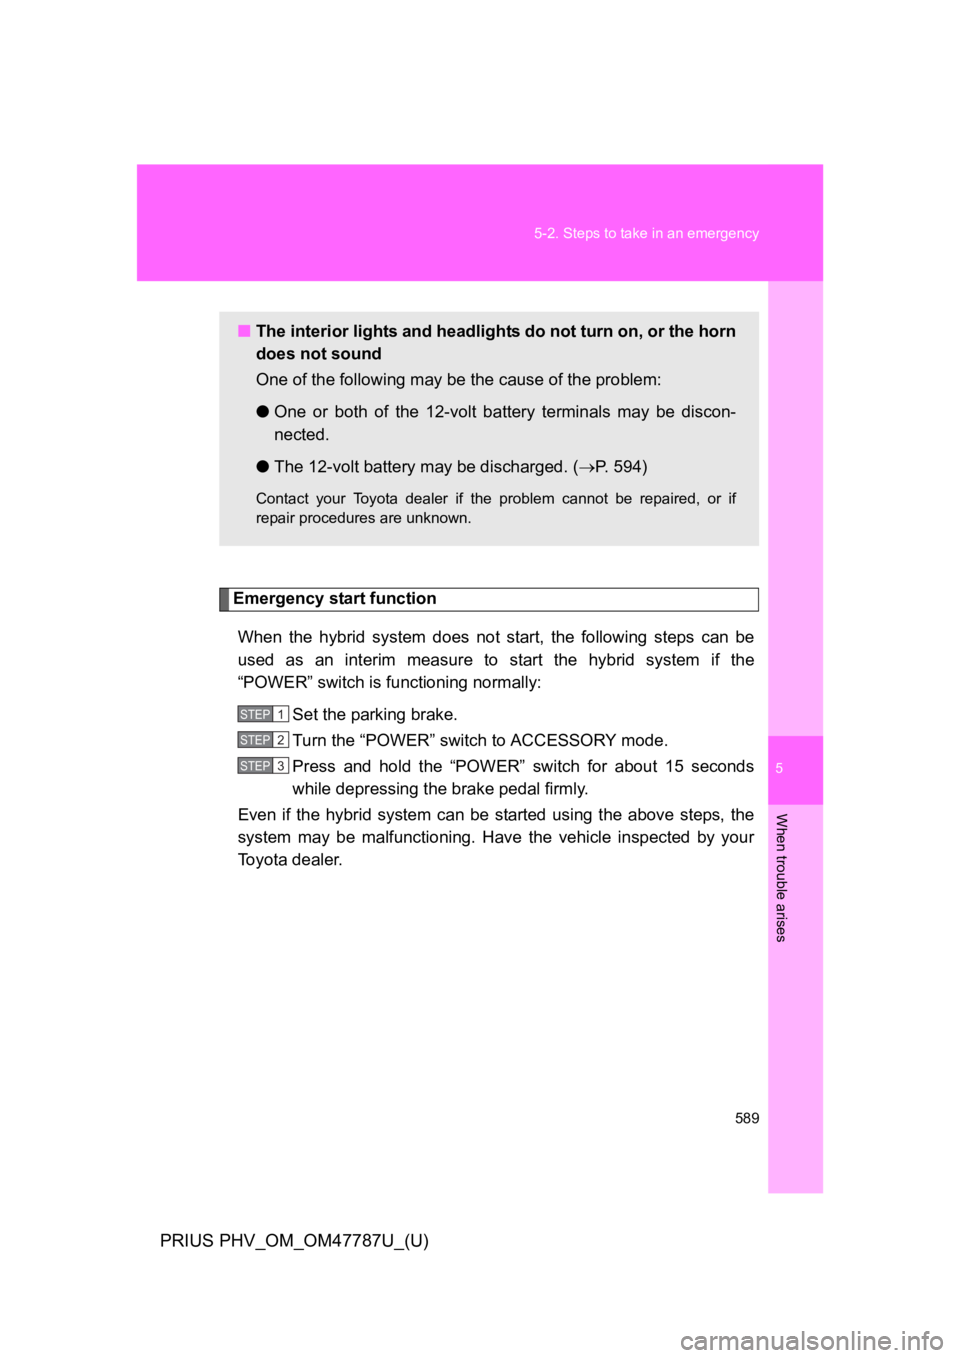
Emergency start function
When the hybrid system does not start, the following steps can be
used as an interim measure to start the hybrid system if the
“POWER” switch is functioning normally:
Set the parking brake.
Turn the “POWER” switch to ACCESSORY mode.
Press and hold the “POWER” switch for about 15 seconds
while depressing the brake pedal firmly.
Even if the hybrid system can be started using the above steps, the
system may be malfunctioning. Have the vehicle inspected by your
To y o t a d e a l e r .
■The interior lights and headlights do not turn on, or the horn
does not sound
One of the following may be the cause of the problem:
●One or both of the 12-volt battery terminals may be discon-
nected.
●The 12-volt battery may be discharged. (→P. 5 9 4 )
Contact your Toyota dealer if the problem cannot be repaired, or if
repair procedures are unknown.
STEP 1
STEP 2
STEP 3
Page 616 of 704
5
When trouble arises
593
5-2. Steps to take in an emergency
PRIUS PHV_OM_OM47787U_(U)
■Stopping the hybrid system
Set the parking brake, shift the shift position to P and press the “POWER”
switch as you normally do when stopping the hybrid system.
■Replacing the key battery
As the above procedure is a temporary measure, it is recommended that the
electronic key battery be replaced immediately when the battery is depleted.
(→P. 4 9 3 )
■Changing “POWER” switch modes
Within 10 seconds of the buzzer sounding, release the brake pedal and
press the “POWER” switch.
The hybrid system does not start and modes will be changed each time the
switch is pressed. (→P. 2 4 0 )
Page 620 of 704

5
When trouble arises
597
5-2. Steps to take in an emergency
PRIUS PHV_OM_OM47787U_(U)
■Starting the hybrid system when the 12-volt battery is discharged
The hybrid system cannot be started by push-starting.
■To p r e v e n t 1 2 - v o l t b a t t e r y d i s c h a r g e
●Turn off the headlights and the audio system while the hybrid system is
off.
●Turn off any unnecessary electrical components when the vehicle is run-
ning at a low speed for an extended period, such as in heavy traffic.
■When the 12-volt battery is removed or discharged
●The hybrid system may not start. (→P. 4 7 3 )
●If the 12-volt battery is depleted with the shift position in P, it will not be
possible to shift the shift position other than P. In this case, the vehicle
cannot be towed without lifting both front wheels because the front
wheels are locked by the parking lock. (→P. 5 2 5 )
●When the 12-volt battery is reconnected, start the hybrid system, depress
the brake pedal, and confirm that it is possible to shift into each shift posi-
tion.
■Charging the 12-volt battery
The electricity stored in the 12-volt battery will discharge gradually even
when the vehicle is not in use, due to natural discharge and the draining
effects of certain electrical appliances. If the vehicle is left for a long time, the
12-volt battery may discharge, and the hybrid system may be unable to start.
(The 12-volt battery charges automatically while the hybrid system is operat-
ing.)
Page 628 of 704
5
When trouble arises
605
5-2. Steps to take in an emergency
PRIUS PHV_OM_OM47787U_(U)
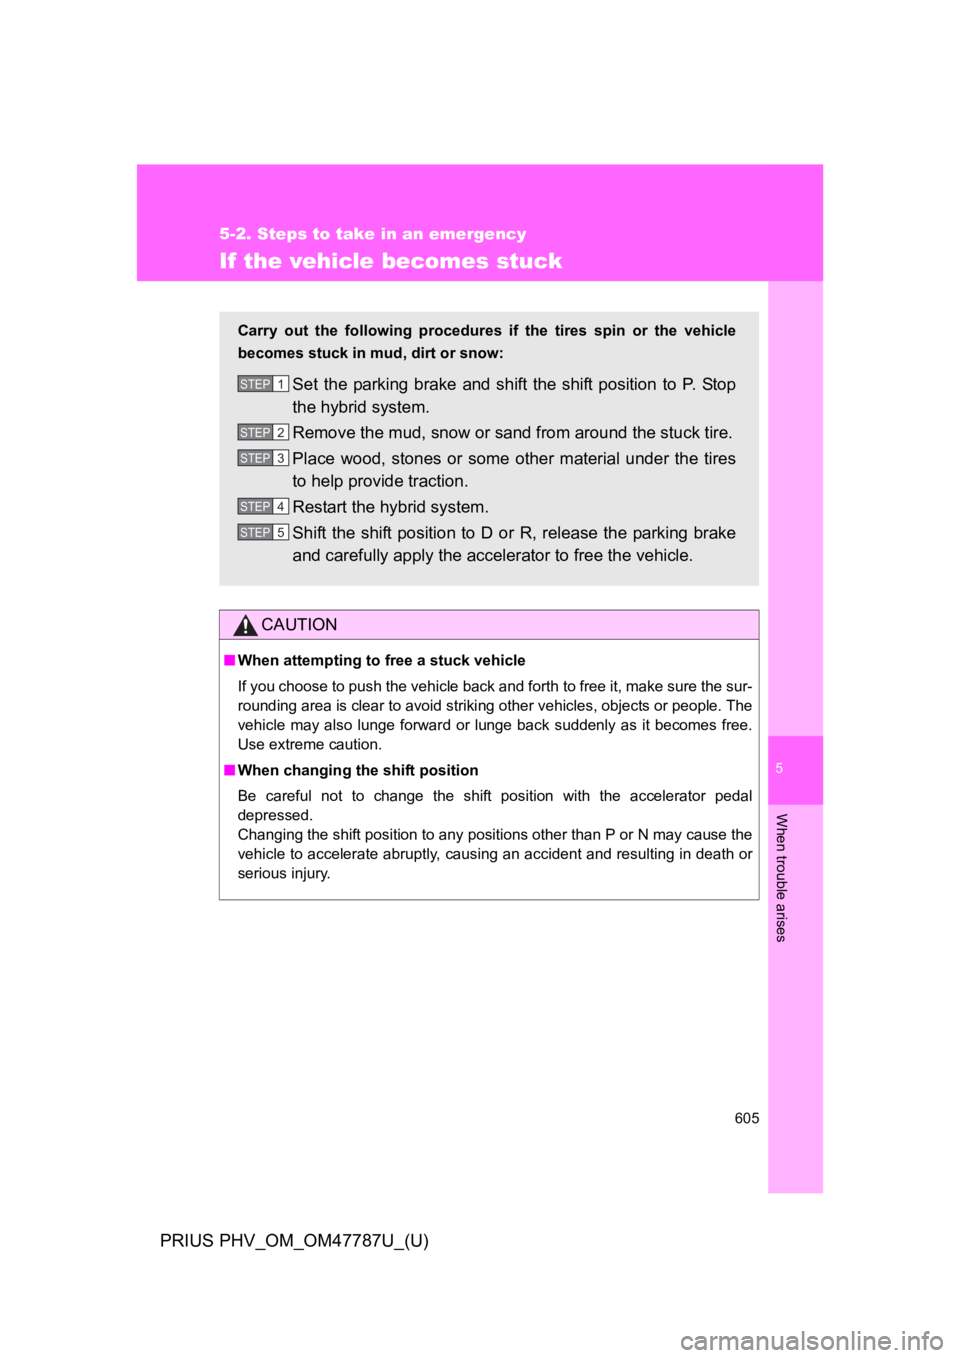
If the vehicle becomes stuck
CAUTION
■When attempting to free a stuck vehicle
If you choose to push the vehicle back and forth to free it, make sure the sur-
rounding area is clear to avoid striking other vehicles, objects or people. The
vehicle may also lunge forward or lunge back suddenly as it becomes free.
Use extreme caution.
■When changing the shift position
Be careful not to change the shift position with the accelerator pedal
depressed.
Changing the shift position to any positions other than P or N may cause the
vehicle to accelerate abruptly, causing an accident and resulting in death or
serious injury.
Carry out the following procedures if the tires spin or the vehicle
becomes stuck in mud, dirt or snow:
Set the parking brake and shift the shift position to P. Stop
the hybrid system.
Remove the mud, snow or sand from around the stuck tire.
Place wood, stones or some other material under the tires
to help provide traction.
Restart the hybrid system.
Shift the shift position to D or R, release the parking brake
and carefully apply the accelerator to free the vehicle.
STEP 1
STEP 2
STEP 3
STEP 4
STEP 5
Page 641 of 704
619
6-1. Specifications
6
Vehicle specifications
PRIUS PHV_OM_OM47787U_(U)
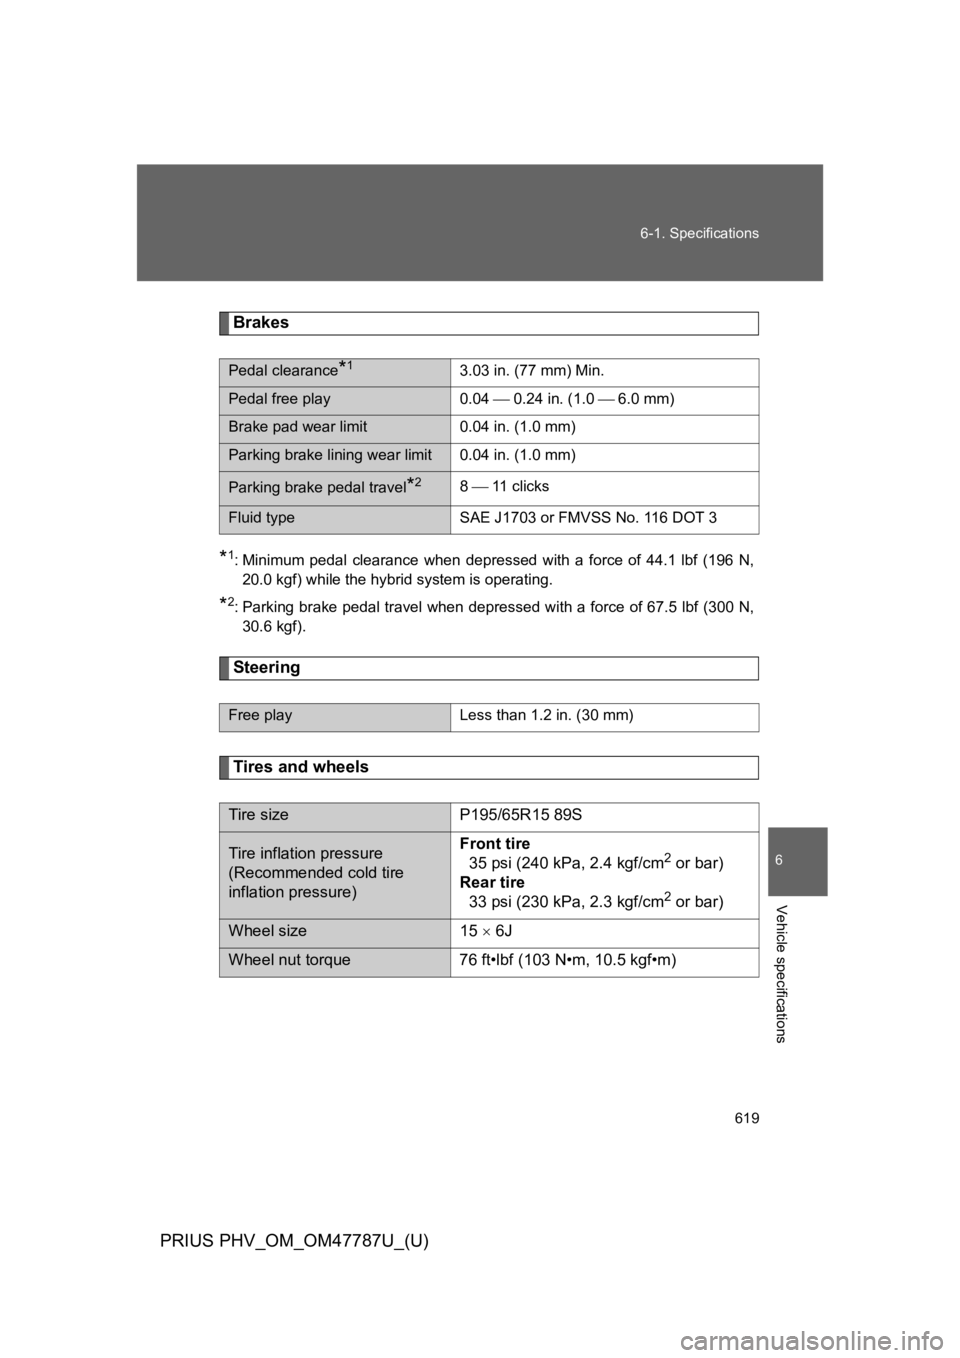
Brakes
*1:Minimum pedal clearance when depressed with a force of 44.1 lbf (196 N,
20.0 kgf) while the hybrid system is operating.
*2:Parking brake pedal travel when depressed with a force of 67.5 lbf (300 N,
30.6 kgf).
Steering
Tires and wheels
Pedal clearance*13.03 in. (77 mm) Min.
Pedal free play 0.04 ⎯ 0.24 in. (1.0 ⎯ 6.0 mm)
Brake pad wear limit 0.04 in. (1.0 mm)
Parking brake lining wear limit 0.04 in. (1.0 mm)
Parking brake pedal travel*28 ⎯ 11 c l i c k s
Fluid type SAE J1703 or FMVSS No. 116 DOT 3
Free playLess than 1.2 in. (30 mm)
Tire sizeP195/65R15 89S
Tire inflation pressure
(Recommended cold tire
inflation pressure)
Front tire
35 psi (240 kPa, 2.4 kgf/cm2 or bar)
Rear tire
33 psi (230 kPa, 2.3 kgf/cm2 or bar)
Wheel size 15 × 6J
Wheel nut torque 76 ft•lbf (103 N•m, 10.5 kgf•m)
Page 686 of 704
666
PRIUS PHV_OM_OM47787U_(U)
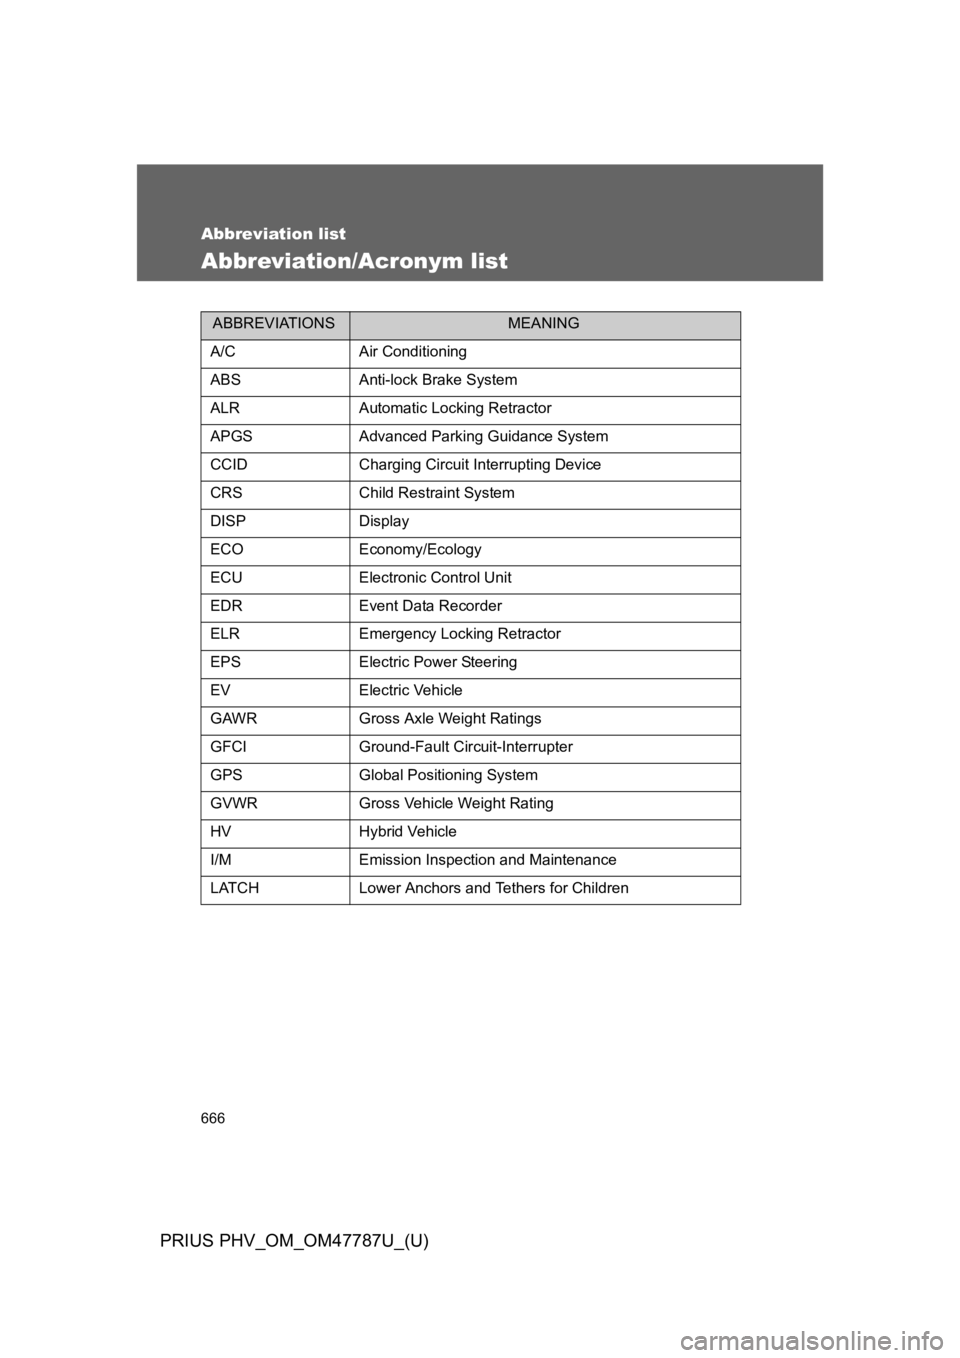
Abbreviation list
Abbreviation/Acronym list
ABBREVIATIONSMEANING
A/CAir Conditioning
ABSAnti-lock Brake System
ALRAutomatic Locking Retractor
APGSAdvanced Parking Guidance System
CCIDCharging Circuit Interrupting Device
CRSChild Restraint System
DISPDisplay
ECOEconomy/Ecology
ECUElectronic Control Unit
EDREvent Data Recorder
ELREmergency Locking Retractor
EPSElectric Power Steering
EVElectric Vehicle
GAWRGross Axle Weight Ratings
GFCIGround-Fault Circuit-Interrupter
GPSGlobal Positioning System
GVWRGross Vehicle Weight Rating
HVHybrid Vehicle
I/MEmission Inspection and Maintenance
LATCHLower Anchors and Tethers for Children
Page 689 of 704

669
Alphabetical index
PRIUS PHV_OM_OM47787U_(U)
Back door
Back door ............................. 140
Smart key system ................. 108
Wireless remote control........ 132
Back-up lights
Replacing light bulbs ............ 507
Wattage ................................ 620
Battery
Checking .............................. 471
If the 12-volt battery is
discharged ......................... 594
Preparing and checking
before winter ...................... 349
Bluetooth®*
Bottle holders .......................... 390
Brake
Fluid...................................... 619
Parking brake ....................... 255
Brake assist ............................. 328
Break-in tips ............................ 226
Brightness control
Instrument panel light
control ................................ 260
Camera*
Care
Exterior ..................................424
Interior ...................................428
Seat belts ..............................429
Cargo capacity .........................348
Cargo hooks .............................403
CD player*
Chains .......................................351
Charging
Charging cable ........................74
Charging equipment ................73
Charging messages ..............562
Charging precautions ..............94
Charging procedure ................80
Charging timer function ...........86
Charging time will
increase when.......................93
High voltage components........44
Information related to
charging display ....................89
Maintenance..........................103
Power sources precautions .....79
Power sources that can be
used ......................................77
Safety functions.................75, 91
When charging cannot be
carried out .............................98
BC
*: Refer to “Display Audio System Owner’s Manual”
or “Navigation System Owner’s Manual”.