Page 335 of 556
335
3-6. Other interior features
3
Interior features
Seat heaters
■The seat heaters can be used when
The “POWER” switch is in ON mode.
■ When not in use
Turn the seat heater off. The indicator light goes off.
: If equipped
Turns on the front left seat
heater
Turns on the front right seat
heater
The indicator light comes on.
Push the switch once again to
turn off the seat heater.
Page 336 of 556
336 3-6. Other interior features
CAUTION
■Burns
●Use caution when seating the following persons in a seat with the seat
heater on to avoid the possibility of burns:
• Babies, small children, the elderly, the sick and the physically chal-
lenged
• Persons with sensitive skin
• Persons who are fatigued
• Persons who have taken alcohol or drugs that induce sleep (sleeping drugs, cold remedies, etc.)
● Do not cover the seat with anything when using the seat heater.
Using the seat heater with a blanket or cushion increases the temperature
of the seat and may lead to overheating.
● Do not use the seat heater more than necessary. Doing so may cause
minor burns or overheating.
NOTICE
■To prevent seat heater damage
Do not put heavy objects that have an uneven surface on the seat and do
not stick sharp objects (needles, nails, etc.) into the seat.
■ To prevent 12-volt battery discharge
Turn the seat heaters off when the hybrid system is off, and check that the
indicator is off.
Page 337 of 556
337
3-6. Other interior features
3
Interior features
Coat hooks
CAUTION
■Items that cannot be hung on the coat hook
Do not hang coat hangers or other hard or sharp objects on the hook. If the
SRS curtain shield airbags deploy, these items may become projectiles,
causing death or serious injury.
: If equipped
Page 338 of 556
338
3-6. Other interior features
Assist grips
CAUTION
■Assist grip
Do not use the assist grip when getting in or out of the vehicle or rising from
your seat.
NOTICE
■To prevent damage to the assist grip
Do not hang any heavy object or put a heavy load on the assist grip.
An assist grip installed on the ce iling can be used to support your
body while sitting on the seat.
Front
Rear (if equipped)
Page 339 of 556
339
3-6. Other interior features
3
Interior features
Floor mat
Use only floor mats designed specifically for vehicles of the same
model and model year as your vehicle. Fix them securely in place
onto the carpet.
Insert the retaining hooks
(clips) into the floor mat eye-
lets.
Turn the upper knob of each
retaining hook (clip) to secure
the floor mats in place.
*: Always align the marks.
The shape of the retaining hooks (clips) may differ from that shown in the
illustration.
STEP1
*
STEP2
Page 340 of 556

340 3-6. Other interior features
CAUTION
Observe the following precautions.
Failure to do so may cause the driver's floor mat to slip, possibly interfering
with the pedals while driving. An unexpectedly high speed may result or it may
become difficult to stop the vehicle, leading to a serious accident.
■When installing the driver's floor mat
●Do not use floor mats designed for other models or different model year
vehicles, even if they are Toyota Genuine floor mats.
● Only use floor mats designed for the driver's seat.
● Always install the floor mat securely using the retaining hooks (clips) pro-
vided.
● Do not use two or more floor mats on top of each other.
● Do not place the floor mat bottom-side up or upside-down.
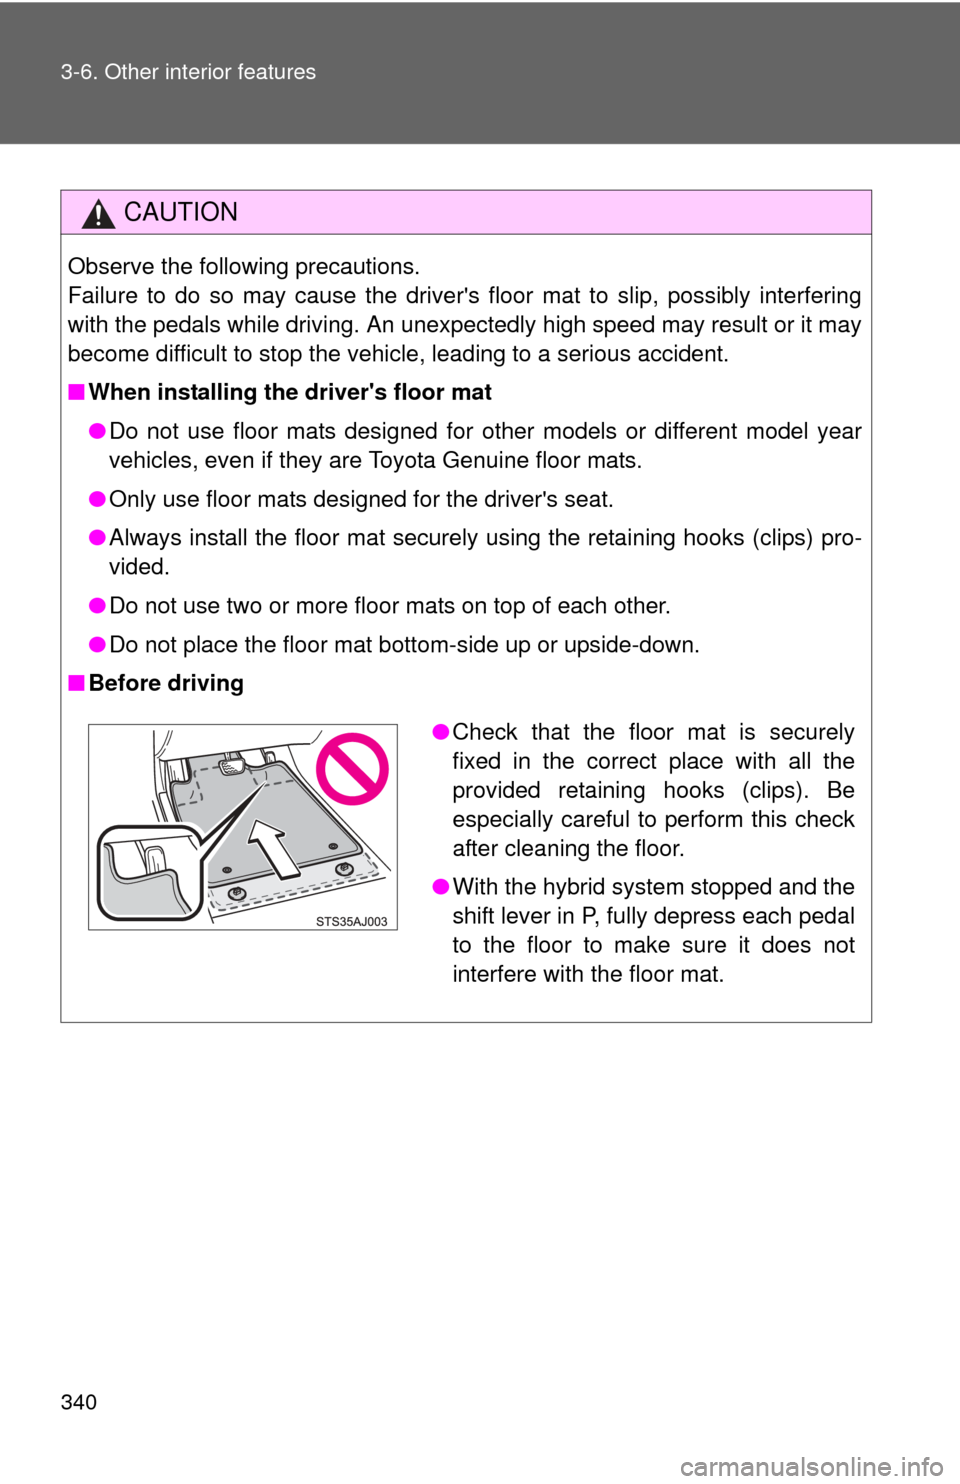
■ Before driving
●Check that the floor mat is securely
fixed in the correct place with all the
provided retaining hooks (clips). Be
especially careful to perform this check
after cleaning the floor.
● With the hybrid system stopped and the
shift lever in P, fully depress each pedal
to the floor to make sure it does not
interfere with the floor mat.
Page 341 of 556
341
3-6. Other interior features
3
Interior features
Luggage cover
: If equipped
■Removing the luggage cover
Unhook the cords.
Push the luggage cover for-
ward to disengage the
anchors.
Remove the luggage cover.
STEP1
STEP2
STEP3
Page 342 of 556
342 3-6. Other interior features
■Installing the luggage cover
Place the luggage cover on
the anchors.
Push the luggage cover until a
click sound is heard.
Hook the cords.
STEP1
STEP2
STEP3