Page 201 of 644
201
2-3. Operating the lights and wipers
2
When driving
HILUX_OM_OM0K134E_(EE)
Headlight cleaner switch
: If equipped
The headlight cleaners can be operated when
The engine switch is in the “ON” position and the headlight switch is turned
on.
Windshield washer linked operation
When the windshield washer is operated with the engine switch in the “ON”
position and the headlights on, the headlight cleaners will operate once.
(P. 199)
NOTICE
When the washer fluid tank is empty
Do not press the switch continually as the washer fluid pump may overheat.
Washer fluid can be sprayed on the headlights.
Press the switch to clean the
headlights.
Page 209 of 644

209 2-4. Using other driving systems
2
When driving
HILUX_OM_OM0K134E_(EE)
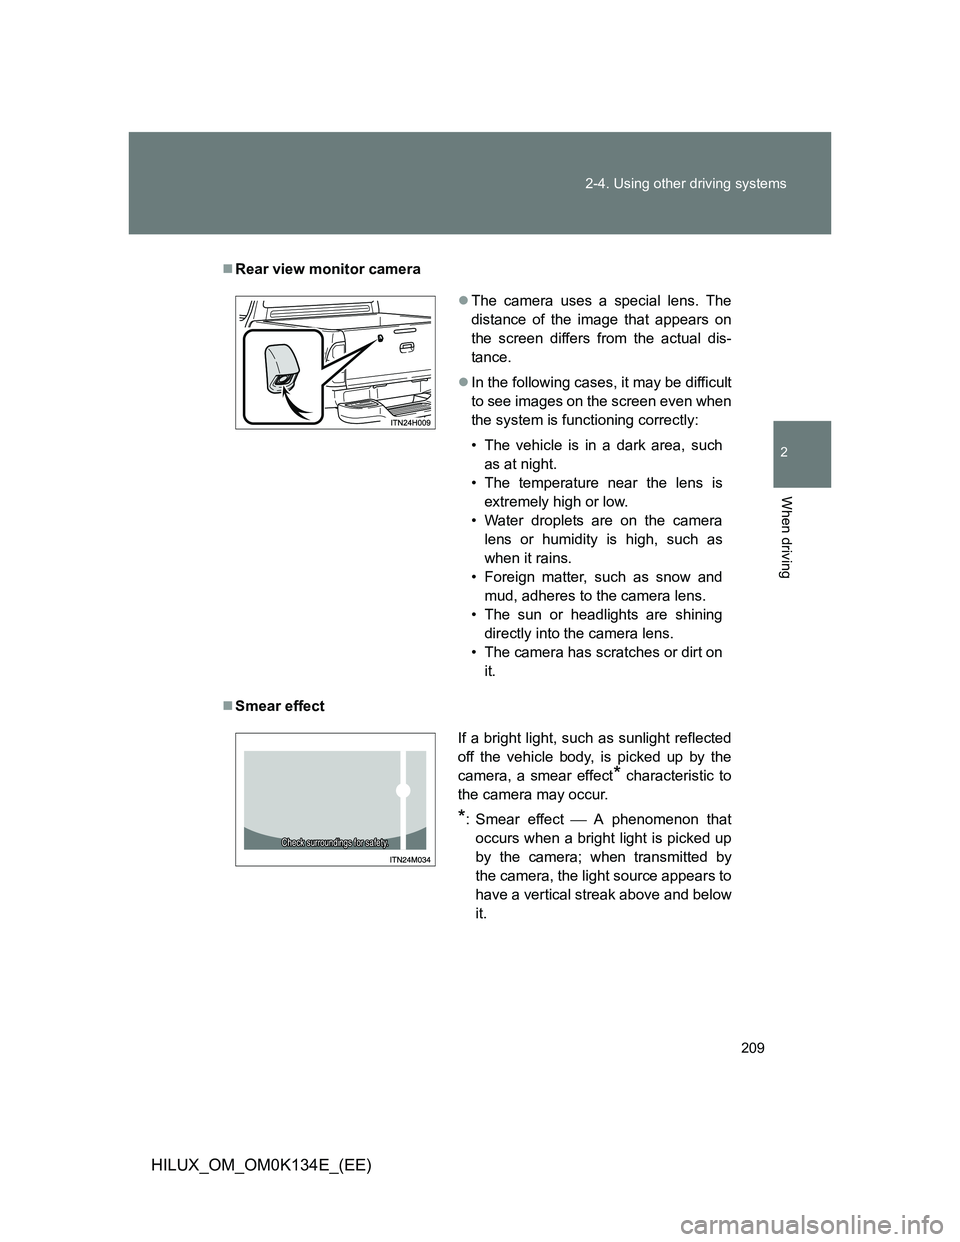
Rear view monitor camera
Smear effect
The camera uses a special lens. The
distance of the image that appears on
the screen differs from the actual dis-
tance.
In the following cases, it may be difficult
to see images on the screen even when
the system is functioning correctly:
• The vehicle is in a dark area, such
as at night.
• The temperature near the lens is
extremely high or low.
• Water droplets are on the camera
lens or humidity is high, such as
when it rains.
• Foreign matter, such as snow and
mud, adheres to the camera lens.
• The sun or headlights are shining
directly into the camera lens.
• The camera has scratches or dirt on
it.
If a bright light, such as sunlight reflected
off the vehicle body, is picked up by the
camera, a smear effect
* characteristic to
the camera may occur.
*: Smear effectA phenomenon that
occurs when a bright light is picked up
by the camera; when transmitted by
the camera, the light source appears to
have a vertical streak above and below
it.
Page 323 of 644
323 3-3. Using the “touch screen”
3
Interior features
HILUX_OM_OM0K134E_(EE)Changing between day mode and night mode
When the headlights are turned on, the screen dims.
However, the screen can be switched to day mode by touching
“Day mode”.
The screen will stay in day mode when the headlights are turned on until
“Day mode” is touched again.
Adjusting the screen contrast/brightness
Touch “General” or “Camera” on the “Display settings” screen.
Adjust the display as desired
using “+” or “-”.
Select “Contrast” or “Brightness”
using the “<<” or “>>”.
Touch “OK”.
STEP1
STEP2
“-”“+”
“Contrast”WeakerStronger
“Brightness”DarkerBrighter
STEP3
Page 525 of 644
525 4-3. Do-it-yourself maintenance
4
Maintenance and care
HILUX_OM_OM0K134E_(EE)
FuseAmpereCircuit
24ECU-B10 A
Door courtesy switches, power
door lock system, wireless remote
control system, steering sensor
and headlights
25RAD15 AAudio system
26DOME7.5 A
Interior lights, engine switch light,
personal light, gauges and meters,
clock, multi-information display,
wireless remote control system,
daytime running light system and
fog light
27A/F20 AEmission control system
28ALT-S7.5 ACharging system
29TURN-HAZ15 AEmergency flashers and turn signal
lights
30ECU-B No.27.5 AAir conditioning system
31DCC30 AECU-B, DOME and RAD fuses
Page 527 of 644

527 4-3. Do-it-yourself maintenance
4
Maintenance and care
HILUX_OM_OM0K134E_(EE)
FuseAmpereCircuit
4OBD7.5 AOn-board diagnosis system
5INJ15 A
Multiport fuel injection system/
sequential multiport fuel injection
system
6ECU-IG &
GAUGE10 A
Air conditioning system, charging
system, rear differential lock sys-
tem, ABS, TRC, VSC, emergency
flashers, turn signal lights, back-up
lights, multiport fuel injection sys-
tem/sequential multiport fuel injec-
tion system, shift lock control
system, rear window defogger,
headlights, door courtesy switches,
power door lock system, wireless
remote control system, steering
sensor, daytime running light sys-
tem, cruise control, headlight clean-
ers, seat heaters, outside rear view
mirror defoggers, multi-information
display and passenger’s seat belt
reminder light
7WIP20 AWindshield wiper and washer
8IGN7.5 A
Multiport fuel injection system/
sequential multiport fuel injection
system, SRS airbags and fuel pump
9ACC7.5 A
Audio system, power outlet, clock,
power rear view mirror control sys-
tem, shift lock control system and
multi-information display
Page 545 of 644
545 4-3. Do-it-yourself maintenance
4
Maintenance and care
HILUX_OM_OM0K134E_(EE)
CAUTION
Replacing light bulbs
Turn off the lights. Do not attempt to replace the bulb immediately after
turning off the lights.
The bulbs become very hot and may cause burns.
Do not touch the glass portion of the light bulb with bare hands. Hold the
bulb by the plastic or metal portion.
If the bulb is scratched or dropped, it may blow out or crack.
Fully install light bulbs and any parts used to secure them. Failure to do so
may result in heat damage, fire, or water entering the headlight unit. This
may damage the headlights or cause condensation to build up on the lens.
To prevent damage or fire
Make sure bulbs are fully seated and locked.
Check the wattage of the bulb before installing to prevent heat damage.
Page 584 of 644

584
5-2. Steps to take in an emergency
HILUX_OM_OM0K134E_(EE)
If the engine will not start
If the engine will not start even though correct starting procedures
are being followed (
P. 162), consider each of the following points:
The engine will not start even though the starter motor
operates normally.
One of the following may be the cause of the problem:
There may not be sufficient fuel in the vehicle’s tank.
(P. 595)
There may be a malfunction in the engine immobilizer system.
(P. 102)
The starter motor turns over slowly, the interior lights and
headlights are dim, or the horn does not sound or sounds at
a low volume.
One of the following may be the cause of the problem:
The battery may be discharged. (P. 587)
The battery terminal connections may be loose or corroded.
The starter motor does not turn over, the interior lights and
headlights do not turn on, or the horn does not sound.
One of the following may be the cause of the problem:
One or both of the battery terminals may be disconnected.
The battery may be discharged. (P. 587)
Contact any authorized Toyota dealer or repairer, or another duly
qualified and equipped professional, if the problem cannot be
repaired, or if repair procedures are unknown.
Page 589 of 644

5
589 5-2. Steps to take in an emergency
When trouble arises
HILUX_OM_OM0K134E_(EE)
Starting the engine when the battery is discharged (vehicles with auto-
matic transmission)
The engine cannot be started by push-starting.
To prevent battery discharge
Turn off the headlights and the audio system while the engine is off.
Turn off any unnecessary electrical components when the vehicle is run-
ning at a low speed for an extended period, such as in heavy traffic.
When the battery is removed or discharged
The power windows must be initialized. (P. 92)
Charging the battery
The electricity stored in the battery will discharge gradually even when the
vehicle is not in use, due to natural discharge and the draining effects of cer-
tain electrical appliances. If the vehicle is left for a long time, the battery may
discharge, and the engine may be unable to start. (The battery recharges
automatically during driving.)
Start the engine of the second vehicle. Increase the engine
speed slightly and maintain at that level for approximately 5
minutes to recharge the battery of your vehicle.
Maintain the engine speed of the second vehicle and start
the engine of your vehicle.
Once the vehicle’s engine has started, remove the jumper
cables in the exact reverse order from which they were con-
nected.
Once the engine starts, have the vehicle inspected at any autho-
rized Toyota dealer or repairer, or another duly qualified and
equipped professional, as soon as possible.STEP2
STEP3
STEP4