Page 440 of 684
440 3-7. Using the storage features
Glove boxUnlock with the master key
(vehicles without smart key
system) or mechanical key
(vehicles with smart key sys-
tem)
Lock with the master key
(vehicles without smart key
system) or mechanical key
(vehicles with smart key sys-
tem)
Open (pull lever)
CAUTION
■ Items that should not be left in the storage spaces
Do not leave glasses, lighters or spray cans in the storage spaces, as this
may cause the following when cabin temperature becomes high:
● Glasses may be deformed by heat or cracked if they come into contact
with other stored items.
● Lighters or spray cans may explode. If they come into contact with other
stored items, the lighter may catch fire or the spray can may release gas,
causing a fire hazard.
■Power back door main switch ( vehicles with power back door)
The power back door main switch is located in the glove box. ( P. 62)
Glove box
Page 441 of 684
441
3-7. Using the
storage features
3
Interior features
Console box
Upper Pull up the knob to release the
lock. Lift the lid.
Lower Push down the lever.
CAUTION
■Caution while driving
Keep the glove box closed. In the event of sudden braking or sudden swerv-
ing, an accident may occur due to an occupant being struck by the open
glove box or the items stored inside.
CAUTION
■Caution while driving
Keep the console box closed.
Injuries may result in the event of an accident or sudden braking.
Glove box and console box
Page 450 of 684
450 3-7. Using the storage features
Side table■ Installing the side table
Take out the side table from the
console box.
Remove the second center seat. ( P. 82)
Engage the front pins of the
side table with the hooks.
Push down on the side table to
engage the rear pin locks.
■ Removing the side table
Take out the second center seat
from the console box.
STEP1
STEP2
STEP3
STEP1
Side table
Page 451 of 684
451
3-7. Using the
storage features
3
Interior features
Pull the lock release lever to
remove the side table.
Stow the side table in the con-
sole box.
Push down on the end to engage
the pins in the holes and close
the console box door.
Make sure that the side table is
securely locked in position.
STEP2
STEP3
STEP4
CAUTION
■Caution while driving
Keep the console box closed.
Injuries may result in the event of an accident or sudden braking.
Side table
Page 454 of 684
454
3-8. Other interior features
Clock (vehicles without multi-infor mation display)
■The clock is displayed when
The engine switch is in the “ACC” or “ON” position.
Adjusts the hours.
Adjusts the minutes.
Page 460 of 684
460
3-8. Other interior features
Seat heaters
■The seat heaters can be used when
Vehicles without smart key system
The engine switch is in the “ON” position. Vehicles with smart key system
The “ENGINE START STOP” switch is in IGNITION ON mode.
■ When not in use
Turn the knob fully counterclockwise. The indicator light turns off.
Press the knob into the recessed position.
Pops the knob out
On
The indicator light comes on.
Adjusts the seat tempera-
ture
The further you turn the knob
clockwise, the warmer the seat
becomes.Front passenger's seat
Driver's seat
: If equipped
Page 470 of 684
470
3-8. Other interior features
Garage door opener
The garage door opener (HomeLink Universal Transceiver) is manufac-
tured under license from HomeLink.
Programming the HomeLink (for U.S.A. owners)
The HomeLink
compatible transceiver in your vehicle has 3 buttons
which can be programmed to operate 3 different devices. Refer to the
programming method below appropriate for the device.
Indicator
Buttons
■ Programming the HomeLink
Point the remote control for the
device 1 to 3 in. (25 to 75 mm)
from the HomeLink
control but-
tons.
Keep the indicator light on the
HomeLink in view while pro-
gramming.
The garage door opener can be programmed to operate garage
doors, gates, entry doors, door locks, hom e lighting systems, secu-
rity systems, and other devices.
STEP1
: If equipped
Page 473 of 684

473
3-8. Other interior features
3
Interior features
Test the operation of the HomeLink by pressing the newly
programmed button. Check to see if the gate/device operates
correctly.
Repeat the steps above to program another device for each of
the remaining HomeLink
buttons.
■ Programming other devices
To program other devices such as home security systems, home
door locks or lighting, contact your authorized Toyota dealer for
assistance.
■ Reprogramming a button
The individual HomeLink
buttons cannot be erased but can be
reprogrammed. To reprogram a button, follow the programming
instructions.
Operating the HomeLink
Press the appropriate HomeLink button. The HomeLink indicator
light on the HomeLink transceiver should turn on.
The HomeLink continues to send a signal for up to 20 seconds as long
as the button is pressed.
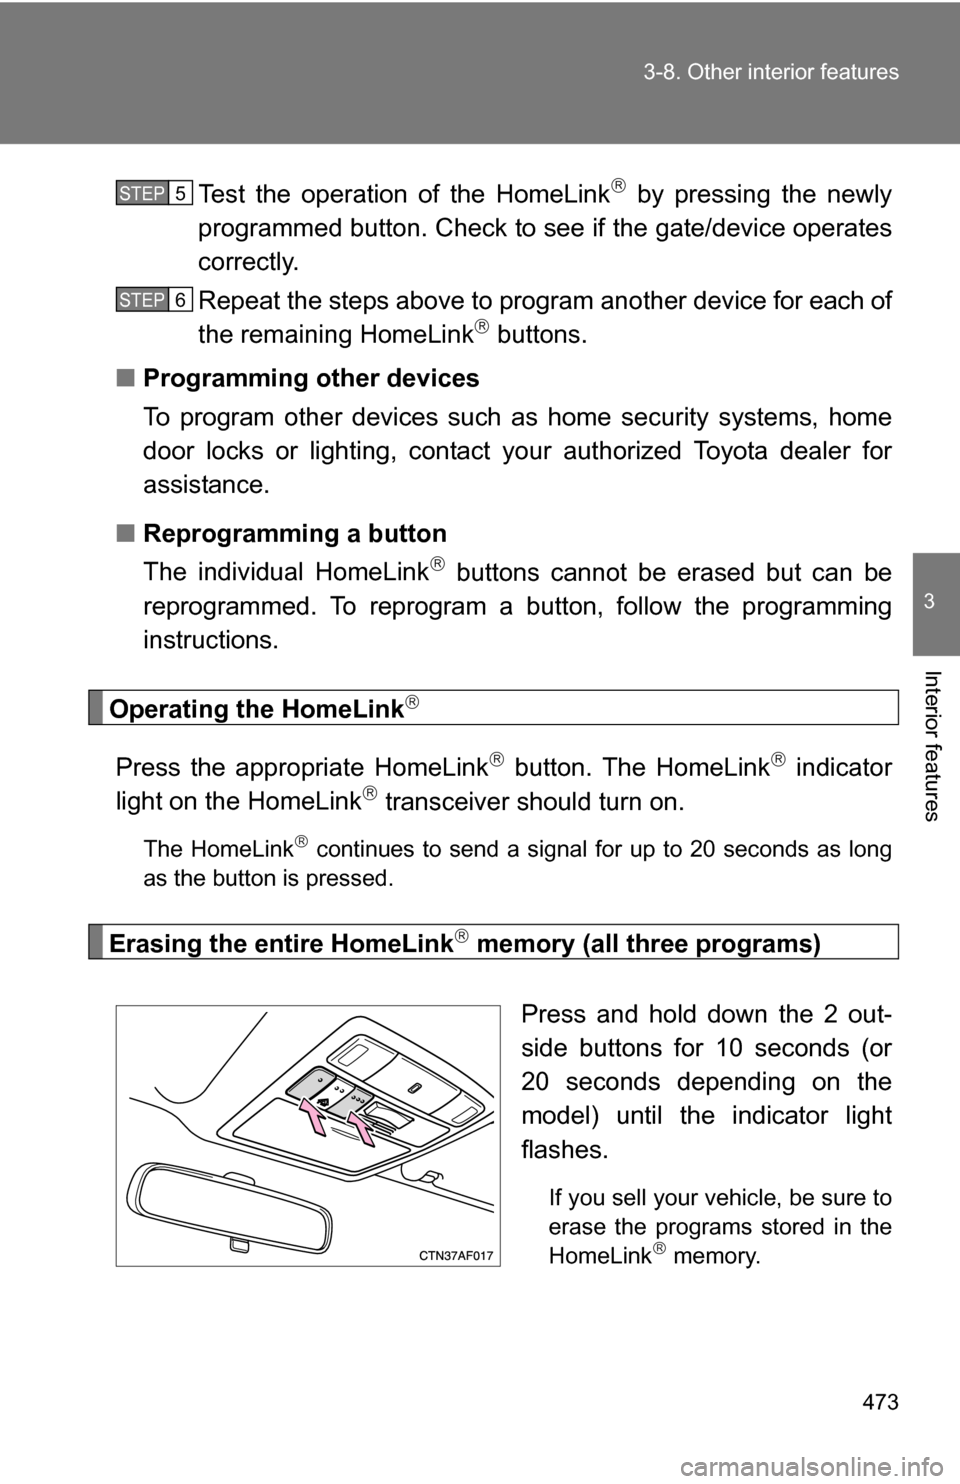
Erasing the entire HomeLink memory (all three programs)
Press and hold down the 2 out-
side buttons for 10 seconds (or
20 seconds depending on the
model) until the indicator light
flashes.
If you sell your vehicle, be sure to
erase the programs stored in the
HomeLink
memory.
STEP5
STEP6