Page 131 of 684

131
1-7. Safety information
1
Before driving
CAUTION
■
SRS airbag precautions
Observe the following precautions regarding the airbags.
Failure to do so may cause death or serious injury.
●The driver and all passengers in the vehicle must wear their seat belts
properly.
The SRS airbags are supplemental devices to be used with the seat belts.
● The SRS driver airbag deploys with considerable force, and can cause
death or serious injury especially if the driver is very close to the airbag.
The National Highway Traffic Safety Administration (“NHTSA”) advises:
Since the risk zone for the driver’s airbag is the first 2 - 3 in. (50 - 75 mm) of
inflation, placing yourself 10 in. (250 mm) from your driver airbag provides
you with a clear margin of safety. This distance is measured from the center
of the steering wheel to your breastbone. If you sit less than 10 in. (250 mm)
away now, you can change your driving position in several ways:
• Move your seat to the rear as far as you can while still reaching thepedals comfortably.
• Slightly recline the back of the seat. Although vehicle designs vary, many drivers can achieve the 10 in.
(250 mm) distance, even with the driver seat all the way forward, sim-
ply by reclining the back of the seat somewhat. If reclining the back of
your seat makes it hard to see the road, raise yourself by using a firm,
non-slippery cushion, or raise the seat if your vehicle has that feature\
.
• If your steering wheel is adjustable, tilt it downward. This points the air- bag toward your chest instead of your head and neck.
The seat should be adjusted as recommended by NHTSA above, while still
maintaining control of the foot pedals, steering wheel, and your view of the
instrument panel controls.
Page 196 of 684
196 2-2. Instrument cluster
Setting up the displaysDisplay the set up screen on the
multi-information display when
the vehicle is stopped.
Press and hold the “DISP” button
on the steering wheel to display
the set up screen.
Select the desired item on the
menu screen.
Press and hold the “DISP” button
on the steering wheel to enter the
setting mode.
■Setting the clock
Select “CLOCK” on the menu screen. Press and hold the
“DISP” button on the steering wheel until the display changes.
Press the “DISP” button on the
steering wheel to adjust the
hours.
After adjusting the hours, wait 5
seconds to allow the hours to be
automatically input.
STEP1
STEP2
STEP1
STEP2
Page 197 of 684
197
2-2. Instrument cluster
2
When driving
Press the “DISP” button on the
steering wheel to adjust the min-
utes.
After adjusting the minutes, wait 5
seconds to allow the minutes to
be automatically input.
■
Setting the display
Select “DISPLAY” on the menu screen. Press and hold the
“DISP” button on the steering w heel until the display changes.
Select the desired item on the
menu screen.
Press and hold the “DISP” button
on the steering wheel to enter the
setting mode.
● Setting day mode
Select “DAY MODE” on the menu screen. Press and hold the
“DISP” button on the steering w heel until the display changes.
Press the “DISP” button on the steering wheel to select “ON”
or “OFF”.
After setting day mode, wait 5 seconds to allow the mode to be auto-
matically input.
STEP3
STEP1
STEP2
STEP1
STEP2
Page 198 of 684

198 2-2. Instrument cluster
●Setting the background color
Select “BACKGROUND COLOR” on the menu screen. Press
and hold the “DISP” button on the steering wheel until the dis-
play changes.
Press the “DISP” button on the steering wheel to select
“BLACK” or “BLUE”.
After selecting a background color, wait 5 seconds to allow the color
to be automatically input.
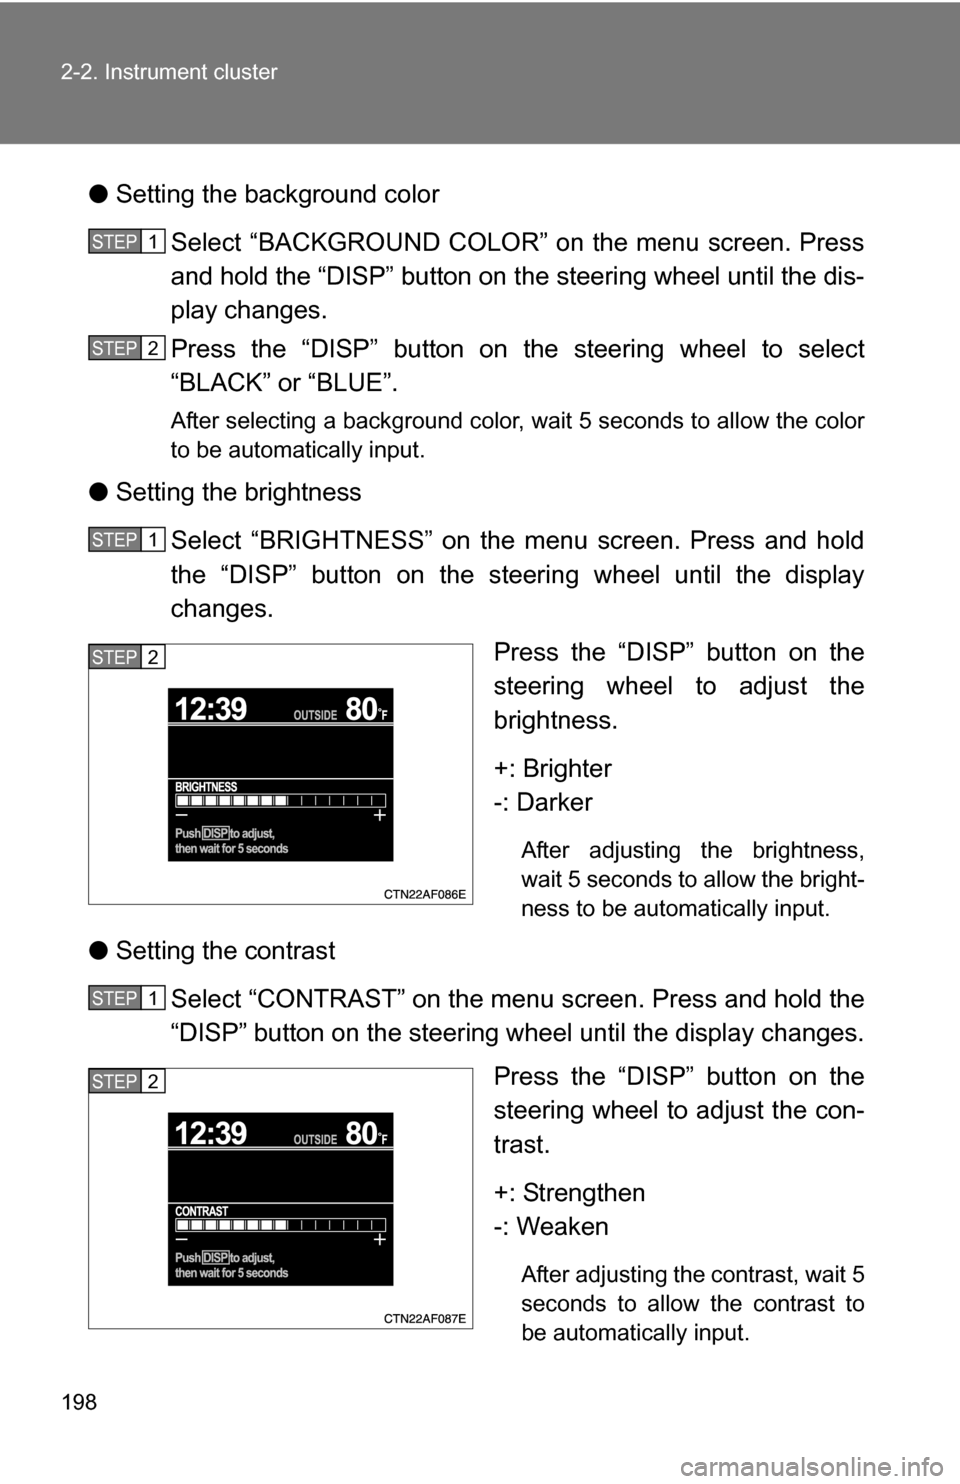
●Setting the brightness
Select “BRIGHTNESS” on the menu screen. Press and hold
the “DISP” button on the steering wheel until the display
changes. Press the “DISP” button on the
steering wheel to adjust the
brightness.
+: Brighter
-: Darker
After adjusting the brightness,
wait 5 seconds to allow the bright-
ness to be automatically input.
●Setting the contrast
Select “CONTRAST” on the menu screen. Press and hold the
“DISP” button on the steering wheel until the display changes. Press the “DISP” button on the
steering wheel to adjust the con-
trast.
+: Strengthen
-: Weaken
After adjusting the contrast, wait 5
seconds to allow the contrast to
be automatically input.
STEP1
STEP2
STEP1
STEP2
STEP1
STEP2
Page 199 of 684
199
2-2. Instrument cluster
2
When driving
●
Returning to the previous screen
Select “RETURN” on the menu screen. Press and hold the “DISP”
button on the steering wheel until the display changes.
Setting up the rear view monitor display
Display the set up screen on the
multi-information display when
the vehicle is stopped and the
rear view monitor is turned on.
Press and hold the “DISP” button
on the steering wheel to display
the set up screen.
Select the desired item on the
menu screen.
Press and hold the “DISP” button
on the steering wheel to enter the
adjustment mode.
STEP1
STEP2
Page 200 of 684
200 2-2. Instrument cluster
■Setting the brightness
Select “BRIGHTNESS” on the menu screen. Press and hold
the “DISP” button on the steering wheel until the display
changes.
Press the “DISP” button on the
steering wheel to adjust the
brightness.
+: Brighter
-: Darker
After adjusting the brightness,
wait 5 seconds to allow the bright-
ness to be automatically input.
■Setting the contrast
Select “CONTRAST” on the menu screen. Press and hold the
“DISP” button on the steering wheel until the display changes.
Press the “DISP” button on the
steering wheel to adjust the con-
trast.
+: Strengthen
-: Weaken
After adjusting the contrast, wait 5
seconds to allow the contrast to
be automatically input.
STEP1
STEP2
STEP1
STEP2
Page 201 of 684
201
2-2. Instrument cluster
2
When driving
■
Setting the color
Select “COLOR” on the menu screen. Press and hold the
“DISP” button on the steering w heel until the display changes.
Press the “DISP” button on the
steering wheel to adjust the
color.
G: Green
R: Red
After selecting a color, wait 5 sec-
onds to allow the color to be auto-
matically input.
■ Setting the tone
Select “TONE” on the menu screen. Press and hold the
“DISP” button on the steering w heel until the display changes.
Press the “DISP” button on the
steering wheel to adjust the tone.
+: Brighter
-: Darker
After adjusting the tone, wait 5
seconds to allow the tone to be
automatically input.
■ Returning to the previous screen
Select “RETURN” on the menu screen. Press and hold the “DISP”
button on the steering wheel until the display changes.
STEP1
STEP2
STEP1
STEP2
Page 300 of 684
300 3-2. Using the audio system
Type C: CD player with changer and AM/FM radio
TitlePage
Using the radioP. 307
Using the CD playerP. 314
Playing back MP3 and WMA discsP. 322
Operating an iPodP. 330
Operating a USB memoryP. 337
Optimal use of the audio systemP. 345
Using the AUX portP. 349
Using the steering wheel audio switchesP. 351