Page 272 of 353

SETUP
272
INFORMATION
�The displayed time to the destina-
tion is the approximate driving
time that is calculated based on the
selected speeds and the actual
position along the guidance route.
� The time shown on the screen may
vary greatly depending on prog-
ress along the route, which may be
affected by conditions such as
traffic jams and construction work.
� It is possible to display up to 99
hours 59 minutes.
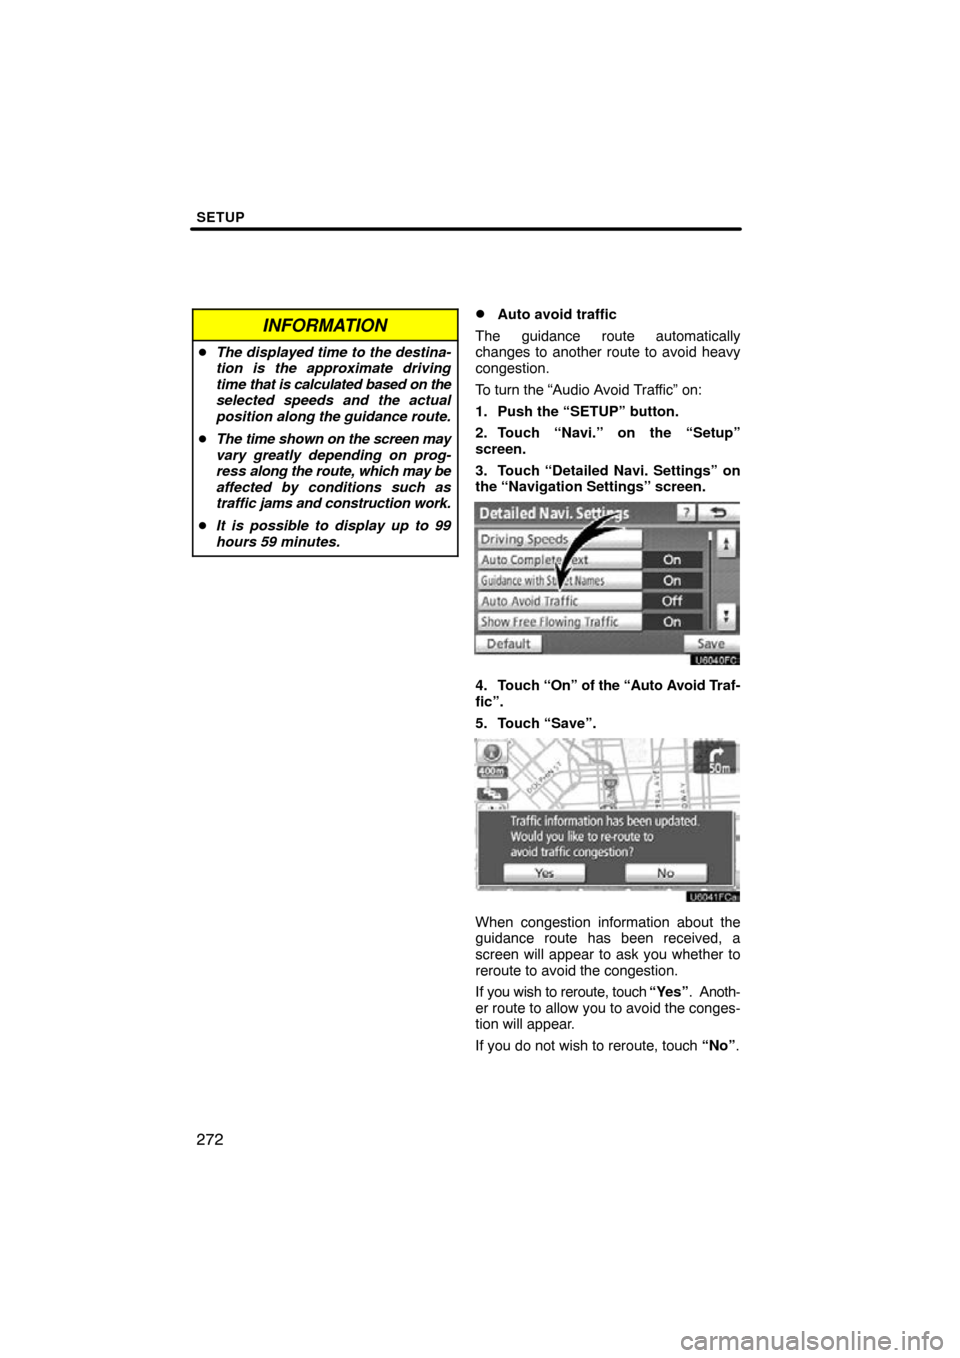
�Auto avoid traffic
The guidance route automatically
changes to another route to avoid heavy
congestion.
To turn the “Audio Avoid Traffic” on:
1. Push the “SETUP” button.
2. Touch “Navi.” on the “Setup”
screen.
3. Touch “Detailed Navi. Settings” on
the “Navigation Settings” screen.
4. Touch “On” of the “Auto Avoid Traf-
fic”.
5. Touch “Save”.
When congestion information about the
guidance route has been received, a
screen will appear to ask you whether to
reroute to avoid the congestion.
If you wish to reroute, touch “Yes”. Anoth-
er route to allow you to avoid the conges-
tion will appear.
If you do not wish to reroute, touch “No”.
Page 273 of 353
SETUP
273
INFORMATION
When the “Traffic Information” indi-
cator is dimmed, “Auto Avoid Traf-
fic”, “Traffic Voice Guidance” and
“Show Free Flowing Traffic” will not
operate.
�Show free flowing traffic
Freely flowing traffic is shown with the ar-
row.
To turn the “Show Free Flowing Traffic” on:
1. Push the “SETUP” button.
2. Touch “Navi.” on the “Setup”
screen.
3. Touch “Detailed Navi. Settings” on
the “Navigation Settings” screen.
4. Select “On” of the “Show Free Flow-
ing Traffic”.
5. Touch “Save”.
INFORMATION
When the “Traffic Information” indi-
cator is dimmed, “Auto Avoid Traf-
fic”, “Traffic Voice Guidance” and
“Show Free Flowing Traffic” will not
operate.
Page 274 of 353
SETUP
274
�
POI category change
(Select POI icons)
Select from among the 6 icons displayed
on the “Customize POI Icons” screen, so
that setting of the icons to be displayed on
the map screen can be done easily.
1. Push the “SETUP” button.
2. Touch “Navi.” on the “Setup”
screen.
3. Touch “Detailed Navi. Settings” on
the “Navigation Settings” screen.
Then touch
to display page 2 of the
“Detailed Navi. Settings” screen.
4. Touch “Customize POI Icons”.
5. Touch the category button to be
changed.
6. Touch the desired group.
If the desired POI category is not on the
screen, touch “List All Categories” to list
all POI categories.
7. Touch the desired category.
8. Touch “OK”.
Page 275 of 353

SETUP
275
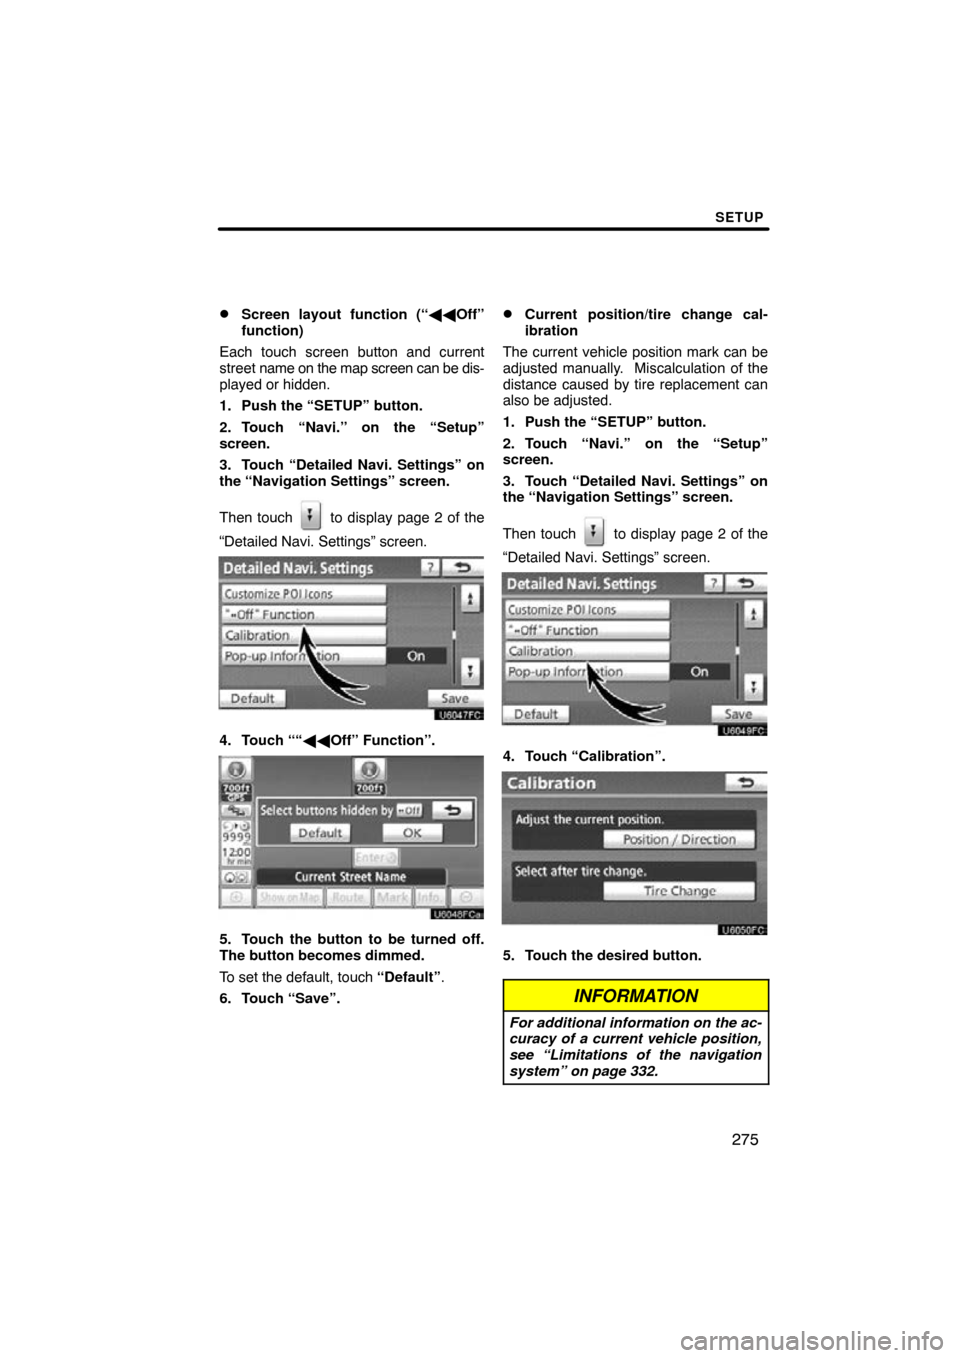
�
Screen layout function (“��
Off”
function)
Each touch screen button and current
street name on the map screen can be dis-
played or hidden.
1. Push the “SETUP” button.
2. Touch “Navi.” on the “Setup”
screen.
3. Touch “Detailed Navi. Settings” on
the “Navigation Settings” screen.
Then touch
to display page 2 of the
“Detailed Navi. Settings” screen.
4. Touch ““�� Off” Function”.
5. Touch the button to be turned off.
The button becomes dimmed.
To set the default, touch “Default”.
6. Touch “Save”.
�Current position/tire change cal-
ibration
The current vehicle position mark can be
adjusted manually. Miscalculation of the
distance caused by tire replacement can
also be adjusted.
1. Push the “SETUP” button.
2. Touch “Navi.” on the “Setup”
screen.
3. Touch “Detailed Navi. Settings” on
the “Navigation Settings” screen.
Then touch
to display page 2 of the
“Detailed Navi. Settings” screen.
4. Touch “Calibration”.
5. Touch the desired button.
INFORMATION
For additional information on the ac-
curacy of a current vehicle position,
see “Limitations of the navigation
system” on page 332.
Page 277 of 353
SETUP
277
TIRE CHANGE CALIBRATION
The tire change calibration function will be
used when replacing the tires. This func-
tion will adjust the miscalculation caused
by the circumference difference between
the old and new tires. If this procedure is
not performed when the tires are replaced,
the current vehicle position mark may be
incorrectly displayed.
To perform a distance calibration pro-
cedure, touch “Tire Change” on the
“Calibration” screen.
The message appears and the quick dis-
tance calibration is automatically started.
A few seconds later, a map will be dis-
played.
�Pop�up information
When the “Pop−up information” is turned
on, the pop−up information will be dis-
played.
1. Push the “SETUP” button.
2. Touch “Navi.” on the “Setup”
screen.
3. Touch “Detailed Navi. Settings” on
the “Navigation Settings” screen.
Then touch
to display page 2 of the
“Detailed Navi. Settings” screen.
4. Touch “Pop�up Information”.
5. Touch “On” or “Off”.
6. Touch “Save”.
Page 324 of 353
SETUP
324
(e) Initializing the Bluetooth� audio
settings
You can initialize the settings.
U10023GS
1. Touch “Default” on “BT Audio Set-
ting” screen.
U10024GS
2. Touch “Yes”. When the navigation system is turned on,
the “Information” screen displays
when it is
time to replace a part or certain compo-
nents. (See page 27.)
1. Push the “SETUP” button.
2. Touch “Vehicle”.
3. Touch “Maintenance”.
Vehicle Settings —
— Maintenance
Page 331 of 353
SECTION 9
APPENDIX
331
APPENDIX
�Limitations of the navigation system 332 . . . . . . . . . . . . . . . . . . . . .
� Map database information and updates 334
. . . . . . . . . . . . . . . .
Changing the map DVD −ROM 343 . . . . . . . . . . . . . . . . . . . . . . . .
Page 332 of 353

APPENDIX
332
This navigation system calculates the
current vehicle position using satellite
signals, various vehicle signals, map
data, etc. However, the accurate posi-
tion may not be shown depending on
the satellite condition, road configura-
tion, vehicle condition or other circum-
stances.
The Global Positioning System (GPS) de-
veloped and operated by the U.S. Depart-
ment of Defense provides an accurate cur-
rent vehicle position, normally using 4 or
more satellites, and in some case 3 satel-
lites. The GPS system has a certain level
of inaccuracy. While the navigation sys-
tem will compensate for this most of the
time, occasional positioning errors of up to
300 feet (100 m) can and should be expec-
ted. Generally, position errors will be cor-
rected within a few seconds.
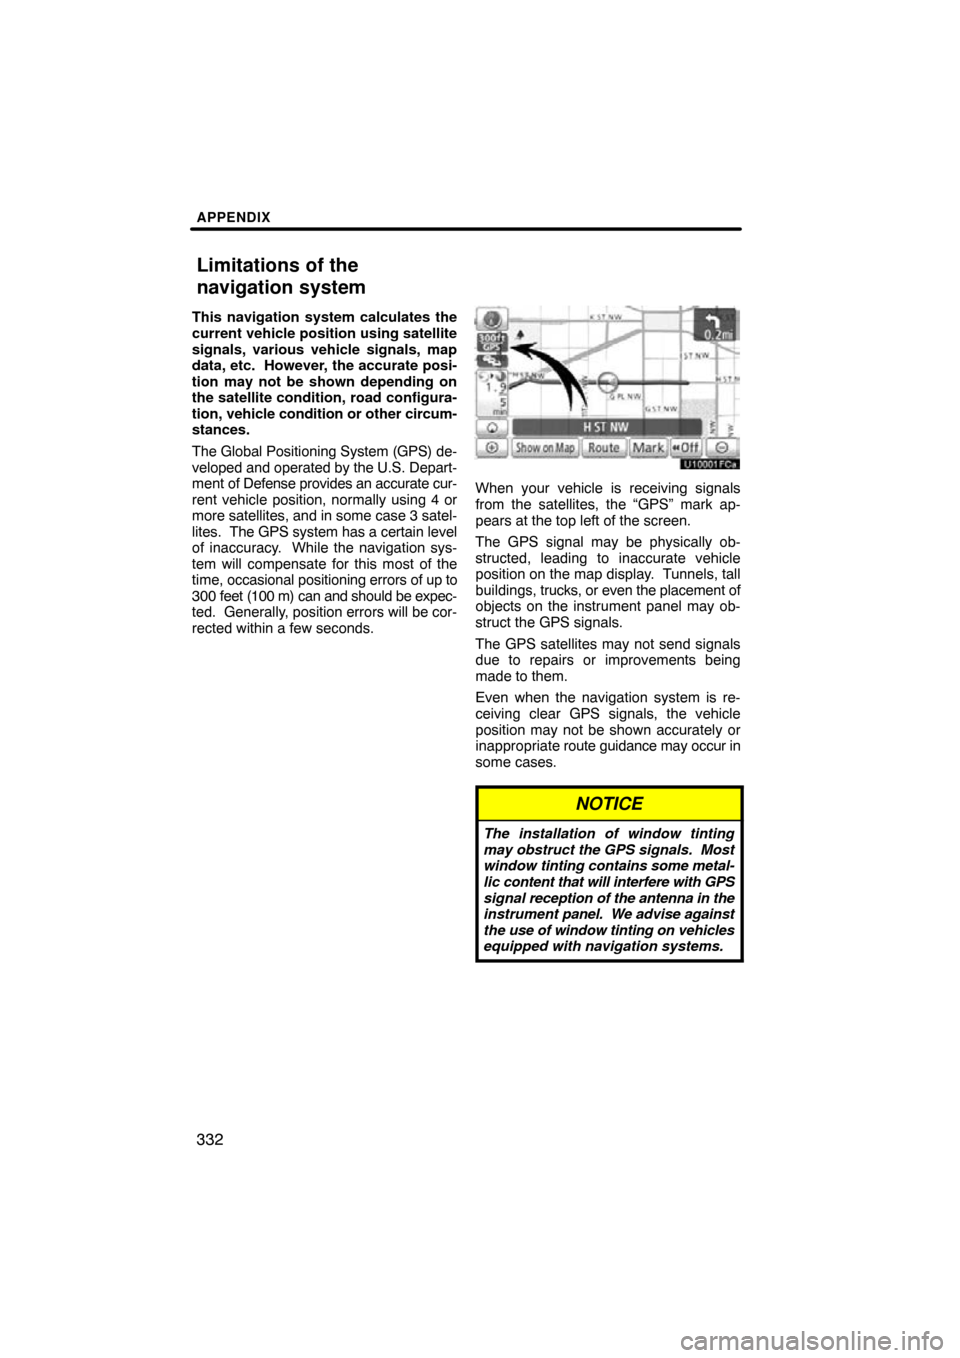
When your vehicle is receiving signals
from the satellites, the “GPS” mark ap-
pears at the top left of the screen.
The GPS signal may be physically ob-
structed, leading to inaccurate vehicle
position on the map display. Tunnels, tall
buildings, trucks, or even the placement of
objects on the instrument panel may ob-
struct the GPS signals.
The GPS satellites may not send signals
due to repairs or improvements being
made to them.
Even when the navigation system is re-
ceiving clear GPS signals, the vehicle
position may not be shown accurately or
inappropriate route guidance may occur in
some cases.
NOTICE
The installation of window tinting
may obstruct the GPS signals. Most
window tinting contains some metal-
lic content that will interfere with GPS
signal reception of the antenna in the
instrument panel. We advise against
the use of window tinting on vehicles
equipped with navigation systems.
Limitations of the
navigation system