Page 108 of 336
108
4. SETUP
1Press the “SETUP” button.
2Touch “Navigation” on the “Setup”
screen.
3Touch “Detailed Navi. Settings” on
the “Navigation Settings” screen.
4Touch “Favorite POI Categories” .
5Touch the category to be changed.
6Touch the desired group.
If the desired POI category is not on the
screen, touch “List All Categories” to list
all POI categories.
7Touch the desired category.
The screen returns to the first page of the
“Favorite POI Categories” screen.
8Touch “OK”.
INFORMATION
●When the “Traffic Information” indicator
is dimmed, “Avoid Traffic”, “Traffic Inci-
dent Warning” and “Show Free Flowing
Traffic” will not operate.
POI CATEGORY CHANGE
(SELECT POI ICONS)
Select up to 6 POI icons to be dis-
played on the map screen.
Page 109 of 336

109
4. SETUP
3
NAVIGATION SYSTEM
1Press the “SETUP” button.
2Touch “Navigation” on the “Setup”
screen.
3Touch “Detailed Navi. Settings” on
the “Navigation Settings” screen.
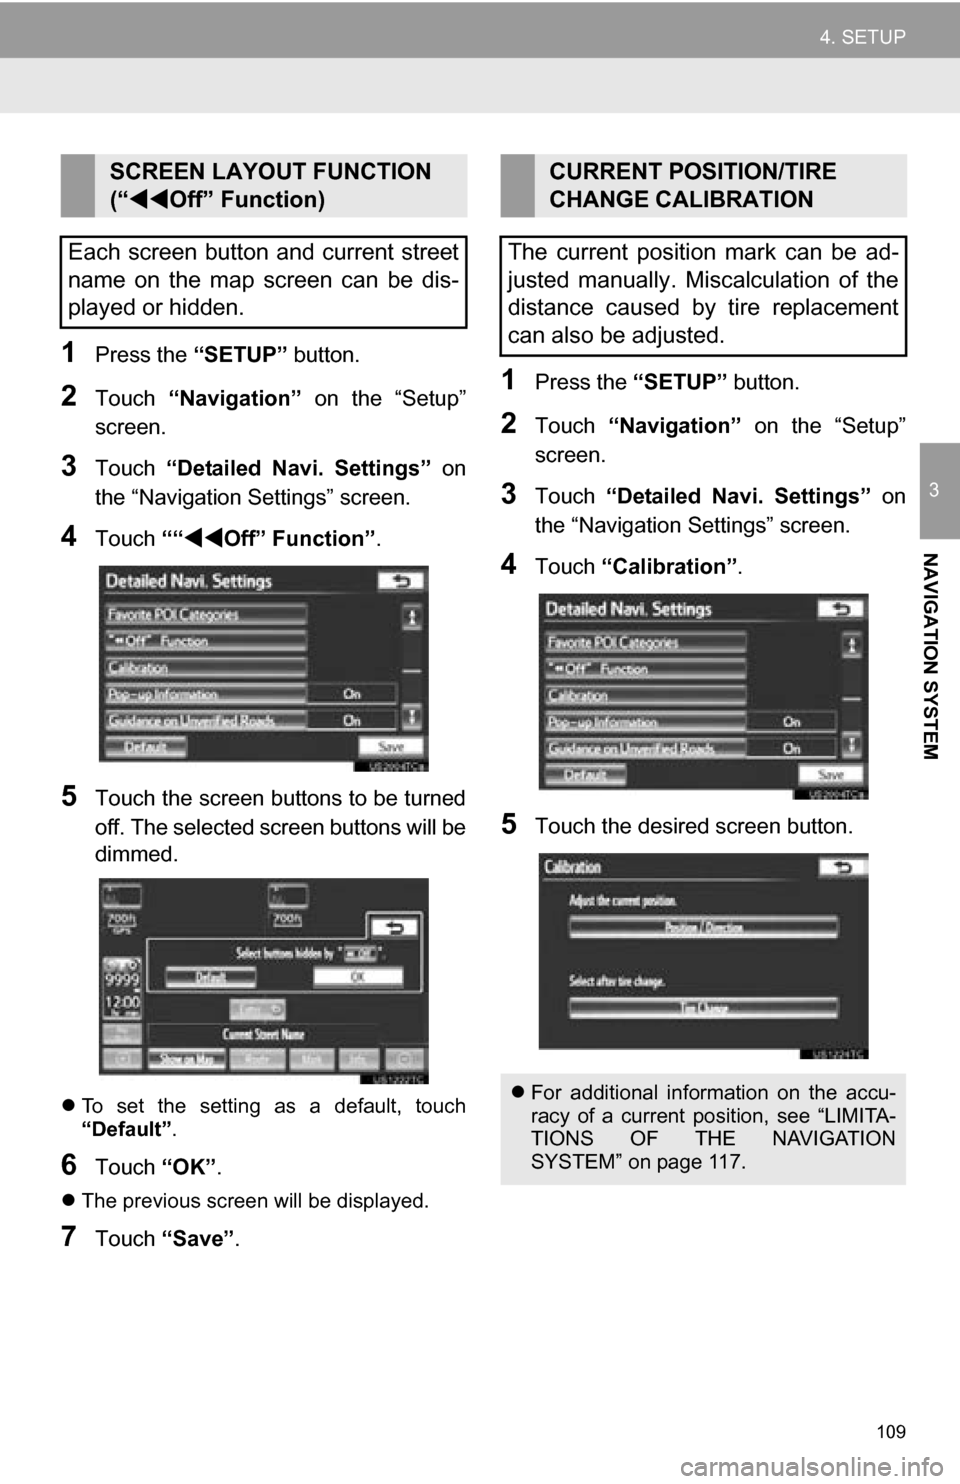
4Touch ““Off” Function” .
5Touch the screen buttons to be turned
off. The selected screen buttons will be
dimmed.
To set the setting as a default, touch
“Default” .
6Touch “OK”.
The previous screen will be displayed.
7Touch “Save” .
1Press the “SETUP” button.
2Touch “Navigation” on the “Setup”
screen.
3Touch “Detailed Navi. Settings” on
the “Navigation Settings” screen.
4Touch “Calibration”.
5Touch the desired screen button.
SCREEN LAYOUT FUNCTION
(“Off” Function)
Each screen button and current street
name on the map screen can be dis-
played or hidden.CURRENT POSITION/TIRE
CHANGE CALIBRATION
The current position mark can be ad-
justed manually. Miscalculation of the
distance caused by tire replacement
can also be adjusted.
For additional information on the accu-
racy of a current position, see “LIMITA-
TIONS OF THE NAVIGATION
SYSTEM” on page 117.
Page 110 of 336

110
4. SETUP
■POSITION/DIRECTION CALIBRA-
TION
1Touch “Position / Direction” .
2Touch one of the 8 directional screen
buttons to move the cursor to the
desired point on the map.
3Touch “OK”.
4Touch either the or to adjust
the direction of t he current position
mark.
5Touch “OK”.
The map will be displayed.
■TIRE CHANGE CALIBRATION
1To perform the distance calibration
procedure, touch “Tire Change”.
The message appears and the quick dis-
tance calibration is automatically started.
A few seconds later, a map will be dis-
played.
1Press the “SETUP” button.
2Touch “Navigation” on the “Setup”
screen.
3Touch “Detailed Navi. Settings” on
the “Navigation Settings” screen.
When driving, the current position
mark will be automatically corrected by
GPS signals. If GPS reception is poor
due to location, the current position
mark can be adjusted manually.
The tire change calibration function will
be used when replacing the tires. This
function will adjust miscalculation
caused by the circumference differ-
ence between the old and new tires.
INFORMATION
● If this procedure is not performed when
the tires are replaced, the current posi-
tion mark may be incorrectly displayed.
POP-UP INFORMATION
When “Pop-up information” is turned
on, pop-up information will be dis-
played.
Page 111 of 336
111
4. SETUP
3
NAVIGATION SYSTEM
4Touch “Pop-up Information”.
5Touch “On” or “Off”.
6Touch “Save” .
When “Pop-up Information” is turned
off, the following messages will not be dis-
played.
This message appears when the map
scale is over 0.5 miles (800 m).
This message appears when the map is
switched to dual map screen mode.
Page 112 of 336
112
4. SETUP
2. VEHICLE SETTINGS
1Press the “SETUP” button.
2Touch “Vehicle” .
3Touch “Maintenance” .
4Touch the desired screen button.
Setting maintenance information. (See
page 112.)
Setting dealer. (See page 114.)
1Press the “SETUP” button.
2Touch “Vehicle” on the “Setup”
screen.
3Touch “Maintenance” on the “Vehicle
Settings” screen.
4Touch the desired screen button.
When the vehicle needs to be serviced,
the screen button color will change to
orange.
MAINTENANCE
When the navigation system is turned
on, the “Maintenance Reminder”
screen displays when it is time to re-
place a part or certain components.
(See page 28.)
MAINTENANCE INFORMATION
SETTING
Screen buttonFunction
“Engine oil”Replace engine oil
“Oil filter”Replace engine oil filter
“Rotation”Rotate tires
“Tires”Replace tires
“Battery”Replace 12-volt battery
“Brake pad”Replace brake pads
Page 113 of 336

113
4. SETUP
3
NAVIGATION SYSTEM
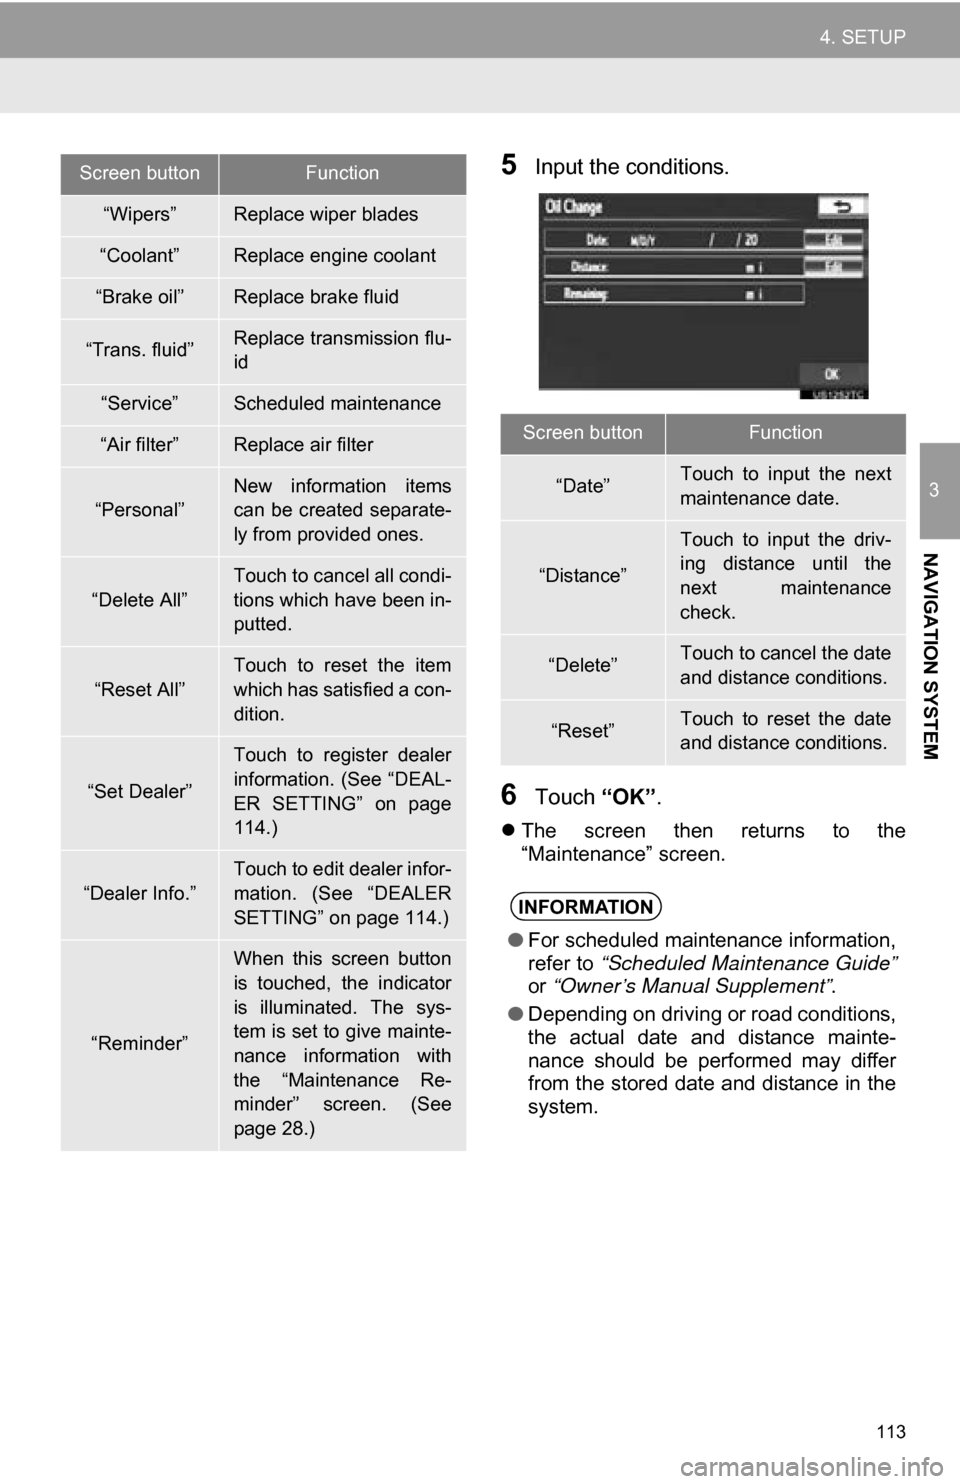
5Input the conditions.
6Touch “OK”.
The screen then returns to the
“Maintenance” screen.
“Wipers”Replace wiper blades
“Coolant”Replace engine coolant
“Brake oil”Replace brake fluid
“Trans. fluid”Replace transmission flu-
id
“Service”Scheduled maintenance
“Air filter”Replace air filter
“Personal”New information items
can be created separate-
ly from provided ones.
“Delete All”
Touch to cancel all condi-
tions which have been in-
putted.
“Reset All”
Touch to reset the item
which has satisfied a con-
dition.
“Set Dealer”
Touch to register dealer
information. (See “DEAL-
ER SETTING” on page
114.)
“Dealer Info.”
Touch to edit dealer infor-
mation. (See “DEALER
SETTING” on page 114.)
“Reminder”
When this screen button
is touched, the indicator
is illuminated. The sys-
tem is set to give mainte-
nance information with
the “Maintenance Re-
minder” screen. (See
page 28.)
Screen buttonFunction
Screen buttonFunction
“Date”Touch to input the next
maintenance date.
“Distance”
Touch to input the driv-
ing distance until the
next maintenance
check.
“Delete”Touch to cancel the date
and distance conditions.
“Reset”Touch to reset the date
and distance conditions.
INFORMATION
● For scheduled maintenance information,
refer to “Scheduled Maintenance Guide”
or “Owner’s Manual Supplement” .
● Depending on driving or road conditions,
the actual date and distance mainte-
nance should be performed may differ
from the stored date and distance in the
system.
Page 115 of 336
115
4. SETUP
3
NAVIGATION SYSTEM
■TO EDIT “Dealer” OR “Contact”
1Touch “Edit” next to “Dealer” or “Con-
tact”.
2Enter the name using the alphanumer-
ic keys.
Up to 70 characters can be entered for
dealer and 24 characters for contact.
3Touch “OK”.
The previous screen will be displayed.
■TO EDIT “Location”
1Touch “Edit” next to “Location”.
2Touch one of the 8 directional screen
buttons to move the cursor to the
desired point on the map screen.
3Touch “OK”.
The previous screen will be displayed.
■TO EDIT “Phone #” (PHONE NUM-
BER)
1Touch “Edit” next to “Phone #”.
2Enter the number using number keys.
3Touch “OK”.
The previous screen will be displayed.
Page 117 of 336

117
3
NAVIGATION SYSTEM
5. GPS (GLOBAL POSITIONING SYSTEM)
1. LIMITATIONS OF THE NAVIGATION SYSTEM
The Global Positioning System (GPS) de-
veloped and operated by the U.S. Depart-
ment of Defense provides an accurate
current position, normally using 4 or more
satellites, and in some case 3 satellites.
The GPS system has a certain level of in-
accuracy. While the navigation system will
compensate for this most of the time, oc-
casional positioning errors of up to 300
feet (100 m) can and should be expected.
Generally, position errors will be corrected
within a few seconds.
When the vehicle is receiving signals from
satellites, the “GPS” mark appears at the
top left of the screen.
The GPS signal may be physically ob-
structed, leading to in accurate vehicle po-
sition on the map screen. Tunnels, tall
buildings, trucks, or even the placement of
objects on the instrument panel may ob-
struct the GPS signals.
The GPS satellites may not send signals
due to repairs or improvements being
made to them.
Even when the naviga tion system is re-
ceiving clear GPS signals, the vehicle po-
sition may not be shown accurately or
inappropriate route guidance may occur in
some cases.
Accurate current position may not be
shown in the following cases:
• When driving on a small angled Y-
shaped road.
• When driving on a winding road.
• When driving on a slippery road such as in sand, gravel, snow, etc.
• When driving on a long straight road.
• When freeway and surface streets run in parallel.
• After moving by ferry or vehicle carrier.
• When a long route is searched during high speed driving.
• When driving without setting the current
position calibration correctly.
• After repeating a change of direction by going forward and backward, or turning
on a turntable in a parking lot.
• When leaving a covered parking lot or parking garage.
• When a roof carrier is installed.
• When driving with tire chains installed.
• When the tires are worn.
• After replacing a tire or tires.
• When using tires that are smaller or larger than the factory specifications.
• When the tire pressure in any of the 4 tires is not correct.
This navigation system calculates the
current position using satellite signals,
various vehicle signals, map data, etc.
However, an accurate position may not
be shown depending on satellite condi-
tions, road configuration, vehicle con-
dition or other circumstances.NOTICE
● The installation of window tinting may
obstruct the GPS signals. Most window
tinting contains some metallic content
that will interfere with GPS signal recep-
tion of the antenna in the instrument
panel. We advise against the use of win-
dow tinting on vehicles equipped with
navigation systems.
If the vehicle cannot receive GPS sig-
nals, the current position can be
adjusted manually. For information on
setting the current position calibration,
see page 109.