Page 389 of 512

3896-3. Do-it-yourself maintenance
6
Maintenance and care
AVALON_HV_U (OM41451U)
■After a fuse is replaced
●If the lights do not turn on even after the fuse has been replaced, a bulb may
need replacement. ( P. 390)
● If the replaced fuse blows again, have the vehicle inspected by your Toyota
dealer.
■ If there is an overload in a circuit
The fuses are designed to blow, protecting the wiring harness from damage.
■ When replacing light bulbs
Toyota recommends that you use genuine Toyota products designed for this
vehicle. Because certain bulbs are connected to circuits designed to prevent
overload, non-genuine parts or parts not designed for this vehicle may be
unusable.
CAUTION
■To prevent system breakdowns and vehicle fire
Observe the following precautions.
Failure to do so may cause damage to the vehicle, and possibly a fire or
injury.
●Never use a fuse of a higher amperage rating than that indicated, or use\
any other object in place of a fuse.
● Always use a genuine Toyota fuse or equivalent.
Never replace a fuse with a wire, even as a temporary fix.
● Do not modify the fuses or fuse boxes.
NOTICE
■Before replacing fuses
Have the cause of electrical overload determined and repaired by your
Toyota dealer as soon as possible.
Page 392 of 512
3926-3. Do-it-yourself maintenance
AVALON_HV_U (OM41451U)■
Headlight low beam (halogen bulb)
Unplug the connector while
pressing the lock release.
Turn the bulb base counter-
clockwise.
Set the new light bulb.
Align the 3 tabs on the light bulb
with the mounting, and insert.
Turn it clockwise to set.
Set the connector.
After installing the connector,
shake the bulb base gently to
check that it is not loose, turn
the headlights on once and visu-
ally confirm that no light is leak-
ing through the mounting.
Replacing light bulbs
1
2
3
4
Page 393 of 512
3936-3. Do-it-yourself maintenance
6
Maintenance and care
AVALON_HV_U (OM41451U)■
Headlight high beam and daytim
e running light (vehicles with
halogen bulbs for low beams)/Headlight high beam (vehicles
with discharge bulbs for low beams)
Unplug the connector while
pressing the lock release.
Turn the bulb base counter-
clockwise.
Set the new light bulb.
Align the 3 tabs on the light bulb
with the mounting, and insert.
Turn it clockwise to set.
Set the connector.
After installing the connector,
shake the bulb base gently to
check that it is not loose, turn
the headlights on once and visu-
ally confirm that no light is leak-
ing through the mounting.
1
2
3
4
Page 395 of 512
3956-3. Do-it-yourself maintenance
6
Maintenance and care
AVALON_HV_U (OM41451U)
Turn the bulb base counter-
clockwise.
Set the new light bulb.
Align the 3 tabs on the light bulb
with the mounting, and insert.
Turn it clockwise to set.
Set the connector.
After installing the connector,
shake the bulb base gently to
check that it is not loose, turn
the fog lights on once and visu-
ally confirm that no light is leak-
ing through the mounting.
Reinstall the fender liner and
the fender liner bolt.
4
5
6
7
Page 401 of 512
4016-3. Do-it-yourself maintenance
6
Maintenance and care
AVALON_HV_U (OM41451U)■
License plate light
Remove the cover.
To prevent damaging the vehi-
cle, wrap the flathead screw-
driver with a tape.
Remove the lens.
Insert a properly sized screw-
driver into the hole of the lens,
and pry off the lens as shown in
the illustration.
To prevent damaging the vehi-
cle, wrap the screwdriver with a
tape.
Remove the light bulb.
When installing, reverse the steps listed.
■Replacing the following bulbs
If any of the lights listed below has burnt out, have it replaced by
your Toyota dealer.
● Headlight low beams (discharge bulb)
● Daytime running lights (vehic les with discharge headlights)
● Side marker lights
● Side turn signal lights
● Stop/tail lights
● High mounted stoplight
● Outer foot lights (if equipped)
1
2
3
4
Page 402 of 512

4026-3. Do-it-yourself maintenance
AVALON_HV_U (OM41451U)
■Discharge headlights (if equipped)
If voltage to the discharge bulbs is insufficient, the bulbs may not come on, or
may go out temporarily. The discharge bulbs will come on when normal
power is restored.
■ LED light bulbs
The daytime running lights (vehicles with discharge headlights), stop/tail
lights, high mounted stoplight and outer foot lights each consist of a number
of LEDs. If any of the LEDs burn out, take your vehicle to your Toyota dealer
to have the light replaced.
■ Condensation build-up on the inside of the lens
Temporary condensation build-up on the inside of the lens does not indicate a
malfunction. Contact your Toyota dealer for more information in the following
situations:
●Large drops of water have built up on the inside of the lens.
● Water has built up inside the lens.
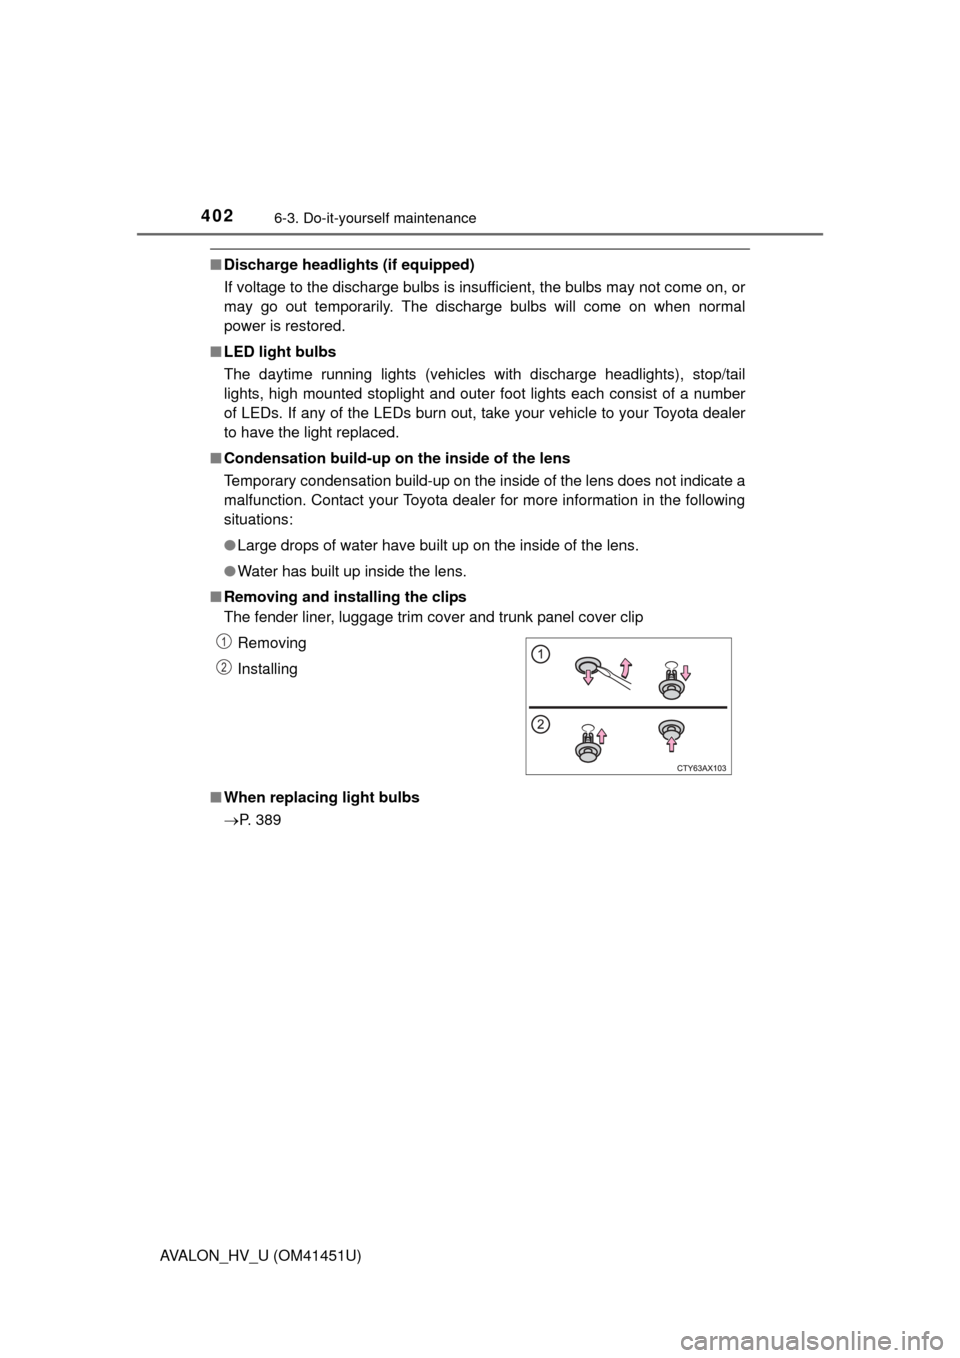
■ Removing and installing the clips
The fender liner, luggage trim cover and trunk panel cover clip
■ When replacing light bulbs
P. 389Removing
Installing
1
2
Page 403 of 512

4036-3. Do-it-yourself maintenance
6
Maintenance and care
AVALON_HV_U (OM41451U)
CAUTION
■Replacing light bulbs
●Turn off the lights. Do not attempt to replace the bulb immediately after
turning off the lights.
The bulbs become very hot and may cause burns.
● Do not touch the glass portion of the light bulb with bare hands. Hold the
bulb by the plastic or metal portion.
If the bulb is scratched or dropped, it may blow out or crack.
● Fully install light bulbs and any parts used to secure them. Failure to do so
may result in heat damage, fire, or water entering the headlight unit. This
may damage the headlights or cause condensation to build up on the lens.
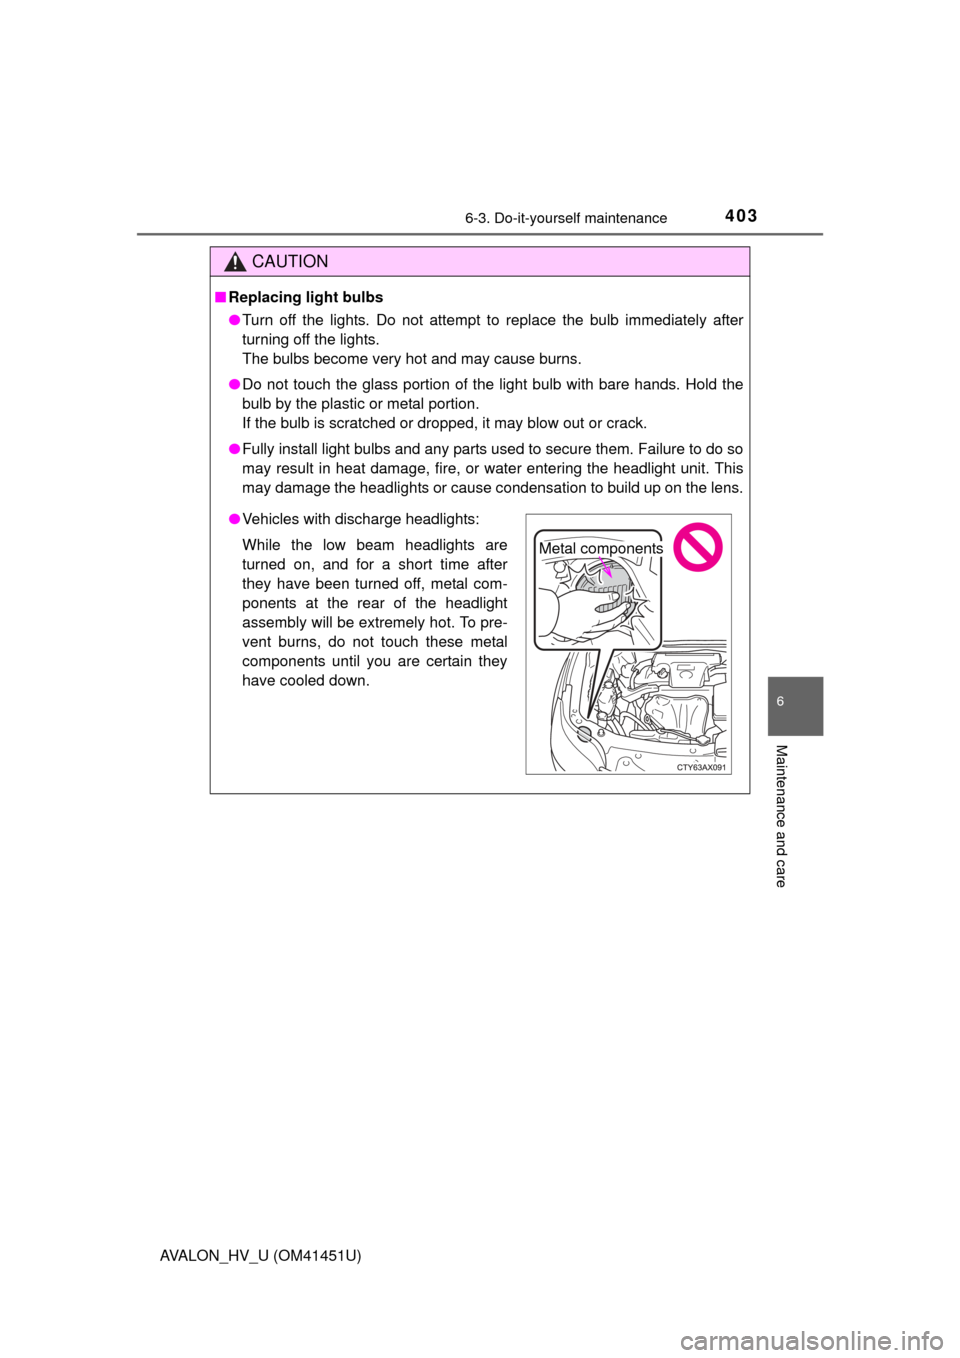
●Vehicles with discharge headlights:
While the low beam headlights are
turned on, and for a short time after
they have been turned off, metal com-
ponents at the rear of the headlight
assembly will be extremely hot. To pre-
vent burns, do not touch these metal
components until you are certain they
have cooled down.
Metal components
Page 404 of 512
4046-3. Do-it-yourself maintenance
AVALON_HV_U (OM41451U)
CAUTION
■Discharge headlights (if equipped)
●Contact your Toyota dealer before replacing the discharge headlights
(including light bulbs).
● Do not touch the discharge headlight’s high voltage socket when the head-
lights are turned on.
An extremely high voltage of 30000 V will be discharged and could result
in death or serious injury by electric shock.
● Do not attempt to take apart or repair the headlight bulbs, connectors,
power supply circuits, or related components.
Doing so could result in electric shock and death or serious injury.
■ To prevent damage or fire
●Make sure bulbs are fully seated and locked.
● Check the wattage of the bulb before installing to prevent heat damage.