2013 SUBARU TRIBECA window
[x] Cancel search: windowPage 172 of 420

&Type C inside mirror (if equipped)
1) Left button
2) Auto dimming indicator
3) Photosensor
4) Right button
This mirror has an anti-glare feature which
automatically reduces glare coming from
headlights of vehicles behind you. It also
contains a built-in compass. . By pressing and releasing the left
button, the automatic dimming function is
toggled on or off. When the automatic
dimming function is on, the auto dimming
indicator light (green) located to the right
of the button will illuminate. . By pressing and releasing the right
button, the compass display is toggled on or off. When the compass is on, an
illuminated compass reading will appear
in the lower part of the mirror.
Even with the mirror in anti-glare mode,
the mirror surface turns bright if the
transmission is shifted into reverse. This
is to ensure good rearward visibility duringreversing. !
Photosensors
The mirror has a photosensor attached on
both the front and back sides. If the glare
from the headlights of vehicles behind you
strikes the mirror, these sensors detect it
and make the reflection surface of the
mirror dimmer to help prevent you from
being blinded. For this reason, use care
not to cover the sensors with stickers, or
other similar items. Periodically wipe the sensors clean using a piece of dry soft
cotton cloth or an applicator. !
Compass calibration
1. For optimum calibration, switch off all
nonessential electrical accessories (rear
window defogger, heater/air conditioning
system, spotlight, etc.) and ensure all
doors are shut.
2. Drive to an open, level area away from
large metallic objects or structures and
make certain the ignition switch is in the“ ON ”position.
3. Press and hold the left button for 3
seconds then release, and the compass
will enter the calibration mode. “CAL ”and
direction will be displayed.
4. Drive slowly in a circle until “CAL ”
disappears from the display (approxi-
mately two or three circles). The compass
is now calibrated.
5. Further calibration may be necessary
should outside influences cause the mirror
to read inaccurately. You will know that
this has occurred if your compass begins
to read in only limited directions. Should
you encounter this situation, return to step
one of the above procedure and recali-
brate the mirror.
Instruments and controls/Mirrors3-41
– CONTINUED –
Page 174 of 420
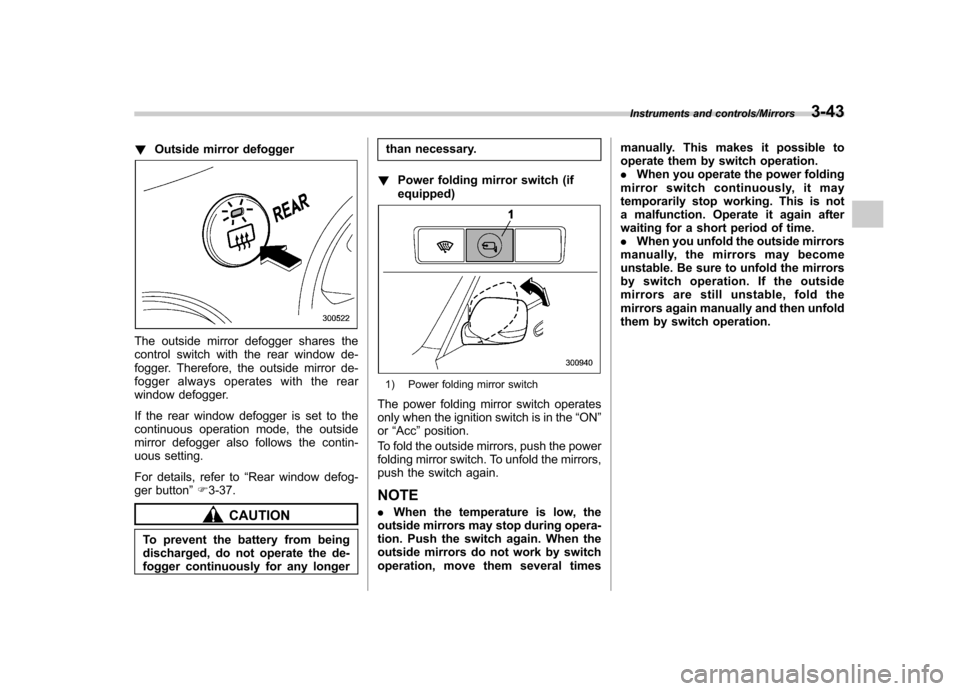
!Outside mirror defogger
The outside mirror defogger shares the
control switch with the rear window de-
fogger. Therefore, the outside mirror de-
fogger always operates with the rear
window defogger.
If the rear window defogger is set to the
continuous operation mode, the outside
mirror defogger also follows the contin-
uous setting.
For details, refer to “Rear window defog-
ger button ”F 3-37.
CAUTION
To prevent the battery from being
discharged, do not operate the de-
fogger continuously for any longer than necessary.
! Power folding mirror switch (ifequipped)
1) Power folding mirror switch
The power folding mirror switch operates
only when the ignition switch is in the “ON ”
or “Acc ”position.
To fold the outside mirrors, push the power
folding mirror switch. To unfold the mirrors,
push the switch again.
NOTE . When the temperature is low, the
outside mirrors may stop during opera-
tion. Push the switch again. When the
outside mirrors do not work by switch
operation, move them several times manually. This makes it possible to
operate them by switch operation..
When you operate the power folding
mirror switch continuously, it may
temporarily stop working. This is not
a malfunction. Operate it again after
waiting for a short period of time.. When you unfold the outside mirrors
manually, the mirrors may become
unstable. Be sure to unfold the mirrors
by switch operation. If the outside
mirrors are still unstable, fold the
mirrors again manually and then unfold
them by switch operation.
Instruments and controls/Mirrors3-43
Page 180 of 420
Automatic climate control system NOTE .Operate the automatic climate con-
trol system when the engine is running. . The blower fan rotates at a low
speed when the engine coolant tem-
perature is low.
For efficient defogging or dehumidify-
ing in cold weather, press the “A/C ”
button.. The vehicle has a rear air condi-
tioner. The fan speed of the rear air
conditioner can be adjusted, but other
adjustments (outlet air temperature, air
distribution, etc.) are not possible for
the rear air conditioner. For details,
refer to “Rear air conditioner ”F 4-9.
The automatic climate control system
automatically controls outlet air tempera-
ture, fan speed, airflow distribution, air
inlet control, and air conditioner compres-
sor operation. It activates when the“ AUTO ”button is pressed, and is used to
maintain a constant, comfortable climate
within the passenger compartment.
The temperature can be set within a range
of 65 to 85 8F (18 to 32 8C). &
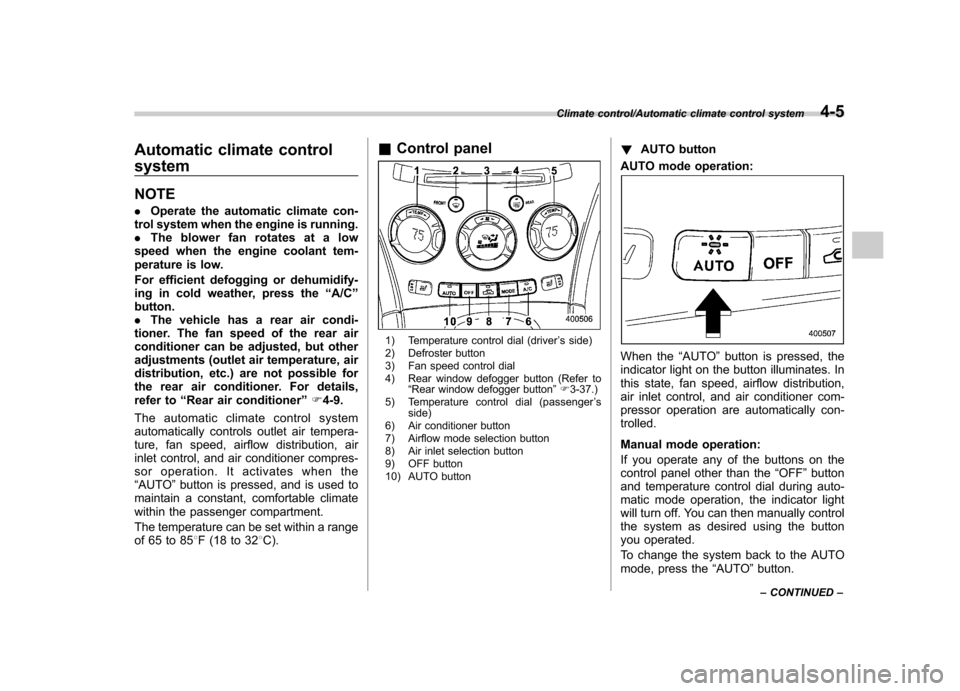
Control panel
1) Temperature control dial (driver ’s side)
2) Defroster button
3) Fan speed control dial
4) Rear window defogger button (Refer to “Rear window defogger button ”F 3-37.)
5) Temperature control dial (passenger ’s
side)
6) Air conditioner button
7) Airflow mode selection button
8) Air inlet selection button
9) OFF button
10) AUTO button !
AUTO button
AUTO mode operation:
When the “AUTO ”button is pressed, the
indicator light on the button illuminates. In
this state, fan speed, airflow distribution,
air inlet control, and air conditioner com-
pressor operation are automatically con-trolled.
Manual mode operation:
If you operate any of the buttons on the
control panel other than the “OFF ”button
and temperature control dial during auto-
matic mode operation, the indicator light
will turn off. You can then manually control
the system as desired using the button
you operated.
To change the system back to the AUTO
mode, press the “AUTO ”button.
Climate control/Automatic climate control system4-5
– CONTINUED –
Page 182 of 420
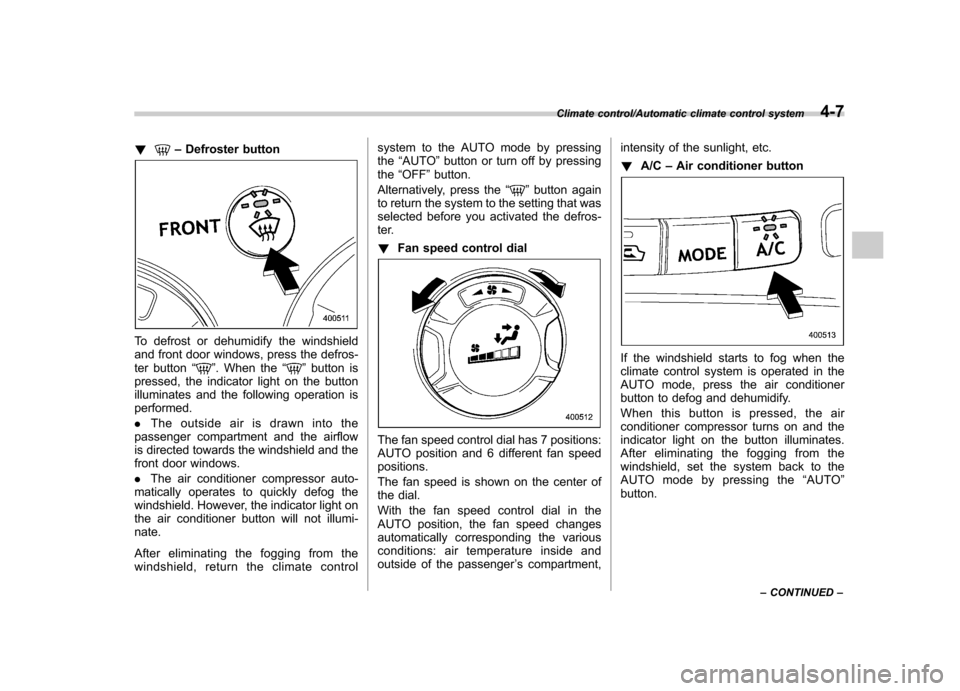
!–Defroster button
To defrost or dehumidify the windshield
and front door windows, press the defros-
ter button “
”. When the “”button is
pressed, the indicator light on the button
illuminates and the following operation isperformed. . The outside air is drawn into the
passenger compartment and the airflow
is directed towards the windshield and the
front door windows. . The air conditioner compressor auto-
matically operates to quickly defog the
windshield. However, the indicator light on
the air conditioner button will not illumi-nate.
After eliminating the fogging from the
windshield, return the climate control system to the AUTO mode by pressingthe
“AUTO ”button or turn off by pressing
the “OFF ”button.
Alternatively, press the “
”button again
to return the system to the setting that was
selected before you activated the defros-
ter. ! Fan speed control dial
The fan speed control dial has 7 positions:
AUTO position and 6 different fan speedpositions.
The fan speed is shown on the center of
the dial.
With the fan speed control dial in the
AUTO position, the fan speed changes
automatically corresponding the various
conditions: air temperature inside and
outside of the passenger ’s compartment, intensity of the sunlight, etc. !
A/C –Air conditioner button
If the windshield starts to fog when the
climate control system is operated in the
AUTO mode, press the air conditioner
button to defog and dehumidify.
When this button is pressed, the air
conditioner compressor turns on and the
indicator light on the button illuminates.
After eliminating the fogging from the
windshield, set the system back to the
AUTO mode by pressing the “AUTO ”
button.
Climate control/Automatic climate control system4-7
– CONTINUED –
Page 183 of 420
4-8Climate control/Automatic climate control system
NOTE
For efficient defogging or dehumidify-
ing in cold weather, turn on the air
conditioner. However, if the ambient
temperature decreases to approxi-
mately 328F(0 8C), the air conditioner
compressor may stop operating. ! Airflow mode selection button
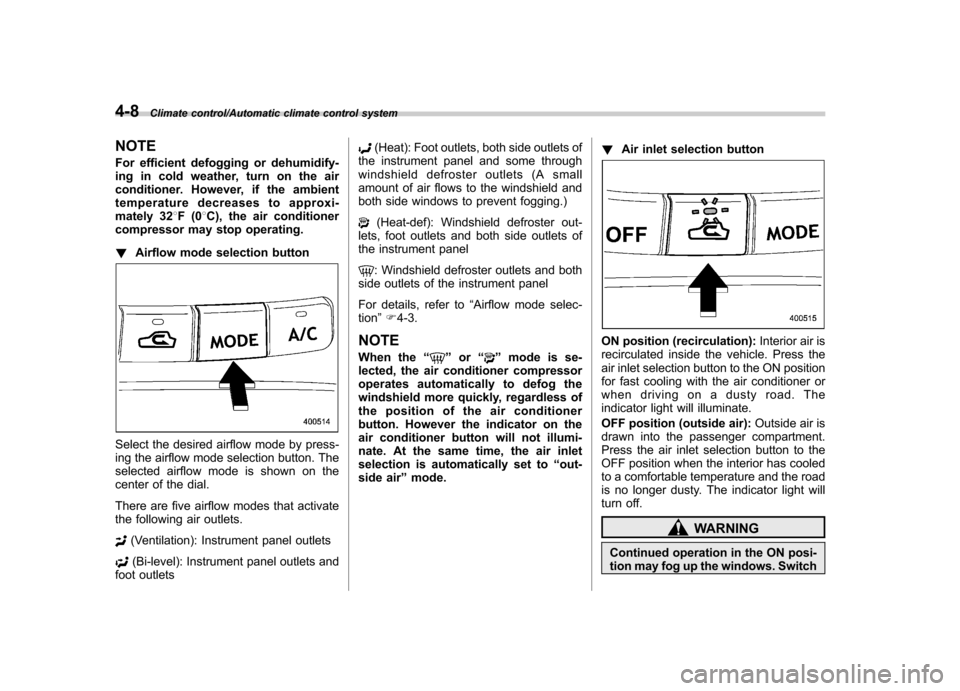
Select the desired airflow mode by press-
ing the airflow mode selection button. The
selected airflow mode is shown on the
center of the dial.
There are five airflow modes that activate
the following air outlets.
(Ventilation): Instrument panel outlets
(Bi-level): Instrument panel outlets and
foot outlets
(Heat): Foot outlets, both side outlets of
the instrument panel and some through
windshield defroster outlets (A small
amount of air flows to the windshield and
both side windows to prevent fogging.)
(Heat-def): Windshield defroster out-
lets, foot outlets and both side outlets of
the instrument panel
: Windshield defroster outlets and both
side outlets of the instrument panel
For details, refer to “Airflow mode selec-
tion ”F 4-3.
NOTE
When the “
”or “”mode is se-
lected, the air conditioner compressor
operates automatically to defog the
windshield more quickly, regardless of
the position of the air conditioner
button. However the indicator on the
air conditioner button will not illumi-
nate. At the same time, the air inlet
selection is automatically set to “out-
side air ”mode. !
Air inlet selection button
ON position (recirculation): Interior air is
recirculated inside the vehicle. Press the
air inlet selection button to the ON position
for fast cooling with the air conditioner or
when driving on a dusty road. The
indicator light will illuminate.
OFF position (outside air): Outside air is
drawn into the passenger compartment.
Press the air inlet selection button to the
OFF position when the interior has cooled
to a comfortable temperature and the road
is no longer dusty. The indicator light will
turn off.
WARNING
Continued operation in the ON posi-
tion may fog up the windows. Switch
Page 185 of 420
4-10Climate control/Operating tips for heater and air conditioner
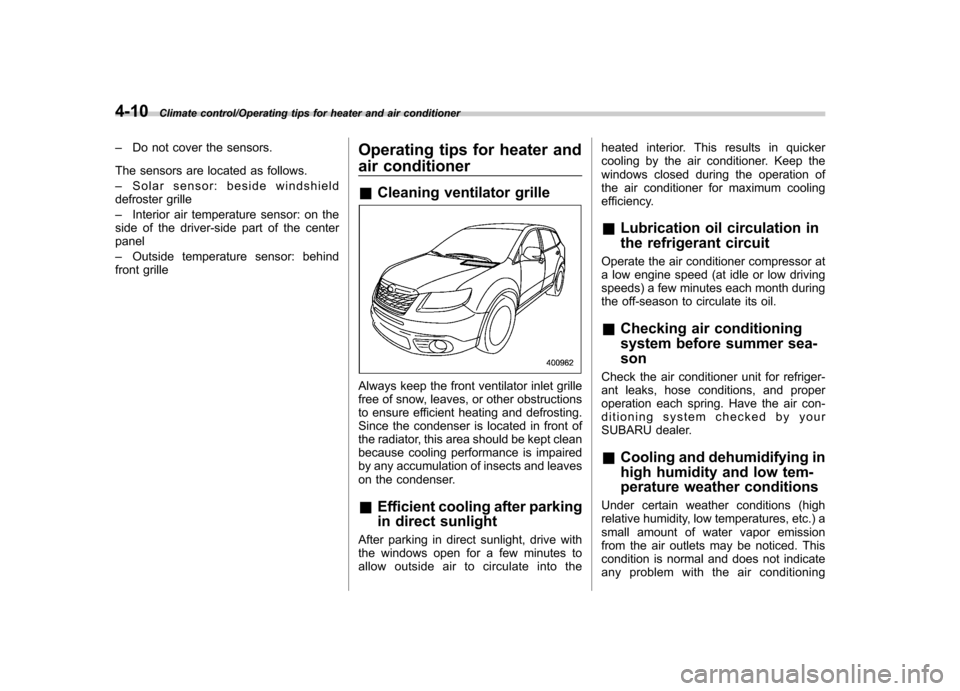
–Do not cover the sensors.
The sensors are located as follows. – Solar sensor: beside windshield
defroster grille– Interior air temperature sensor: on the
side of the driver-side part of the center panel – Outside temperature sensor: behind
front grille Operating tips for heater and
air conditioner &
Cleaning ventilator grille
Always keep the front ventilator inlet grille
free of snow, leaves, or other obstructions
to ensure efficient heating and defrosting.
Since the condenser is located in front of
the radiator, this area should be kept clean
because cooling performance is impaired
by any accumulation of insects and leaves
on the condenser. &Efficient cooling after parking
in direct sunlight
After parking in direct sunlight, drive with
the windows open for a few minutes to
allow outside air to circulate into the heated interior. This results in quicker
cooling by the air conditioner. Keep the
windows closed during the operation of
the air conditioner for maximum cooling
efficiency. &
Lubrication oil circulation in
the refrigerant circuit
Operate the air conditioner compressor at
a low engine speed (at idle or low driving
speeds) a few minutes each month during
the off-season to circulate its oil. & Checking air conditioning
system before summer sea-son
Check the air conditioner unit for refriger-
ant leaks, hose conditions, and proper
operation each spring. Have the air con-
ditioning system checked by your
SUBARU dealer. & Cooling and dehumidifying in
high humidity and low tem-
perature weather conditions
Under certain weather conditions (high
relative humidity, low temperatures, etc.) a
small amount of water vapor emission
from the air outlets may be noticed. This
condition is normal and does not indicate
any problem with the air conditioning
Page 191 of 420
5-2Audio/Antenna system
Antenna system &Printed antenna
CAUTION
Do not use sharp instruments or
window cleaner containing abra-
sives to clean the inner surface of
the window on which the antenna is
printed. Doing so may damage the
antenna printed on the window.
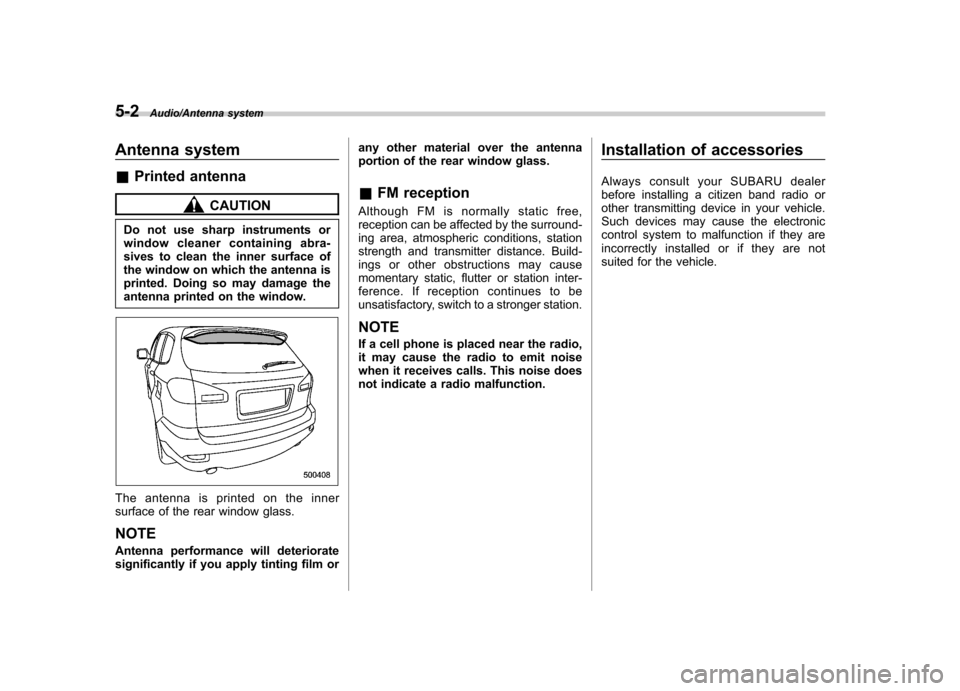
The antenna is printed on the inner
surface of the rear window glass. NOTE
Antenna performance will deteriorate
significantly if you apply tinting film or any other material over the antenna
portion of the rear window glass.
& FM reception
Although FM is normally static free,
reception can be affected by the surround-
ing area, atmospheric conditions, station
strength and transmitter distance. Build-
ings or other obstructions may cause
momentary static, flutter or station inter-
ference. If reception continues to be
unsatisfactory, switch to a stronger station. NOTE
If a cell phone is placed near the radio,
it may cause the radio to emit noise
when it receives calls. This noise does
not indicate a radio malfunction. Installation of accessories
Always consult your SUBARU dealer
before installing a citizen band radio or
other transmitting device in your vehicle.
Such devices may cause the electronic
control system to malfunction if they are
incorrectly installed or if they are not
suited for the vehicle.
Page 223 of 420

6-4Interior equipment/Sun visors
(automatic illumination - ON).
. The doors are unlocked using the
remote keyless entry transmitter. . The ignition switch is turned from the
“ Acc ”position to the “LOCK ”position.
The automatically illuminated map lights
remain illuminated for several seconds
and then gradually turn off after all doors
are closed.
While the lights are illuminated, if any of
the following operations are performed,
the map lights turn off immediately. . The ignition switch is turned from the
“ LOCK ”position to the “Acc ”or “ON ”
position.. All doors and the rear gate are locked
using the remote keyless entry transmitter.
The setting of the period for which the light
remains illuminated (OFF delay timer) can
be changed by a SUBARU dealer. Con-
tact your SUBARU dealer for details.
NOTE
If any of the doors or the rear gate is
not completely closed, the map lights
will remain illuminated as a result.
However, the map lights are automati-
cally turned off by the battery drainage
prevention functi on to prevent the
battery from discharging. For details, refer to
“Battery drainage prevention
function ”F 2-6.
& Automatic ambient light for
center console area (if equipped)
The automatic ambient light illuminates
when the ignition switch is in the “ON ”
position and the light control switch is inthe “
”position or “”position. The
light dimly illuminates the area around the
center console. The light turns off when
the light control switch is in the “OFF ”
position. Also, the brightness of the light is
adjusted by the illumination brightness
control dial. Sun visors
To block out glare, swing down the visors.
To use the sun visor at a side window,
swing it down and move it sideways.