2013 SUBARU IMPREZA WRX remote start
[x] Cancel search: remote startPage 27 of 414

24
Function settings
A SUBARU dealer can change the settings of the functions shown in the following table to meet your personal requirements. Contact
the nearest SUBARU dealer for details.Item Function Possible settings Default setting Page
Alarm system Alarm system Operation/Non-operation Operation 2-15
Monitoring start delay time (after
closure of doors)0 second/30 seconds 30 seconds 2-16
Impact sensor operation (only models
with shock sensors (dealer option)) Operation/Non-operation Non-operation 2-19
Passive arming Operation/Non-operation Non-operation 2-18
Dome light and map lights illumination
(models with moonroof) ON/OFF OFF 2-15
Dome light illumination
(models without moonroof)
Remote keyless entry system Hazard warning flasher Operation/Non-operation Operation 2-7 Audible signal Operation/Non-operation Operation 2-10
Key lock-in prevention Key lock-in prevention Operation/Non-operation Operation 2-7
Remote engine start system
(dealer option) Horn chirp confirmation ON/OFF ON 7-12
Defogger and deicer system for models
with the automatic climate control system Rear window defogger, outside mirror
defogger and windshield wiper deicerOperation for 15 minutes/
Continuous operationOperation for 15 minutes 3-46
Dome light Operation of dome light/map light OFF delay timerOFF/Short/Normal/Long Long 6-2, 6-3
Map light for models with a moonroof
Battery drainage prevention function Battery drainage prevention function Operation/Non-operation Operation 2-5
Seatbelt warning Sounds a chime while driving Operation/Non-operation Operation 3-13
Page 88 of 414

stantly, the immobilizer system does not
impede normal starting of the engine.
If the engine fails to start, pull out the key
once before trying again. Refer to“Ignition
switch ”F 3-3.
This device complies with Part 15 of
the FCC Rules and RSS-Gen of IC
Rules. Operation is subject to the
following two conditions: (1) this de-
vice may not cause harmful interfer-
ence, and (2) this device must accept
any interference received, including
interference that may cause undesiredoperation.
CAUTION
. Do not place the key under direct
sunlight or anywhere it may
become hot.
. Do not get the key wet. If the key
gets wet, wipe it dry with a cloth
immediately.
NOTE
To protect your vehicle from theft,
please pay close attention to the fol-
lowing security precautions: . Never leave your vehicle unattended
with its keys inside. . Before leaving your vehicle, close all windows and the moonroof, and lock
the doors and rear gate..
Do not leave spare keys or any
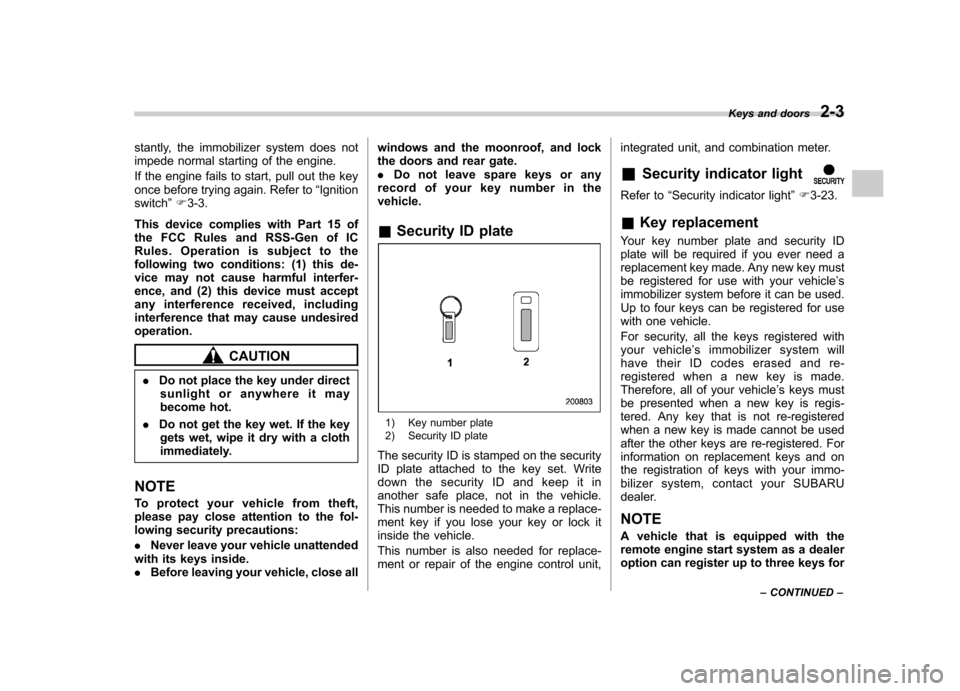
record of your key number in thevehicle. & Security ID plate
1) Key number plate
2) Security ID plate
The security ID is stamped on the security
ID plate attached to the key set. Write
down the security ID and keep it in
another safe place, not in the vehicle.
This number is needed to make a replace-
ment key if you lose your key or lock it
inside the vehicle.
This number is also needed for replace-
ment or repair of the engine control unit, integrated unit, and combination meter. &
Security indicator light
Refer to “Security indicator light ”F 3-23.
& Key replacement
Your key number plate and security ID
plate will be required if you ever need a
replacement key made. Any new key must
be registered for use with your vehicle ’s
immobilizer system before it can be used.
Up to four keys can be registered for use
with one vehicle.
For security, all the keys registered with
your vehicle ’s immobilizer system will
have their ID codes erased and re-
registered when a new key is made.
Therefore, all of your vehicle ’s keys must
be presented when a new key is regis-
tered. Any key that is not re-registered
when a new key is made cannot be used
after the other keys are re-registered. For
information on replacement keys and on
the registration of keys with your immo-
bilizer system, co ntact your SUBARU
dealer.
NOTE
A vehicle that is equipped with the
remote engine start system as a dealer
option can register up to three keys for Keys and doors
2-3
– CONTINUED –
Page 99 of 414

2-14Keys and doors
7. Perform parts 5 and 6 of the procedure
for each of the remaining digits of the
transmitter code beginning with the sec-
ond digit (counting from the left) and
finishing with the eighth digit. NOTE . When you finish entering the eighth
digit, an electronic tone will sound for
30 seconds.. If the interval between one push of
the switch and the next exceeds 5
seconds, an error will occur. In this
event, perform the procedure again
beginning with part 4. If an error occurs
six times, perform the procedure again
starting with part 3.
8. Before the electronic tone stops
sounding, use the power door lock switch
to reenter the transmitter code beginning
with the leftmost digit. NOTE
If you do not start entering the number
using the lock switch before the elec-
tronic tone stops sounding, an error
will occur. In this event, perform the
procedure again beginning with part 3.
9. When you have finished entering the
code a second time, an electronic tone will
sound for 1 second and automatic door
locking and unlocking operation will take place once to indicate completion of
registration, provided the code entered
the second time is identical to that entered
the first time.
NOTE
If the code entered the second time is
not identical to the code entered the
first time, an error will occur. In this
event, perform the procedure again
beginning with part 5. If an error occurs
five times, perform the procedure again
starting with part 3.
10. If you wish to program another trans-
mitter code into the system (up to four
transmitter codes can be programmed into
the system), perform the procedure begin-
ning with part 4. When you have finished
programming all of the necessary trans-
mitter codes into the system, remove the
key from the ignition switch.
11. Test every registered transmitter to
confirm correct operation. ! Deleting old transmitter codes
The control unit of the remote keyless
entry system has four memory locations to
store transmitter codes, giving it the ability
to operate with up to four transmitters.
When you lose a transmitter, the losttransmitter ’s code remains in the memory.
For security reasons, lost transmitter codes should be deleted from the mem-
ory.
To delete old transmitter codes, program
four transmitter codes into the system. If
you have only one current transmitter,
program it four times. If you have two
current transmitters, program each one
twice. If you have three current transmit-
ters, program two of them once and the
third one twice. This process will leave
only current transmitter codes in thesystem
’s memory.
NOTE
Make sure no one else is operating
their keyless entry system within range
of your vehicle when programming
transmitters. If someone else were to
operate their remote transmitter while
you are programming your transmit-
ters, it is possible that their transmitter
code will be programmed into your
system, allowing them unauthorized
access to your vehicle.
Page 101 of 414

2-16Keys and doors
& If you have accidentally trig-
gered the alarm system
! To stop the alarm
Do any of the following operations: . Press any button on the remote trans-
mitter.. Turn the ignition switch to the “ON ”
position. NOTE
Only registered keys will stop the
alarm. If the immobilizer transponder
is not registered, the alarm will notstop. & Arming the system
! To arm the system using remote transmitter
1. Close all windows.
2. Remove the key from the ignition switch.
3. Open the doors and get out of the vehicle.
4. Make sure that the engine hood (and
the trunk lid on the 4-door) are locked.
5. Close all doors (and the rear gate on
the 5-door).
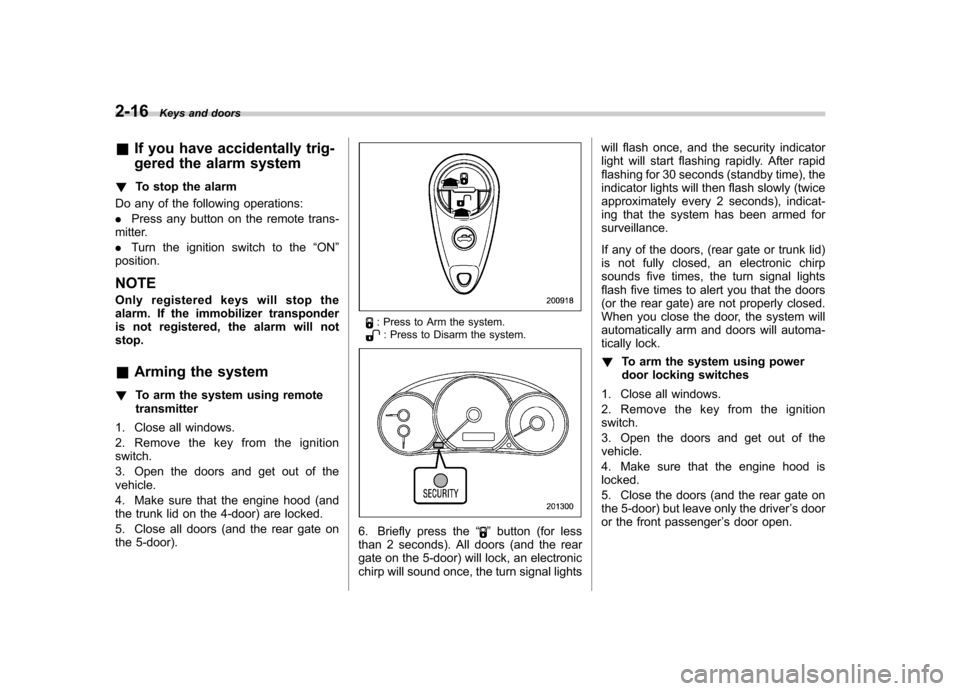
: Press to Arm the system.: Press to Disarm the system.
6. Briefly press the “”button (for less
than 2 seconds). All doors (and the rear
gate on the 5-door) will lock, an electronic
chirp will sound once, the turn signal lights will flash once, and the security indicator
light will start flashing rapidly. After rapid
flashing for 30 seconds (standby time), the
indicator lights will then flash slowly (twice
approximately every 2 seconds), indicat-
ing that the system has been armed forsurveillance.
If any of the doors, (rear gate or trunk lid)
is not fully closed, an electronic chirp
sounds five times, the turn signal lights
flash five times to alert you that the doors
(or the rear gate) are not properly closed.
When you close the door, the system will
automatically arm and doors will automa-
tically lock. !
To arm the system using power
door locking switches
1. Close all windows.
2. Remove the key from the ignition switch.
3. Open the doors and get out of the vehicle.
4. Make sure that the engine hood is locked.
5. Close the doors (and the rear gate on
the 5-door) but leave only the driver ’s door
or the front passenger ’s door open.
Page 102 of 414

6. Push the front side (“LOCK ”side) of
the power door locking switch to set the
door locks.
7. Close the door. An electronic chirp will
sound once, the turn signal lights will flash
once and the security indicator light will
start flashing rapidly. After rapid flashing
for 30 seconds (standby time), the indi-
cator lights will then flash slowly (twice
approximately every 2 seconds), indicat-
ing that the system has been armed forsurveillance. NOTE . The system can be armed even if the
engine hood and/or the windows are
opened. Always make sure that they
are fully closed before arming thesystem. .
The 30-second standby time can be
eliminated if you prefer. Have it per-
formed by your SUBARU dealer.. If your vehicle is a 4-door and you
unlock the trunk using the remotetransmitter ’s “
”button with the
alarm system armed, the system will
be temporarily placed in a standby
state. The system will go back to the
surveillance state upon locking thetrunk.. The system is in the standby mode
for a 30-second period after locking the
doors with the remote transmitter. The
security indicator light will flash at
short intervals during this period. . If any of the following actions are
done during the standby period, the
system will not switch to the surveil-
lance state.
–Doors are unlocked using the
remote transmitter. – Any door (including the rear gate
of a 5-door or the trunk of a 4-door)
is opened. – Ignition switch is turned to the
“ ON ”position.
& Disarming the system
Briefly press the “
”button (for less than
2 seconds) on the remote transmitter. The driver ’s door will unlock, an electronic chirp will sound twice, the turn signal
lights will flash twice. The flashing of the
security indicator light will then change
slowly (once approximately every 3 sec-
onds from twice approximately every 2
seconds), indicating that the alarm system
has been disarmed. NOTE
After disarming the alarm system,
briefly press the
“
”button a second
time within 5 seconds to unlock all
other doors and the rear gate (5-door). ! Emergency disarming
If you cannot disarm the system using the
transmitter (i.e. the transmitter is lost,
broken or the transmitter battery is too
weak), you can disarm the system without
using the transmitter as follows. . Turntheignitionswitchfromthe
“ LOCK ”to the “ON ”position with a
registered key. & Valet mode
When you choose the valet mode, the
alarm system does not operate. In valet
mode, the remote transmitter is used only
for locking and unlocking the doors and
rear gate (5-door) and panic activation.
To enter the valet mode, change the
setting of your vehicle ’s alarm system for
Keys and doors
2-17
– CONTINUED –
Page 119 of 414

3-4Instruments and controls
&Acc
In this position the electrical accessories
(audio, accessory power outlet, etc.) can
be used. & ON
This is the normal operating position after
the engine is started. & START
The engine is started in this position. The
starter cranks the engine to start it. When
the key is released (after the engine has
started), the key automatically returns tothe “ON ”position.
CAUTION
Do not turn the ignition switch to the “ START ”position while the engine
is running.
If your registered key fails to start the
engine, pull out the key once (the security
indicator light will blink), and then insert
the key in the ignition switch and turn it tothe “START ”position and again try to start
the engine. NOTE
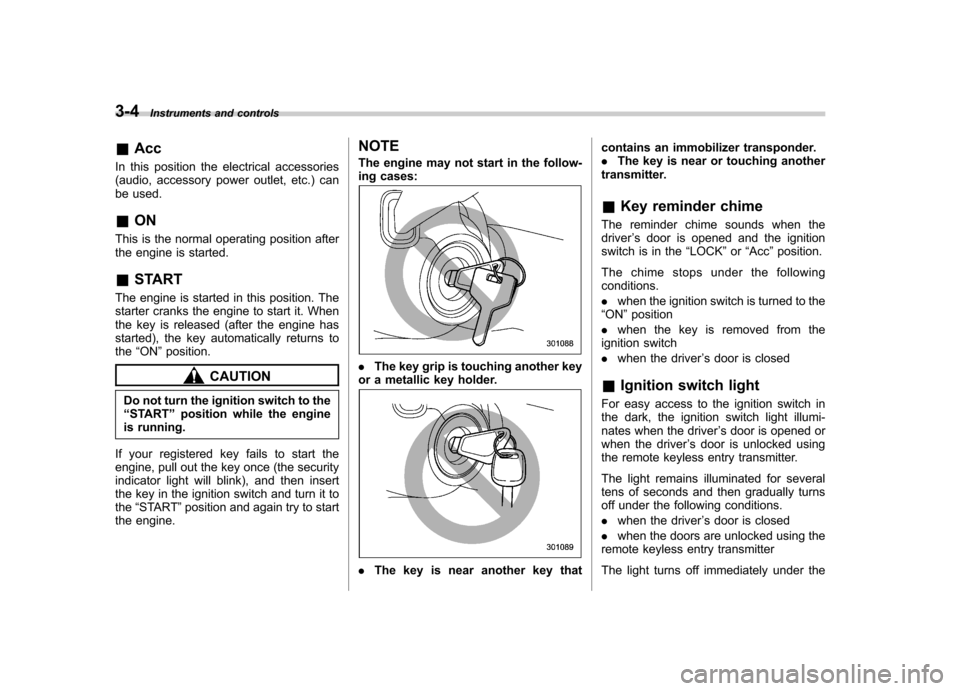
The engine may not start in the follow-
ing cases:.
The key grip is touching another key
or a metallic key holder.
. The key is near another key that contains an immobilizer transponder. .
The key is near or touching another
transmitter. & Key reminder chime
The reminder chime sounds when the driver ’s door is opened and the ignition
switch is in the “LOCK ”or “Acc ”position.
The chime stops under the followingconditions. . when the ignition switch is turned to the
“ ON ”position
. when the key is removed from the
ignition switch. when the driver ’s door is closed
& Ignition switch light
For easy access to the ignition switch in
the dark, the ignition switch light illumi-
nates when the driver ’s door is opened or
when the driver ’s door is unlocked using
the remote keyless entry transmitter.
The light remains illuminated for several
tens of seconds and then gradually turns
off under the following conditions. . when the driver ’s door is closed
. when the doors are unlocked using the
remote keyless entry transmitter
The light turns off immediately under the
Page 244 of 414

Fuel...................................................................... 7-3
Fuel requirements ............................................... 7-3
Fuel filler lid and cap ........................................... 7-4
State emission testing (U.S. only) ...................... 7-7
Preparing to drive ............................................... 7-8
Starting the engine .............................................. 7-9
Stopping the engine ........................................... 7-10
Remote engine start system (dealer option) .............................................................. 7-10
Starting your vehicle .......................................... 7-10
Remote start safety features ............................... 7-11
Entering the vehicle while it is running via remote start ................................................................. 7-11
Entering the vehicle following remote engine start shutdown ......................................................... 7-11
Pre-heating or pre-cooling the interior of the vehicle ............................................................. 7-11
Service mode ..................................................... 7-11
Remote engine start transmitter programming and programmable feature option ..................... 7-12
System maintenance .......................................... 7-12
Manual transmission –6 speeds (STI) ............. 7-14
Selecting reverse gear ........................................ 7-15
Shifting speeds .................................................. 7-15
Driving tips ........................................................ 7-16
Manual transmission –5 speeds (except
STI) ................................................................... 7-16
Shifting speeds .................................................. 7-17
Driving tips ........................................................ 7-17 Driver
’s Control Center Differential (DCCD)
(STI) ................................................................. 7-18
To change mode of driver ’s control center
differential ....................................................... 7-18
Auto mode ........................................................ 7-19
Manual mode ..................................................... 7-20
Temporary release ............................................. 7-21
SI-DRIVE (STI) .................................................... 7-22
Intelligent (I) mode ............................................. 7-22
Sport (S) mode .................................................. 7-22
Sport Sharp (S#) mode. ...................................... 7-23
SI-DRIVE selector .............................................. 7-23
Limited slip differential (LSD) (STI) .................. 7-24
Power steering ................................................... 7-24
Braking ............................................................... 7-24
Braking tips ....................................................... 7-24
Brake system .................................................... 7-25
Disc brake pad wear warning indicators ............. 7-25
ABS (Anti-lock Brake System) .......................... 7-26
ABS system self-check ...................................... 7-26
ABS warning light .............................................. 7-26
Electronic Brake Force Distribution (EBD) system ............................................................. 7-26
Steps to take if EBD system malfunctions ..... ..... 7-27
Vehicle Dynamics Control system .................... 7-28
Vehicle Dynamics Control system monitor..... ..... 7-29
Vehicle Dynamics Control mode switch (STI) . ..... 7-29
Vehicle Dynamics Control OFF switch (except STI) ................................................................. 7-30 Starting and operating
7
Page 253 of 414

7-10Starting and operating
Stopping the engine
The ignition switch should be turned off
only when the vehicle is stopped and the
engine is idling.
WARNING
Do not stop the engine when the
vehicle is moving. This will cause
loss of power to the power steering
and the brake booster, making steer-
ing and braking more difficult. It
could also result in accidental acti-
vation of the “LOCK ”position on the
ignition switch, causing the steering
wheel to lock. Remote engine start system
(dealer option)
WARNING
. Do not start the engine using the
remote start system in an en-
closed environment (e.g., in a
closed garage). Prolonged opera-
tion of a motor vehicle in an
enclosed environment can cause
a harmful build-up of Carbon
Monoxide. Carbon Monoxide is
harmful to your health. Exposure
to high levels of Carbon Monox-
ide can cause headaches, dizzi-
ness or in extreme cases uncon-
sciousness and/or death.
. Before performing any servicing
of the vehicle, temporarily place
the remote engine start system in
service mode to prevent the
system from unexpectedly start-
ing the engine.
& Starting your vehicle
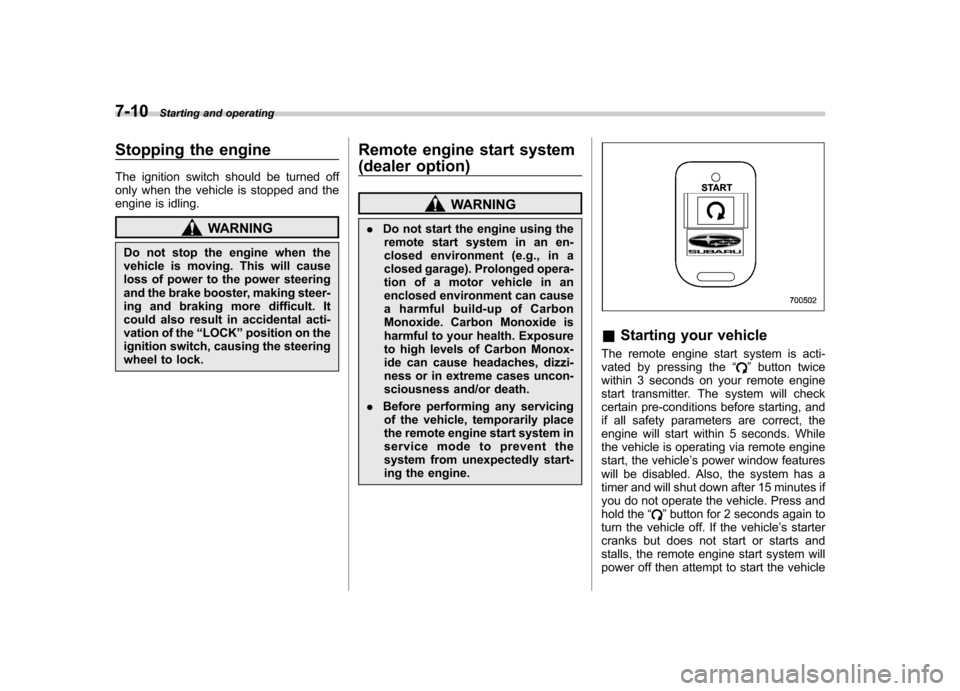
The remote engine start system is acti-
vated by pressing the “
”button twice
within 3 seconds on your remote engine
start transmitter. The system will check
certain pre-conditions before starting, and
if all safety parameters are correct, the
engine will start within 5 seconds. While
the vehicle is operating via remote engine
start, the vehicle ’s power window features
will be disabled. Also, the system has a
timer and will shut down after 15 minutes if
you do not operate the vehicle. Press and
hold the “
”button for 2 seconds again to
turn the vehicle off. If the vehicle ’s starter
cranks but does not start or starts and
stalls, the remote engine start system will
power off then attempt to start the vehicle