2013 SUBARU IMPREZA WRX ESP
[x] Cancel search: ESPPage 225 of 414
5-44Audio
dial.
3. After “SELECTED ”is displayed, you
can select the following menus. . “DIAL ”to make a phone call
. “CHANGE NAME ”to change the name
(voice tag) . “SET SPD DIAL ”/“ SET SPEED DIAL ”
to set the speed dial. “DELETE ENTRY ”to delete the name
(voice tag) from the phonebook. “GO BACK ”to go back to the menu
mode
NOTE . After “LIST NAMES ”is selected, if
the OFF hook switch
is pushed, the
selected number is called. . After “LIST NAMES ”is selected, if
no operation is performed, the mem-
ories are displayed and voice tags arespoken. ! Changing voice tag
1. Select the “CHANGE NAME ”menu.
2. Select the phone number by perform-
ing either of the following procedures. –Operate the “TUNE/TRACK/CH ”
dial. – Press the talk switch
and say
the voice tag.
3. Select the “CONFIRM ”menu. –
Then the selected phone number/
name is displayed.
4. Press the talk switch
.
5. Say the new voice tag.
6. Select the “CONFIRM ”menu.
– Then “CHANGED ”is displayed.
! Set speed dial
1. Select “SET SPD DIAL ”by operating
the “TUNE/TRACK/CH ”dial or select
“ SET SPEED DIAL ”by using the voice
command system.
2. Select the phone number by perform-
ing either of the following procedures.
–Operate the “TUNE/TRACK/CH ”
dial. – Press the talk switch
and say
the voice tag.
3. Select the “CONFIRM ”menu.
4. Press the preset button (from
to) to which you want to register the
phone number. NOTE
If the number to be used is already
registered in speed dial, “OVER-
WRITE? ”will be displayed.
! Deleting the phonebook data
1. Select the “DELETE ENTRY ”menu. 2. Select the phone number by perform-
ing either of the following procedures.
–Operate the “TUNE/TRACK/CH ”
dial. – Press the talk switch
and say
the voice tag.
3. Select the “CONFIRM ”menu.
– Then “DELETED ”is displayed and
the selected phonebook data is de- leted.
! Deleting the speed dial
1. Select “DEL SPD DIAL ”by operating
the “TUNE/TRACK/CH ”dial or select
“ DELETE SPEED DIAL ”by using the
voice command system.
2. Press the preset button (from
to) to which you want to delete the
speed dial.
3. Select the “CONFIRM ”menu.
– Then “DELETED ”is displayed and
the selected speed dial is deleted.
! Deleting the redial data
1. Select the “REDIAL ”menu.
2. Select the phone number by operating the “TUNE/TRACK/CH ”dial.
3. Select the “DELETE ”menu.
4. Select the “CONFIRM ”menu.
– Then “DELETED ”is displayed and
the selected redial data is deleted.
Page 237 of 414
6-8Interior equipment
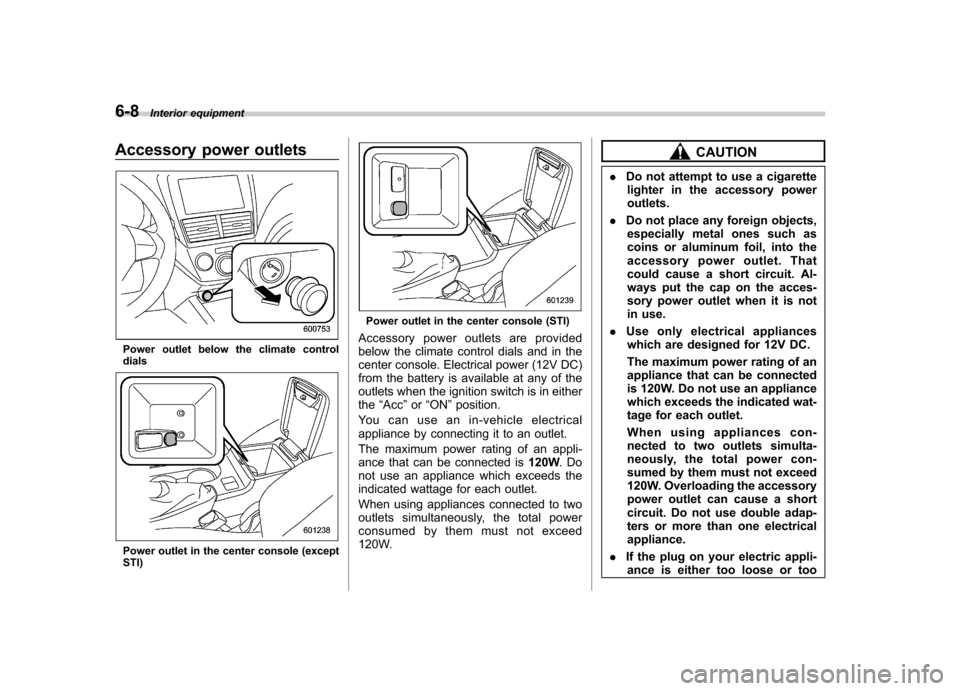
Accessory power outlets
Power outlet below the climate control dials
Power outlet in the center console (except STI)
Power outlet in the center console (STI)
Accessory power outlets are provided
below the climate control dials and in the
center console. Electrical power (12V DC)
from the battery is available at any of the
outlets when the ignition switch is in eitherthe “Acc ”or “ON ”position.
You can use an in-vehicle electrical
appliance by connecting it to an outlet.
The maximum power rating of an appli-
ance that can be connected is 120W.Do
not use an appliance which exceeds the
indicated wattage for each outlet.
When using appliances connected to two
outlets simultaneously, the total power
consumed by them must not exceed
120W.
CAUTION
. Do not attempt to use a cigarette
lighter in the accessory power outlets.
. Do not place any foreign objects,
especially metal ones such as
coins or aluminum foil, into the
accessory power outlet. That
could cause a short circuit. Al-
ways put the cap on the acces-
sory power outlet when it is not
in use.
. Use only electrical appliances
which are designed for 12V DC.
The maximum power rating of an
appliance that can be connected
is 120W. Do not use an appliance
which exceeds the indicated wat-
tage for each outlet.
When using appliances con-
nected to two outlets simulta-
neously, the total power con-
sumed by them must not exceed
120W. Overloading the accessory
power outlet can cause a short
circuit. Do not use double adap-
ters or more than one electricalappliance.
. If the plug on your electric appli-
ance is either too loose or too
Page 246 of 414

Fuel
CAUTION
Use of a fuel which is low in quality
or use of an inappropriate fuel
additive may cause engine damage.
& Fuel requirements
! Except STI
The engine is designed to operate usingpremium unleaded gasoline with an
octane rating of 91 AKI (95 RON) or
higher . If premium unleaded gasoline is
not available, regular unleaded gasoline
with an octane rating of 87 AKI (90 RON)
or higher may be temporarily used. For
optimum engine performance and drive-
ability, it is required that you use premium
grade unleaded gasoline. NOTE
Be sure to use premium unleaded
gasoline of 91 AKI (95 RON) or higher.
If other gasoline (lower than 91 AKI (95
RON)) is used, knocking, reduced out-
put and poor accelerator response willresult. !
STI
The engine is designed to operate at
maximum performance using unleaded
gasoline with an octane rating of 93 AKI
(98 RON) or higher . If 93 AKI (98 RON)
fuel is not readily available in your area,
unleaded gasoline with an octane rating of
91 AKI (95 RON) may be used with no
detriment to engine durability or driveabil-
ity. However, you may notice a slight
decrease in maximum engine perfor-
mance while using 91 AKI (95 RON) fuel.
Use of 91 AKI (95 RON) fuel will not affect
your warranty coverage. ! Fuel octane rating
This octane rating is the average of the
Research Octane and Motor Octane
numbers and is commonly referred to as
the Anti Knock Index (AKI).
Using a gasoline with a lower octane
rating can cause persistent and heavy
knocking, which can damage the engine.
Do not be concerned if your vehicle
sometimes knocks lightly when you drive
up a hill or when you accelerate. Contact
your SUBARU dealer if you use a fuel with
the specified octane rating and your
vehicle knocks heavily or persistently. ! Unleaded gasoline
The neck of the fuel filler pipe is designed
to accept only an unleaded gasoline filler nozzle. Under no circumstances should
leaded gasoline be used because it will
damage the emission control system and
may impair driveability and fuel economy. !
Gasoline for California-certified LEV
If your vehicle was certified to California ’s
low emission vehicle (LEV) standards as
indicated on the underhood tune-up label,
it is designed to optimize engine and
emission performance with gasoline that
meets the clean burning low-sulfur Cali-
fornia gasoline specifications. If you live in
any other state than California, your
vehicle will operate on gasoline meeting
Federal specifications. Gasoline sold out-
side California is permitted to have higher
sulfur levels, which may affect the perfor-
mance of your vehicle ’s catalytic converter
and may produce a sulfur exhaust odor or
smell. SUBARU recommends that you try
a different brand of unleaded gasoline
having lower sulfur to determine if the
problem is fuel related before returning
your vehicle to an authorized dealer forservice. ! MMT
Some gasoline contains an octane-en-
hancing additive called MMT (Methylcy-
clopentadienyl Manganese Tricarbonyl). If
you use such fuels, your emission control Starting and operating
7-3
– CONTINUED –
Page 248 of 414
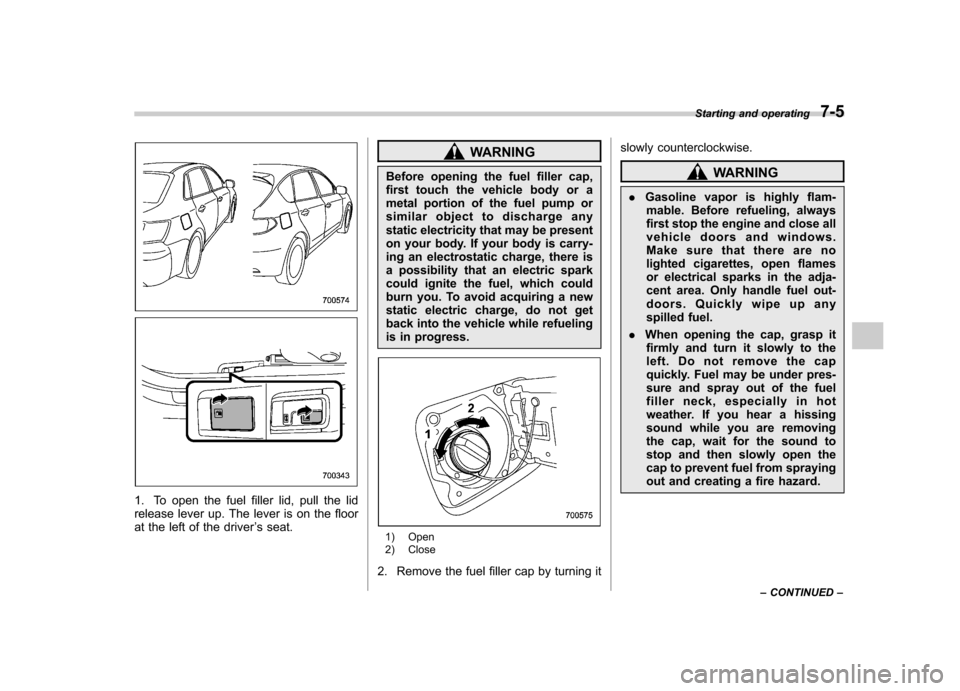
1. To open the fuel filler lid, pull the lid
release lever up. The lever is on the floor
at the left of the driver’s seat.
WARNING
Before opening the fuel filler cap,
first touch the vehicle body or a
metal portion of the fuel pump or
similar object to discharge any
static electricity that may be present
on your body. If your body is carry-
ing an electrostatic charge, there is
a possibility that an electric spark
could ignite the fuel, which could
burn you. To avoid acquiring a new
static electric charge, do not get
back into the vehicle while refueling
is in progress.
1) Open
2) Close
2. Remove the fuel filler cap by turning it slowly counterclockwise.
WARNING
. Gasoline vapor is highly flam-
mable. Before refueling, always
first stop the engine and close all
vehicle doors and windows.
Make sure that there are no
lighted cigarettes, open flames
or electrical sparks in the adja-
cent area. Only handle fuel out-
doors. Quickly wipe up any
spilled fuel.
. When opening the cap, grasp it
firmly and turn it slowly to the
left. Do not remove the cap
quickly. Fuel may be under pres-
sure and spray out of the fuel
filler neck, especially in hot
weather. If you hear a hissing
sound while you are removing
the cap, wait for the sound to
stop and then slowly open the
cap to prevent fuel from spraying
out and creating a fire hazard. Starting and operating
7-5
– CONTINUED –
Page 250 of 414

whenever the low fuel warning
light illuminates. Engine misfires
as a result of an empty tank
could cause damage to the en-gine.State emission testing (U.S. only)
WARNING
Testing of an All-Wheel Drive model
must NEVER be performed on a
single two-wheel dynamometer. At-
tempting to do so will result in
uncontrolled vehicle movement and
may cause an accident or injuries to
persons nearby.
CAUTION
. At state inspection time, remem-
ber to tell your inspection or
service station in advance not to
place your SUBARU AWD vehicle
on a two-wheel dynamometer.
Otherwise, serious transmission
damage will result.
. Resultant vehicle damage due to
improper testing is not covered
under the SUBARU Limited War-
ranty and is the responsibility of
the state inspection program or
its contractors or licensees.
California and a number of federal states
have Inspection/Maintenance programs to inspect your vehicle
’s emission control
system. If your vehicle does not pass this
test, some states may deny renewal of
your vehicle ’s registration.
Your vehicle is equipped with a computer
that monitors the performance of the engine ’s emission control system. Certi-
fied emission inspectors will inspect the
On-Board Diagnostic (OBDII) system as
part of the state emission inspection
process. The OBDII system is designed
to detect engine and transmission pro-
blems that might cause the vehicle emis-
sions to exceed allowable limits. OBDII
inspections apply to all 1996 model year
and newer passenger cars and trucks.
Over 30 states plus the District of Colum-
bia have implemented emission inspec-
tion of the OBDII system. . The inspection of the OBDII system
consists of a visual operational check of the “CHECK ENGINE ”warning light/mal-
function indicator light (MIL) and an
examination of the OBDII system with an
electronic scan tool. . A vehicle
passes the OBDII system
inspection if proper operation of the “ CHECK ENGINE ”warning light is ob-
served, there are no stored diagnostic
trouble codes, and the OBDII readiness
monitors are all complete. Starting and operating
7-7
– CONTINUED –
Page 262 of 414
&Auto mode
In the auto mode, the system estimates
the driving and road conditions using
signals from the wheel speed sensor,
throttle position sensor, steering angle
sensor and brake switch, etc. According
to the result, it electronically and auto-
matically controls the degree of limitation
of the differential action (LSD torque) to
optimize the differential action of the
center differential. When the ignition
switch is turned ON, the “AUTO ”indicator
light on the combination meter illuminates. The auto mode has 3 modes as follows.
Mode Operation
AUTO [+] This mode emphasizes traction control and strengthens the
limitation of differential action
that is suitable for driving on
slippery roads for vehicle stabi-
lity.
AUTO This mode is suitable for most driving situations.
AUTO [ �] This mode is suitable when you
seek quick response from the
steering wheel and smooth driving.
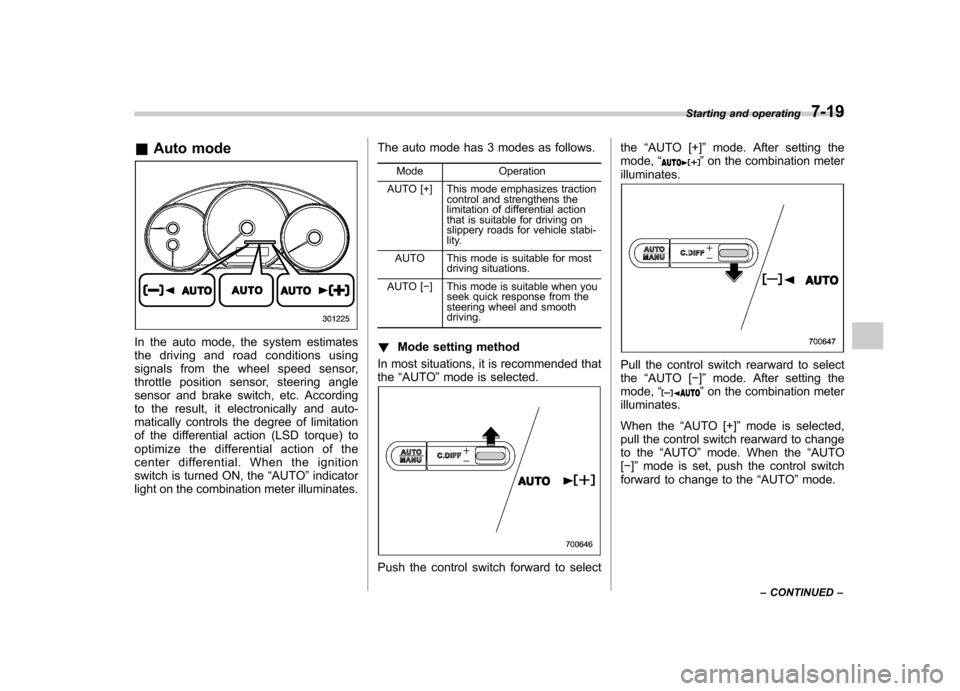
! Mode setting method
In most situations, it is recommended that the “AUTO ”mode is selected.
Push the control switch forward to select the
“AUTO [+] ”mode. After setting the
mode, “
”on the combination meter
illuminates.
Pull the control switch rearward to select the “AUTO [ �]” mode. After setting the
mode, “
”on the combination meter
illuminates.
When the “AUTO [+] ”mode is selected,
pull the control switch rearward to change
to the “AUTO ”mode. When the “AUTO
[ � ]” mode is set, push the control switch
forward to change to the “AUTO ”mode.
Starting and operating
7-19
– CONTINUED –
Page 264 of 414
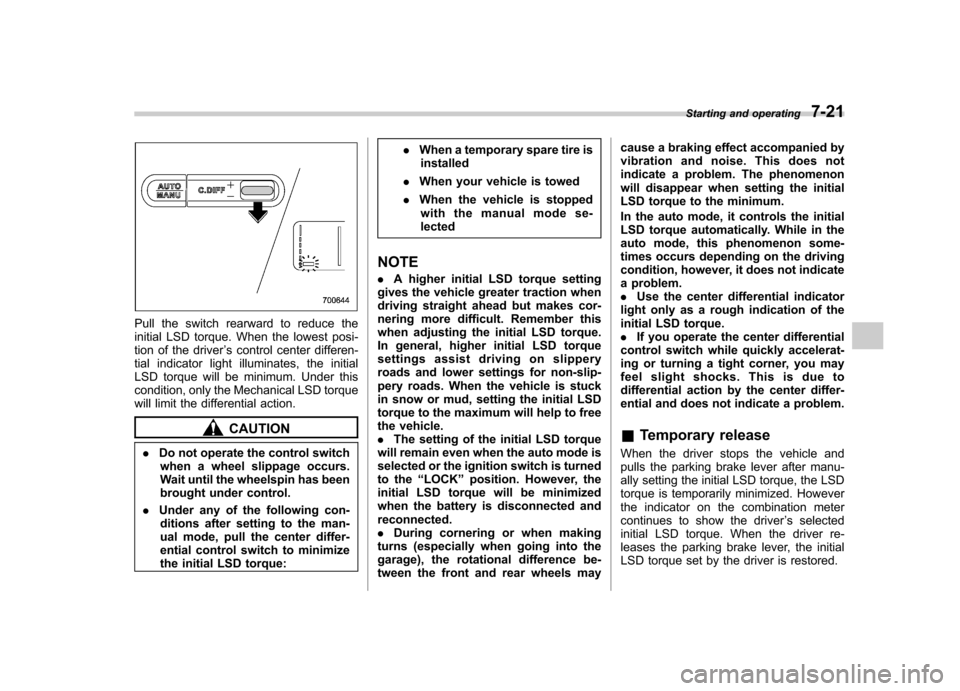
Pull the switch rearward to reduce the
initial LSD torque. When the lowest posi-
tion of the driver’s control center differen-
tial indicator light illuminates, the initial
LSD torque will be minimum. Under this
condition, only the Mechanical LSD torque
will limit the differential action.
CAUTION
. Do not operate the control switch
when a wheel slippage occurs.
Wait until the wheelspin has been
brought under control.
. Under any of the following con-
ditions after setting to the man-
ual mode, pull the center differ-
ential control switch to minimize
the initial LSD torque: .
When a temporary spare tire is
installed
. When your vehicle is towed
. When the vehicle is stopped
with the manual mode se-lected
NOTE . A higher initial LSD torque setting
gives the vehicle greater traction when
driving straight ahead but makes cor-
nering more difficult. Remember this
when adjusting the initial LSD torque.
In general, higher initial LSD torque
settings assist driving on slippery
roads and lower settings for non-slip-
pery roads. When the vehicle is stuck
in snow or mud, setting the initial LSD
torque to the maximum will help to free
the vehicle.. The setting of the initial LSD torque
will remain even when the auto mode is
selected or the ignition switch is turned
to the “LOCK ”position. However, the
initial LSD torque will be minimized
when the battery is disconnected andreconnected.. During cornering or when making
turns (especially when going into the
garage), the rotational difference be-
tween the front and rear wheels may cause a braking effect accompanied by
vibration and noise. This does not
indicate a problem. The phenomenon
will disappear when setting the initial
LSD torque to the minimum.
In the auto mode, it controls the initial
LSD torque automatically. While in the
auto mode, this phenomenon some-
times occurs depending on the driving
condition, however, it does not indicate
a problem..
Use the center differential indicator
light only as a rough indication of the
initial LSD torque.. If you operate the center differential
control switch while quickly accelerat-
ing or turning a tight corner, you may
feel slight shocks. This is due to
differential action by the center differ-
ential and does not indicate a problem. & Temporary release
When the driver stops the vehicle and
pulls the parking brake lever after manu-
ally setting the initial LSD torque, the LSD
torque is temporarily minimized. However
the indicator on the combination meter
continues to show the driver ’s selected
initial LSD torque. When the driver re-
leases the parking brake lever, the initial
LSD torque set by the driver is restored. Starting and operating
7-21
Page 265 of 414
7-22Starting and operating
SI-DRIVE (STI)
SI-DRIVE (SUBARU Intelligent Drive)
works to maximize engine performance,
control and efficiency.
This system consists of three modes:
Intelligent (I), Sport (S), and Sport Sharp
(S#). By adjusting the SI-DRIVE selector,
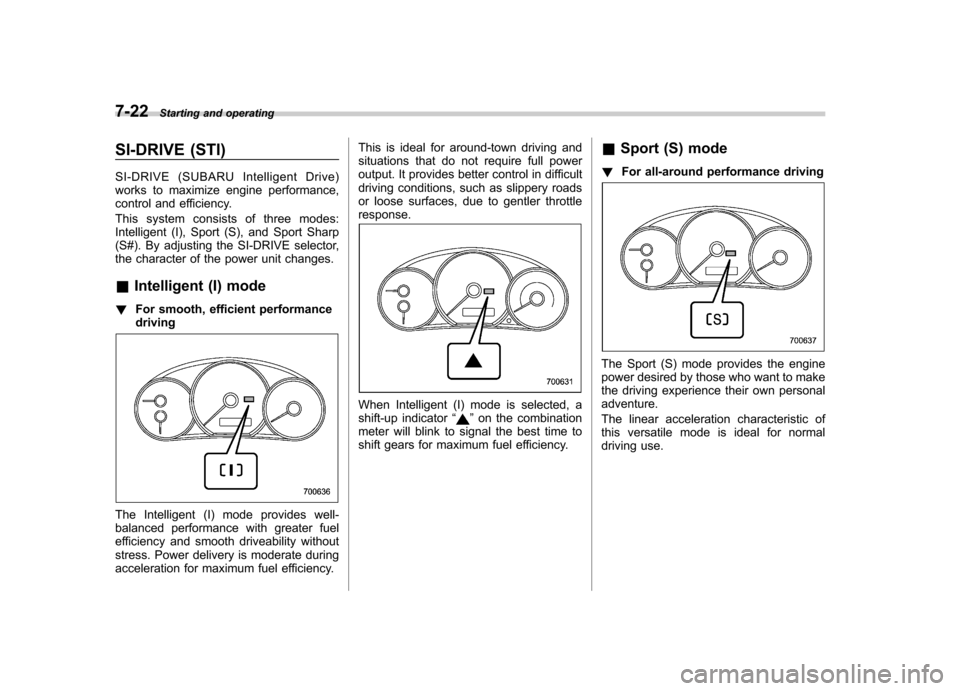
the character of the power unit changes. &Intelligent (I) mode
! For smooth, efficient performance driving
The Intelligent (I) mode provides well-
balanced performance with greater fuel
efficiency and smooth driveability without
stress. Power delivery is moderate during
acceleration for maximum fuel efficiency. This is ideal for around-town driving and
situations that do not require full power
output. It provides better control in difficult
driving conditions, such as slippery roads
or loose surfaces, due to gentler throttleresponse.
When Intelligent (I) mode is selected, a
shift-up indicator
“”on the combination
meter will blink to signal the best time to
shift gears for maximum fuel efficiency. &
Sport (S) mode
! For all-around performance driving
The Sport (S) mode provides the engine
power desired by those who want to make
the driving experience their own personaladventure.
The linear acceleration characteristic of
this versatile mode is ideal for normal
driving use.