2013 SUBARU FORESTER oil temperature
[x] Cancel search: oil temperaturePage 312 of 436

!Driving on grades
. Before going down a steep hill, slow
down and shift into lower gear (if neces-
sary, use 1st gear) in order to utilize the
engine braking effect and prevent over-
heating of your vehicle ’s brakes. Do not
make sudden downshifts. . When driving uphill in hot weather, the
air conditioner may turn off automatically
to protect the engine from overheating. . When driving uphill in hot weather, pay
attention to the following indicators be-
cause the engine and transmission are
relatively prone to overheating.
–Temperature gauge (if equipped)
– Coolant temperature high warning
light (if equipped) – AT OIL TEMP warning light (AT
models)
. If any of the following conditions occur,
immediately turn off the air conditioner and
stop the vehicle in the nearest safe
location. Refer to “If you park your vehicle
in case of an emergency ”F9-2 and
“ Engine overheating ”F 9-13.
– Temperature gauge needle ap-
proaches the OVERHEAT zone (if
equipped). Refer to “Temperature
gauge (models with type A combina-
tion meter) ”F 3-11.
– Coolant temperature high warning light illuminates (if equipped). Refer to“
Coolant temperature low indicator
light/Coolant temperature high warn-
ing light ”F 3-16.
– AT OIL TEMP warning light illumi-
nates (AT models). Refer to “AT OIL
TEMP warning light (AT models) ”F 3-
17.
. If your vehicle has an automatic trans-
mission, avoid using the accelerator pedal
to stay stationary on an uphill slope
instead of using the parking brake or foot
brake. That may cause the transmission
fluid to overheat. . If your vehicle has an automatic trans-
mission, place the select lever as follows.
Uphill slopes: “D ”position
Downhill slopes: A low-speed gear posi-
tion to use engine braking ! Parking on a grade
Always block the wheels under both
vehicle and trailer when parking. Apply
the parking brake firmly. You should not
park on a hill or slope. But if parking on a
hill or slope cannot be avoided, you
should take the following steps.
1. Press and hold the brake pedal.
2. Have someone place chocks under
both the vehicle and trailer wheels.
3. When the chocks are in place, release
the brake pedal slowly until the chocks absorb the load.
4. Press the brake pedal fully and then
apply the parking brake; slowly release
the brake pedal.
5. Shift into 1st or reverse gear (manual
transmission models) or the
“P ” position
(automatic transmission models) and shut
off the engine. Driving tips
8-25
Page 326 of 436
Engine overheating
WARNING
Never attempt to remove the radia-
tor cap until the engine has been
shut off and has fully cooled down.
When the engine is hot, the coolant
is under pressure. Removing the
cap while the engine is still hot
could release a spray of boiling hot
coolant, which could burn you very
seriously.
If the engine overheats, safely pull off the
road and stop the vehicle in a safe place. & If steam is coming from the
engine compartment
Turn off the engine and get everyone
away from the vehicle until it cools down. & If no steam is coming from
the engine compartment
NOTE
For details about how to check the
coolant level or how to add coolant,
refer to “Engine coolant ”F 11-14.
1. Keep the engine running at idlingspeed. 2. Open the hood to ventilate the engine
compartment. Refer to
“Engine hood ”
F 11-5.
Confirm that the cooling fan is turning. If
the fan is not turning, immediately turn off
the engine and contact your SUBARU
dealer for repair.
3. After the engine coolant temperature
has dropped, turn off the engine.
If any of the following conditions occur,
turn off the engine. .The temperature gauge stays in the
overheated zone (if equipped). Referto “Temperature gauge (models with
type A combination meter) ”F 3-11.
. The coolant temperature high warn-
ing light remains illuminated (if
equipped). Refer to “Coolant tempera-
ture low indicator light/Coolant tem-
perature high warning light ”F 3-16.
4. After the engine has fully cooled down,
check the coolant level in the reservoir.
If the coolant level is below the “LOW ”
mark, add coolant up to the “FULL ”mark.
5. If there is no coolant in the reservoir,
add coolant to the reservoir. Then remove
the radiator cap (non-turbo models) or the
coolant filler tank cap (turbo models) and
fill the radiator with coolant.
If you have to remove a hot radiator cap/
coolant filler tank cap, first wrap a thick cloth around the cap, then turn the cap
counterclockwise slowly without pressing
down until it stops. Release the pressure
from the cooling system. After the pres-
sure has been fully released, remove the
cap by pressing it down and turningcounterclockwise.
In case of emergency
9-13
Page 349 of 436
11-12Maintenance and service
Non-turbo models
Turbo models
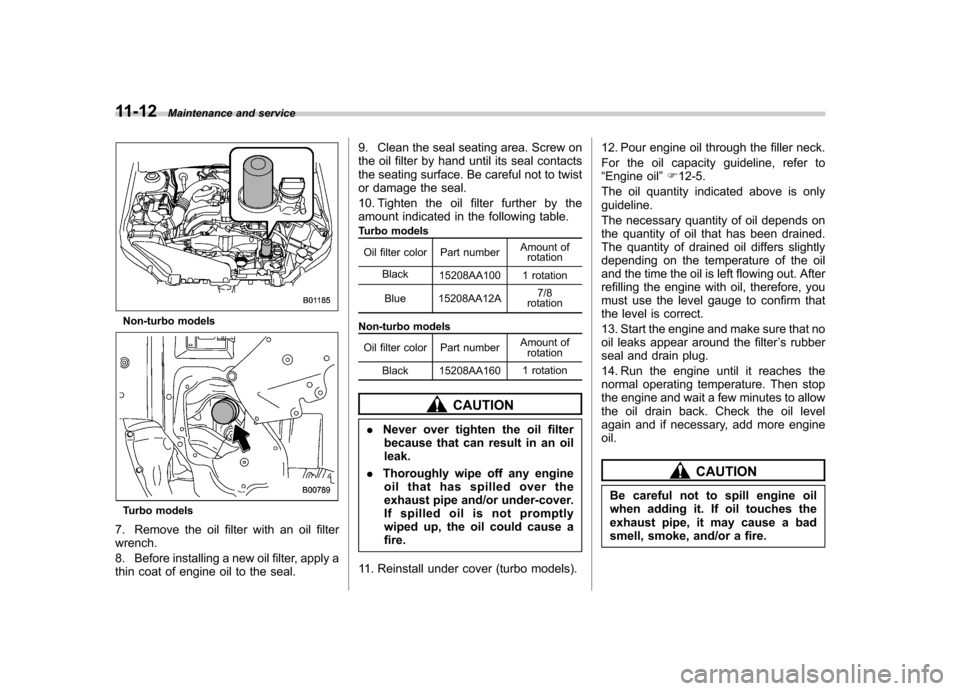
7. Remove the oil filter with an oil filter wrench.
8. Before installing a new oil filter, apply a
thin coat of engine oil to the seal. 9. Clean the seal seating area. Screw on
the oil filter by hand until its seal contacts
the seating surface. Be careful not to twist
or damage the seal.
10. Tighten the oil filter further by the
amount indicated in the following table.
Turbo models
Oil filter color Part number Amount of
rotation
Black 15208AA100 1 rotation
Blue 15208AA12A 7/8
rotation
Non-turbo models Oil filter color Part number Amount of
rotation
Black 15208AA160 1 rotation
CAUTION
. Never over tighten the oil filter
because that can result in an oil leak.
. Thoroughly wipe off any engine
oil that has spilled over the
exhaust pipe and/or under-cover.
If spilled oil is not promptly
wiped up, the oil could cause afire.
11. Reinstall under cover (turbo models). 12. Pour engine oil through the filler neck.
For the oil capacity guideline, refer to “
Engine oil ”F 12-5.
The oil quantity indicated above is onlyguideline.
The necessary quantity of oil depends on
the quantity of oil that has been drained.
The quantity of drained oil differs slightly
depending on the temperature of the oil
and the time the oil is left flowing out. After
refilling the engine with oil, therefore, you
must use the level gauge to confirm that
the level is correct.
13. Start the engine and make sure that no
oil leaks appear around the filter ’s rubber
seal and drain plug.
14. Run the engine until it reaches the
normal operating temperature. Then stop
the engine and wait a few minutes to allow
the oil drain back. Check the oil level
again and if necessary, add more engineoil.
CAUTION
Be careful not to spill engine oil
when adding it. If oil touches the
exhaust pipe, it may cause a bad
smell, smoke, and/or a fire.
Page 359 of 436
11-22Maintenance and service
&Recommended grade and viscosity
Each oil manufacturer has its own base
oils and additives. Never use different
brands together. For details, refer to“ Manual transmission, front differential
and rear differential gear oil ”F 12-8. Rear differential gear oil
There is no rear differential gear oil level
gauge. To check the rear differential gear
oil level, consult your SUBARU dealer forinspection. &
Recommended grade and viscosity
Each oil manufacturer has its own base
oils and additives. Never use different
brands together. For details, refer to“ Manual transmission, front differential
and rear differential gear oil ”F 12-8. Power steering fluid &
Checking the fluid level
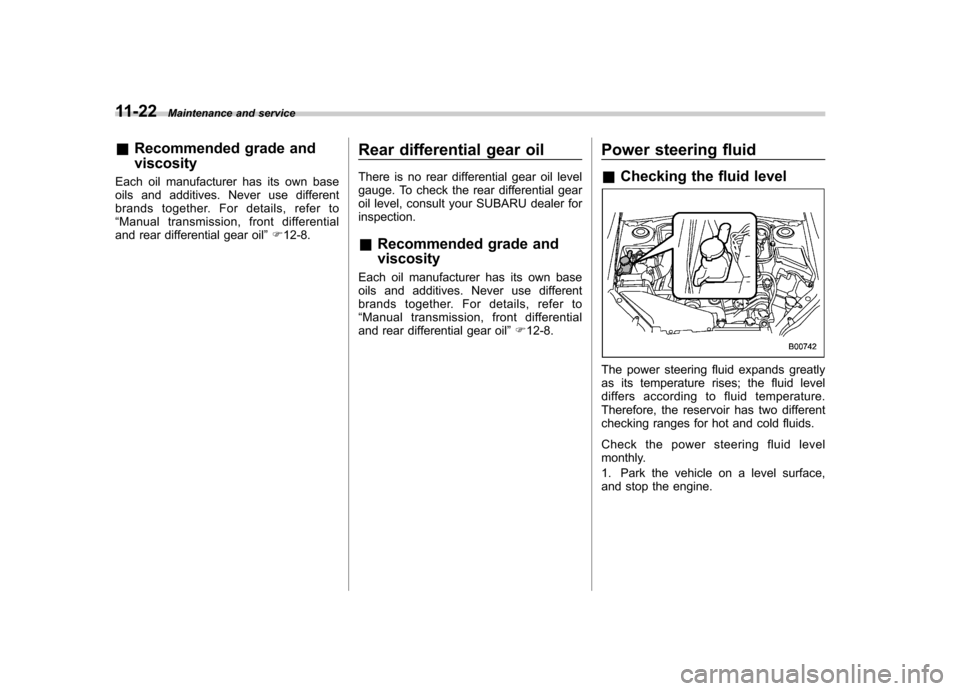
The power steering fluid expands greatly
as its temperature rises; the fluid level
differs according to fluid temperature.
Therefore, the reservoir has two different
checking ranges for hot and cold fluids.
Check the power steering fluid level
monthly.
1. Park the vehicle on a level surface,
and stop the engine.
Page 395 of 436
12-6Specifications
!Alternative engine oil
If the SUBARU approved oil is unavailable, the following alternative oil can be used. NOTE
Each quantity indicated here is only a guideline. The necessary quantity for replacement may differ slightly depending on the
temperature and other factors. ! Non-turbo models
Oil grade SAE viscosity No. and
applicable temperature Oil capacity
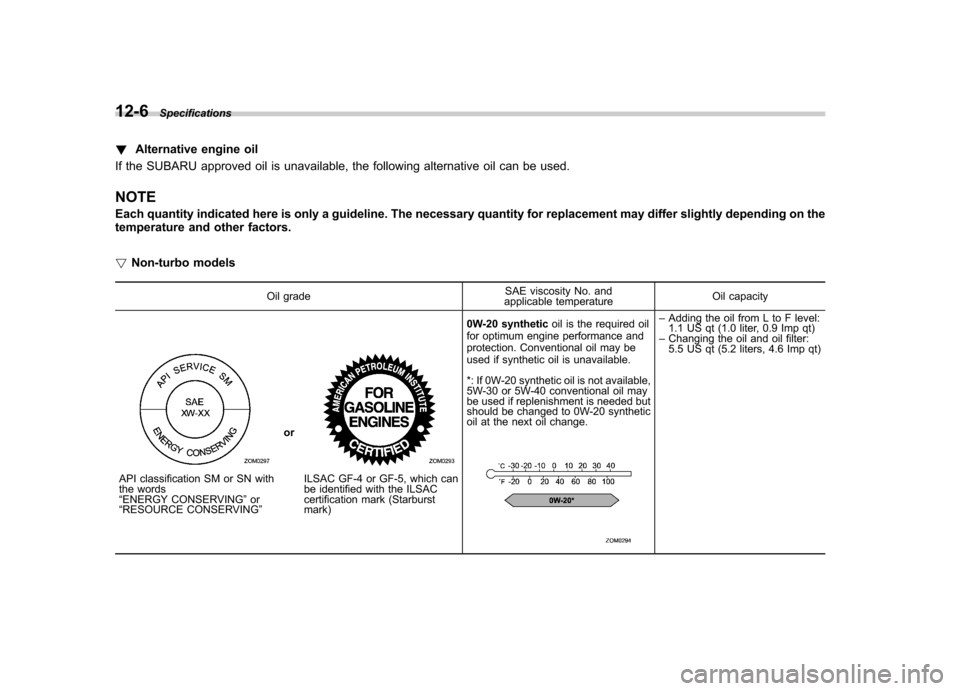
API classification SM or SN with
the words “
ENERGY CONSERVING ”or
“ RESOURCE CONSERVING ”orILSAC GF-4 or GF-5, which can
be identified with the ILSAC
certification mark (Starburst mark) 0W-20 synthetic
oil is the required oil
for optimum engine performance and
protection. Conventional oil may be
used if synthetic oil is unavailable.
*: If 0W-20 synthetic oil is not available,
5W-30 or 5W-40 conventional oil may
be used if replenishment is needed but
should be changed to 0W-20 synthetic
oil at the next oil change.
– Adding the oil from L to F level:
1.1 US qt (1.0 liter, 0.9 Imp qt)
– Changing the oil and oil filter:
5.5 US qt (5.2 liters, 4.6 Imp qt)
Page 396 of 436
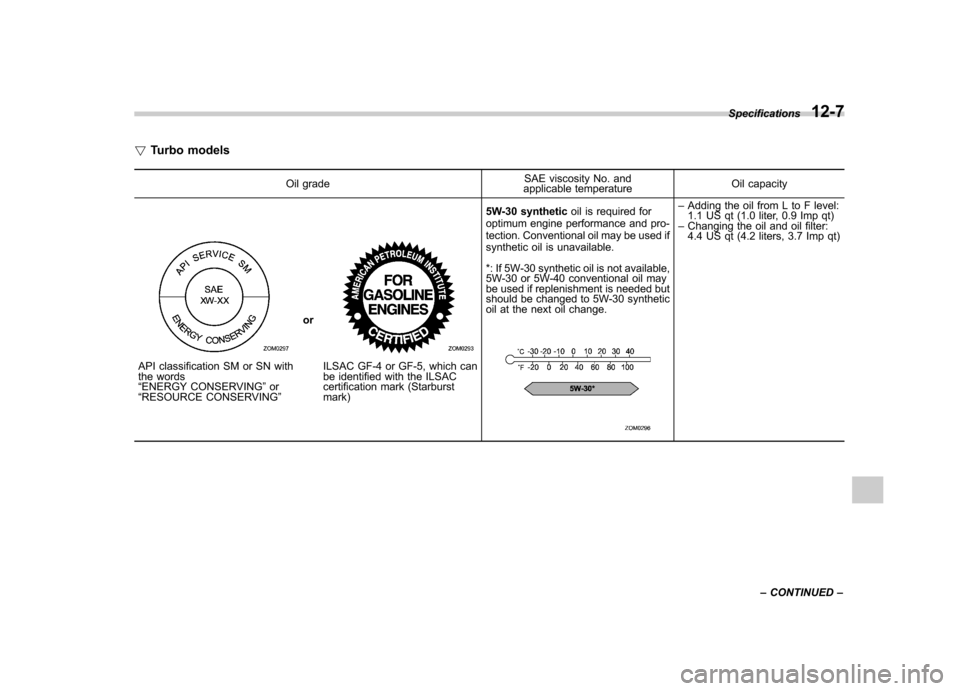
!Turbo models
Oil grade SAE viscosity No. and
applicable temperature Oil capacity
API classification SM or SN with
the words “
ENERGY CONSERVING ”or
“ RESOURCE CONSERVING ”orILSAC GF-4 or GF-5, which can
be identified with the ILSAC
certification mark (Starburst mark) 5W-30 synthetic
oil is required for
optimum engine performance and pro-
tection. Conventional oil may be used if
synthetic oil is unavailable.
*: If 5W-30 synthetic oil is not available,
5W-30 or 5W-40 conventional oil may
be used if replenishment is needed but
should be changed to 5W-30 synthetic
oil at the next oil change.
– Adding the oil from L to F level:
1.1 US qt (1.0 liter, 0.9 Imp qt)
– Changing the oil and oil filter:
4.4 US qt (4.2 liters, 3.7 Imp qt) Specifications
12-7
– CONTINUED –
Page 397 of 436

12-8Specifications
&Manual transmission, front differential and rear differential gear oil
Oil grade SAE viscosity No. and applicable temperature Oil capacity
Manual transmission
API classification GL-5
3.7 US qt (3.5 liters, 3.1 Imp qt)
Front differential (AT models) 1.3 US qt (1.2 liters, 1.1 Imp qt)
Rear differential 0.8 US qt (0.8 liter, 0.7 Imp qt)
For the checking procedure, or other details, refer to “Manual transmission oil ”F 11-19, “Front differential gear oil (AT models) ”F 11-21, “Rear differential
gear oil ”F 11-22.
Page 412 of 436

crease in temperature could cause
tread separation, and failure of the
tire(s). Possible resulting loss of
vehicle control could lead to anaccident. !Measuring and adjusting air
pressure to achieve proper in-
flation
Check and, if necessary, adjust the
pressure of each tire (including the
spare) at least once a month and
before any long journey. Check the
tire pressures when the tires are
cold. Use a pressure gauge to
adjust the tire pressures to the
specific values. Driving even a
short distance warms up the tires
and increases the tire pressures.
Also, the tire pressures are affected
by the outside temperature. It is
best to check tire pressure out-
doors before driving the vehicle.
When a tire becomes warm, the air
inside it expands, causing the tire
pressure to increase. Be careful not
to mistakenly release air from a
warm tire to reduce its pressure. &
Glossary of tire terminology
. Accessory weight
The combined weight (in excess of
those standard items which may be
replaced) of automatic transmis-
sion, power steering, power brakes,
power windows, power seats, radio,
and heater, to the extent that these
items are available as factory-in-
stalled equipment (whether in-
stalled or not). . Bead
The part of the tire that is made of
steel wires, wrapped or reinforced
by ply cords and that is shaped to fit
the rim.. Bead separation
A breakdown of the bond between
components in the bead.. Bias ply tire
A pneumatic tire in which the ply
cords that extend to the beads are
laid at alternate angles substantially
less than 90 degrees to the center-
line of the tread. . Carcass
The tire structure, except tread and sidewall rubber which, when in-
flated, bears the load. .
Chunking
The breaking away of pieces of the
tread or sidewall.. Cold tire pressure
The pressure in a tire that has been
driven less than 1 mile or has been
standing for three hours or more.. Cord
The strands forming the plies in the tire. . Cord separation
The parting of cords from adjacent
rubber compounds.. Cracking
Any parting within the tread, side-
wall, or inner liner of the tire
extending to cord material. . Curb weight
The weight of a motor vehicle with
standard equipment including the
maximum capacity of fuel, oil and
coolant, and if so equipped, air
conditioning and additional weight
optional engine.
Consumer information and Reporting safety defects
13-5
– CONTINUED –