2013 SUBARU FORESTER AUX
[x] Cancel search: AUXPage 174 of 436
Antenna system.................................................. 5-3
Roof antenna (Rod type) ...................................... 5-3
FM reception ....................................................... 5-3
Installation of accessories .................................. 5-4
Audio set ............................................................. 5-4
Type A audio set (if equipped) ............................. 5-5
Type B audio set (if equipped) ............................. 5-6
Type C audio set (if equipped) ............................. 5-7
Type D audio set (if equipped) ............................. 5-8
Power and audio controls .................................. 5-9
Power switch and volume control ........................ 5-9
Sound controls and audio settings ...................... 5-9
FM/AM radio operation ...................................... 5-13
FM/AM selection ................................................. 5-13
Tuning ............................................................... 5-13
HD Radio
TMTechnology (Digital AM and FM
Radio) (type D audio) ........................................ 5-15
Displaying radio PS (Program Service Name) and RT (Radio Text) ................................................ 5-16
Station preset .................................................... 5-17
Satellite radio operation (if equipped) .............. 5-18
Sirius XM
TMsatellite radio (U.S.A. only).... ........... 5-18
Satellite radio reception ...................................... 5-18
Displaying satellite radio ID of tuner ................... 5-19
Band selection ................................................... 5-20
Channel and category selection .......................... 5-20
Channel preset ................................................... 5-21
Display selection (type A, B and C audio) ........... 5-22
CD player operation ........................................... 5-22
Play file. ............................................................. 5-22
How to insert a CD (type A, C and D) .................. 5-23How to insert a CD(s) (type B) ..
.......................... 5-23
How to play back a CD ...................................... 5-24
To select a track from the beginning .................. 5-24
Fast-forwarding and rewinding . .......................... 5-25
Repeating .......................................................... 5-25
Random playback .............................................. 5-26
Scan (type A, B and C audio) ... .......................... 5-27
Display selection (type A, B and C audio) ........... 5-27
Folder selection ................................................. 5-28
How to eject a CD from the player (type A, C and D audio) .............................................................. 5-28
How to eject CDs from the player (type B) ..... ..... 5-28
When the following messages are displayed. . ..... 5-29
Auxiliary input jack (if equipped). ..................... 5-29
Precautions to observe when handling a compact disc ................................................... 5-30
USB storage device / iPod
®operations
(type C and D audio) ...................................... 5-32
Play file ............................................................. 5-32
Connectable USB storage device ....................... 5-32
Connectable iPod
®models ................................. 5-33
Connecting USB storage device / iPod®............. 5-33
How to play back ............................................... 5-34
To select a track from the beginning .................. 5-34
To select a chapter from the beginning when connecting iPod
®............................................. 5-34
Fast-forwarding and rewinding . .......................... 5-34
Repeating .......................................................... 5-35
Random playback .............................................. 5-35
SCAN (only when connecting USB storage device) (type C audio) ...................................... 5-36Audio
5
Page 178 of 436
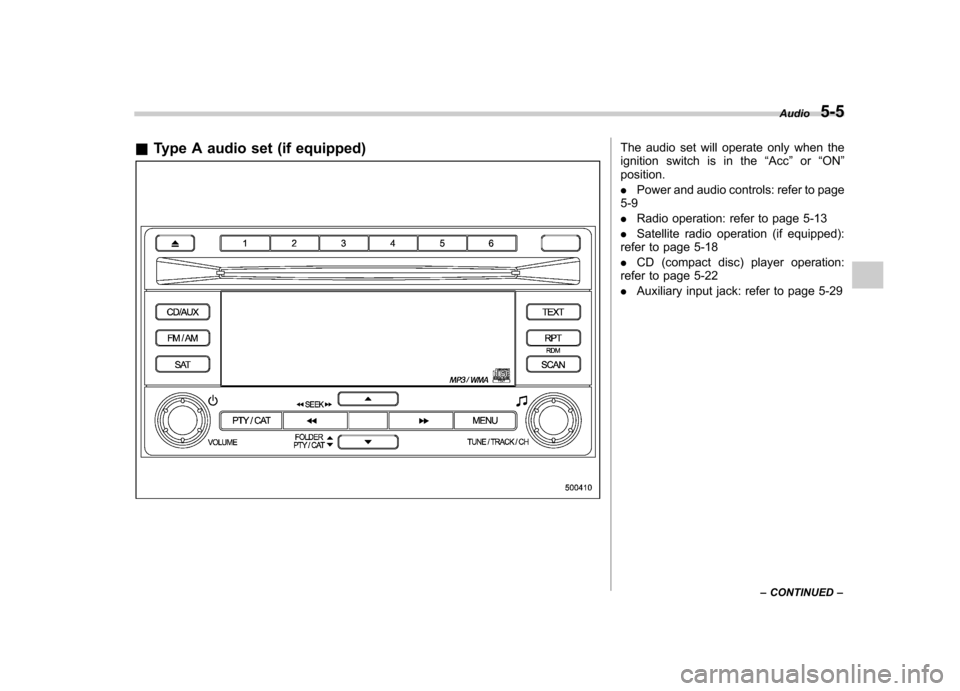
&Type A audio set (if equipped)The audio set will operate only when the
ignition switch is in the “Acc ”or “ON ”
position. . Power and audio controls: refer to page
5-9. Radio operation: refer to page 5-13
. Satellite radio operation (if equipped):
refer to page 5-18. CD (compact disc) player operation:
refer to page 5-22. Auxiliary input jack: refer to page 5-29 Audio
5-5
– CONTINUED –
Page 179 of 436
5-6Audio
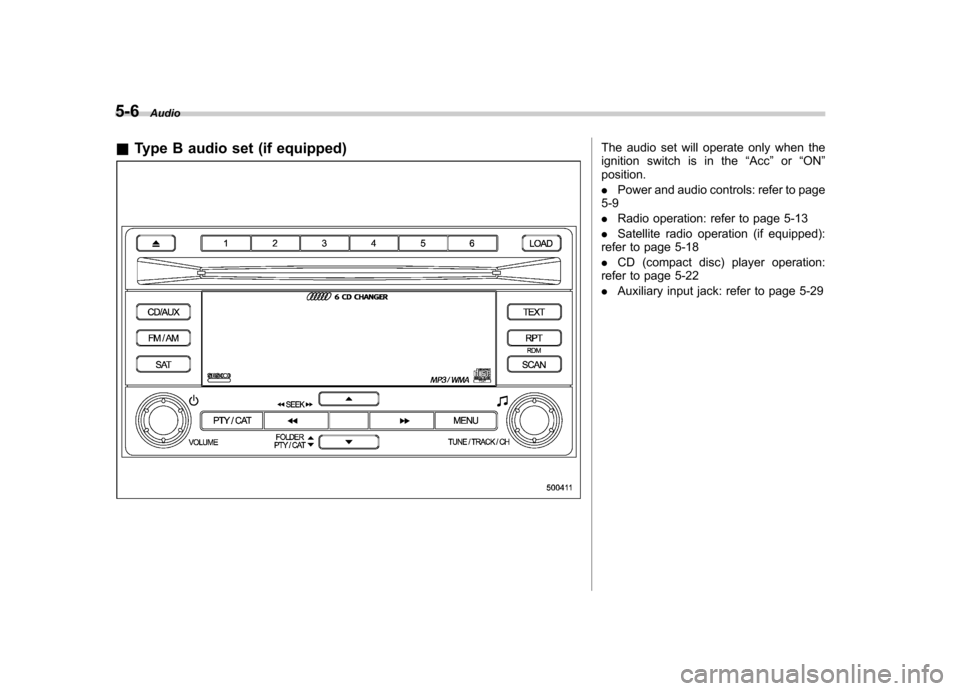
& Type B audio set (if equipped)
The audio set will operate only when the
ignition switch is in the “Acc ”or “ON ”
position. . Power and audio controls: refer to page
5-9. Radio operation: refer to page 5-13
. Satellite radio operation (if equipped):
refer to page 5-18. CD (compact disc) player operation:
refer to page 5-22. Auxiliary input jack: refer to page 5-29
Page 180 of 436
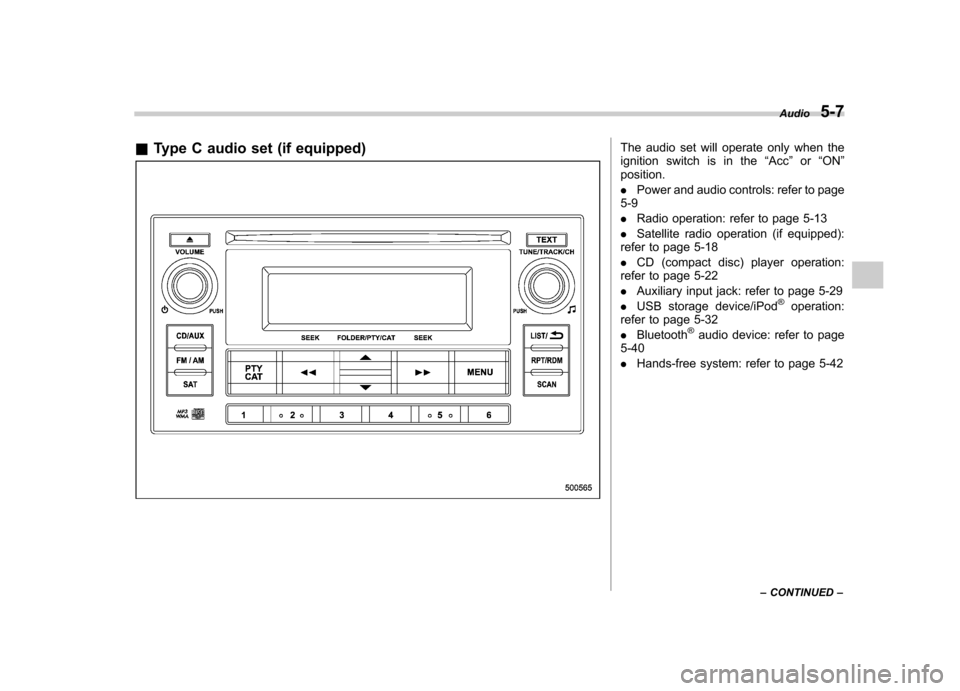
&Type C audio set (if equipped)The audio set will operate only when the
ignition switch is in the “Acc ”or “ON ”
position. . Power and audio controls: refer to page
5-9. Radio operation: refer to page 5-13
. Satellite radio operation (if equipped):
refer to page 5-18. CD (compact disc) player operation:
refer to page 5-22. Auxiliary input jack: refer to page 5-29
. USB storage device/iPod
®operation:
refer to page 5-32. Bluetooth
®audio device: refer to page
5-40. Hands-free system: refer to page 5-42 Audio
5-7
– CONTINUED –
Page 181 of 436
5-8Audio
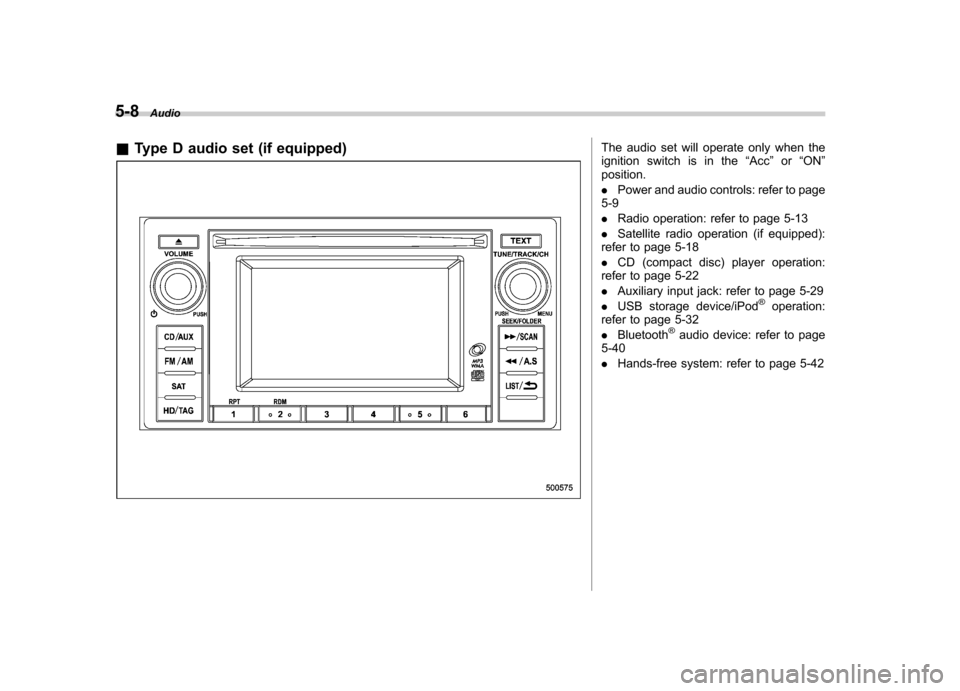
& Type D audio set (if equipped)
The audio set will operate only when the
ignition switch is in the “Acc ”or “ON ”
position. . Power and audio controls: refer to page
5-9. Radio operation: refer to page 5-13
. Satellite radio operation (if equipped):
refer to page 5-18. CD (compact disc) player operation:
refer to page 5-22. Auxiliary input jack: refer to page 5-29
. USB storage device/iPod
®operation:
refer to page 5-32. Bluetooth
®audio device: refer to page
5-40. Hands-free system: refer to page 5-42
Page 185 of 436

5-12Audio
!Adjustable level of each mode
Mode Range of levels (displayed)DefaultsettingTurn counterclockwise Turn clockwise
Volume Volume control 0 to 40 15 For less volume For more volume AUX volume control* 0 to 40 15 For less volume For more volume
Tone and balance Bass control �8 to +8 0 For less bass sound For more bass sound
Midrange control �8 to +8 0 For less midrange sound For more midrange sound
Treble control �8 to +8 0 For less treble sound For more treble sound
Balance L9 to R9 0 Right channel attenuated Left channel attenuated
Fader R9 to F9 0 Front attenuated Rear attenuated
Other settings SPEED VOLUME OFF to 2 OFF For less auto volume change For more auto volume change
BEEP (Type A, B and C audio) OFF to ON ON OFF ON
CS Auto (Type B audio) OFF to ON OFF OFF ON
SRS Sound (Type D audio) OFF to ON ON OFF ON
Brightness (Type D audio) 0 to 15 8 For less brightness For more brightness
Contrast (Type D audio) 0 to 15 8 For less contrast For more contrast
Screen size (Type D audio) Normal to Wide Wide Normal Wide
HD ON/OFF (Type D audio) OFF to ON ON ON OFF
Initialize (Type D audio) Cancel to Initialize Cancel Initialize Cancel
*: For type A and B audio, AUX volume can be adjusted only when an AUX audio product is connected.
Page 202 of 436
NOTE .Avoid driving the vehicle with a CD
sticking out. Vibration might make it fall out.. If you press the
button while
the player is in all disc ejection mode,
the mode will be cancelled following
ejection of the disc that is currently
being ejected.. If you press the
button orbutton while the player is in all disc
ejection mode, the player will draw in
the discs that have been ejected and
play them. & When the following mes-
sages are displayed
If one of the following messages is
displayed while operating the CD player,
determine the cause based on the follow-
ing information. If you cannot clear those
messages, please contact your SUBARU
dealer. ! When “PUSH EJECT ”is displayed
Press the
button to eject the disc.
Check the disc for damage or deformation
and also check that the correct disc is
inserted. Do not try to eject the disc
forcibly. Mini CDs (i.e., 8 cm/3 inch CDs)
are not supported, and if inserted, they will
be immediately ejected and this message will be displayed. If the disc cannot be
ejected or this message remains dis-
played, please contact your SUBARU
dealer. !
When “CHECK DISC ”is displayed
Press the
button to eject the disc.
Check that the disc is not damaged or
scratched, and also check that the disc is
inserted correctly. This message may
appear when using some CD-RW discs.
Check that the disc type (i.e., 8 cm/3 inch
mini CDs are not supported) and data
format are correct. This player can only
play MP3, WMA (all models) and AAC
(type C and D audio) data formats. If the
disc cannot be ejected or this message
remains displayed, please contact your
SUBARU dealer. Auxiliary input jack (if
equipped)
1) Models without Hands-free system
2) Models with Hands-free system
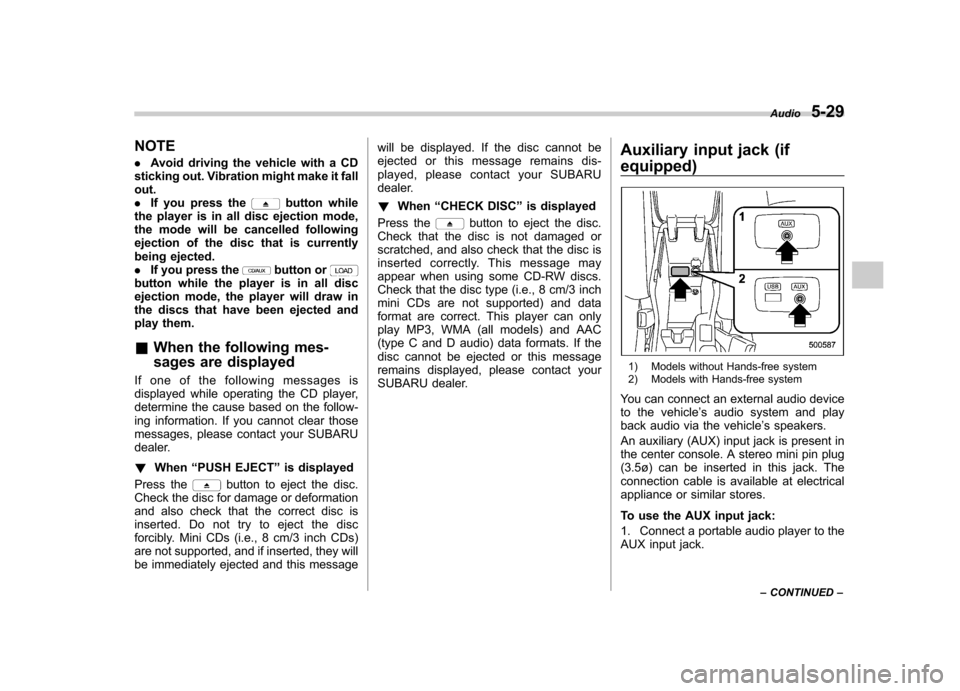
You can connect an external audio device
to the vehicle ’s audio system and play
back audio via the vehicle ’s speakers.
An auxiliary (AUX) input jack is present in
the center console. A stereo mini pin plug
(3.5ø) can be inserted in this jack. The
connection cable is available at electrical
appliance or similar stores.
To use the AUX input jack:
1. Connect a portable audio player to the
AUX input jack. Audio
5-29
– CONTINUED –
Page 203 of 436
5-30Audio
Type A and B audio
Type C and D audio
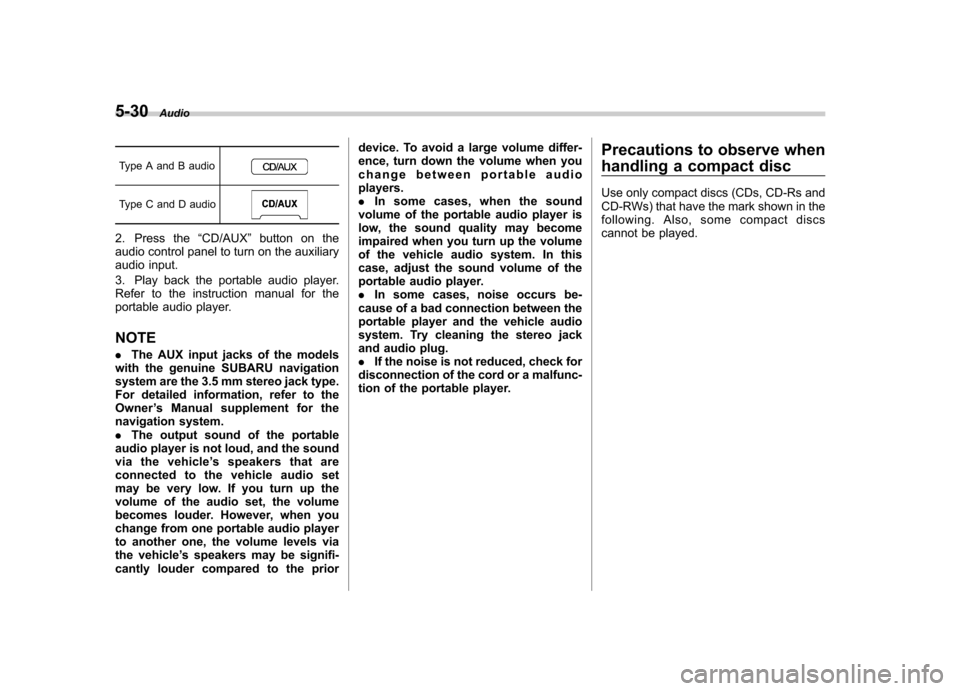
2. Press the “CD/AUX ”button on the
audio control panel to turn on the auxiliary
audio input.
3. Play back the portable audio player.
Refer to the instruction manual for the
portable audio player. NOTE . The AUX input jacks of the models
with the genuine SUBARU navigation
system are the 3.5 mm stereo jack type.
For detailed information, refer to the
Owner ’s Manual supplement for the
navigation system.. The output sound of the portable
audio player is not loud, and the sound
via the vehicle ’s speakers that are
connected to the vehicle audio set
may be very low. If you turn up the
volume of the audio set, the volume
becomes louder. However, when you
change from one portable audio player
to another one, the volume levels via
the vehicle ’s speakers may be signifi-
cantly louder compared to the prior device. To avoid a large volume differ-
ence, turn down the volume when you
change between portable audioplayers..
In some cases, when the sound
volume of the portable audio player is
low, the sound quality may become
impaired when you turn up the volume
of the vehicle audio system. In this
case, adjust the sound volume of the
portable audio player.. In some cases, noise occurs be-
cause of a bad connection between the
portable player and the vehicle audio
system. Try cleaning the stereo jack
and audio plug. . If the noise is not reduced, check for
disconnection of the cord or a malfunc-
tion of the portable player. Precautions to observe when
handling a compact disc
Use only compact discs (CDs, CD-Rs and
CD-RWs) that have the mark shown in the
following. Also, some compact discs
cannot be played.