Page 194 of 484

194
2-2. Instrument cluster
WARNING
■If a safety system warning light does not come on
Should a safety system light such as the ABS and SRS airbag system warn-
ing light not come on when you start the engine, this could mean that these
systems are not available to help protect you in an accident, which could
result in death or serious injury. Have the vehicle inspected by your
SUBARU dealer immediately if this occurs.
*4
: Vehicles without a keyless access with push button start sys- tem
These lights turn on when the engine switch is turned to the “ON”
position to indicate that a system check is being performed. They
will turn off after the engine is started. There may be a malfunction
in a system if a light does not come on, or if the lights do not turn off.
Have the vehicle inspected by your SUBARU dealer for details.
Vehicles with a keyless access with push button start system
These lights turn on when the push-button ignition switch is turned
to “ON” mode to indicate that a system check is being performed.
They will turn off after the engine is started. There may be a mal-
function in a system if a light does not come on, or if the lights do
not turn off. Have the vehicle inspected by your SUBARU dealer for
details.
Page 208 of 484
208
2-3. Operating the lights and windshield wipers
■The windshield wipers and washer can be operated when
Vehicles without a keyless access with push button start system
The engine switch is in the “ON” position.
Vehicles with a keyless access with push button start system
The push-button ignition switch is in “ON” mode.
■If no windshield washer fluid sprays
Check that the washer nozzles are not blocked if there is washer fluid in the
windshield washer fluid reservoir.
WARNING
■Caution regarding the use of washer fluid
When it is cold, do not use the washer fluid until the windshield becomes
warm. The fluid may freeze on the windshield and cause low visibility. This
may lead to an accident, resulting in death or serious injury.
Washer/wiper dual opera-
tion
The wipers will automatically
operate a couple of times after
the washer squirts.
Page 269 of 484

269
3-5. Other interior features
3
Interior features
WARNING
Observe the following precautions.
Failure to do so may cause the driver's floor mat to slip, possibly interfering
with the pedals while driving. An unexpectedly high speed may result or it may
become difficult to stop the vehicle, leading to a serious accident.
■When installing the driver's floor mat
●Do not use floor mats designed for ot her models or different model year
vehicles, even if they are SUBARU Genuine floor mats.
●Only use floor mats designed for the driver's seat.
●Always install the floor mat securely using the retaining hooks (clips) pro-
vided.
●Do not use two or more floor mats on top of each other.
●Do not place the floor mat bottom-side up or upside-down.
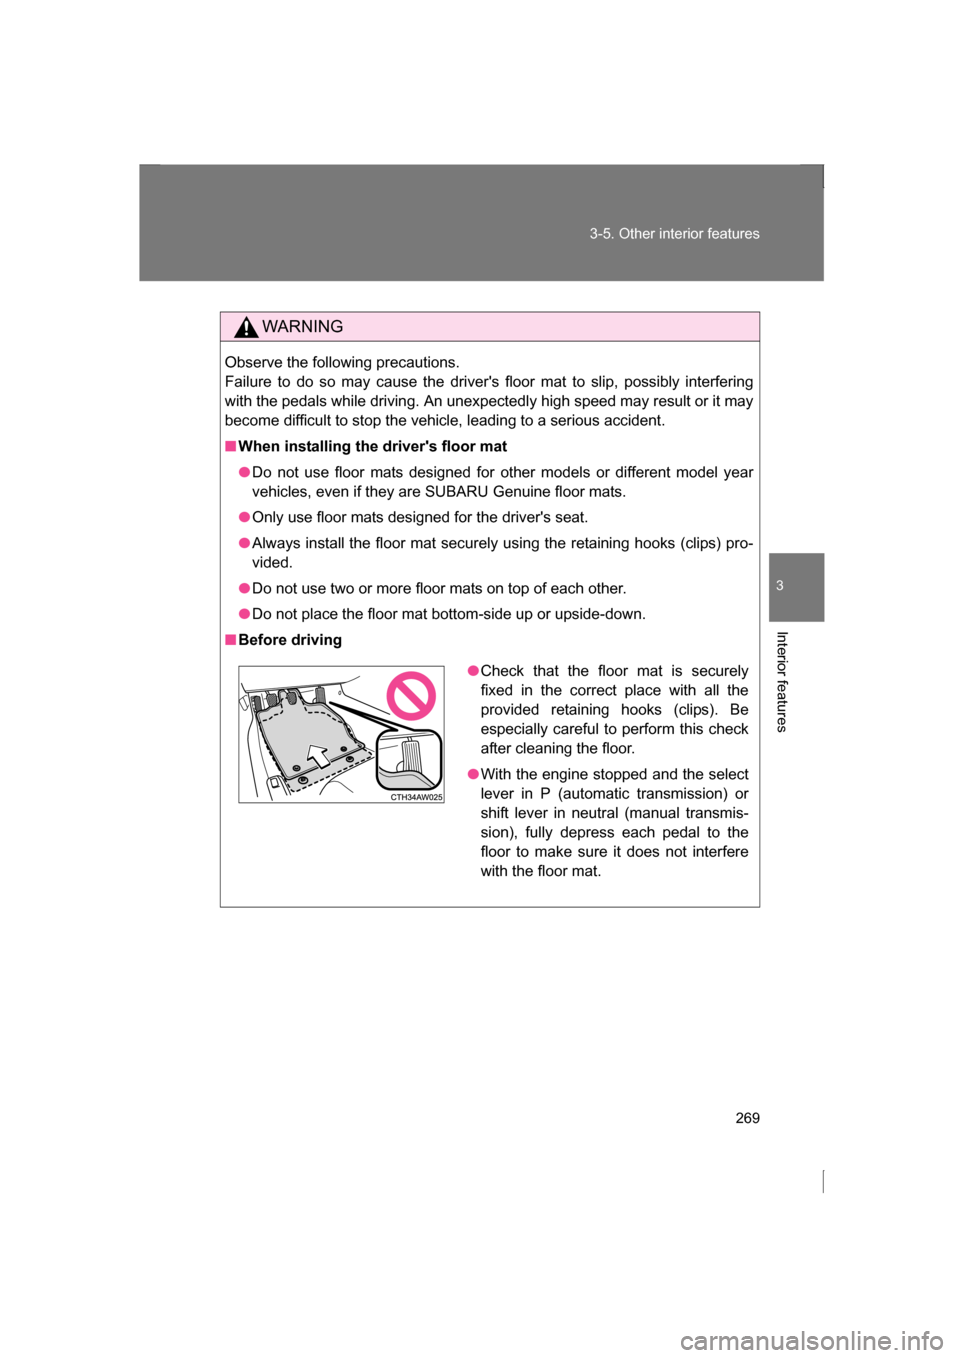
■Before driving
●Check that the floor mat is securely
fixed in the correct place with all the
provided retaining hooks (clips). Be
especially careful to perform this check
after cleaning the floor.
●With the engine stopped and the select
lever in P (automatic transmission) or
shift lever in neutral (manual transmis-
sion), fully depress each pedal to the
floor to make sure it does not interfere
with the floor mat.
Page 271 of 484
Maintenance and care4
271
4-1. Maintenance and careCleaning and protecting the vehicle exterior......... 272
Cleaning and protecting the vehicle interior.......... 276
Cleaning and protecting the Alcantara ®
area ....... 280
4-2. Maintenance Maintenance requirements .................. 282
General maintenance....... 285
Emission inspection and maintenance (I/M)
programs........................ 288 4-3. Do-it-yourself
maintenance
Do-it-yourself service precautions .................... 289
Engine hood ..................... 292
Engine compartment ........ 294
Tires ................................. 308
Tire inflation pressure ...... 315
Wheels ............................. 319
Air conditioning filter......... 322
Transmitter/access key battery ............................ 325
Checking and replacing fuses .............................. 329
Light bulbs........................ 337
Page 285 of 484
285
4-2. Maintenance
4
Maintenance and care
General maintenance
Engine compartment
ItemsCheck points
Battery Check the connections.
(→ P. 302)
Brake fluid At the correct level? ( →P. 300)
Engine coolant At the correct level? ( →P. 298)
Engine oil At the correct level? ( →P. 295)
Exhaust system No fumes or strange sounds?
Radiator/condenser/hoses Not blocked with foreign matter? (
→P. 300)
Washer fluid At the correct level? ( →P. 306)
Listed below are the general maintenance items that should be per-
formed at the intervals specified in the “Warranty and Maintenance
Booklet”. It is recommended that any problem you notice should be
brought to the attention of your SUBARU dealer or qualified service
shop for advice.
Page 293 of 484
293
4-3. Do-it-yourself maintenance
4
Maintenance and care
WARNING
■Pre-driving check
Check that the engine hood is fully closed and locked.
If the engine hood is not locked properly it may open while the vehicle is in
motion and cause an accident, which may result in death or serious injury.
CAUTION
■When opening the engine hood
Do not lift up or operate the wipers. Doing so may cause the engine hood
and wipers to contact, scratching the engine hood.
■When closing the engine hood
Do not apply excessive weight or force when closing the engine hood as
doing so may result in damage.
Page 295 of 484
295
4-3. Do-it-yourself maintenance
4
Maintenance and care
Engine oilWith the engine at operating temperature and turned off, check the oil
level on the dipstick.
■Checking the engine oil Park the vehicle on level ground. After warming up the engine
and turning it off, wait more than five minutes for the oil to
drain back into the bottom of the engine.
Hold a rag under the end and
pull the dipstick out.
Wipe the dipstick clean.
Reinsert the dipstick fully.
Holding a rag under the end, pull the dipstick out and check
the oil level.
When checking the oil, look at both sides of the dipstick and use the
lower measurement to determine the level of oil.
Wipe the dipstick and reinsert it fully.
Low
Full
STEP 1
STEP 2
STEP 3
STEP 4
STEP 5
STEP 6
Page 296 of 484
296
4-3. Do-it-yourself maintenance
■Adding engine oilIf the oil level is below or near
the low level mark, add engine
oil of the same type as already in
the engine.
Make sure to check the oil type and prepare the items needed before
adding oil.
Remove the oil filler cap by turning it counterclockwise.
Add engine oil slowly, checking the dipstick.
Install the oil filler cap by turning it clockwise.
Engine oil selection →
P. 414
Oil quantity
(Low → Full) 1.1 qt. (1.0 L, 0.9 Imp. qt.)
Items
Clean funnel
STEP 1
STEP 2
STEP 3