2013 SKODA YETI air condition
[x] Cancel search: air conditionPage 100 of 266

Operational problemsFirst read and observe the introductory information and safety warn-
ings
on page 91.
If the cooling system does not operate at outside temperatures higher than +5 °C,
there is a problem in the system. The reasons for this may be.
› One of the fuses has blown. Check the fuse and replace if necessa-
ry » page 236 .
› The cooling system has switched off automatically for a short time because the
coolant temperature of the engine is too hot » page 11.
If you are not able to resolve the operational problem yourself, or if the cooler output has reduced, switch off the cooling system and seek assistance from a
specialist garage.
Auxiliary heating (auxiliary heating and ventilation)
Introduction
This chapter contains information on the following subjects:
Switching on and off directly
98
System settings
98
Radio remote control
99
Conditions for the functioning of auxiliary heating (Aux. heating and ventilation),
hereinafter referred to only as auxiliary heating (Aux. heating).
The charge state of the vehicle battery is sufficient.
The fuel supply is adequate (the warning icon
is not lit in the display of the
instrument cluster).
Auxiliary ventilation
The auxiliary ventilation enables fresh air to flow into the vehicle interior by
switching off the engine, whereby the interior temperature is effectively de-
creased (e.g. with the vehicle parked in the sun).
Auxiliary heating (auxiliary heating)
The auxiliary heating (auxiliary heating) can be used when stationary, when the engine is switched off to preheat the vehicle and also while driving (e.g. during
the heating phase of the engine).
The auxiliary heater (parking heater) functions in connection with the air-condi-
tioning system or Climatronic.
The auxiliary heating (auxiliary heating) also warms up the engine.
The auxiliary heating (parking heating) warms up the coolant by combusting fuel
from the vehicle tank.
The coolant warms up the air, which (if the blower speed is not set to zero) flows into the passenger compartment.WARNING■ The auxiliary heater (independent vehicle heater) must never be operated in
closed rooms (e.g. garages) – risk of poisoning!■
The auxiliary heating (parking heating) must not be allowed to run during re-
fuelling – risk of fire.
■
The exhaust pipe of the auxiliary heating is located underneath the vehicle.
Therefore, if you wish to operate the auxiliary heating (auxiliary heating), do
not park the vehicle in such a way that the exhaust gases can come into con-
tact with highly flammable materials (e.g. dry grass) or easily inflammable sub-
stances (e.g. spilt fuel) – risk of fire.
CAUTION
■ The running auxiliary heating (auxiliary heating) consumes fuel from the vehicle
tank and automatically controls the filling level. If only a low quantity of fuel is
present in the fuel tank, the auxiliary heater switches itself off.■
The exhaust pipe of the auxiliary heating, which is located on the underside of
the vehicle, must not be clogged and the exhaust flow must not be blocked.
■
If the auxiliary heating is running, the vehicle battery discharges. If the auxiliary
heating and ventilation has been operated several times over a longer period, the
vehicle must be driven a few kilometres in order to recharge the vehicle battery.
Note
■ The auxiliary heating only switches the blower on, if it has achieved a coolant
temperature of approx. 50 °C.■
At low outside temperatures, this can result in a formation of water vapour in
the area of the engine compartment. This is quite normal and is not an operating problem.
97Heating and air-conditioning
Page 101 of 266
■The air inlet in front of the windscreen must be free (e.g. of ice, snow or leaves)
to ensure that the auxiliary heating (aux. heating) operates properly.■
So that warm air can flow into the vehicle interior after switching on the auxili-
ary heating, you must maintain the comfort temperature normally selected by you, leave the fan switched on and leave the air outlet vents in an open position.It is recommended putting the air flow in the position or .
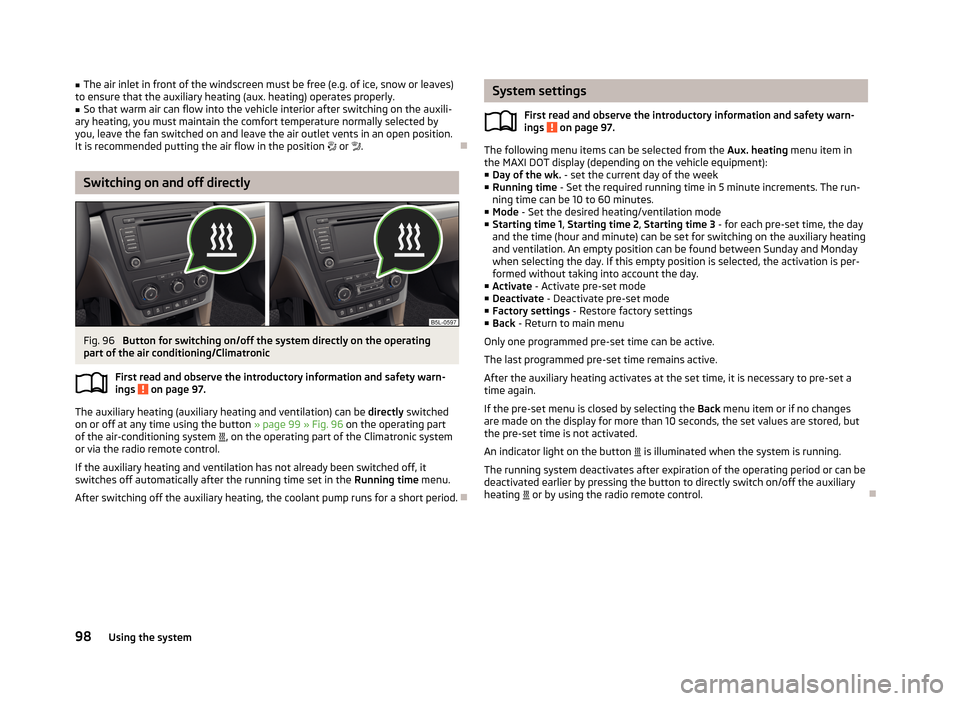
Switching on and off directly
Fig. 96
Button for switching on/off the system directly on the operating
part of the air conditioning/Climatronic
First read and observe the introductory information and safety warn-
ings
on page 97.
The auxiliary heating (auxiliary heating and ventilation) can be directly switched
on or off at any time using the button » page 99 » Fig. 96 on the operating part
of the air-conditioning system
, on the operating part of the Climatronic system
or via the radio remote control.
If the auxiliary heating and ventilation has not already been switched off, it switches off automatically after the running time set in the Running time menu.
After switching off the auxiliary heating, the coolant pump runs for a short period.
System settings
First read and observe the introductory information and safety warn-
ings
on page 97.
The following menu items can be selected from the Aux. heating menu item in
the MAXI DOT display (depending on the vehicle equipment): ■ Day of the wk. - set the current day of the week
■ Running time - Set the required running time in 5 minute increments. The run-
ning time can be 10 to 60 minutes.
■ Mode - Set the desired heating/ventilation mode
■ Starting time 1 , Starting time 2 , Starting time 3 - for each pre-set time, the day
and the time (hour and minute) can be set for switching on the auxiliary heating
and ventilation. An empty position can be found between Sunday and Monday when selecting the day. If this empty position is selected, the activation is per-formed without taking into account the day.
■ Activate - Activate pre-set mode
■ Deactivate - Deactivate pre-set mode
■ Factory settings - Restore factory settings
■ Back - Return to main menu
Only one programmed pre-set time can be active.
The last programmed pre-set time remains active. After the auxiliary heating activates at the set time, it is necessary to pre-set a
time again.
If the pre-set menu is closed by selecting the Back menu item or if no changes
are made on the display for more than 10 seconds, the set values are stored, but
the pre-set time is not activated.
An indicator light on the button
is illuminated when the system is running.
The running system deactivates after expiration of the operating period or can be
deactivated earlier by pressing the button to directly switch on/off the auxiliary
heating
or by using the radio remote control.
98Using the system
Page 102 of 266

Radio remote controlFig. 97
Auxiliary heating (aux. heating):
Radio remote control
First read and observe the introductory information and safety warn-
ings on page 97.
Explanation of graphic » Fig. 97
Aerial
Warning light
Turn on auxiliary heating (auxiliary heating)
Turn off auxiliary heating (auxiliary heating)
The transmitter and the battery are housed in the housing of the remote control. The receiver is located in the interior of the vehicle.
The effective range of the radio remote control when the battery is charged is up
to 600 m. Obstacles between the remote control and the vehicle, bad weather
conditions and a weakening battery can reduce the range significantly.
To switch the auxiliary heating (aux. heating) on or off, hold the remote control
vertical, with the aerial
A
» Fig. 97 pointing upwards. The antenna must not be
covered with the fingers or the palm of the hand during this process.
The auxiliary heating can only be switched on/off safely using the radio remotecontrol, if the distance between the radio remote control and the vehicle is at
least 2 m.
ABAfter pressing the button, the warning light in the remote control gives the
user different kinds of feedback:Display warning light B » Fig. 97MeaningLights up green for around 2 seconds.The auxiliary heating has been switch-
ed on.Lights up red for around 2 seconds.The auxiliary heating has been switch-
ed off:Slowly flashes green for around 2 sec- onds.The ignition signal was not received.Quickly flashes green for around 2 sec-
onds.The auxiliary heating is blocked, e. g.
because the tank is nearly empty or
there is a fault in the auxiliary heating.Flashes red for around 2 seconds.The switch off signal was not received.Lights up orange for around 2 seconds,
then green or red.The battery is weak, however the
switching on or off signal was received.Lights up orange for around 2 seconds,
then flashes green or red.The battery is weak, however the
switching on or off signal was not re-
ceived.Flashes orange for around 5 seconds.The battery is discharged, however the
switching on or off signal was not re-
ceived.
Replace the battery » page 231.
CAUTION
The radio remote control comprises electronic components and must therefore be
protected against water, severe impacts and direct sunlight.
99Heating and air-conditioning
Page 127 of 266

After emergency stop of the ignition, the steering is unlocked.
Brakes
Introduction
This chapter contains information on the following subjects:
Information on braking
124
Handbrake
125WARNING■ Greater physical effort is required for braking when the engine is switched
off – risk of accident!■
During the braking procedure on a vehicle with manual transmission, when
the vehicle is in gear and at low revs, press the clutch pedal. Otherwise, the
function of the brake booster may be impaired – risk of accident!
■
Never leave children unattended in the vehicle. The children might, for ex-
ample, release the handbrake or take the vehicle out of gear. The vehicle could then start to move – risk of accident!
WARNINGIn the event of damage occurring to the standard fitted front spoiler or the
retrofitting of another front spoiler, wheel hubs etc. » page 184, Service work,
adjustments and technical alterations , It must be ensured that the air supply
to the front brakes is not impaired. The front brakes may overheat which can
have a negative impact on the functioning of the braking system – risk of acci- dent!
CAUTION
■ Observe the recommendations on the new brake pads » page 130.■Never let the brakes slip with light pressure on the pedal if braking is not neces-
sary. This causes the brakes to overheat and can also result in a longer braking distance and excessive wear.
Information on braking
First read and observe the introductory information and safety warn-
ings
on page 124.
If the brakes are applied in full and the control unit for the braking system consid-
ers the situation to be dangerous for the following traffic, the brake light flashes
automatically.
After the speed was reduced below around 10 km/h or the vehicle was stopped,
the brake light stops flashing and the hazard warning light system switches on.
The hazard warning light system is switched off automatically after accelerating
or driving off again.
Before driving a long distance at a steep incline, reduce speed and shift into the
next lowest gear. As a result, the braking effect of the engine will be used, reduc- ing the load on the brakes. Any additional braking should be completed intermit-tently, not continuously.
Wear-and-tear
The wear of the brake pads is dependent on the operating conditions and driving style.
The brake pads wear more quickly if a lot of journeys are completed in towns and over short distances or if a very sporty style of driving is adopted.
If operated under severe conditions , the thickness of the brake pads must be
checked by a specialist garage between service appointments as well.
Wet roads or road salt
The performance of the brakes can be delayed as the brake discs and brake pads may be moist or have a coating of ice or layer of salt on them in winter. The
brakes are cleaned and dried by applying the brakes several times.
Corrosion
Corrosion on the brake discs and dirt on the bake pads occur if the vehicle has
been parked for a long period and if you do not make much use of the braking
system. The brakes are cleaned and dried by applying the brakes several times.
Faults in the brake surface
If it is found that the braking distance has suddenly become longer and that the
brake pedal can be depressed further, the brake system may be faulty.
Visit a specialist garage immediately and adjust your style of driving appropriate-ly, as you will not know the exact extent of the damage.
124Driving
Page 136 of 266

It is quite normal that a new engine has a higher oil consumption at first, and rea-ches its lowest level only after a certain running in time. The oil consumption of a
new vehicle can therefore only be correctly assessed after driving about 5 000 km.
For the sake of the environment
■ Additional improvements to the fuel economy can be made by using synthetic
high-lubricity oils.■
Regularly check the ground under the vehicle. Have your vehicle inspected by a
specialist garage if you find any stains caused by oil or other fluids on the ground.
Note
We recommend that your vehicle be serviced on a regular basis by a ŠKODA serv- ice partner.
Saving electrical energy
First read and observe the introductory information and safety warn-ings
on page 130.
When the engine is running, the alternator generates and supplies electrical pow-
er. If more electrical components of the electrical system are switched on, more
fuel is needed to operate the alternator. We therefore recommend switching off
electrical components if these are no longer required.
Environmental compatibility
First read and observe the introductory information and safety warn-ings
on page 130.
Environmental protection has played a major role in the design, material selection
and production of your new ŠKODA. Particular emphasis has been placed on the
following points.
Design measures › Joints designed to be easily detached.
› Simplified disassembly due to the modular structure system.
›
Improved purity of different classes of materials.
› Identification of all plastic parts in accordance with VDA Recommendation 260.
› Reduced fuel consumption and exhaust emission CO
2.
› Minimum fuel leakage during accidents.
› Reduced noise.
Choice of materials › Extensive use of recyclable material.
› Air conditioning filled with CFC-free refrigerant.
› No cadmium.
› No asbestos.
› Reduction in the “vaporisation” of plastics.
Manufacture › Solvent-free cavity protection.
› Solvent-free protection of the vehicle for transportation from the production
plant to the customer.
› The use of solvent-free adhesives.
› No CFCs used in the production process.
› Without use of mercury.
› Use of water-soluble paints.
Trade-in and recycling of old cars
ŠKODA meets the requirements of the brand and its products with regard to pro-
tecting the environment and the preserving resources. All new ŠKODA vehicles
can be utilized up to 95 % and always 1)
be returned.
In a lot of countries sufficient trade-in networks have been created, where you can trade-in your vehicle. After you trade-in your vehicle, you will receive a confir- mation stating the recycling in accordance with environmental regulations.
Note
You can find more detailed information about the trade-in and recycling of old
cars from a specialist garage.1)
Subject to fulfilment of the national legal requirements.
133Starting-off and Driving
Page 143 of 266

Activation / deactivationFig. 118
OFF ROAD button
First read and observe the introductory information and safety warn-ings on page 138.
Activating
›
Press the symbol button
» Fig. 118 .
The symbol in the button comes on.
Deactivating
›
Press the symbol key
» Fig. 118 or turn the ignition off.
The symbol in the button is no longer illuminated.
Note
If the engine stalls while driving and is started again within 30 seconds, then OFF
ROAD mode will be automatically activated.
Parking aid
Introduction
This chapter contains information on the following subjects:
Function
141
Activation/deactivation
141WARNING■ The parking aid is not a substitute for the driver paying proper attention and
it is always the driver's responsibility to take care when reversing the vehicle
or carrying out similar manoeuvres. Pay particular attention to small children
and animals as they may not be recognised by the system sensors.■
Before reversing, you should make sure that there are no small obstacles,
such as rocks, thin posts, trailer drawbars etc. in front or behind your vehicle.
Such obstacles may not be recognised by the system sensors.
■
Under certain circumstances, surfaces of certain objects and types of cloth-
ing cannot reflect the system signals. Thus, these objects or people who wear such clothing are not recognised by the System sensors.
■
External sound sources can have a detrimental effect on the system. Under
adverse conditions, this can cause objects or people to not be recognized by
the system.
CAUTION
■ If a warning signal sounds for about 3 seconds after activating the system and
there is no obstacle close to your car, this indicates a system fault. The fault is
also indicated by the symbol flashing in the button » Fig. 119 on page 141 .
Seek help from a specialist garage.■
The sensors must be kept clean (free of ice, etc.) to enable the system to oper-
ate properly.
■
The system function may be limited under adverse weather conditions (heavy
rain, water vapour, very low or high temperatures etc.).
■
Additionally installed modules such as bicycle carriers can impair the function of
the parking aid.
Note
■ The signal tones for front obstacle recognition are factory-set to be higher than
for rear obstacle recognition.■
If not all fields around the vehicle are shown after the system is activated, the
vehicle will need to be moved a few metres forwards or in reverse.
■
The sound of the park-assist can be adjusted via the MAXI DOT display in the
Assistants menu option » page 29.
■
If the system is activated and the selector lever of the automatic gearbox is in
position P (the vehicle cannot move), the warning tone is interrupted and no ob-
stacles are displayed.
140Driving
Page 145 of 266
This chapter contains information on the following subjects:
Orientation lines and monitored area142
Switching on/off
143
Optical Parking Assistant (hereinafter only as a system) supports the driver when
parking and manoeuvring.
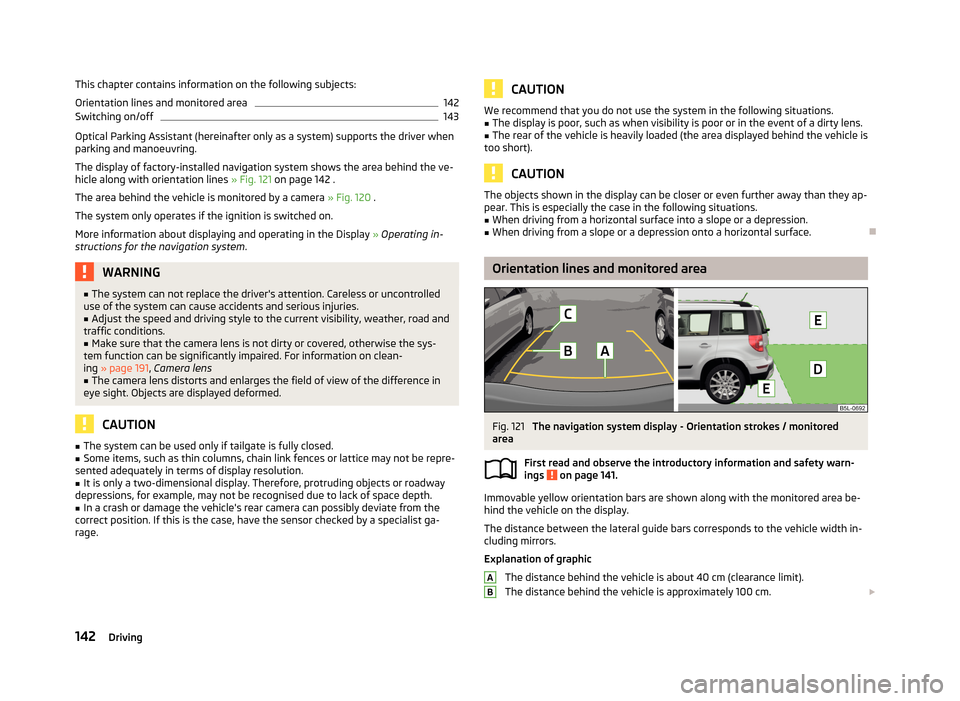
The display of factory-installed navigation system shows the area behind the ve- hicle along with orientation lines » Fig. 121 on page 142 .
The area behind the vehicle is monitored by a camera » Fig. 120 .
The system only operates if the ignition is switched on. More information about displaying and operating in the Display » Operating in-
structions for the navigation system .
WARNING■
The system can not replace the driver's attention. Careless or uncontrolled
use of the system can cause accidents and serious injuries.■
Adjust the speed and driving style to the current visibility, weather, road and
traffic conditions.
■
Make sure that the camera lens is not dirty or covered, otherwise the sys-
tem function can be significantly impaired. For information on clean-
ing » page 191 , Camera lens
■
The camera lens distorts and enlarges the field of view of the difference in
eye sight. Objects are displayed deformed.
CAUTION
■ The system can be used only if tailgate is fully closed.■Some items, such as thin columns, chain link fences or lattice may not be repre-
sented adequately in terms of display resolution.■
It is only a two-dimensional display. Therefore, protruding objects or roadway
depressions, for example, may not be recognised due to lack of space depth.
■
In a crash or damage the vehicle's rear camera can possibly deviate from the
correct position. If this is the case, have the sensor checked by a specialist ga-
rage.
CAUTIONWe recommend that you do not use the system in the following situations.■The display is poor, such as when visibility is poor or in the event of a dirty lens.■
The rear of the vehicle is heavily loaded (the area displayed behind the vehicle is
too short).
CAUTION
The objects shown in the display can be closer or even further away than they ap-
pear. This is especially the case in the following situations.■
When driving from a horizontal surface into a slope or a depression.
■
When driving from a slope or a depression onto a horizontal surface.
Orientation lines and monitored area
Fig. 121
The navigation system display - Orientation strokes / monitored
area
First read and observe the introductory information and safety warn-
ings
on page 141.
Immovable yellow orientation bars are shown along with the monitored area be-
hind the vehicle on the display.
The distance between the lateral guide bars corresponds to the vehicle width in-
cluding mirrors.
Explanation of graphic The distance behind the vehicle is about 40 cm (clearance limit).The distance behind the vehicle is approximately 100 cm.
AB142Driving
Page 153 of 266

The automatic start procedure takes place again. The warning symbol goes
out.
Further information on automatic transmission Engine shut down takes place when the selector lever is in positions P, D , S and N
and in Tiptronic mode.
When the selector lever is in position P the engine remains shut down after you
release the brake pedal. Start the engine by pressing the gas pedal or by moving
the selector lever into a different mode and releasing the brake pedal.
If the selector lever is moved into position R during the STOP phase , the engine
will re-start.
No automatic engine shutdown takes place when the vehicle is moving at low
speed (e.g. during a traffic jam or when tuning) and remains stationary after pressing the brake pedal lightly. Automatic engine shutdown takes place if you
press the brake pedal down with more force.
Operating conditions of the system
First read and observe the introductory information and safety warn-ings
on page 149.
The START-STOP system is very complex. Some of the procedures are hard to check without servicing.
No engine shut down is carried out
Before each STOP phase, the system checks whether certain conditions have
been met. No engine shut down takes place in the following situations.
› The engine has not reached the minimum temperature for START STOP mode.
› The temperature inside the vehicle has not reached the desired temperature
set in the air-conditioning system/heating.
› The external temperature is very low/high.
› The intensive windscreen heater (Climatronic) or windscreen heater/ventilation
is switched on with the maximum air temperature setting (manual air condition-
ing system).
› The parking aid/Park Assist is switched on.
› The charge state of the vehicle battery is too low.
› The stationary vehicle is on a steep slope or a steep downhill section.
› The idling speed is too high.
› The steering angle is too large (manoeuvring).
› The selector lever position
R is selected (e.g. when parking).
The warning symbol appears in the instrument cluster display.
The automatic start procedure takes place again
During the STOP phase, the engine fires up without any active driver intervention, e.g. in the following situations.
› The vehicle begins to roll, e.g. on a slope.
› The difference between the temperature setting of the air-conditioning sys-
tem/heating and the temperature of the interior is too large.
› The intensive windscreen heater (Climatronic) or windscreen heater/ventilation
is switched on with the maximum air temperature setting (manual air condition-
ing system).
› The brake pedal was pressed several times (the pressure in the braking system
is too low).
› The charge state of the vehicle battery is too low.
› The current consumption is too high.
Manually activating/deactivating the system
Fig. 125
Button for the START-STOP sys-
tem
First read and observe the introductory information and safety warn-
ings on page 149.
Activation/deactivation
›
Press the symbol button
» Fig. 125 .
When start-stop mode is deactivated, the indicator light in the button lights up.
Note
If the system is deactivated during the STOP phase, the automatic start proce-
dure takes place.
150Driving