2013 SKODA OCTAVIA ESP
[x] Cancel search: ESPPage 6 of 30
Introductory information
Important notes
Introduction
This chapter contains information on the following subjects:
Declaration of conformity
4
Warning statement
4
Component protection
4
This Owner's Manual describes all possible equipment variants without identify-
ing them as special equipment, model variants or market-dependent equipment.
Consequently, this vehicle does not need to contain all of the equipment compo-
nents described in these operating instructions.
The level of equipment of your vehicle refers to your purchase contract of the ve-
hicle. For more information, please contact your ŠKODA Partner.
The illustrations in this manual can differ in minor details from your vehicle; they
are only intended for general information.
WARNING■ Concentrate fully at all times on your driving! As the driver you are fully re-
sponsible for the operation of your vehicle.■
Only use the device in a way that ensures that you are in full control of your
vehicle in every traffic situation - there is a risk of accident!
■
Adjust the volume to ensure that acoustic signals from outside, e.g. sirens
from vehicles which have the right of way, such as police, ambulance and fire
brigade vehicles, can be heard at all time.
■
High volumes can cause hearing damage.
Declaration of conformity
First read and observe the introductory information and safety warn-
ings
on page 4.
ŠKODA AUTO a.s. hereby declares that the ŠKODA Infotainment systems meet the
basic requirements and additional provisions of Directive 1999/5/EC.
Warning statement First read and observe the introductory information and safety warn-ings
on page 4.
FCC § 15.19 Labelling requirements
This device complies with part 15 of the FCC Rules and Industry Canada license-
exempt RSS standard(s). Operation is subject to the following two conditions:
(1) This device may not cause harmful interference, and(2) This device must accept any interference received, including interference that
may cause undesired operation.
FCC § 15.21 Information to user
Changes or modifications not expressly approved by the party responsible for
compliance could void the user’s authority to operate the equipment.
INDUSTRY CANADA Statements
Le présent appareil est conforme aux CNR d'Industrie Canada applicables aux
appareils radio exempts de licence. L'exploitation est autorisée aux deux
conditions suivantes : (1) l'appareil ne doit pas produire de brouillage, et (2) l'utilisateur de l'appareil doit accepter tout brouillage radioélectrique subi, mêmesi le brouillage est susceptible d'en compromettre le fonctionnement.
Component protection
First read and observe the introductory information and safety warn-
ings
on page 4.
Some electronic control units are factory-equipped with component protection.
The component protection was developed as a protection mechanism for:
4Introductory information
Page 8 of 30
Switching the device on/offFirst read and observe the introductory information given on page 5.›
Press the knob to switch the device on or off.
When the device is switched on, the audio source and operating mode that were active before switching off the device will be restored.
If the vehicle key is pulled out of the ignition lock while the unit is switched on,the unit will switch off automatically. After switching on the ignition, the unit is
turned on automatically.
If the device was switched off using the
knob, then the device will not switch
on automatically after switching on the ignition.
If your vehicle is fitted with the KESSY system, the device will switch off automat-
ically after the engine has been turned off and the door opened.
When the ignition is switched off, the system switches off automatically after ap-prox. half an hour (discharge protection of the vehicle battery).
Adjusting the volume
First read and observe the introductory information given on page 5.
Increase the volume
›
Turn the knob to the right.
Reduce the volume
›
Turn the knob to the left.
Muting
›
Press the MUTE button
or
›
Set the volume to 0 using the knob.
CAUTION
Car speakers may be damaged if playback is too loud or distorted.Note■
The change in volume is displayed on the device display screen.■The corresponding symbol appears in the display when the sound is muted. .■
Some connected sources allow the volume to be changed directly at the source.
■
Excessively high volumes can cause sound resonance in the vehicle.
■
The loudspeakers in the vehicle are designed for a device power output of 4 x
20 W.
Operating the device
Introduction
This chapter contains information on the following subjects:
Operating via the device screen
7
Operating using the buttons on the control lever
7
Operating using the buttons/dials on the multi-function steering wheel -
Audio menu
8
First and foremost, pay attention to the safety instructions » page 4 , Important
notes .
Some features of the device are also displayed in the Maxi DOT display 1)
. Depend-
ing on the vehicle equipment, these features can be operated as follows.
■ Using the buttons on the operating lever » page 7
■ Using the buttons/dials on the multi-function steering wheel » page 8
Note
If the ignition and the side light are switched on, the buttons and dials on the
multifunction steering wheel will also be illuminated.1)
Description of the display in the Maxi DOT display » Owner's Manual , chapter Information system
6Introductory information
Page 9 of 30
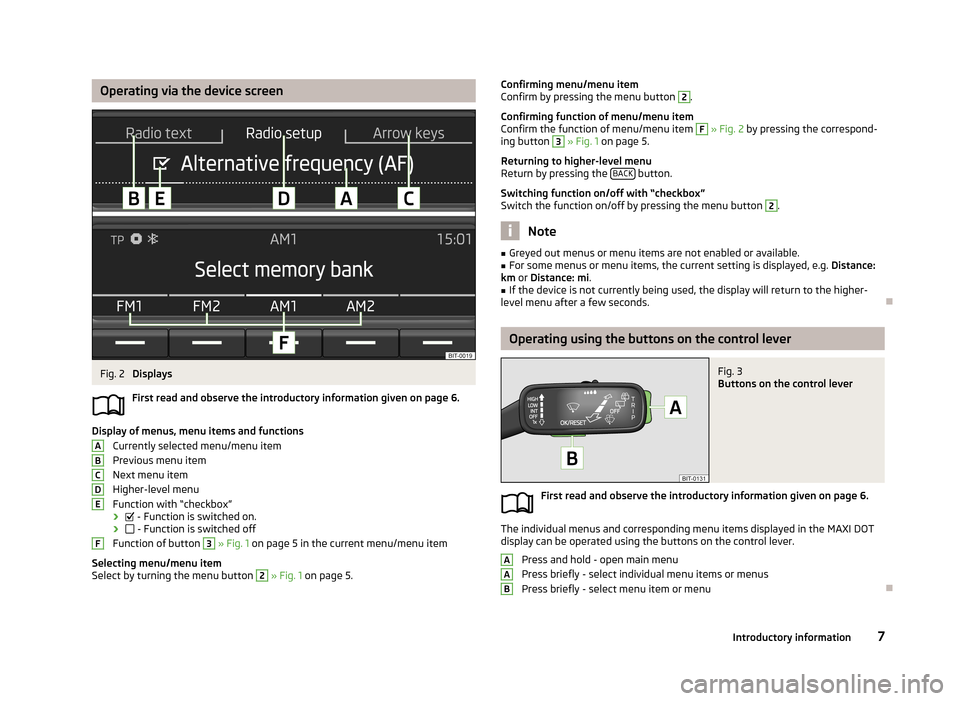
Operating via the device screenFig. 2
Displays
First read and observe the introductory information given on page 6.
Display of menus, menu items and functions Currently selected menu/menu item
Previous menu item
Next menu item
Higher-level menu
Function with “checkbox” ›
- Function is switched on.
›
- Function is switched off
Function of button
3
» Fig. 1 on page 5 in the current menu/menu item
Selecting menu/menu item
Select by turning the menu button
2
» Fig. 1 on page 5.
ABCDEFConfirming menu/menu item
Confirm by pressing the menu button 2.
Confirming function of menu/menu item
Confirm the function of menu/menu item F
» Fig. 2 by pressing the correspond-
ing button
3
» Fig. 1 on page 5.
Returning to higher-level menu
Return by pressing the BACK
button.
Switching function on/off with “checkbox” Switch the function on/off by pressing the menu button
2
.
Note
■ Greyed out menus or menu items are not enabled or available.■For some menus or menu items, the current setting is displayed, e.g. Distance:
km or Distance: mi .■
If the device is not currently being used, the display will return to the higher-
level menu after a few seconds.
Operating using the buttons on the control lever
Fig. 3
Buttons on the control lever
First read and observe the introductory information given on page 6.
The individual menus and corresponding menu items displayed in the MAXI DOT display can be operated using the buttons on the control lever.
Press and hold - open main menu
Press briefly - select individual menu items or menus
Press briefly - select menu item or menu
AAB7Introductory information
Page 15 of 30
If radio stations have already been stored under the preset buttons, then the sta-
tion keys will be overwritten with newly located stations after the automatic sta-
tion search.
Storing stations
Set the desired radio station and press and hold the corresponding button3
» Fig. 1 on page 5 until a beep is heard. The station is stored in the device
memory and its name appears above the corresponding button
3
.
Selecting a frequency band and radio station
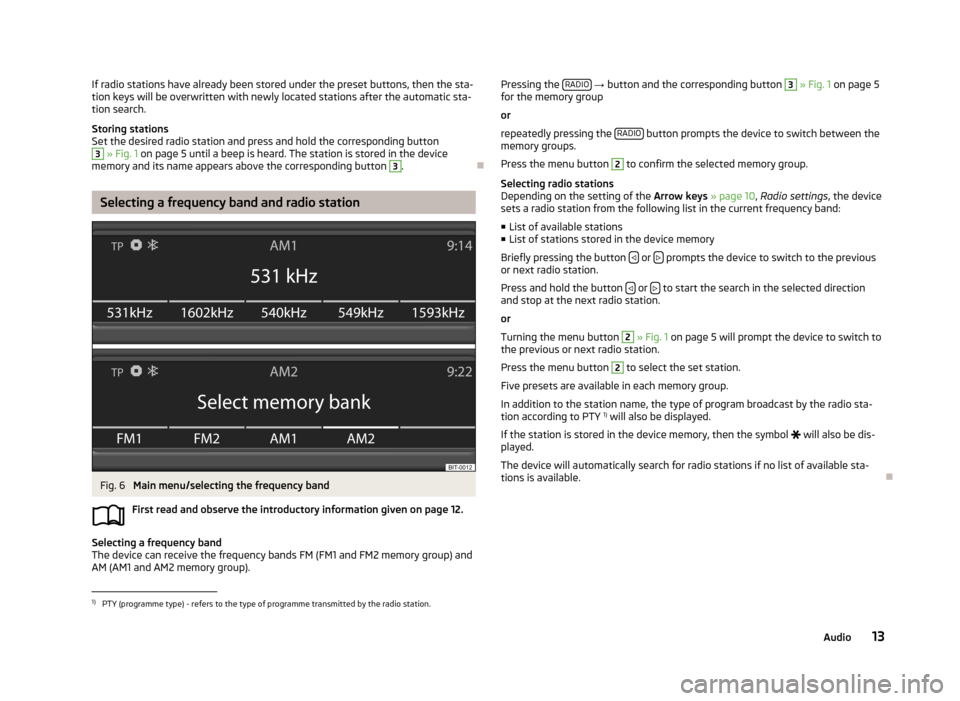
Fig. 6
Main menu/selecting the frequency band
First read and observe the introductory information given on page 12.
Selecting a frequency band
The device can receive the frequency bands FM (FM1 and FM2 memory group) and
AM (AM1 and AM2 memory group).
Pressing the RADIO
→ button and the corresponding button 3 » Fig. 1 on page 5
for the memory group
or
repeatedly pressing the RADIO
button prompts the device to switch between the
memory groups.
Press the menu button
2
to confirm the selected memory group.
Selecting radio stations
Depending on the setting of the Arrow keys » page 10 , Radio settings , the device
sets a radio station from the following list in the current frequency band:
■ List of available stations
■ List of stations stored in the device memory
Briefly pressing the button
or prompts the device to switch to the previous
or next radio station.
Press and hold the button
or to start the search in the selected direction
and stop at the next radio station.
or
Turning the menu button
2
» Fig. 1 on page 5 will prompt the device to switch to
the previous or next radio station.
Press the menu button
2
to select the set station.
Five presets are available in each memory group. In addition to the station name, the type of program broadcast by the radio sta-
tion according to PTY 1)
will also be displayed.
If the station is stored in the device memory, then the symbol
will also be dis-
played.
The device will automatically search for radio stations if no list of available sta- tions is available.
1)
PTY (programme type) - refers to the type of programme transmitted by the radio station.
13Audio
Page 16 of 30
Activating/deactivating traffic programme TPFirst read and observe the introductory information given on page 12.
Certain radio stations transmit traffic reports. The device enables playback of
these traffic reports.
›
Press the RADIO button
→ menu button
2
» Fig. 1 on page 5 → TP.
Screen display
The functionality of the traffic monitoring system is displayed in the screen by the
symbol in conjunction with the station name (e.g. in the station list or preset
list).
If the radio station does not broadcast traffic reports, or if no traffic stations can
be found (due to a general radio reception interruption, for example), then the
symbol is displayed on the screen.
If a radio station is tuned in that does not support traffic reports,
then the most
suitable station is automatically set in the background
in order to ensure the
continuous reception of traffic reports.
The device will function in exactly the same way with the selected
frequency
band.
When playing in Media mode, the most recently selected radio station continues
to be received in the background if this station supports traffic reports.
Interrupting/stopping the traffic programme
When the traffic programme is being received, Traffic announcement is displayed
on the device display screen along with the following options:
■ TP off - Switches off the traffic announcement currently being broadcast
■ Cancel - Deactivates the traffic programme function
Media
Introduction
This chapter contains information on the following subjects:
Selecting sources
15
Supported sources and file formats
15
Operation
16Adjusting additional functions17USB and AUX inputs17
First and foremost, pay attention to the safety instructions » page 4 , Important
notes .
The device allows you to play audio files in various formats and to connect differ-
ent source types » page 15.
When the source has been connected, the device starts to automatically play au- dio files in alphabetical order.
WARNING■ Never place external sources on the console panel. They could be thrown in-
to the passenger compartment during sudden driving manoeuvres, thereby in-
juring the occupants.■
Never place external sources close to the airbags. They could be thrown into
the passenger compartment when the airbags are deployed, injuring the oc-
cupants.
■
Never hold external sources in your hand or on your knees while driving.
They could be thrown into the passenger compartment during sudden driving
manoeuvres, thereby injuring the occupants.
■
Always route the connection cable for the external source such that it does
not restrict you when driving.
CAUTION
Do not store any important data on the connected external sources. ŠKODA as-
sumes no responsibility for lost or damaged files or connected devices.
Note
See the owner's manual of the specific manufacturer for instructions on operat-
ing the external source.
14Audio
Page 17 of 30
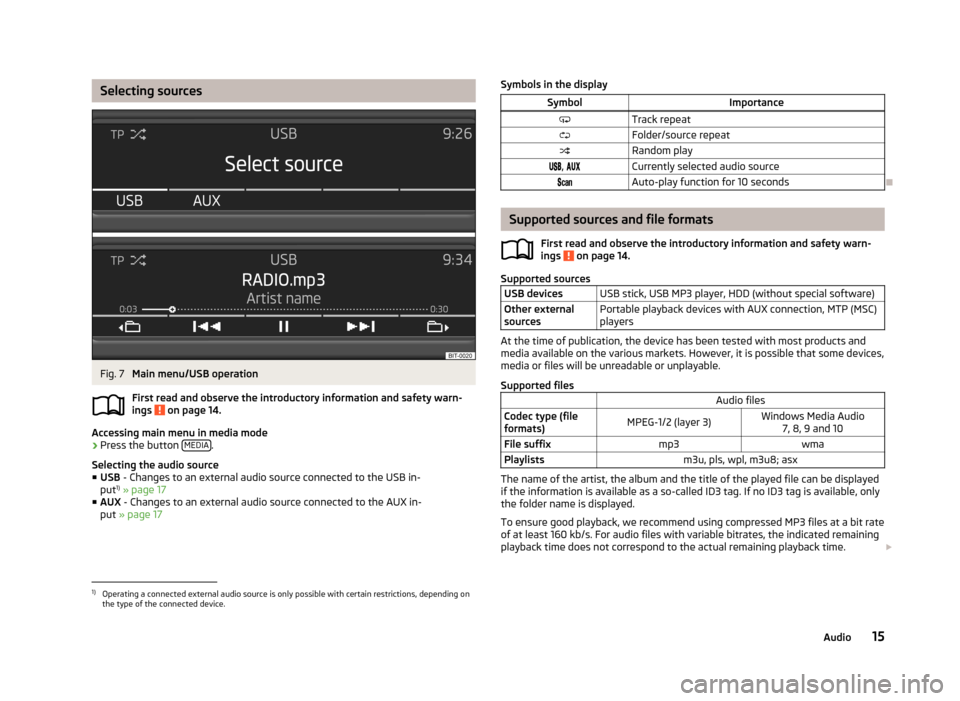
Selecting sourcesFig. 7
Main menu/USB operation
First read and observe the introductory information and safety warn-
ings
on page 14.
Accessing main menu in media mode
›
Press the button MEDIA.
Selecting the audio source ■ USB - Changes to an external audio source connected to the USB in-
put 1)
» page 17
■ AUX - Changes to an external audio source connected to the AUX in-
put » page 17
Symbols in the displaySymbolImportanceTrack repeatFolder/source repeatRandom play, Currently selected audio sourceAuto-play function for 10 seconds
Supported sources and file formats
First read and observe the introductory information and safety warn-
ings
on page 14.
Supported sources
USB devicesUSB stick, USB MP3 player, HDD (without special software)Other external
sourcesPortable playback devices with AUX connection, MTP (MSC)
players
At the time of publication, the device has been tested with most products and
media available on the various markets. However, it is possible that some devices,
media or files will be unreadable or unplayable.
Supported files
Audio filesCodec type (file
formats)MPEG-1/2 (layer 3)Windows Media Audio 7, 8, 9 and 10File suffixmp3wmaPlaylistsm3u, pls, wpl, m3u8; asx
The name of the artist, the album and the title of the played file can be displayed
if the information is available as a so-called ID3 tag. If no ID3 tag is available, only the folder name is displayed.
To ensure good playback, we recommend using compressed MP3 files at a bit rate
of at least 160 kb/s. For audio files with variable bitrates, the indicated remaining
playback time does not correspond to the actual remaining playback time.
1)
Operating a connected external audio source is only possible with certain restrictions, depending on
the type of the connected device.
15Audio