2013 Peugeot 807 ECU
[x] Cancel search: ECUPage 9 of 234

4
7a
7b7b 2
4
7a5
5
2
7
1
FAMILIARISATIO
N
Exterior
Audible and/or visual rear
parking assistance. 87
Tailgate
Locking and unlocking by
remote control. Press the
handle and raise the tailgate.
Parking assistance 25
Transverse roof bars
Release the four levers,
move your bars then secure
the levers. 105
Spare wheel
Raise the wheel to be
repaired by means of the
cable until it is fl ush against
the fl oor. Close the cover on
the access opening securely. 117
Wheelbrace.
Jack box.
Towing eye.
11 7
Page 17 of 234

4
244
7
6
4 3 3
415
1
FAMILIARISATIO
N
Interior
Battery
11 6
Child monitoring mirror
102
Disarming the passenger's front airbag
96
Opening control
Sliding side doors from the
inside. 24
Handbrake
86
Bonnet opening controls
The bonnet opening control
is a red handle under a
cover. Release the bonnet
from inside the vehicle then
go to the front and insert
your hand under the badge
to open and raise the bonnet,
place the strut in its location
securely. 111
Safety auto-reverse.
97 102 84 83
Electric windows/Safety auto-reverse
CHILD SAFETY
Monitoring mirror.
Child seats. On a steep gradient,
guide the side door
manually to assist
closing.
closing
Page 79 of 234

EASE OF USE and COMFORT
3
77
Practical information
1. Driver's upper glove box
FRONT INTERIOR LAYOUT
This is fi tted with a lock.
To open the glove box, lift the handle.
The light comes on when the cover is
opened.
It contains three sockets for the
connection of video equipment and
access to the fascia fuse box.
It includes special compartments for
storing maps, a packet of cigarettes,
an A4 document etc.
RCA sockets.
This permits the connection of a mobile
telephone charger, a baby's bottle
warmer, etc.
To open, press the button.
To close, press the cover.
It includes special compartments for
storing a pen, a mobile telephone,
coins or tokens and credit cards.
2. Audio equipment concealing fl ap
Lower the fl ap fully to lock it in place.
Press the fl ap to raise it.
3. Central storage compartment
4. Passenger's upper glove box
To open, press the button.
To close, press the cover.
It includes special compartments for
storing a pair of spectacles, keys, fi ve
CDs and four audio cassettes or nine
audio CDs.
5. Passenger's lower glove box
6. Lighter or 12 V socket for
accessories (120 W)
12. Mat fi tting/removal
When removing the front mat, push
the seats as far back as possible and
remove the fi xings.
When refi tting, position the mat
correctly on the pins and clip the
fi xings. Check that the mat is secured
correctly.
To prevent the mat from becoming
caught under the pedals:
- only use mats suited to the fi xings
already present in the vehicle.
It
is imperative that these fi xings are
used.
- never fi t one mat on top of another.
7. Cooled compartment
It can hold up to three cans.
Slide the closer, located on the right, to
open (upwards) or close (downwards)
the air inlet.
8. Can holder and ashtray
This retractable and lit support contains
up to two can holders, a removable
ashtray and a location for the lighter
when it is used as a 12 V socket
(120 W).
9. Storage compartment or
additional telematics control
The storage compartment must not be
used as an ashtray.
If fi tted on your vehicle, the additional
telematics control is located on the
centre console.
10. Storage compartment
11. Door tray with space for a bottle
of water
Bluetooth.
Page 81 of 234

EASE OF USE and COMFORT
3
79
Practical information
REAR INTERIOR LAYOUT
5. Storage compartment
11. Luggage retaining net "octopus"
position
Secure the net's four hooks in their
stowing rings on the fl oor.
1. Access handle
2. Grab handle and coat hook
3. Door tray with storage for a can
and a bottle of water or for the
portable bin with ashtray
4. High load retaining net fastenings
Open the covers of the upper
fastenings in row 3.
Install the ends of the metal bar in
these fastenings.
Secure the two tray strap hooks in the
stowing rings on the fl oor.
Pull the two straps taut.
Secure the two hooks on the elastic
parts of the tray in these rings.
The rings are located directly below the
corresponding upper fastenings.
6. Can holder
7. Storage compartment
8. Bottle holder or portable bin with
ashtray
9. Luggage retaining net "hammock"
position fastenings
Fold the net in two.
Secure the two centre hooks in the
stowing rings on the fl oor.
Secure the net's remaining four hooks
on the tailgate pillars.
10.
12 V socket for accessories (120 W)
This permits the connection of a mobile
telephone charger, a baby's bottle
warmer, ...
12. Load space cover
(5 seat version)
To install it:
- position one end of the roller in
row 2,
- compress the opposite end of the
roller and position it,
- release it to allow it to engage,
- unroll the cover as far as the pillars,
- secure the two hooks on the pillars,
To remove it:
- pull the cover towards you to
detach it from its fastenings,
- return the cover into its roller,
- compress it and remove it from its
support in row 2.
13. Rear shelf with umbrella holder
(7-8 seat version)
To remove the shelf:
- pull it rearward
- lift it slightly, then remove it
To install it:
- tilt it forwards slightly,
- push to engage it in its fastenings.
Page 87 of 234

SAFETY
85
Improved safety and security
4
IMPROVED SAFETY AND SECURITY
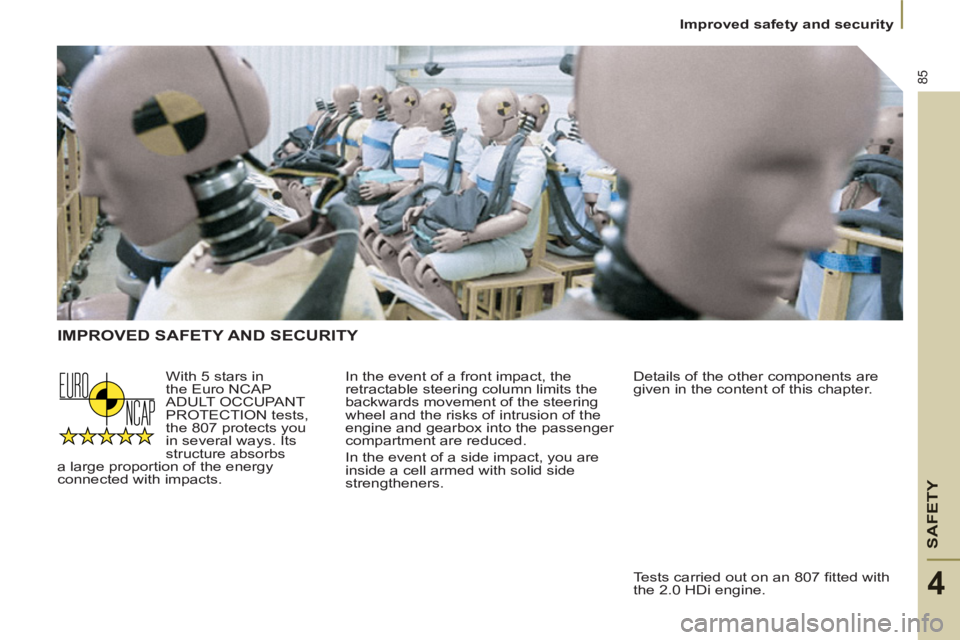
In the event of a front impact, the
retractable steering column limits the
backwards movement of the steering
wheel and the risks of intrusion of the
engine and gearbox into the passenger
compartment are reduced.
In the event of a side impact, you are
inside a cell armed with solid side
strengtheners. With 5 stars in
the Euro NCAP
ADULT OCCUPANT
PROTECTION tests,
the 807 protects you
in several ways. Its
structure absorbs
a large proportion of the energy
connected with impacts.
Tests carried out on an 807 fi tted with
the 2.0 HDi engine.
Details of the other components are
given in the content of this chapter.
Page 93 of 234

SAFETY
91
Seat belts
4
FRONT AND REAR SIDE SEAT
BELTS
The front seats and the rear side seats
of row 2 are fi tted with pre-tensioners
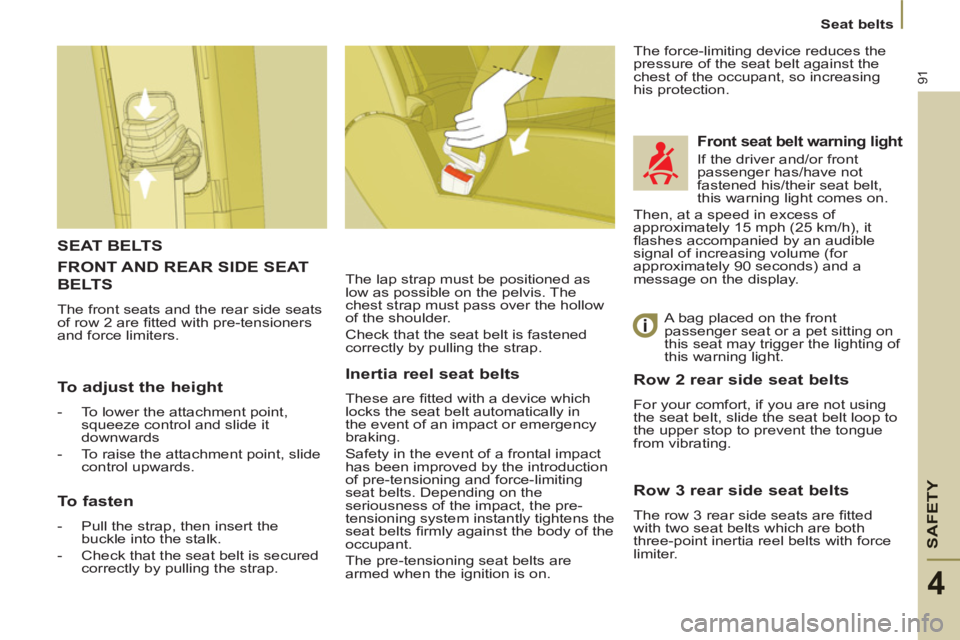
and force limiters. The lap strap must be positioned as
low as possible on the pelvis. The
chest strap must pass over the hollow
of the shoulder.
Check that the seat belt is fastened
correctly by pulling the strap. The force-limiting device reduces the
pressure of the seat belt against the
chest of the occupant, so increasing
his protection.
A bag placed on the front
passenger seat or a pet sitting on
this seat may trigger the lighting of
this warning light.
SEAT BELTS
Front seat belt warning light
If the driver and/or front
passenger has/have not
fastened his/their seat belt,
this warning light comes on.
Then, at a speed in excess of
approximately 15 mph (25 km/h), it
fl ashes accompanied by an audible
signal of increasing volume (for
approximately 90 seconds) and a
message on the display.
Row 2 rear side seat belts
For your comfort, if you are not using
the seat belt, slide the seat belt loop to
the upper stop to prevent the tongue
from vibrating.
To adjust the height
-
To lower the attachment point,
squeeze control and slide it
downwards
-
To raise the attachment point, slide
control upwards.
To fasten
-
Pull the strap, then insert the
buckle into the stalk.
-
Check that the seat belt is secured
correctly by pulling the strap.
Inertia reel seat belts
These are fi tted with a device which
locks the seat belt automatically in
the event of an impact or emergency
braking.
Safety in the event of a frontal impact
has been improved by the introduction
of pre-tensioning and force-limiting
seat belts. Depending on the
seriousness of the impact, the pre-
tensioning system instantly tightens the
seat belts fi rmly against the body of the
occupant.
The pre-tensioning seat belts are
armed when the ignition is on.
Row 3 rear side seat belts
The row 3 rear side seats are fi tted
with two seat belts which are both
three-point inertia reel belts with force
limiter.
Page 94 of 234

92
Seat belts
Depending on the nature and
seriousness of any impact, the
pretensioning device may be triggered
before and independently of infl ation
of the air bags. It instantly tightens
the seat belts against the body of the
occupants.
Triggering of the pretensioners is
accompanied by a slight discharge
of harmless smoke and a noise, due
to the activation of the pyrotechnic
cartridge incorporated in the system.
The force limiter reduces the pressure
of the seat belt against the body of the
occupants.
The pretensioning seat belts are active
when the ignition is switched on.
The inertia reels are fi tted with a device
which automatically locks the strap in
the event of a collision or emergency
braking or if the vehicle rolls over.
You can unfasten the seat belt by
pressing the red button on the buckle.
Guide the seat belt after unfastening. The upper part of the seat belt should
be positioned in the hollow of the
shoulder.
The lap part should be placed as low
as possible on the pelvis.
Do not invert the seat belt buckles as
they will not fulfi l their role completely.
If the seats are fi tted with armrests, the
lap part of the seat belt should always
pass under the armrest.
Check that the seat belt is fastened
correctly by pulling the strap fi rmly.
Good practice
The driver must ensure that
passengers use the seat belts correctly
and that they are all strapped in
securely before moving off.
Wherever you are seated in the
vehicle, always fasten your seat belt,
even for short journeys.
The seat belts are fi tted with an inertia
reel which automatically adjusts the
length of the strap to your size.
Do not use accessories (clothes pegs,
clips, safety pins, etc.) which permit a
clearance with the seat belt straps.
Ensure that the seat belt is rolled up
correctly after use.
After folding or moving a seat or a rear
bench seat, ensure that the seat belt is
rolled up correctly and that the buckle
is ready to accommodate the tongue. To install the seat belt, move the tongue
into position to insert it into the buckle
Row 2 and 3 rear centre seat
belts
The row 2 rear centre seat and the
rear bench seat centre seat have an
integrated three-point inertia reel seat
belt.
The air bag warning light comes on
if the pretensioners are triggered.
Consult a PEUGEOT dealer.
In order to be effective, a seat belt
must:
- restrain one person only,
- must not be twisted, check by
pulling in front of you with an even
movement,
- be tightened as close to the body
as possible.
Recommendations for children:
- use a suitable child seat if the
passenger is less than 12 years old
or shorter than one metre fi fty,
- never allow a child to travel on
your lap, even with the seat belt
fastened.
For further information regarding child
seats, refer to the "Children on board"
section of chapter 4.
In accordance with current safety
regulations, your PEUGEOT dealer
guarantees all work or any checks,
from testing to maintenance, on your
seat belt equipment.
Have the seat belts checked regularly
(even after a minor impact) by a
PEUGEOT dealer: they must not show
any signs of wear, cutting or fraying
and they must not be transformed or
modifi ed.
Clean the seat belt straps with soapy
water or a textile cleaning product, sold
by PEUGEOT dealers.
Page 96 of 234

94
Airbags
Good practice
If your vehicle is fi tted with a front
passenger air bag, side air bags or
curtain air bags, observe this good
practice.
Sit in a normal upright position.
Wear a correctly adjusted seat belt.
Do not leave anything between the
occupants and the air bags (a child,
pet, object...). This could hamper the
operation of the air bags or injure the
occupants.
After an accident or if the vehicle has
been stolen or broken into, have the air
bag systems checked.
All work on the air bag system is strictly
forbidden unless it is carried out by
qualifi ed personnel of the PEUGEOT
network.
Front air bags
Do not drive holding the steering wheel
by its spokes or resting your hands on
the centre part of the wheel.
Passengers must not place their feet
on the fascia.
Smoke as little as possible as
deployment of the air bags can cause
burns or the risk of injury from a
cigarette or pipe.
Never remove or pierce the steering
wheel or hit it violently.
Side air bags
Only put approved covers on the seats.
These will not hinder infl ation of the
side air bags. Consult a PEUGEOT
dealer.
Do not fi x or glue anything to the seat
backs. This could cause injury to the
chest or arms when the side air bag
infl ates.
Do not sit with the upper part of the
body any nearer to the door than
necessary.
Curtain air bags
Do not fi x or glue anything to the roof.
This could cause injury to the head
when the curtain air bag infl ates.
Do not remove the grab handles
installed on the roof, they play a part in
securing the curtain air bags.
Even if all of the precautions
mentioned are observed, a risk of
injury or of minor burns to the head,
chest or arms when an air bag is
triggered cannot be ruled out. In fact,
the bag infl ates almost instantly (within
a few milliseconds) then defl ates within
the same time discharging the hot gas
via openings provided for this purpose.