Page 193 of 394
When thebutton is pressed twice with a
compact disc loaded, the compact disc will be
ejected further for easier CD removal. If the disc
is not removed within 20 seconds, the disc will
reload.
Additional features
For more information about the iPod® player
available with this system, see “iPod® player
operation without Navigation System” in this sec-
tion.
For more information about the USB interface
available with this system, see “USB interface
(models without Navigation System)” in this sec-
tion.
For more information about the Bluetooth® audio
interface available with this system, see
“Bluetooth® streaming audio without Navigation
System” in this section.
For more information about the Pandora® audio
feature available with this system, see “Pan-
dora® audio” in this section.
1.CD eject button
2. FM-AM button
3. AUX button
4. CD insert slot
5. BACK button 6. TUNE knob / AUDIO button
7. Display screen
8. ON-OFF button / VOL (volume)
9.
Backward seek button and
Forward seek button
Type B
LHA2500
4-48Monitor, climate, audio, phone and voice recognition systems
Page 194 of 394
10. CD button
11. XM button**No satellite radio reception is available
when the XM button is pressed to access
satellite radio stations unless optional
satellite receiver and antenna are installed
and an SiriusXM Satellite Radio service
subscription is active. Satellite radio is
not available in Alaska, Hawaii and Guam.
FM/AM/SAT RADIO WITH
COMPACT DISC (CD) PLAYER (Type
B) (if so equipped)
For all operation precautions, see “Audio opera-
tion precautions” in this section.
Audio main operation
VOL (volume) / ON-OFF button:
Place the ignition switch in the ACC or ON
position and press the ON-OFF button while the
system is off to call up the mode (radio, CD, AUX,
Bluetooth® audio USB or iPod®) that was play-
ing immediately before the system was turned off.
To turn the system off, press the ON-OFF button.
Turn the VOL (volume) control knob to adjust the
volume. This vehicle may be equipped with Speed Sen-
sitive Volume. When this feature is active, the
audio volume changes as the driving speed
changes.
Audio settings:1. Press the MENU button.
2. Select the “Settings” key.
3. Select the “Audio” key.
Use the touchscreen to adjust the following items
to the desired setting:
Bass, Treble, Balance and Fade:
Controls the sound of the audio system. Balance
adjusts the sound between the left and right
speakers. Fade adjusts the sound between the
front and rear speakers.
LHA2261
Monitor, climate, audio, phone and voice recognition systems4-49
Page 200 of 394
Additional features
For more information about the iPod® player
available with this system, see “iPod® player
operation with Navigation System” in this section.
For more information about the USB interface
available with this system, see “USB interface
(models with Navigation System)” in this section.
For more information about the Bluetooth® audio
interface available with this system, see
“Bluetooth® streaming audio with Navigation
System” in this section.
For more information about the Pandora® audio
feature available with this system, see “Pan-
dora® audio” in this section.
USB INTERFACE (models without
Navigation System) (if so equipped)
Connecting a device to the USB input
jack
CAUTION
●Depending on size and shape of USB
device, the console lid may not fully
close. Do not force console lid closed
as this may damage USB device. ●
Do not force the USB device into the
USB port. Inserting the USB device
tilted or up-side-down into the port may
damage the USB device and the port.
Make sure that the USB device is con-
nected correctly into the USB port.
(Some USB devices come with a
mark as a guide. Make sure that the
mark is facing the correct direction be-
fore inserting the device.)
● Do not locate objects near the USB de-
vice to prevent the objects from leaning
on the USB device and the port. Pres-
sure from the objects may damage the
USB device and the port.
The USB input jack is located inside the center
console
�1. Insert the USB device into the jack.
When a compatible storage device is plugged
into the jack, compatible audio files on the stor-
age device can be played through the vehicle’s
audio system.
LHA2577
Monitor, climate, audio, phone and voice recognition systems4-55
Page 209 of 394
Scrolling menus:
While navigating long lists of artists, albums or
songs in the music menu, it is possible to scroll
the list by the first character in the name. To
activate character indexing, touch and hold the
“A-Z” key in the upper right corner of the screen.
Turn the TUNE knob to choose the number or
letter to jump to in the list and then press the
ENTER button.
If no character is selected after two seconds, the
display returns to normal.
BLUETOOTH® STREAMING AUDIO
WITHOUT NAVIGATION SYSTEM (if
so equipped)
If you have a compatible Bluetooth® audio de-
vice that is capable of playing audio files, the
device can be connected to the vehicle’s audio
system so that the audio files on the device play
through the vehicle’s speakers.
Connecting Bluetooth® audio
To connect your Bluetooth® audio device to the
vehicle, follow the procedure below:1. Press the SETTING button.
2. Select the “Bluetooth” key.
LHA2279LHA2257
4-64Monitor, climate, audio, phone and voice recognition systems
Page 210 of 394
3. Select the “Add Telephone or Device” key.This same screen can be accessed to re-
move, replace or select a different
Bluetooth® device.
4. The system acknowledges the command and asks you to initiate connecting from the
phone handset. The connecting procedure
of the cellular phone varies according to
each cellular phone model. See the cellular
phone Owner’s Manual for details. You can
also visit www.nissanusa.com/bluetooth for
instructions on connecting NISSAN recom-
mended cellular phones.Audio main operation
To switch to the Bluetooth® audio mode, press
the CD button repeatedly until the
Bluetooth® audio mode is displayed on the
screen.
The controls for the Bluetooth® audio are dis-
played on the screen. Use the Preset 3 button for
play and the Preset 4 button for pause.
BLUETOOTH® STREAMING AUDIO
WITH NAVIGATION SYSTEM (if so
equipped)
If you have a compatible Bluetooth® audio de-
vice that is capable of playing audio files, the
device can be connected to the vehicle’s audio
system so that the audio files on the device play
through the vehicle’s speakers.
LHA2274LHA2292
Monitor, climate, audio, phone and voice recognition systems4-65
Page 211 of 394
Connecting Bluetooth® audio
To connect your Bluetooth® audio device to the
vehicle, follow the procedure below:1. Press the MENU button.
2. Select the “Settings” key. 3. Select the “Phone & Bluetooth” key.
4. Select the “Connect New Device” key.
5. The system acknowledges the command
and asks you to initiate connecting from the
phone handset. The connecting procedure
of the cellular phone varies according to
each cellular phone model. See the cellular
phone Owner’s Manual for details. You can
also visit www.nissanusa.com/bluetooth for
instructions on connecting NISSAN recom-
mended cellular phones.
Audio main operation
To switch to the Bluetooth® audio mode, press
the AUX button repeatedly until the Bluetooth®
audio mode is displayed on the screen.
LHA2253LHA2248LHA2265
4-66Monitor, climate, audio, phone and voice recognition systems
Page 212 of 394
The controls for the Bluetooth® audio are dis-
played on the screen.
PANDORA® AUDIO (United States
only) (if so equipped)
The vehicle’s audio system is capable of playing
audio streaming through a compatible, USB-
connected audio device using the Pandora® mu-
sic service.
Connecting a device for use with
Pandora® audio
Devices capable of streaming Pandora® audio
can be connected to the vehicle’s audio system
via the USB input jack. The USB input jack is
located on the center console beneath the heater
and air conditioner controls.
Launch the Pandora® application on the phone
and then connect with the USB jack. Once con-
nected, the Pandora® controls will be displayed
on the control panel display screen.
Compatibility
The following iPhone® models are compatible
with the system:● iPhone® 3GS
● iPhone® 4
● iPhone® 4S The latest Pandora® application should be in-
stalled on the phone.
Audio main operation
Models without Navigation System:
To switch to the Pandora® audio mode, press
the CD-AUX button repeatedly until the Pan-
dora® audio mode is displayed on the screen.
The controls for the Pandora® audio are dis-
played on the screen. Press the audio preset 3
button to pause or play the music.
Press the audio preset 5 button to select “
”
(thumbs up) . Press the audio preset 4 button to
select “
” (thumbs down) .
Models without Navigation System
LHA2283
Monitor, climate, audio, phone and voice recognition systems4-67
Page 214 of 394
CD CARE AND CLEANING
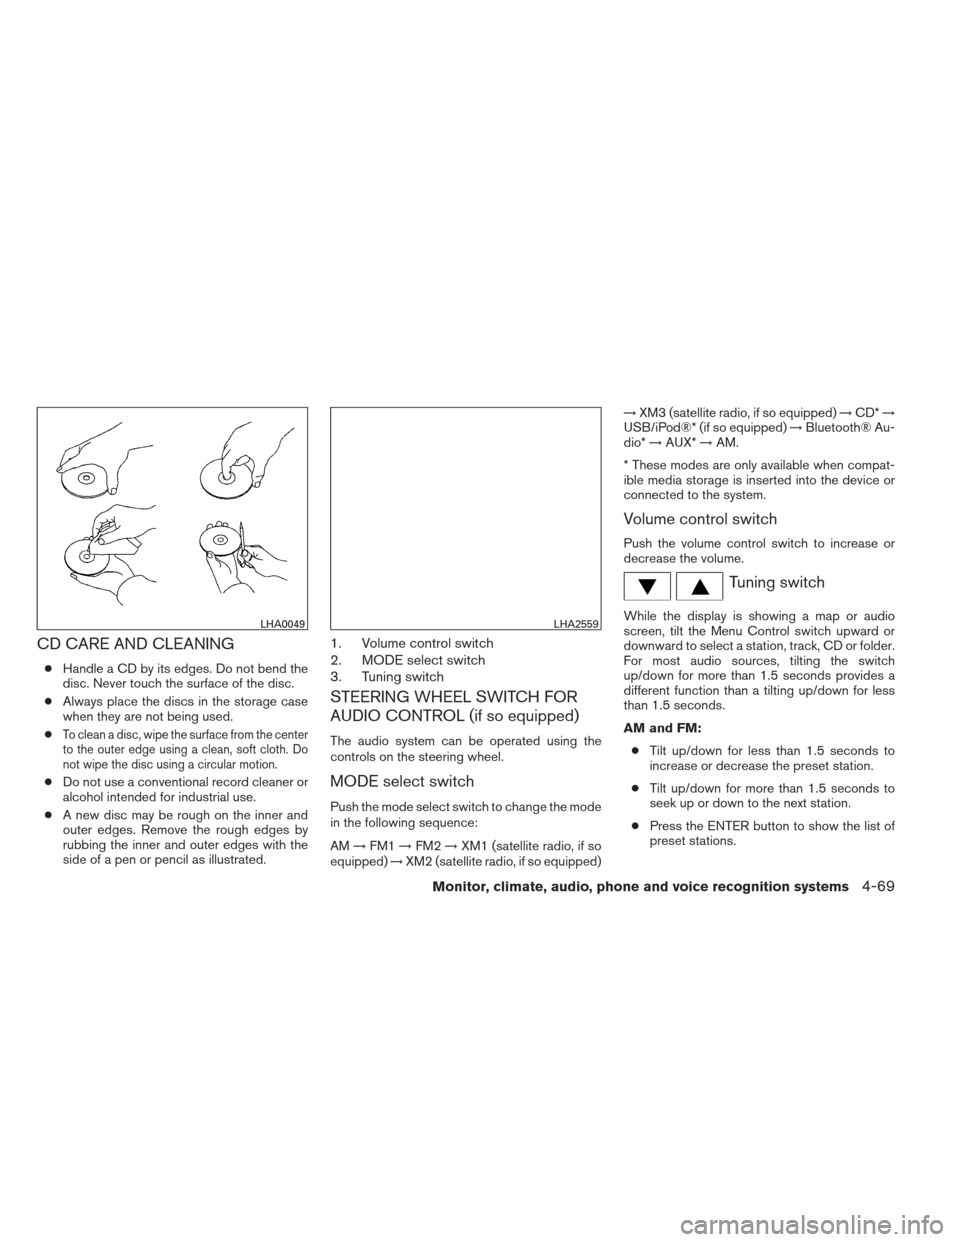
●Handle a CD by its edges. Do not bend the
disc. Never touch the surface of the disc.
● Always place the discs in the storage case
when they are not being used.
●
To clean a disc, wipe the surface from the center
to the outer edge using a clean, soft cloth. Do
not wipe the disc using a circular motion.
● Do not use a conventional record cleaner or
alcohol intended for industrial use.
● A new disc may be rough on the inner and
outer edges. Remove the rough edges by
rubbing the inner and outer edges with the
side of a pen or pencil as illustrated.
1. Volume control switch
2. MODE select switch
3. Tuning switch
STEERING WHEEL SWITCH FOR
AUDIO CONTROL (if so equipped)
The audio system can be operated using the
controls on the steering wheel.
MODE select switch
Push the mode select switch to change the mode
in the following sequence:
AM →FM1 →FM2 →XM1 (satellite radio, if so
equipped) →XM2 (satellite radio, if so equipped) →
XM3 (satellite radio, if so equipped) →CD* →
USB/iPod®* (if so equipped) →Bluetooth® Au-
dio* →AUX* →AM.
* These modes are only available when compat-
ible media storage is inserted into the device or
connected to the system.
Volume control switch
Push the volume control switch to increase or
decrease the volume.
Tuning switch
While the display is showing a map or audio
screen, tilt the Menu Control switch upward or
downward to select a station, track, CD or folder.
For most audio sources, tilting the switch
up/down for more than 1.5 seconds provides a
different function than a tilting up/down for less
than 1.5 seconds.
AM and FM: ● Tilt up/down for less than 1.5 seconds to
increase or decrease the preset station.
● Tilt up/down for more than 1.5 seconds to
seek up or down to the next station.
● Press the ENTER button to show the list of
preset stations.LHA0049LHA2559
Monitor, climate, audio, phone and voice recognition systems4-69