2013 NISSAN XTERRA light
[x] Cancel search: lightPage 190 of 394
Brightness and Contrast
Adjust the brightness or contrast to adjust the
appearance of the display screen.
Clock Adjust
Press the ENTER button to highlight the hours or
minutes and then use the TUNE/SCROLL knob
to adjust the value. Press the ENTER button
again to set the value.On-Screen Clock
Select “ON” or “OFF” to control whether or not
the clock is shown in the upper right corner of the
display screen.
RDS Display
Select “ON” or “OFF” to control whether or not
RDS information is displayed on the screen while
the radio is playing.
Language Select
Select the desired language for the system. Eng-
lish, Spanish and French are the available lan-
guages.iPod® MENU button
This button can only be used for iPod® opera-
tions. See “iPod® player operation without Navi-
gation System” later in this section for details
about the function of this button.
FM/AM/SAT radio operation
FM·AM button:
Press the FM·AM button to change the band as
follows:
AM
→FM1 →FM2 →AM
If another audio source is playing when the
FM·AM button is pressed, the audio source play-
ing will automatically be turned off and the last
radio station played will begin playing.
The FM stereo indicator (STEREO) is shown on
the screen during FM stereo reception. When the
stereo broadcast signal is weak, the radio auto-
matically changes from stereo to monaural re-
ception.
XM band select:
Press the XM button to change the band as
follows:
XM1* →XM2* →XM3* →XM1 (satellite, if so
equipped)
LHA2259
Monitor, climate, audio, phone and voice recognition systems4-45
Page 251 of 394
Additional information:● The TPMS does not monitor the tire
pressure of the spare tire.
● The TPMS will activate only when the vehicle
is driven at speeds above 16 MPH
(25 km/h). Also, this system may not detect a
sudden drop in tire pressure (for example a
flat tire while driving) .
●
The low tire pressure warning light does not
automatically turn off when the tire pressure of
your tires are adjusted. After the tires are in-
flated to the recommended pressure, the ve-
hicle must be driven at speeds above 16 MPH
(25 km/h) to activate the TPMS and turn off the
low tire pressure warning light. Use a tire pres-
sure gauge to check the tire pressure.
●The CHECK TIRE PRES (pressure) warning
message is displayed in the odometer when
the low tire pressure warning light is illumi-
nated and low tire pressure is detected. The
CHECK TIRE PRES warning message turns
off when the low tire pressure warning light
turns off. The low tire pressure warning light
remains illuminated until the tires are inflated
to the recommended COLD tire pressure. The
CHECK TIRE PRES warning message is dis-
played each time the ignition switch is placed
in the ON position as long as the low tire
pressure warning light remains illuminated.
See “Check tire pressure warning message”
in the “Instruments and controls” section.
● The CHECK TIRE PRES warning is not dis-
played if the low tire pressure warning light
illuminates to indicate a TPMS malfunction.
● Tire pressure rises and falls depending on
the heat caused by the vehicle’s operation
and the outside temperature. Low outside
temperature can lower the temperature of
the air inside the tire which can cause a
lower tire inflation pressure. This may cause
the low tire pressure warning light to illumi-
nate. If the warning light illuminates, check
the tire pressure for all four tires.
● The Tire and Loading Information label (also
referred to as the vehicle placard or tire
inflation pressure label) is located in the
driver’s door opening.
For additional information, see “Low tire pressure
warning light” in the “Instruments and controls”
section and “Tire Pressure Monitoring System
(TPMS)” in the “In case of emergency” section.WARNING
●If the low tire pressure warning light illu-
minates while driving, avoid sudden
steering maneuvers or abrupt braking,
reduce vehicle speed, pull off the road to
a safe location and stop the vehicle as
soon as possible. Driving with under-
inflated tires may permanently damage
the tires and increase the likelihood of
tire failure. Serious vehicle damage
could occur and may lead to an accident
and could result in serious personal in-
jury. Check the tire pressure for all four
tires. Adjust the tire pressure to the rec-
ommended COLD tire pressure shown on
the Tire and Loading Information label to
turn the low tire pressure warning light
OFF. If you have a flat tire, replace it with
a spare tire as soon as possible. (See
“Flat tire” in the “In case of emergency”
section for changing a flat tire.)
● When a spare tire is mounted or a wheel
is replaced, the TPMS will not function
and the low tire pressure warning light
will flash for approximately 1 minute.
The light will remain on after 1 minute.
Contact your NISSAN dealer as soon as
possible for tire replacement and/or
system resetting.
5-4Starting and driving
Page 252 of 394
●Replacing tires with those not originally
specified by NISSAN could affect the
proper operation of the TPMS.
● Do not inject any tire liquid or aerosol
tire sealant into the tires, as this may
cause a malfunction of the tire pressure
sensors.
CAUTION
Do not place metalized film or any metal
parts (antenna, etc.) on the windows. This
may cause poor reception of the signals
from the tire pressure sensors, and the
TPMS will not function properly.
Some devices and transmitters may temporarily
interfere with the operation of the TPMS and
cause the low tire pressure warning light to illu-
minate.
Some examples are:
– Facilities or electric devices using similar radio frequencies are near the vehicle.
– If a transmitter set to similar frequencies is being used in or near the vehicle.
– If a computer (or similar equipment) or a DC/AC converter is being used in or near the
vehicle. FCC Notice:
For USA:
This device complies with Part 15 of the
FCC Rules. Operation is subject to the fol-
lowing two conditions:
1. This device may not cause harmful in-
terference, and
2. This device must accept any interfer-
ence received, including interference
that may cause undesired operation.
Note: Changes or modification not ex-
pressly approved by the party respon-
sible for compliance could void the us-
er’s authority to operate the
equipment.
For Canada:
This device complies with RSS-210 of In-
dustry Canada. Operation is subject to the
following two conditions: 1. This device may not cause interfer-
ence, and
2. This device must accept any interfer-
ence, include interference that may
cause undesired operation of the de-
vice. 3.
The term “IC:” before the radio certifi-
cation number only signifies that In-
dustry Canada technical specifications
were met.
ON-PAVEMENT AND OFF-ROAD
DRIVING PRECAUTIONS
Utility vehicles have a significantly higher
rollover rate than other types of vehicles.
They have higher ground clearance than passen-
ger cars to make them capable of performing in a
variety of on-pavement and off-road applications.
This gives them a higher center of gravity than
ordinary cars. An advantage of higher ground
clearance is a better view of the road, allowing
you to anticipate problems. However, they are not
designed for cornering at the same speeds as
conventional two-wheel drive vehicles any more
than low-slung sports cars are designed to per-
form satisfactorily under off-road conditions. If at
all possible, avoid sharp turns at high speeds. As
with other vehicles of this type, failure to operate
this vehicle correctly may result in loss of control
or vehicle rollover. In a rollover crash, an unbelted
person is significantly more likely to die than a
person wearing a seat belt.
Be sure to read the driving safety precautions
later in this section.
Starting and driving5-5
Page 254 of 394
●The vehicle generally moves or pulls in
the direction of the flat tire.
● Do not rapidly apply the brakes.
● Do not rapidly release the accelerator
pedal.
● Do not rapidly turn the steering wheel.
1. Remain calm and do not over react.
2. Maintain a firm grip on the steering wheel with both hands and try to hold a straight
course.
3. When appropriate, slowly release the accel- erator pedal to gradually slow the vehicle.
4. Gradually steer the vehicle to a safe location off the road and away from traffic if possible.
5. Lightly apply the brake pedal to gradually stop the vehicle.
6. Turn on the hazard warning flashers and either contact a roadside emergency service
to change the tire or see “Changing a flat
tire” in the “In case of emergency” section of
this manual.DRINKING ALCOHOL/DRUGS AND
DRIVING
WARNING
Never drive under the influence of alcohol
or drugs. Alcohol in the bloodstream re-
duces coordination, delays reaction time
and impairs judgement. Driving after
drinking alcohol increases the likelihood
of being involved in an accident injuring
yourself and others. Additionally, if you
are injured in an accident, alcohol can
increase the severity of the injury.
NISSAN is committed to safe driving. However,
you must choose not to drive under the influence
of alcohol. Every year thousands of people are
injured or killed in alcohol-related accidents. Al-
though the local laws vary on what is considered
to be legally intoxicated, the fact is that alcohol
affects all people differently and most people
underestimate the effects of alcohol.
Remember, drinking and driving don’t mix! And
that is true for drugs, too (over-the-counter, pre-
scription, and illegal drugs) . Don’t drive if your
ability to operate your vehicle is impaired by alco-
hol, drugs, or some other physical condition.
DRIVING SAFETY PRECAUTIONS
Your NISSAN is designed for both normal and
off-road use. However, avoid driving in deep wa-
ter or mud as your NISSAN is mainly designed for
leisure use, unlike a conventional off-road ve-
hicle.
Remember that two-wheel drive models are less
capable than four-wheel drive models for rough
road driving and extrication when stuck in deep
snow or mud, or the like.
Please observe the following precautions:
WARNING
● Drive carefully when off the road and
avoid dangerous areas. Every person
who drives or rides in this vehicle
should be seated with their seat belt
fastened. This will keep you and your
passengers in position when driving
over rough terrain.
● Do not drive across steep slopes. In-
stead drive either straight up or straight
down the slopes. Off-road vehicles can
tip over sideways much more easily
than they can forward or backward.
Starting and driving5-7
Page 255 of 394
●Many hills are too steep for any vehicle.
If you drive up them, you may stall. If
you drive down them, you may not be
able to control your speed. If you drive
across them, you may roll over.
● Do not shift gears while driving on
downhill grades as this could cause
loss of control of the vehicle.
● Stay alert when driving to the top of a
hill. At the top there could be a drop-off
or other hazard that could cause an
accident.
● If your engine stalls or you cannot make
it to the top of a steep hill, never at-
tempt to turn around. Your vehicle
could tip or roll over. Always back
straight down in R (Reverse) gear. Never
back down in N (Neutral) or with the
clutch depressed (manual transmission
vehicles) , using only the brake, as this
could cause loss of control.
● Heavy braking going down a hill could
cause your brakes to overheat and fade,
resulting in loss of control and an acci-
dent. Apply brakes lightly and use a low
gear to control your speed. Use the hill
descent control feature (if so
equipped) . ●
Unsecured cargo can be thrown around
when driving over rough terrain. Prop-
erly secure all cargo so it will not be
thrown forward and cause injury to you
or your passengers.
● To avoid raising the center of gravity
excessively, do not exceed the rated
capacity of the roof rack/gear bin (if so
equipped) and evenly distribute the
load. Secure heavy loads in the cargo
area as far forward and as low as pos-
sible. Do not equip the vehicle with tires
larger than specified in this manual.
This could cause your vehicle to roll
over.
● Do not grip the inside or spokes of the
steering wheel when driving off-road.
The steering wheel could move sud-
denly and injure your hands. Instead
drive with your fingers and thumbs on
the outside of the rim.
● Before operating the vehicle, ensure
that the driver and all passengers have
their seat belts fastened.
● Always drive with the floor mats in
place as the floor may become hot. ●
Lower your speed when encountering
strong crosswinds. With a higher center
of gravity, your NISSAN is more af-
fected by strong side winds. Slower
speeds ensure better vehicle control.
● Do not drive beyond the performance
capability of the tires, even with 4WD
engaged.
● For 4WD equipped vehicles, do not at-
tempt to raise two wheels off the
ground and shift the transmission to
any drive or reverse position with the
engine running. Doing so may result in
drivetrain damage or unexpected ve-
hicle movement which could result in
serious vehicle damage or personal
injury.
5-8Starting and driving
Page 257 of 394
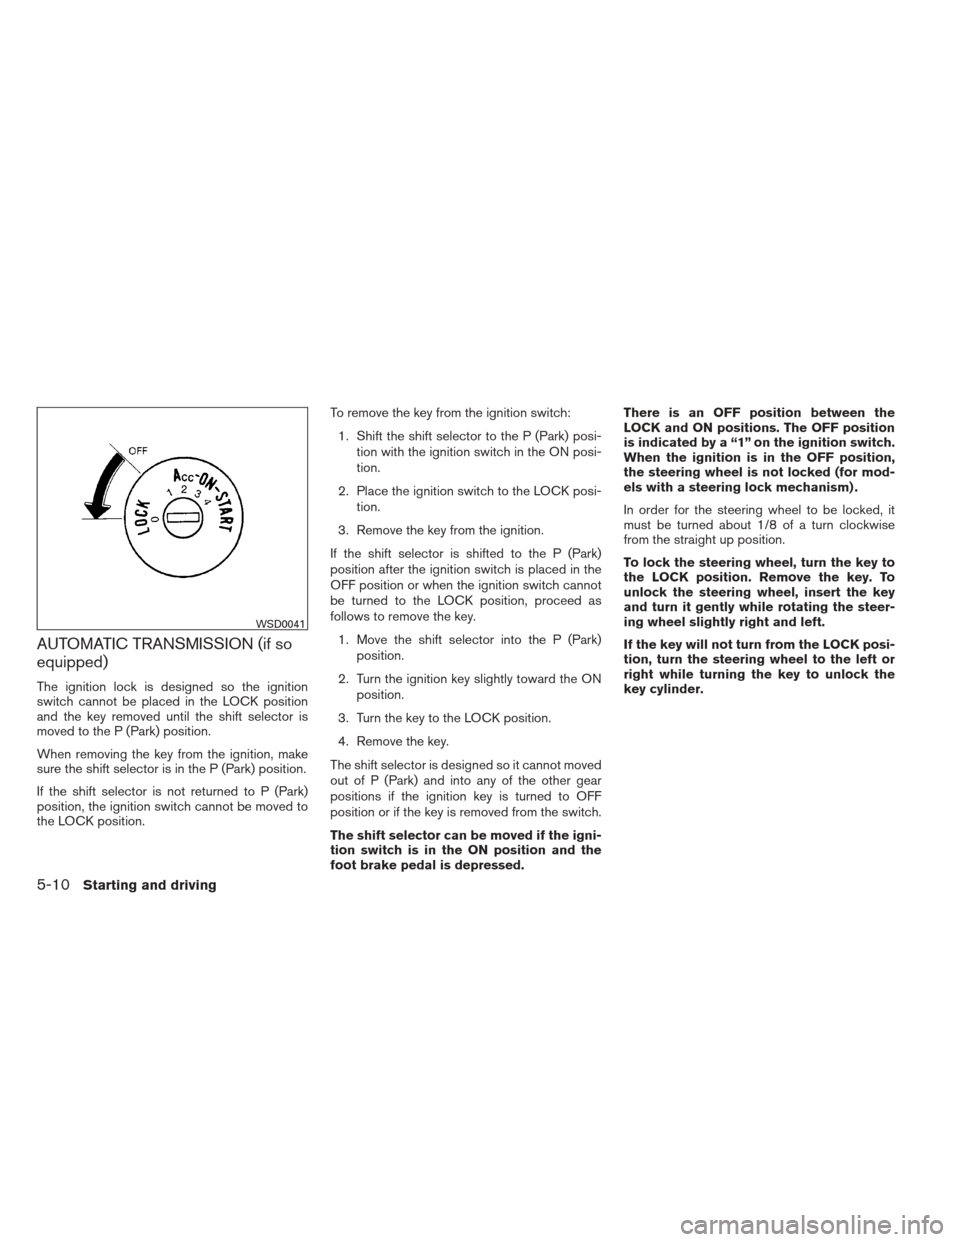
AUTOMATIC TRANSMISSION (if so
equipped)
The ignition lock is designed so the ignition
switch cannot be placed in the LOCK position
and the key removed until the shift selector is
moved to the P (Park) position.
When removing the key from the ignition, make
sure the shift selector is in the P (Park) position.
If the shift selector is not returned to P (Park)
position, the ignition switch cannot be moved to
the LOCK position.To remove the key from the ignition switch:
1. Shift the shift selector to the P (Park) posi- tion with the ignition switch in the ON posi-
tion.
2. Place the ignition switch to the LOCK posi- tion.
3. Remove the key from the ignition.
If the shift selector is shifted to the P (Park)
position after the ignition switch is placed in the
OFF position or when the ignition switch cannot
be turned to the LOCK position, proceed as
follows to remove the key. 1. Move the shift selector into the P (Park) position.
2. Turn the ignition key slightly toward the ON position.
3. Turn the key to the LOCK position.
4. Remove the key.
The shift selector is designed so it cannot moved
out of P (Park) and into any of the other gear
positions if the ignition key is turned to OFF
position or if the key is removed from the switch.
The shift selector can be moved if the igni-
tion switch is in the ON position and the
foot brake pedal is depressed. There is an OFF position between the
LOCK and ON positions. The OFF position
is indicated by a “1” on the ignition switch.
When the ignition is in the OFF position,
the steering wheel is not locked (for mod-
els with a steering lock mechanism) .
In order for the steering wheel to be locked, it
must be turned about 1/8 of a turn clockwise
from the straight up position.
To lock the steering wheel, turn the key to
the LOCK position. Remove the key. To
unlock the steering wheel, insert the key
and turn it gently while rotating the steer-
ing wheel slightly right and left.
If the key will not turn from the LOCK posi-
tion, turn the steering wheel to the left or
right while turning the key to unlock the
key cylinder.
WSD0041
5-10Starting and driving
Page 259 of 394
●Make sure the area around the vehicle is
clear.
● Check fluid levels such as engine oil, cool-
ant, brake fluid, and windshield-washer fluid
as frequently as possible, or at least when-
ever you refuel.
● Check that all windows and lights are clean.
● Visually inspect tires for their appearance
and condition. Also check tires for proper
inflation.
● Lock all doors.
● Position seat and adjust head restraints.
● Adjust inside and outside mirrors.
● Fasten seat belts and ask all passengers to
do likewise.
● Check the operation of warning lights when
the ignition switch is turned to the ON (3)
position. See “Warning/indicator lights and
audible reminders” in the “Instruments and
controls” section of this manual. 1. Apply the parking brake.
2.
Automatic transmission:
Move the shift selector to P (Park) or N
(Neutral) . P (Park) is recommended.
The shift selector cannot be moved out
of the P (Park) position and into any of
the other gear positions if the ignition
switch is placed in the OFF position or
if the key is removed from the ignition
switch.
The starter is designed not to operate if
the shift selector is in any of the driving
positions.
Manual transmission:
Move the shift selector to N (Neutral) . De-
press the clutch pedal to the floor while
cranking the engine.
The starter is designed not to operate
unless the clutch pedal is fully de-
pressed. 3.Crank the engine
with your foot off the accel-
erator pedalby placing the ignition switch in
the START position. Release the key when
the engine starts. If the engine starts, but
fails to run, repeat the above procedure.
●
If the engine is very hard to start in extremely
cold weather or when restarting, depress
the accelerator pedal a little (approximately
1/3 to the floor) and hold it and then crank
the engine. Release the key and the accel-
erator pedal when the engine starts.
● If the engine is very hard to start because
it is flooded, depress the accelerator
pedal all the way to the floor and hold it.
Crank the engine for 5-6 seconds. After
cranking the engine, release the accel-
erator pedal. Crank the engine with your
foot off the accelerator pedal by plac-
ing the ignition in the START position.
Release the key when the engine starts. If
the engine starts, but fails to run, repeat
the above procedure.
CAUTION
Do not operate the starter for more than
15 seconds at a time. If the engine does
not start, turn the key off and wait 10 sec-
onds before cranking again, otherwise the
starter could be damaged.
BEFORE STARTING THE ENGINE STARTING THE ENGINE
5-12Starting and driving
Page 263 of 394
Shift lock release
If the battery is discharged, the shift selector may
not be moved from the P (Park) position even with
the brake pedal depressed.
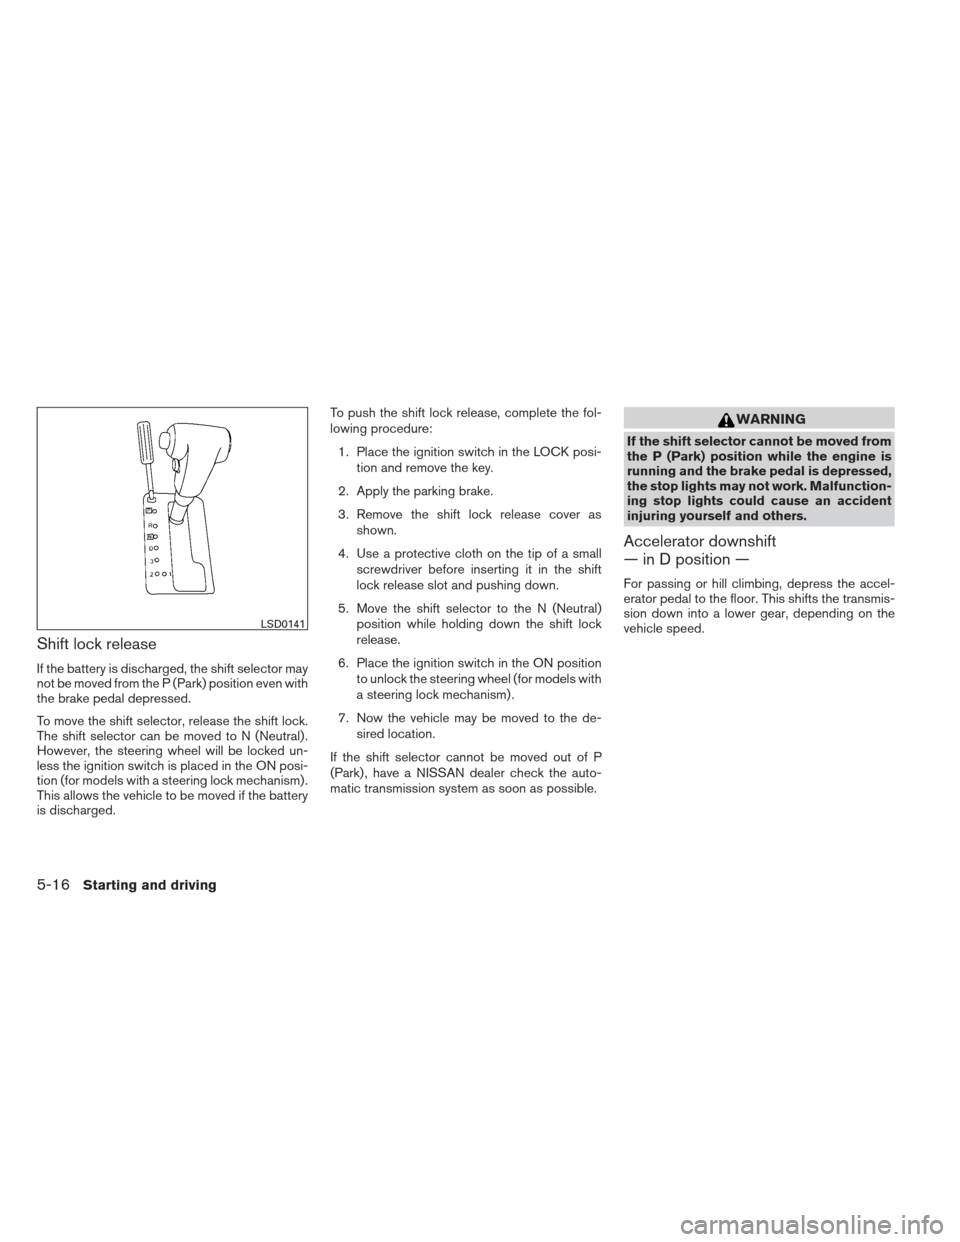
To move the shift selector, release the shift lock.
The shift selector can be moved to N (Neutral) .
However, the steering wheel will be locked un-
less the ignition switch is placed in the ON posi-
tion (for models with a steering lock mechanism) .
This allows the vehicle to be moved if the battery
is discharged.To push the shift lock release, complete the fol-
lowing procedure:
1. Place the ignition switch in the LOCK posi- tion and remove the key.
2. Apply the parking brake.
3. Remove the shift lock release cover as shown.
4. Use a protective cloth on the tip of a small screwdriver before inserting it in the shift
lock release slot and pushing down.
5. Move the shift selector to the N (Neutral) position while holding down the shift lock
release.
6. Place the ignition switch in the ON position to unlock the steering wheel (for models with
a steering lock mechanism) .
7. Now the vehicle may be moved to the de- sired location.
If the shift selector cannot be moved out of P
(Park) , have a NISSAN dealer check the auto-
matic transmission system as soon as possible.
WARNING
If the shift selector cannot be moved from
the P (Park) position while the engine is
running and the brake pedal is depressed,
the stop lights may not work. Malfunction-
ing stop lights could cause an accident
injuring yourself and others.
Accelerator downshift
— in D position —
For passing or hill climbing, depress the accel-
erator pedal to the floor. This shifts the transmis-
sion down into a lower gear, depending on the
vehicle speed.
LSD0141
5-16Starting and driving