Page 72 of 331
1. Tachometer (if so equipped)
2. Speedometer
3. Trip odometer reset switch/trip com-puter mode
4. Instrument brightness control 5. Continuously Variable Transmission
(CVT) / AT Automatic Transmission po-
sition indicator (CVT / A/T models only)
6. Odometer/twin trip odometer/trip com-
puter 7. Fuel gauge
Type A
LIC2283
METERS AND GAUGES
Instruments and controls2-3
Page 73 of 331
1. Tachometer
2. Temperature gauge
3. Odometer/twin trip odometer/tripcomputer
4. Fuel gauge 5. Speedometer
6. Trip odometer reset switch/trip
computer mode 7. Continuously Variable Transmission
(CVT) / Manual Transmission shift
indicatorposition indicator
8. Instrument brightness control
Type B
LIC2146
2-4Instruments and controls
Page 75 of 331
Changing the display:
Press the change button
�3to change the dis-
play as follows:
Odometer (ODO) →Trip
→Trip→
Instant fuel consumption →Average fuel con-
sumption →DTE (cruising range) →Odometer
(ODO)
Resetting the trip odometer:
Press the change button
�3for more than 1 sec-
ond to reset the currently displayed trip odometer
to zero.
Loose fuel cap warning message
Push the reset button�Afor more than 1 second
to reset the LOOSE FUEL CAP warning mes-
sage after the fuel cap has been tightened. For
additional information see “Fuel-filler cap” in the
“Pre-driving checks and adjustments” section of
this manual.
Type B
LIC2139
Type A
LIC2285
Type B
LPD2025
2-6Instruments and controls
Page 77 of 331

FUEL GAUGE
The gauge indicates�Atheapproximatefuel
level in the tank when the ignition switch is placed
in the ON position.
The gauge may move slightly during braking,
turning, acceleration, or going up or down hills.
Type A: The fuel level segments will blink when
the amount of fuel in the tank is getting low.
Type B: The low fuel warning light will turn on
when the amount of fuel in the tank is getting low.
Refill the fuel tank before the gauge regis-
ters E (Empty) . The
indicates that the fuel-filler door is
located on the driver’s side of the vehicle.
CAUTION
●If the vehicle runs out of fuel, thecheck engine light may come on. Refuel as
soon as possible. After a few driving trips,
the
light should turn off. If the light
remains on after a few driving trips, have
the vehicle inspected by a NISSAN dealer.
● For additional information, see “Mal-
function Indicator Light (MIL)” later in
this section.
Type B
LIC2151
Type A
LIC2286
Type B
LIC2287
2-8Instruments and controls
Page 78 of 331

TRIP COMPUTER
When the ignition switch is placed in the ON
position, modes of the trip computer can be
selected by pushing the trip computer change
button
�Aon the instrument panel located near
the speedometer. The following modes can be
selected in the display
�B:
● Instant fuel consumption
● Average fuel consumption
● Distance to empty
Instant fuel economy
The instant fuel economy mode shows the instant
fuel consumption. The display updates instantly
when driving.
Average fuel consumption
The average fuel consumption mode shows the
average fuel consumption since the last reset.
Resetting is done by pushing the trip computer
change button
�Afor more than approximately
1 second.
Distance to empty
The distance to empty mode provides you with an
estimation of the distance that can be driven
before refueling. The range is constantly being
calculated, based on the amount of fuel in the fuel
tank and the actual fuel consumption.
The distance to empty includes a low range
warning feature: when the fuel level is low, the
distance to empty is automatically selected and
the digits blink in order to draw the driver’s atten-
tion. Press the trip computer change button
�Aif
you wish to return to the mode that was selected
before the warning occurred.
When the fuel level drops even lower, the dis-
tance to empty will display (----) .
Trip computer reset
Pushing the change button for more than 3 sec-
onds will reset all modes except Trip A and dis-
tance to empty (dte) .
SERVICE INTERVAL REMINDER (if
so equipped)
When the ignition switch is placed in the ON
position, a wrench symbol and the distance to oil
change information will illuminate on the display
for approximately 5 seconds. The wrench symbol
and distance to oil change switch to oil display
Type A
LIC2288
Type B
LIC2138
Instruments and controls2-9
Page 130 of 331

To open the trunk from the inside, pull the illumi-
nated release handle until the lock releases and
push up on the trunk lid. The release handle is
made of a material that glows in the dark after a
brief exposure to ambient light.
The handle is located inside the trunk compart-
ment on the trunk lock at the center of the trunk
lid.
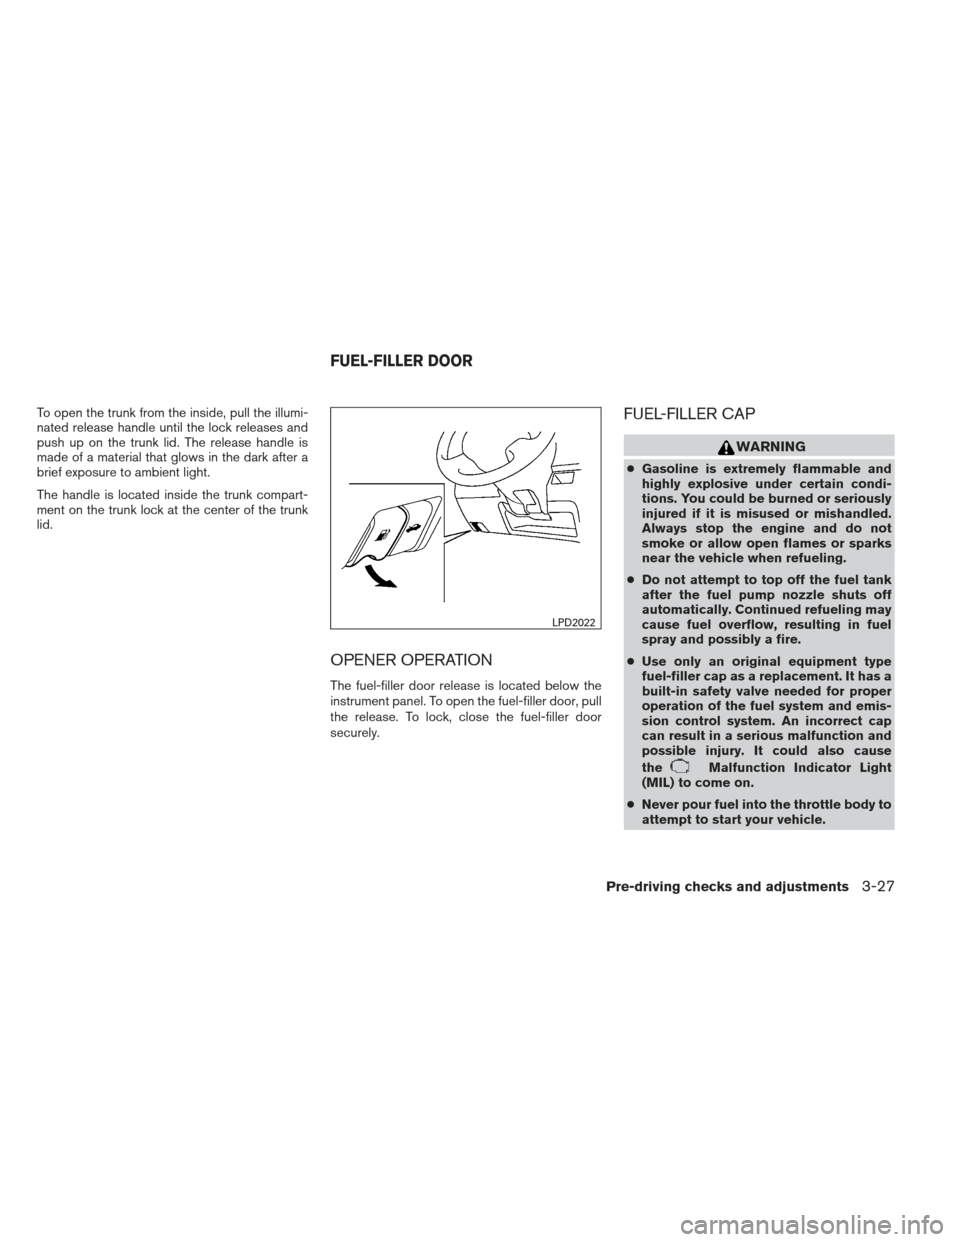
OPENER OPERATION
The fuel-filler door release is located below the
instrument panel. To open the fuel-filler door, pull
the release. To lock, close the fuel-filler door
securely.
FUEL-FILLER CAP
WARNING
●Gasoline is extremely flammable and
highly explosive under certain condi-
tions. You could be burned or seriously
injured if it is misused or mishandled.
Always stop the engine and do not
smoke or allow open flames or sparks
near the vehicle when refueling.
● Do not attempt to top off the fuel tank
after the fuel pump nozzle shuts off
automatically. Continued refueling may
cause fuel overflow, resulting in fuel
spray and possibly a fire.
● Use only an original equipment type
fuel-filler cap as a replacement. It has a
built-in safety valve needed for proper
operation of the fuel system and emis-
sion control system. An incorrect cap
can result in a serious malfunction and
possible injury. It could also cause
the
Malfunction Indicator Light
(MIL) to come on.
● Never pour fuel into the throttle body to
attempt to start your vehicle.
LPD2022
FUEL-FILLER DOOR
Pre-driving checks and adjustments3-27
Page 132 of 331
Loose Fuel Cap warning message
The LOOSE FUEL CAP warning message dis-
plays in the odometer when the fuel-filler cap is
not tightened correctly after the vehicle has been
refueled. It may take a few driving trips for the
message to be displayed. To turn off the warning
message, perform the following:1. Remove and install the fuel-filler cap as pre- viously described as soon as possible.
2. Tighten the fuel-filler cap until it clicks. 3. Press the loose fuel cap warning reset but-
ton
�Ain the meter for about 1 second to
turn off the LOOSE FUEL CAP warning
message after tightening the fuel-filler cap.
Type A
LPD2126
Type B
LPD2025
Pre-driving checks and adjustments3-29
Page 305 of 331

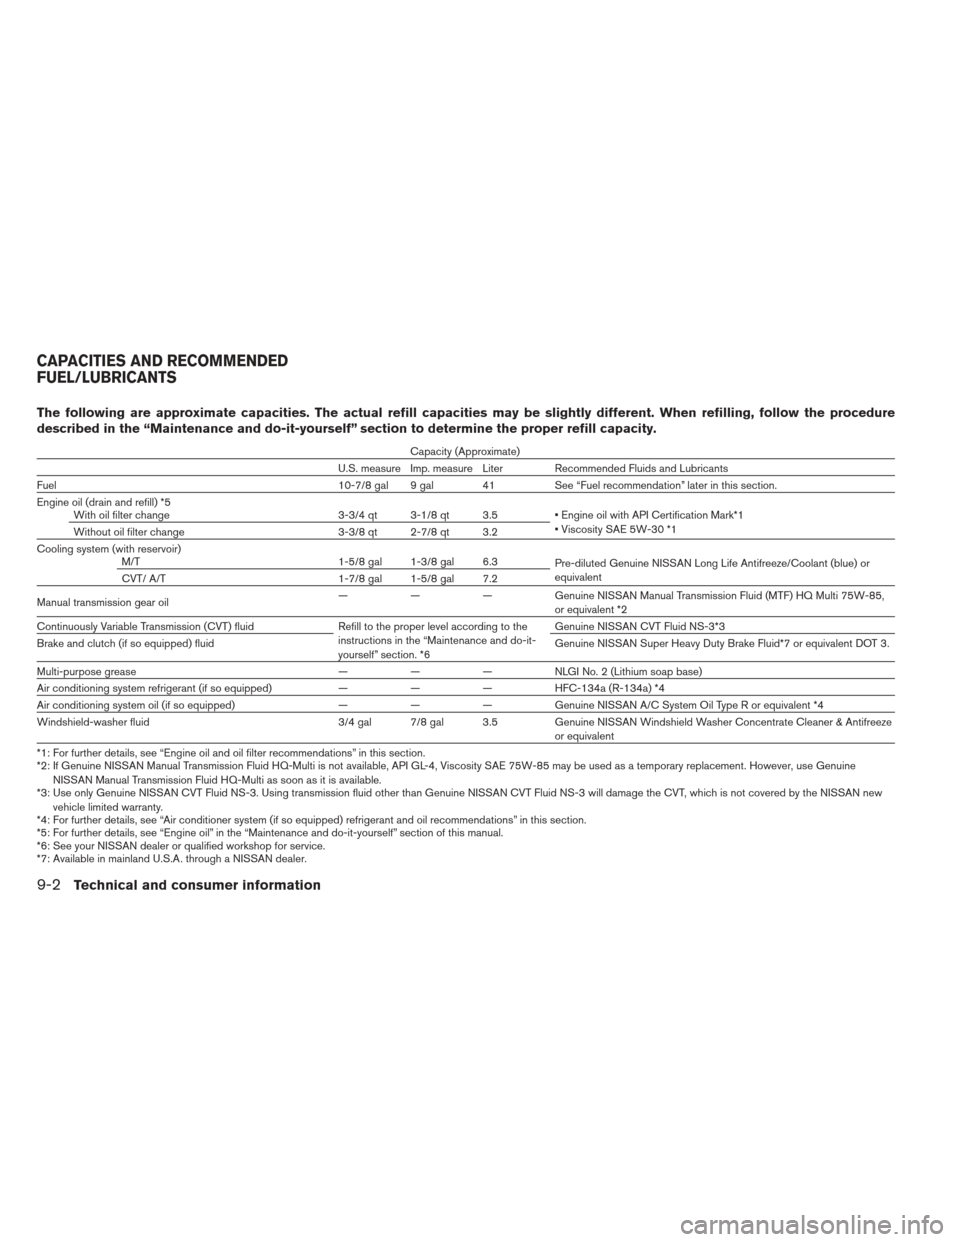
The following are approximate capacities. The actual refill capacities may be slightly different. When refilling, follow the procedure
described in the “Maintenance and do-it-yourself” section to determine the proper refill capacity.
Capacity (Approximate)
U.S. measure Imp. measure Liter Recommended Fluids and Lubricants
Fuel 10-7/8 gal 9 gal 41 See “Fuel recommendation” later in this section.
Engine oil (drain and refill) *5 With oil filter change 3-3/4 qt 3-1/8 qt 3.5 Engine oil with API Certification Mark*1
Viscosity SAE 5W-30 *1
Without oil filter change 3-3/8 qt 2-7/8 qt 3.2
Cooling system (with reservoir) M/T 1-5/8 gal 1-3/8 gal 6.3 Pre-diluted Genuine NISSAN Long Life Antifreeze/Coolant (blue) or
equivalent
CVT/ A/T 1-7/8 gal 1-5/8 gal 7.2
Manual transmission gear oil — — — Genuine NISSAN Manual Transmission Fluid (MTF) HQ Multi 75W-85,
or equivalent *2
Continuously Variable Transmission (CVT) fluid Refill to the proper level according to the
instructions in the “Maintenance and do-it-
yourself” section. *6 Genuine NISSAN CVT Fluid NS-3*3
Brake and clutch (if so equipped) fluid Genuine NISSAN Super Heavy Duty Brake Fluid*7 or equivalent DOT 3.
Multi-purpose grease ———NLG IN o.2 (L it h iu m soap base)
Air conditioning system refrigerant (if so equipped) ———HFC-134a (R-134a) *4
Air conditioning system oil (if so equipped) ———Genuine NISSAN A/C System Oil Type R or equivalent *4
Windshield-washer fluid 3/4 gal 7/8 gal 3.5Genuine NISSAN Windshield Washer Concentrate Cleaner & Antifreeze
or equivalent
*1: For further details, see “Engine oil and oil filter recommendations” in this section.
*2: If Genuine NISSAN Manual Transmission Fluid HQ-Multi is not available, API GL-4, Viscosity SAE 75W-85 may be used as a temporary replacement. However, use Genuine NISSAN Manual Transmission Fluid HQ-Multi as soon as it is available.
*3: Use only Genuine NISSAN CVT Fluid NS-3. Using transmission fluid other than Genuine NISSAN CVT Fluid NS-3 will damage the CVT, which is not covered by the NISSAN new
vehicle limited warranty.
*4: For further details, see “Air conditioner system (if so equipped) refrigerant and oil recommendations” in this section.
*5: For further details, see “Engine oil” in the “Maintenance and do-it-yourself” section of this manual.
*6: See your NISSAN dealer or qualified workshop for service.
*7: Available in mainland U.S.A. through a NISSAN dealer.
CAPACITIES AND RECOMMENDED
FUEL/LUBRICANTS
9-2Technical and consumer information