Page 358 of 458

8 Maintenance and do-it-yourself
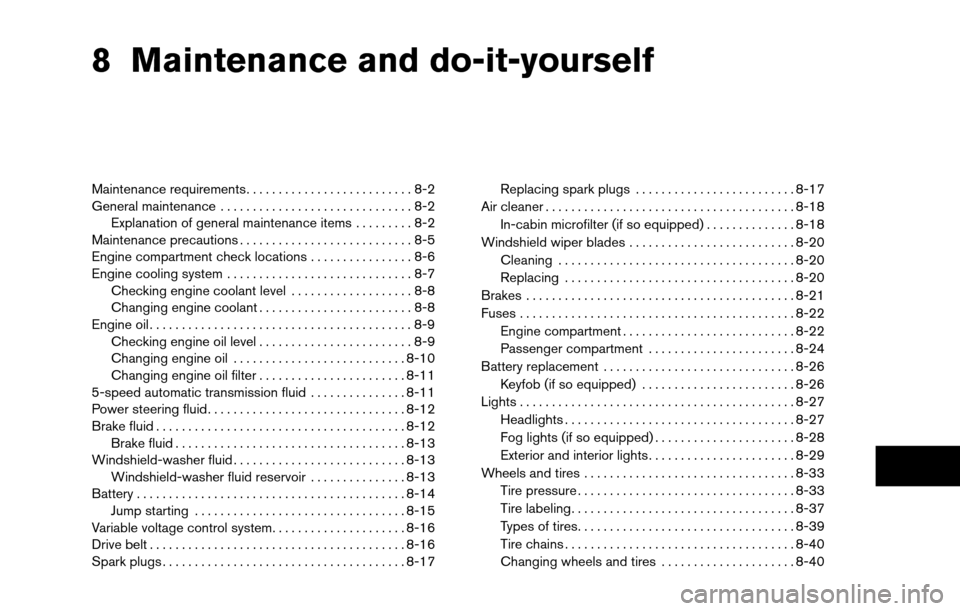
Maintenance requirements..........................8-2
General maintenance ..............................8-2
Explanation of general maintenance items .........8-2
Maintenance precautions ...........................8-5
Engine compartment check locations ................8-6
Engine cooling system .............................8-7
Checking engine coolant level ...................8-8
Changing engine coolant ........................8-8
Engine oil .........................................8-9
Checking engine oil level ........................8-9
Changing engine oil ........................... 8-10
Changing engine oil filter .......................8-11
5-speed automatic transmission fluid ...............8-11
Power steering fluid ............................... 8-12
Brake fluid ....................................... 8-12
Brake fluid .................................... 8-13
Windshield-washer fluid ........................... 8-13
Windshield-washer fluid reservoir ...............8-13
Battery .......................................... 8-14
Jump starting ................................. 8-15
Variable voltage control system .....................8-16
Drive belt ........................................ 8-16
Spark plugs ...................................... 8-17Replacing spark plugs
......................... 8-17
Air cleaner ....................................... 8-18
In-cabin microfilter (if so equipped) ..............8-18
Windshield wiper blades .......................... 8-20
Cleaning ..................................... 8-20
Replacing .................................... 8-20
Brakes .......................................... 8-21
Fuses ........................................... 8-22
Engine compartment ........................... 8-22
Passenger compartment .......................8-24
Battery replacement .............................. 8-26
Keyfob (if so equipped) ........................ 8-26
Lights ........................................... 8-27
Headlights .................................... 8-27
Fog lights (if so equipped) ......................8-28
Exterior
and interior lights ....................... 8-29
Wheels and tires ................................. 8-33
Tire pressure . . . ............................... 8-33
Tire labeling ................................... 8-37
Types of tires .................................. 8-39
Tire chains .................................... 8-40
Changing wheels and tires .....................8-40
Page 363 of 458
1. Battery
2. Fuse/fusible link box
3. Transmission dipstick
4. Engine oil filler cap
5. Brake fluid reservoir
6. Windshield-washer fluid reservoir
7. Air cleaner
8. Drive belt location
9. Radiator cap
10. Power steering fluid reservoir
11. Engine oil dipstick
12. Engine coolant reservoir
NOTE:
Engine cover removed for clarity.
WDI0630
ENGINE COMPARTMENT CHECK
LOCATIONS
8-6Maintenance and do-it-yourself
Page 379 of 458

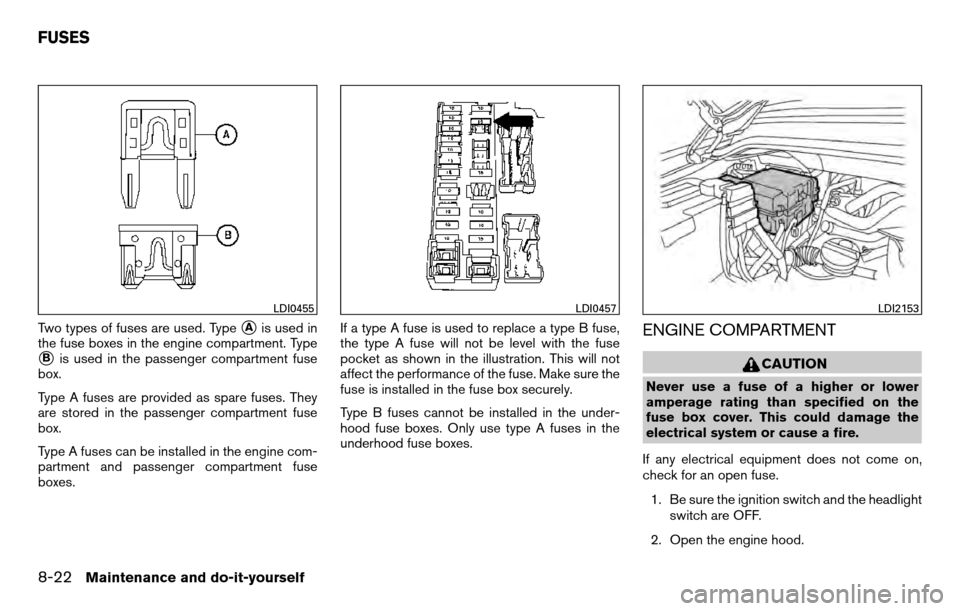
Two types of fuses are used. Type�Ais used in
the fuse boxes in the engine compartment. Type
�Bis used in the passenger compartment fuse
box.
Type A fuses are provided as spare fuses. They
are stored in the passenger compartment fuse
box.
Type A fuses can be installed in the engine com-
partment and passenger compartment fuse
boxes. If a type A fuse is used to replace a type B fuse,
the type A fuse will not be level with the fuse
pocket as shown in the illustration. This will not
affect the performance of the fuse. Make sure the
fuse is installed in the fuse box securely.
Type B fuses cannot be installed in the under-
hood fuse boxes. Only use type A fuses in the
underhood fuse boxes.
ENGINE COMPARTMENT
CAUTION
Never use a fuse of a higher or lower
amperage rating than specified on the
fuse box cover. This could damage the
electrical system or cause a fire.
If any electrical equipment does not come on,
check for an open fuse. 1. Be sure the ignition switch and the headlight switch are OFF.
2. Open the engine hood.
LDI0455LDI0457LDI2153
FUSES
8-22Maintenance and do-it-yourself
Page 380 of 458
3. Remove the fuse box cover by pushing thetab and lifting the cover up.
4. Remove the fuse with the fuse puller. The fuse puller is located in the center of the fuse
block in the passenger compartment.
5. If the fuse is open
�A, replace it with a new
fuse
�B.
6. If a new fuse also opens, have the electrical system checked and repaired by a NISSAN
dealer.Fusible links
If the electrical equipment does not operate and
fuses are in good condition, check the fusible
links. If any of these fusible links are melted,
replace with only Genuine NISSAN parts.
WDI0452LDI0381
Maintenance and do-it-yourself8-23
Page 381 of 458
PASSENGER COMPARTMENT
CAUTION
Never use a fuse of a higher or lower
amperage rating than specified on the
fuse box cover. This could damage the
electrical system or cause a fire.
If any electrical equipment does not operate,
check for an open fuse. 1. Be sure the ignition switch and the headlight switch are OFF.
2. Open the glove box to access the fuse box cover. 3. Pull the fuse box cover to remove.
4. Remove the fuse with the fuse puller.
5. If the fuse is open
�A, replace it with an
equivalent good fuse
�B.
6. Push the fuse box cover to install.
7. If a new fuse also opens, have the electrical system checked and repaired by a NISSAN
dealer.
LDI0618
Type A
WDI0452
8-24Maintenance and do-it-yourself
Page 382 of 458
Extended storage switch
If any electrical equipment does not operate,
remove the extended storage switch and check
for an open fuse.
NOTE:
The extended storage switch is used for
long term vehicle storage. Even if the ex-
tended storage switch is broken it is not
necessary to replace it. Replace only the
open fuse in the switch with a new fuse.How to replace the extended storage switch:
1. To remove the extended storage switch, be sure the ignition switch is in the OFF or
LOCK position.
2. Be sure the headlight switch is in the OFF position.
3. Remove the fuse box cover.
4. Pinch the locking tabs
�1found on each
side of the storage switch.
5. Pull the storage switch straight out from the fuse box
�2.
Type B
LDI0456LDI2035
Maintenance and do-it-yourself8-25
Page 436 of 458
2. Apply the parking brake to access thejumper harness connector. 3. Locate the jumper harness connector under
the lower portion of the instrument panel.
The connector is taped to the wiring harness
�1as indicated.
● The connector is marked with a white tag
with “elec brake conn”. Wire color designation for electric trailer brake
controller jumper harness.
WIRE COLOR NOTE
RED/GREEN
Vehicle stop lamp switch to
trailer brake controller.
BLACK Brake controller ground (-) .
BROWN/WHITE Trailer brake controller switched output.
RED/BLUE Trailer brake controller
illumination.
RED Fused trailer brake controller
battery feed (B+) .
LTI0118LTI0115
Technical and consumer information9-35
Page 448 of 458

FuelCapacities and recommended
fuel/lubricants .................9-2
Fuel economy ................5-23
Fuel-filler door and cap ...........3-12
Fuel gauge ...................2-7
Fuel octane rating ...............9-4
Fuel recommendation .............9-3
Loose fuel cap warning ........2-24, 3-12
Fuses .......................8-22
Fusible links ...................8-23
G
Garage door opener, HomeLink� Universal
Transceiver ....................2-58
Gascap .....................3-12
Gauge Automatic transmission fluid temperature
gauge .....................2-8
Engine coolant temperature gauge .....2-6
Engine oil pressure gauge ..........2-7
Fuel gauge ...................2-7
Odometer ...................2-5
Speedometer .................2-5
Tachometer ..................2-6
Trip odometer .................2-5
Voltmeter ....................2-8
General maintenance ...............8-2
Glove box .....................2-45
Glove box lock ..................2-45
Grocery hooks ..................2-50 H
Hands-free phone system,
Bluetooth� ............4-83, 4-98, 4-109
Hazard warning flasher switch ..........6-2
Headlight and turn signal switch ........2-30
Headlight control switch ............2-30
Headlights ....................8-27
Headphones (See NISSAN mobile entertainment
system) ......................4-76
Heated seats ...................2-34
Heater Heater
and air conditioner
controls .............4-17, 4-25, 4-32
Heater operation ........4-19, 4-26, 4-33
HomeLink� Universal Transceiver ........2-58
Hood release ...................3-11
Horn .......................2-34
I
Ignition switch ...................5-9
Immobilizer system .........2-26, 3-2, 5-11
Important vehicle information label .......9-11
In-cabin microfilter ................8-18
Increasing fuel economy .............5-23
Indicator lights and audible reminders
(See warning/indicator lights and audible
reminders) ....................2-13
Inside automatic anti-glare mirror ........3-16
Inside mirror ...................3-16
Instrument brightness control ..........2-33
Instrument panel ...............0-6, 2-2
Instrument panel dimmer switch ........2-33Interior light
....................2-56
iPod� Player................4-62, 4-64
ISOFIX child restraints .............1-28
J
Jump starting ...................6-8
K
Key.........................3-2
Keyfob battery replacement ...........8-26
Keyless entry system
(See remote keyless entry system) ........3-7
L
Labels Air conditioner specification label .....9-12
C.M.V.S.S. certification label ........9-11
Emission control information label .....9-11
Engine serial number ............9-11
F.M.V.S.S. certification label .........9-11
Tire and Loading Information label .....9-12
Vehicle identification number (VIN) plate . .9-10
Warning labels (for SRS) ..........1-61
LATCH (Lower Anchors and Tethers for CHildren)
System ......................1-28
License
plate
Installing the license plate ..........9-12
Light Air bag warning light .........1-62, 2-18
Brake light (See stop light) .........8-29
10-3