2013 NISSAN SENTRA radio
[x] Cancel search: radioPage 188 of 372
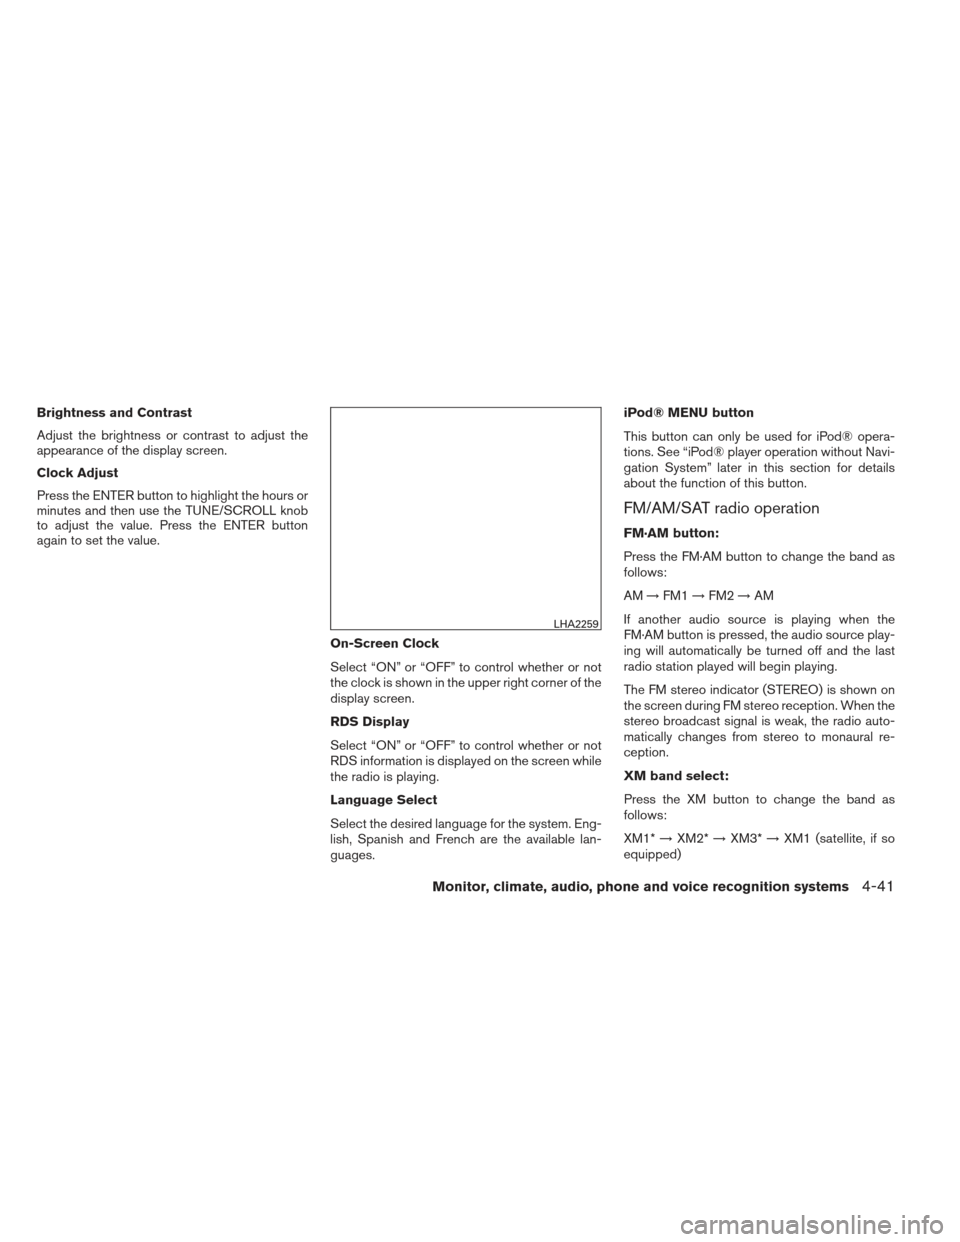
Brightness and Contrast
Adjust the brightness or contrast to adjust the
appearance of the display screen.
Clock Adjust
Press the ENTER button to highlight the hours or
minutes and then use the TUNE/SCROLL knob
to adjust the value. Press the ENTER button
again to set the value.On-Screen Clock
Select “ON” or “OFF” to control whether or not
the clock is shown in the upper right corner of the
display screen.
RDS Display
Select “ON” or “OFF” to control whether or not
RDS information is displayed on the screen while
the radio is playing.
Language Select
Select the desired language for the system. Eng-
lish, Spanish and French are the available lan-
guages.iPod® MENU button
This button can only be used for iPod® opera-
tions. See “iPod® player operation without Navi-
gation System” later in this section for details
about the function of this button.
FM/AM/SAT radio operation
FM·AM button:
Press the FM·AM button to change the band as
follows:
AM
→FM1 →FM2 →AM
If another audio source is playing when the
FM·AM button is pressed, the audio source play-
ing will automatically be turned off and the last
radio station played will begin playing.
The FM stereo indicator (STEREO) is shown on
the screen during FM stereo reception. When the
stereo broadcast signal is weak, the radio auto-
matically changes from stereo to monaural re-
ception.
XM band select:
Press the XM button to change the band as
follows:
XM1* →XM2* →XM3* →XM1 (satellite, if so
equipped)
LHA2259
Monitor, climate, audio, phone and voice recognition systems4-41
Page 189 of 372
When the XM button is pressed while the ignition
switch is in the ACC or ON position, the radio will
come on at the station last played.
The last station played will also come on when
the VOL/ON·OFF control knob is pressed ON.
*When the XM button is pressed, the satellite
radio reception will not be available unless an
optional satellite receiver and antenna are in-
stalled and a SiriusXM Satellite Radio service
subscription is active. Satellite radio is not avail-
able in Alaska, Hawaii and Guam.
If a compact disc is playing when the XM button
is pressed, the compact disc will automatically be
turned off and the last radio station played will
come on.
TUNE/SCROLL knob (Tuning):
Turn the TUNE/SCROLL knob to the left or right
for manual tuning.
SEEK tuning:
Press the SEEK button
orto
tune from low to high or high to low frequencies
and to stop at the next broadcasting station.
SCAN tuning:
Press the SCAN button to stop at each broad-
casting station for 5 seconds. SCAN will appear
on the screen while the radio is scan tuning. Pressing the button again during this 5 second
period will stop SCAN tuning and the radio will
remain tuned to that station. If the SCAN button is
not pressed within 5 seconds, SCAN tuning
moves to the next station.
1 to 6 Station memory operations:
Six stations can be set for the AM band. Twelve
stations can be set for the FM band (6 for FM1, 6
for FM2) . Eighteen channels can be set for the
satellite radio (6 for XM1, 6 for XM2, 6 for XM3) .
1. Choose the radio band AM, FM1 or FM2 using the FM·AM select button, or choose
the satellite band XM1, XM2 or XM3 using
the XM button.
2. Tune to the desired station using manual, SEEK or SCAN tuning. Press and hold any
of the desired station memory buttons (1 –
6) until the preset number is updated on the
display and the sound is briefly muted.
3. The channel indicator will then come on and the sound will resume. Programming is now
complete.
4. Other buttons can be set in the same man- ner.
If the battery cable is disconnected, or if the fuse
opens, the radio memory will be canceled. In that
case, reset the desired stations.
Compact disc (CD) player operation
If the radio is already operating, it automatically
turns off and the compact disc begins to play.
CD·AUX button:
With a CD loaded, press the CD·AUX button until
the CD mode is displayed on the screen.
CD/MP3 display mode:
While listening to an MP3/WMA CD, certain text
may be displayed on the screen if the CD has
been encoded with text information. Depending
on how the MP3/WMA CD is encoded, informa-
tion such as Artist, Song and Folder will be dis-
played.
The track number and the total number of tracks
in the current folder or on the current disc are
displayed on the screen as well.
SEEK/CAT (Reverse or Fast Forward) button:
Press and hold the SEEK/CAT button
orfor 1.5 seconds while the compact disc
is playing to reverse or fast forward the track
being played. The compact disc plays at an in-
creased speed while reversing or fast forwarding.
When the button is released, the compact disc
returns to normal play speed.
4-42Monitor, climate, audio, phone and voice recognition systems
Page 192 of 372
10. CD button
11. XM button**No satellite radio reception is available
when the XM button is pressed to access
satellite radio stations unless optional
satellite receiver and antenna are installed
and an SiriusXM Satellite Radio service
subscription is active. Satellite radio is
not available in Alaska, Hawaii and Guam.
FM/AM/SAT RADIO WITH
COMPACT DISC (CD) PLAYER (Type
B) (if so equipped)
For all operation precautions, see “Audio opera-
tion precautions” in this section.
Audio main operation
VOL (volume) / ON-OFF button:
Place the ignition switch in the ACC or ON
position and press the ON-OFF button while the
system is off to call up the mode (radio, CD, AUX,
Bluetooth® audio USB or iPod®) that was play-
ing immediately before the system was turned off.
To turn the system off, press the ON-OFF button.
Turn the VOL (volume) control knob to adjust the
volume. This vehicle may be equipped with Speed Sen-
sitive Volume. When this feature is active, the
audio volume changes as the driving speed
changes.
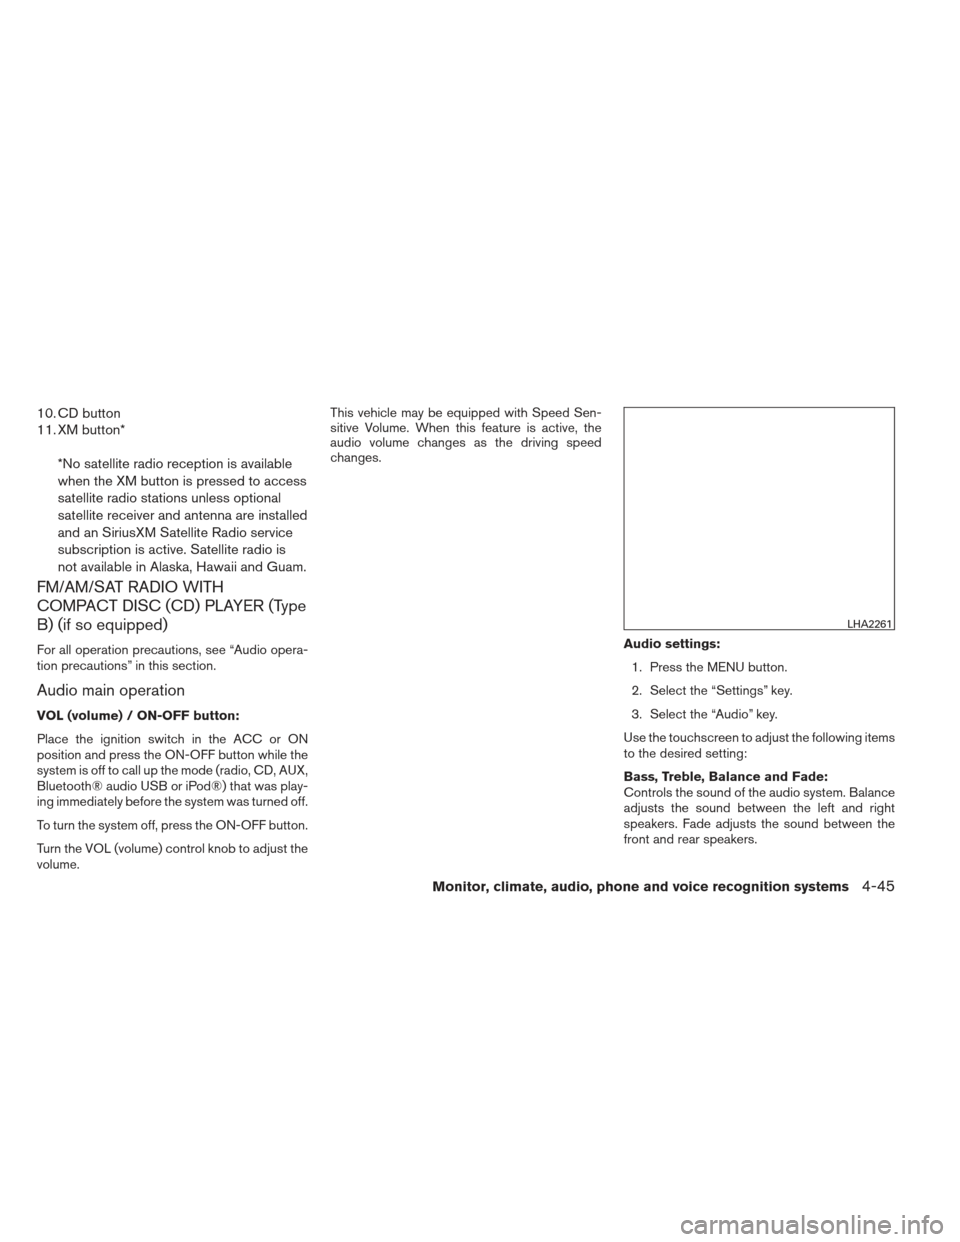
Audio settings:1. Press the MENU button.
2. Select the “Settings” key.
3. Select the “Audio” key.
Use the touchscreen to adjust the following items
to the desired setting:
Bass, Treble, Balance and Fade:
Controls the sound of the audio system. Balance
adjusts the sound between the left and right
speakers. Fade adjusts the sound between the
front and rear speakers.
LHA2261
Monitor, climate, audio, phone and voice recognition systems4-45
Page 193 of 372
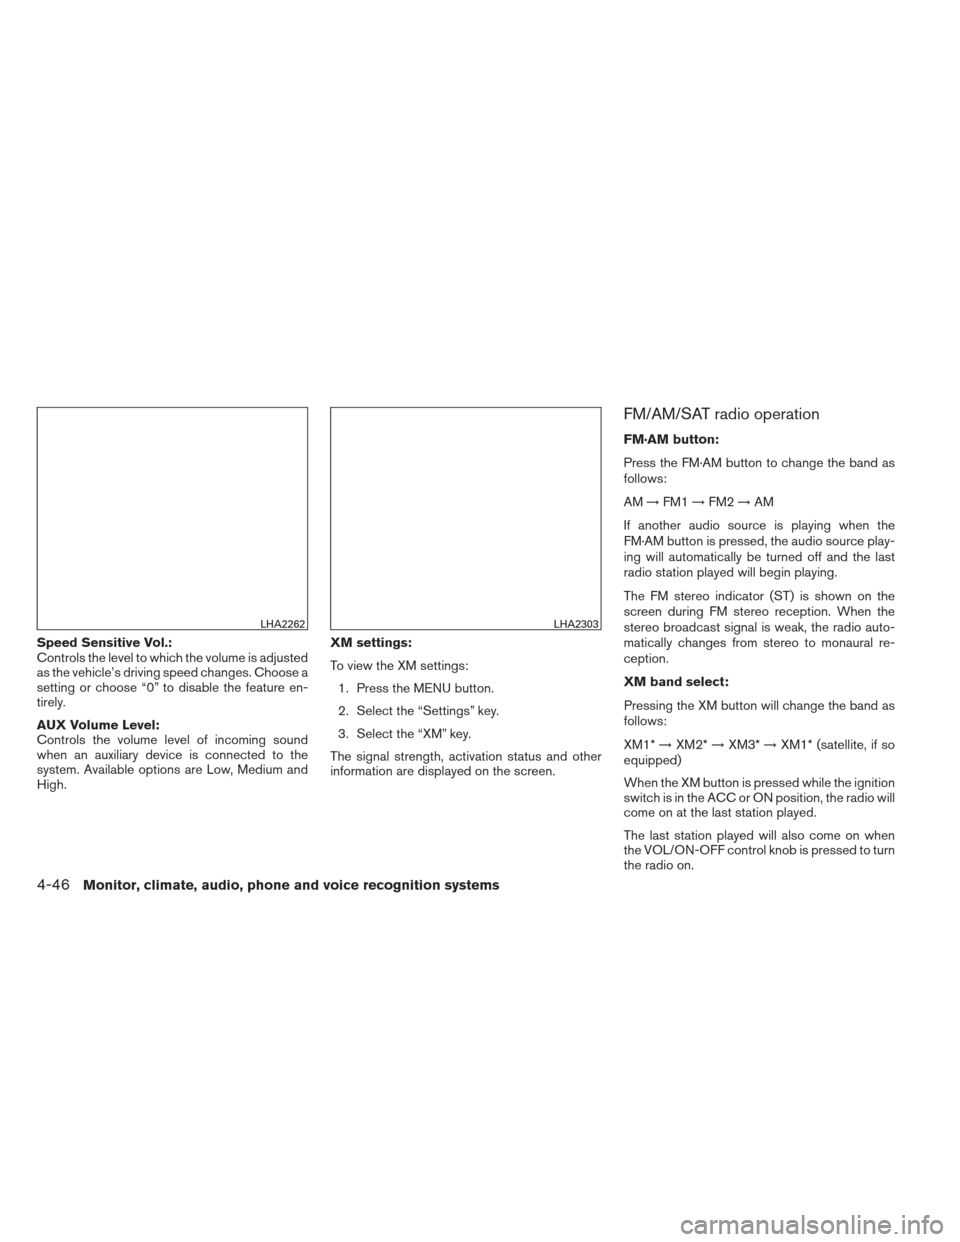
Speed Sensitive Vol.:
Controls the level to which the volume is adjusted
as the vehicle’s driving speed changes. Choose a
setting or choose “0” to disable the feature en-
tirely.
AUX Volume Level:
Controls the volume level of incoming sound
when an auxiliary device is connected to the
system. Available options are Low, Medium and
High.XM settings:
To view the XM settings:
1. Press the MENU button.
2. Select the “Settings” key.
3. Select the “XM” key.
The signal strength, activation status and other
information are displayed on the screen.
FM/AM/SAT radio operation
FM·AM button:
Press the FM·AM button to change the band as
follows:
AM →FM1 →FM2 →AM
If another audio source is playing when the
FM·AM button is pressed, the audio source play-
ing will automatically be turned off and the last
radio station played will begin playing.
The FM stereo indicator (ST) is shown on the
screen during FM stereo reception. When the
stereo broadcast signal is weak, the radio auto-
matically changes from stereo to monaural re-
ception.
XM band select:
Pressing the XM button will change the band as
follows:
XM1* →XM2* →XM3* →XM1* (satellite, if so
equipped)
When the XM button is pressed while the ignition
switch is in the ACC or ON position, the radio will
come on at the last station played.
The last station played will also come on when
the VOL/ON-OFF control knob is pressed to turn
the radio on.
LHA2262LHA2303
4-46Monitor, climate, audio, phone and voice recognition systems
Page 194 of 372
*When the XM button is pressed, the satellite
radio mode will be skipped unless an optional
satellite receiver and antenna are installed and a
SiriusXM Satellite Radio service subscription is
active. Satellite radio is not available in Alaska,
Hawaii and Guam.
If a compact disc is playing when the XM button
is pressed, the compact disc will automatically be
turned off and the last radio station played will
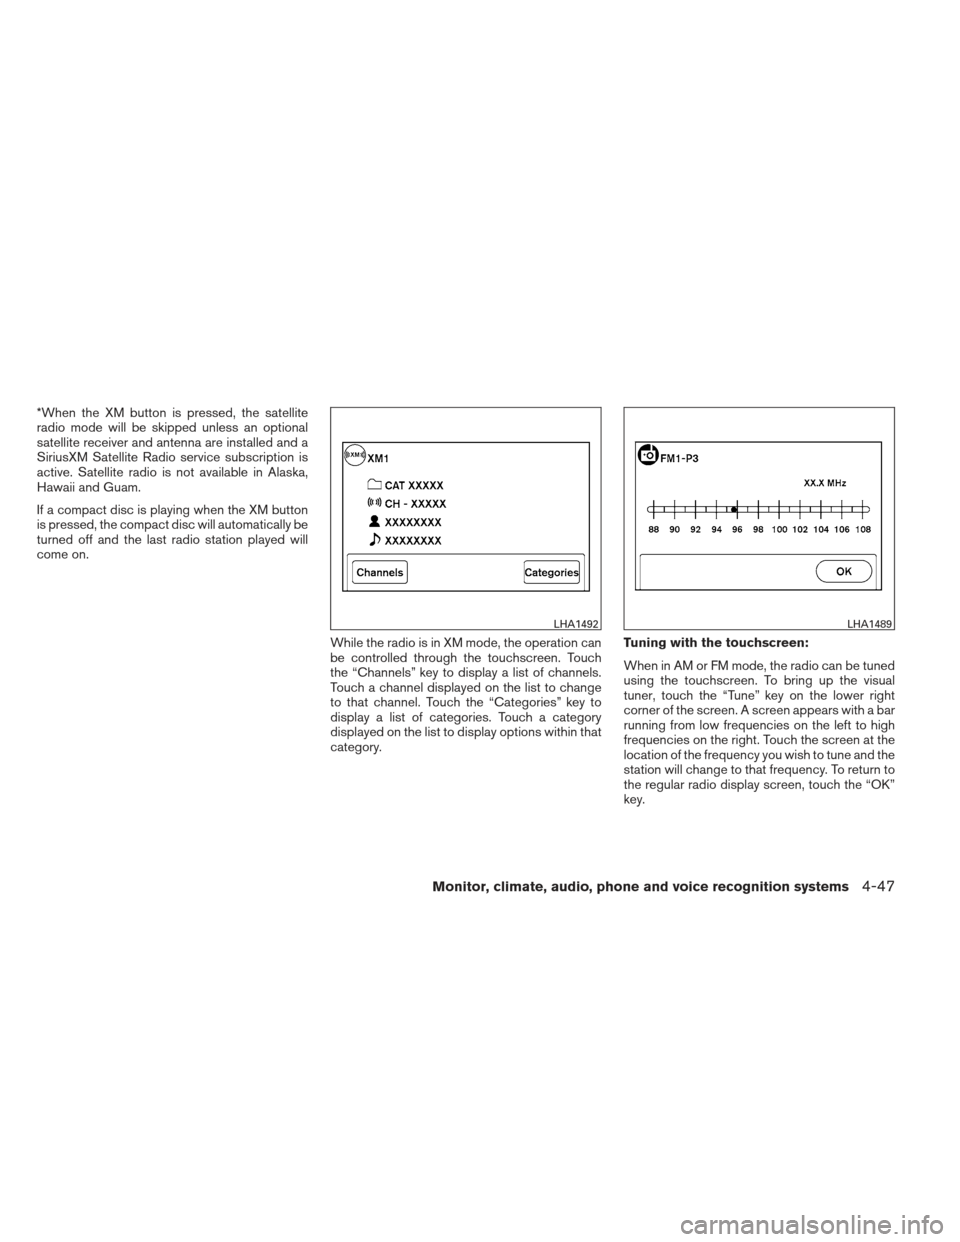
come on.While the radio is in XM mode, the operation can
be controlled through the touchscreen. Touch
the “Channels” key to display a list of channels.
Touch a channel displayed on the list to change
to that channel. Touch the “Categories” key to
display a list of categories. Touch a category
displayed on the list to display options within that
category.Tuning with the touchscreen:
When in AM or FM mode, the radio can be tuned
using the touchscreen. To bring up the visual
tuner, touch the “Tune” key on the lower right
corner of the screen. A screen appears with a bar
running from low frequencies on the left to high
frequencies on the right. Touch the screen at the
location of the frequency you wish to tune and the
station will change to that frequency. To return to
the regular radio display screen, touch the “OK”
key.
LHA1492LHA1489
Monitor, climate, audio, phone and voice recognition systems4-47
Page 195 of 372
Tuning with the TUNE knob:
The radio can also be manually tuned using the
TUNE knob. When in FM or AM mode, turn the
TUNE knob to the left for lower frequencies or to
the right for higher frequencies. When in XM
mode, turn the TUNE knob to change the chan-
nel.
SEEK tuning:
When in FM or AM mode, press the seek
buttons
orto tune from low to high
or high to low frequencies and to stop at the next
broadcasting station.
When in XM mode, press the seek buttons
orto change the category. 1 to 6 Station memory operations:
Twelve stations can be set for the FM band (6 for
FM1, 6 for FM2) and six stations can be set for
the AM band. Eighteen stations can be set for the
XM band (6 for XM1, 6 for XM2, 6 for XM3) .
1. Choose the radio band AM, FM1 or FM2 using the FM·AM select button or choose
the radio band XM1, XM2 or XM3 using the
XM button.
2. Tune to the desired station using manual or seek tuning. Press and hold any of the de-
sired station memory buttons (1 – 6) until a
beep sound is heard. 3. The channel indicator will then come on and
the sound will resume. Programming is now
complete.
4. Other buttons can be set in the same man- ner.
If the battery cable is disconnected or if the fuse
opens, the radio memory will be canceled. In that
case, reset the desired stations.
Presets can also be selected by touching the
desired preset number on the screen.
Compact disc (CD) player operation
If the radio is already operating, it automatically
turns off and the compact disc begins to play.
CD button:
When the CD button is pressed with the system
off and the compact disc loaded, the system will
turn on and the compact disc will start to play.
When the CD button is pressed with a compact
disc loaded and the radio playing, the radio will
automatically be turned off and the compact disc
will start to play.LHA2263
4-48Monitor, climate, audio, phone and voice recognition systems
Page 199 of 372
Audio file operation
CD button:
Place the ignition switch in the ON or ACC
position and press the CD button to switch
to the USB input mode. If a CD is playing or
another audio source is plugged in through the
AUX IN jack on the radio, the CD button
toggles between the three sources.
Play information
Information about the audio files being played
can be displayed on the display screen of the
vehicle’s audio system. Depending on how the
audio files are encoded, information such as
Folder, Song and Artist will be displayed.
The track number and number of total tracks in
the folder are displayed on the screen as well.
SEEK/CAT (Reverse orFast Forward) buttons:
Press and hold the SEEK/CAT buttons
orfor 1.5 seconds while an audio file on
the USB device is playing to reverse or fast
forward the track being played. The track plays at
an increased speed while reversing or fast for-
warding. When the button is released, the audio
file returns to normal play speed.
SEEK/CAT buttons:
Press the SEEK/CAT button
while an au-
dio file on the USB device is playing to return to
the beginning of the current track. Press the
SEEK/CAT button
several times to skip
backward several tracks.
Press the SEEK/CAT button
while an au-
dio file on the USB device is playing to advance
one track. Press the SEEK/CAT button
several times to skip forward several tracks. If the
last track in a folder on the USB device is
skipped, the first track of the next folder is played.
RDM button:
When the RDM button is pressed while an audio
file on the USB device is playing, the play pattern
can be changed as follows:
All Random →1 Folder Random →OFF
All Random: all tracks on the USB device will be
played randomly.
1 Folder Random: all tracks in the current folder
will be played randomly.
OFF: No random play pattern is applied. The
indicator on the display will turn off. The current play pattern of the USB device is
displayed on the screen unless no pattern is
applied.
RPT button:
When the RPT button is pressed while an audio
file on the USB device is playing, the play pattern
can be changed as follows:
1 Folder Repeat
→1 Track Repeat →OFF
1 Track Repeat: the current track will be re-
peated.
1 Folder Repeat: the current folder will be re-
peated.
OFF: No repeat play pattern is applied. The indi-
cator on the display will turn off.
The current play pattern of the USB device is
displayed on the screen unless no pattern is
applied.
TUNE/SCROLL knob:
If there are multiple folders with audio files on the
USB device, turn the TUNE/SCROLL knob to
change folders. Turn the knob to the left to skip
back a folder. Turn the knob to the right to skip
ahead a folder. If there is only one folder of audio
files on the USB device, turning the
TUNE/SCROLL knob in either direction will re-
turn to the first track on the USB device.
4-52Monitor, climate, audio, phone and voice recognition systems
Page 211 of 372
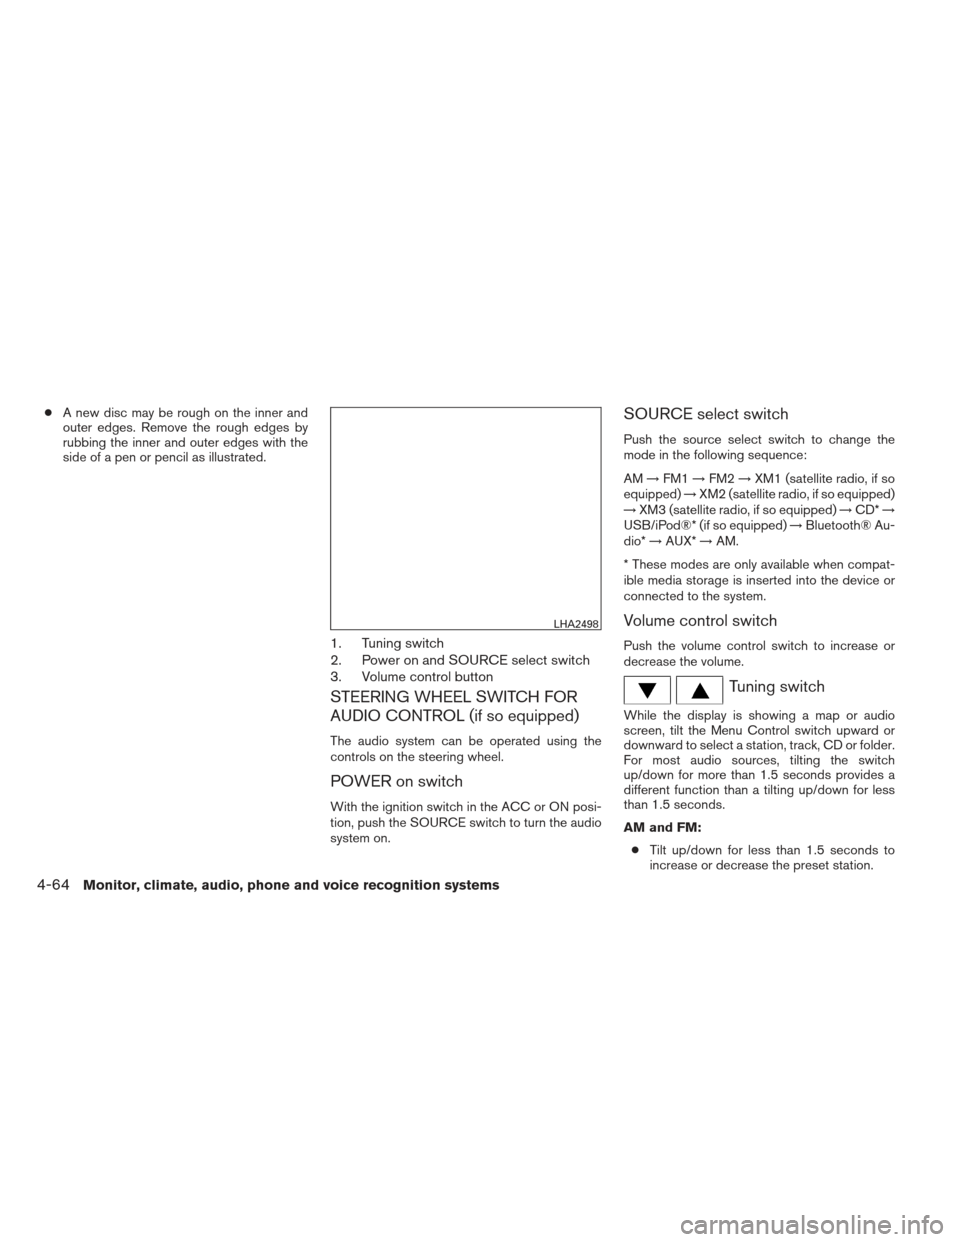
●A new disc may be rough on the inner and
outer edges. Remove the rough edges by
rubbing the inner and outer edges with the
side of a pen or pencil as illustrated.
1. Tuning switch
2. Power on and SOURCE select switch
3. Volume control button
STEERING WHEEL SWITCH FOR
AUDIO CONTROL (if so equipped)
The audio system can be operated using the
controls on the steering wheel.
POWER on switch
With the ignition switch in the ACC or ON posi-
tion, push the SOURCE switch to turn the audio
system on.
SOURCE select switch
Push the source select switch to change the
mode in the following sequence:
AM →FM1 →FM2 →XM1 (satellite radio, if so
equipped) →XM2 (satellite radio, if so equipped)
→ XM3 (satellite radio, if so equipped) →CD* →
USB/iPod®* (if so equipped) →Bluetooth® Au-
dio* →AUX* →AM.
* These modes are only available when compat-
ible media storage is inserted into the device or
connected to the system.
Volume control switch
Push the volume control switch to increase or
decrease the volume.
Tuning switch
While the display is showing a map or audio
screen, tilt the Menu Control switch upward or
downward to select a station, track, CD or folder.
For most audio sources, tilting the switch
up/down for more than 1.5 seconds provides a
different function than a tilting up/down for less
than 1.5 seconds.
AM and FM: ● Tilt up/down for less than 1.5 seconds to
increase or decrease the preset station.
LHA2498
4-64Monitor, climate, audio, phone and voice recognition systems