2013 NISSAN PATHFINDER turn signal
[x] Cancel search: turn signalPage 250 of 506
RADIO
Place the ignition switch in the ACC or ON
position and press the VOL (volume)/ON·OFF
(power) knob to turn the radio on. If you listen to
the radio with the engine not running, the ignition
switch should be placed in the ACC position.
Radio reception is affected by station signal
strength, distance from radio transmitter, build-
ings, bridges, mountains and other external influ-
ences. Intermittent changes in reception quality
normally are caused by these external influences.
Using a cellular phone in or near the ve-
hicle may influence radio reception quality.
Radio reception
Your NISSAN radio system is equipped with
state-of-the-art electronic circuits to enhance ra-
dio reception. These circuits are designed to
extend reception range, and to enhance the qual-
ity of that reception.
However, there are some general characteristics
of both FM and AM radio signals that can affect
radio reception quality in a moving vehicle, even
when the finest equipment is used. These char-
acteristics are completely normal in a given re-
ception area and do not indicate any malfunction
in your NISSAN radio system.Reception conditions will constantly change be-
cause of vehicle movement. Buildings, terrain,
signal distance and interference from other ve-
hicles can work against ideal reception. De-
scribed below are some of the factors that can
affect your radio reception.
Some cellular phones or other devices may
cause interference or a buzzing noise to come
from the audio system speakers. Storing the de-
vice in a different location may reduce or elimi-
nate the noise.
FM RADIO RECEPTION
Range: FM range is normally limited to 25 – 30 mi
(40 – 48 km) , with monaural (single channel) FM
having slightly more range than stereo FM. Exter-
nal influences may sometimes interfere with FM
station reception even if the FM station is within
25 mi (40 km) . The strength of the FM signal is
directly related to the distance between the
transmitter and receiver. FM signals follow a line-
of-sight path, exhibiting many of the same char-
acteristics as light. For example, they will reflect
off objects.
Fade and drift: As your vehicle moves away from
a station transmitter, the signals will tend to fade
and/or drift.
Static and flutter: During signal interference from
buildings, large hills or due to antenna position
(usually in conjunction with increased distance
from the station transmitter) , static or flutter can
be heard. This can be reduced by adjusting the
treble control to reduce treble response.
Multipath reception: Because of the reflective
characteristics of FM signals, direct and reflected
signals reach the receiver at the same time. The
signals may cancel each other, resulting in mo-
mentary flutter or loss of sound.
AM RADIO RECEPTION
AM signals, because of their low frequency, can
bend around objects and skip along the ground.
In addition, the signals can be bounced off the
ionosphere and bent back to earth. Because of
these characteristics, AM signals are also sub-
ject to interference as they travel from transmitter
to receiver.
Fading: Occurs while the vehicle is passing
through freeway underpasses or in areas with
many tall buildings. It can also occur for several
seconds during ionospheric turbulence even in
areas where no obstacles exist.
Static: Caused by thunderstorms, electrical
power lines, electric signs and even traffic lights.
AUDIO SYSTEM
Monitor, climate, audio, phone and voice recognition systems4-59
Page 268 of 506
●Artist name displays the name of the artist of
the song playing.
● Album title displays the title of the album of
the song playing.
FM/AM radio operation
FM/AM band select:
Pressing the AM·FM button will change the band
as follows:
AM →FM1 →FM2 →AM
When the AM·FM button is pressed while the
ignition switch is in the ACC or ON position, the
radio will come on at the station last played.
The last station played will also come on when
the VOL/ON·OFF control knob is pressed ON.
If a compact disc is playing when the AM·FM
button is pressed, the compact disc will auto-
matically be turned off and the last radio station
played will come on.
The FM stereo indicator ST will illuminate during
FM stereo reception. When the stereo broadcast
signal is weak, the radio will automatically change
from stereo to monaural reception.
TUNE/FOLDER (Tuning) knob:
To manually tune the radio, turn the
TUNE/FOLDER knob to the right or left.
SEEK/CAT and TRACK tuning buttons:
Press the SEEK/CAT
button or the
TRACK
button to tune from high to low or
low to high frequencies and stop at the next
broadcasting station.
SCAN tuning:
Press the SCAN button to stop at each broad-
casting station for 5 seconds. Pressing the
SCAN button again during this 5-second period
will stop scan tuning and the radio will remain
tuned to that station. If the SCAN button is not
pressed within 5 seconds, scan tuning moves to
the next station.
1 to 6 Station memory operations:
Twelve stations can be set for the FM band (6 for
FM1, 6 for FM2) and six stations can be set for
the AM band.
1. Choose the radio band AM, FM1 or FM2 using the AM·FM select button.
2. Tune to the desired station using manual, SEEK or SCAN tuning. Press and hold any
of the desired station memory buttons (1 –
6) until a beep sound is heard. 3. The channel indicator will then come on and
the sound will resume. Programming is now
complete.
4. Other buttons can be set in the same man- ner.
If the battery cable is disconnected or if the fuse
opens, the radio memory will be canceled. In that
case, reset the desired stations.
Compact disc (CD) changer operation
Place the ignition switch in the ACC or ON
position and press the LOAD button, then press
one of the CD insert (1 – 6) slots. Insert the
compact disc into the slot with the label side
facing up. The compact disc will be guided auto-
matically into the slot and start playing.
If the radio is already operating, it will automati-
cally turn off and the compact disc will play.
If the system has been turned off while a compact
disc was playing, pressing the VOL/ON·OFF
control knob will start the compact disc.
LOAD button:
To insert a CD in the CD changer, press the
LOAD button for less than 1.5 seconds. Select
the loading slot by pressing the CD insert select
button (1 – 6) , then insert the CD.
Monitor, climate, audio, phone and voice recognition systems4-77
Page 273 of 506
CD/MP3 display mode
While listening to a CD or an MP3/WMA CD,
certain text might be able to be displayed (when
CD encoded with text is being used) .
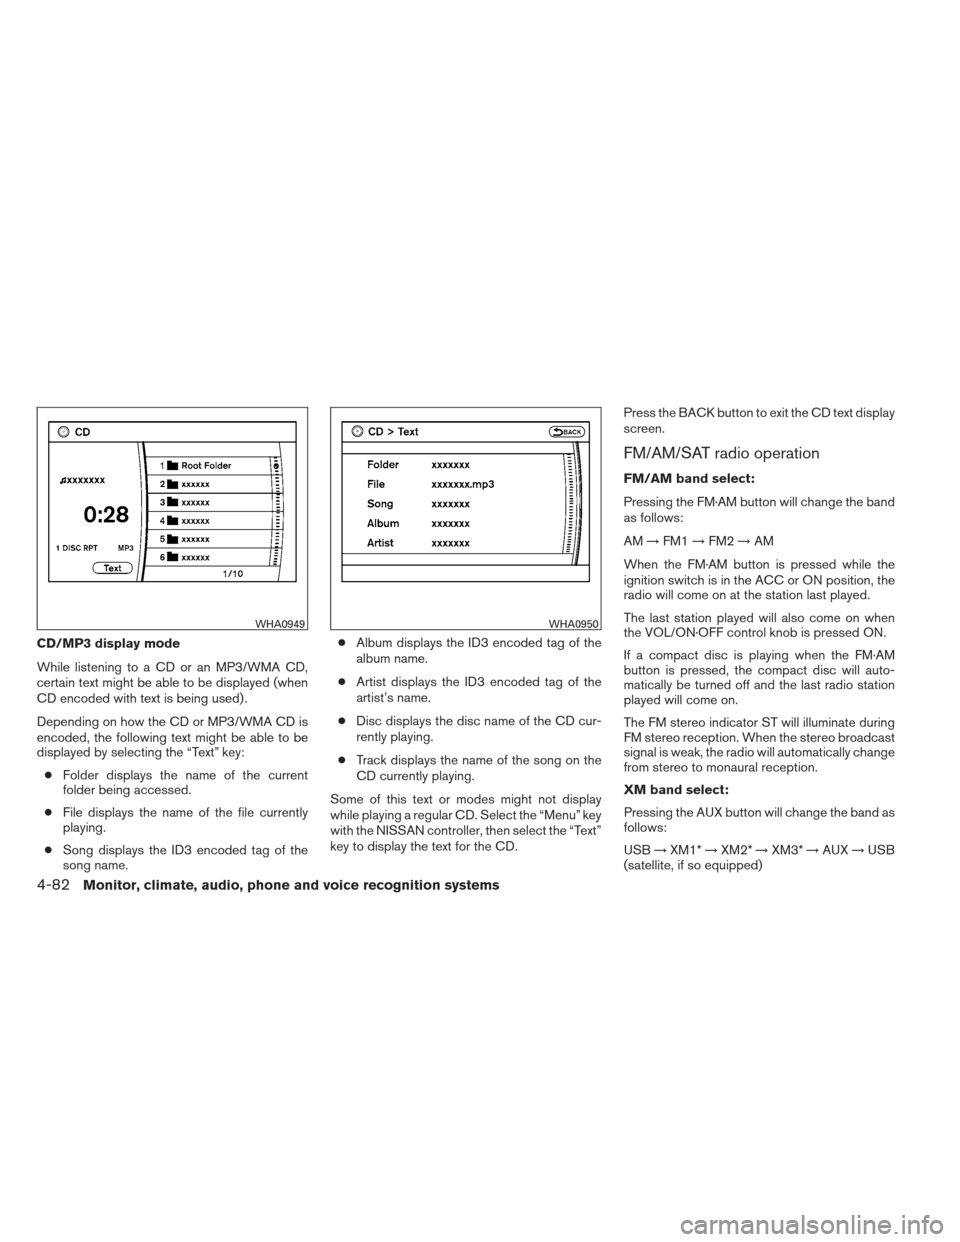
Depending on how the CD or MP3/WMA CD is
encoded, the following text might be able to be
displayed by selecting the “Text” key:● Folder displays the name of the current
folder being accessed.
● File displays the name of the file currently
playing.
● Song displays the ID3 encoded tag of the
song name. ●
Album displays the ID3 encoded tag of the
album name.
● Artist displays the ID3 encoded tag of the
artist’s name.
● Disc displays the disc name of the CD cur-
rently playing.
● Track displays the name of the song on the
CD currently playing.
Some of this text or modes might not display
while playing a regular CD. Select the “Menu” key
with the NISSAN controller, then select the “Text”
key to display the text for the CD. Press the BACK button to exit the CD text display
screen.
FM/AM/SAT radio operation
FM/AM band select:
Pressing the FM·AM button will change the band
as follows:
AM
→FM1 →FM2 →AM
When the FM·AM button is pressed while the
ignition switch is in the ACC or ON position, the
radio will come on at the station last played.
The last station played will also come on when
the VOL/ON·OFF control knob is pressed ON.
If a compact disc is playing when the FM·AM
button is pressed, the compact disc will auto-
matically be turned off and the last radio station
played will come on.
The FM stereo indicator ST will illuminate during
FM stereo reception. When the stereo broadcast
signal is weak, the radio will automatically change
from stereo to monaural reception.
XM band select:
Pressing the AUX button will change the band as
follows:
USB →XM1* →XM2* →XM3* →AUX →USB
(satellite, if so equipped)
WHA0949WHA0950
4-82Monitor, climate, audio, phone and voice recognition systems
Page 280 of 506
●Song displays the ID3 encoded tag of the
song name.
● Album displays the ID3 encoded tag of the
album name.
● Artist displays the ID3 encoded tag of the
artist’s name.
Some of this text might not display while playing a
regular CD.
FM/AM/SAT radio operation
FM/AM band select:
Pressing the AM·FM button will change the band
as follows:
AM →FM1 →FM2 →AM
When the AM·FM button is pressed while the
ignition switch is in the ACC or ON position, the
radio will come on at the station last played.
The last station played will also come on when
the VOL/ON·OFF control knob is pressed ON.
If a compact disc is playing when the AM·FM
button is pressed, the compact disc will auto-
matically be turned off and the last radio station
played will come on.
The FM stereo indicator STEREO will illuminate
during FM stereo reception. When the stereo broadcast signal is weak, the radio will automati-
cally change from stereo to monaural reception.
SAT band select:
Pressing the SAT button will change the band as
follows:
XM1*
→XM2* →XM3* →XM1 (satellite, if so
equipped)
When the SAT button is pressed while the igni-
tion switch is in the ACC or ON position, the
radio will come on at the station last played.
The last station played will also come on when
the VOL/ON·OFF control knob is pressed ON.
*When the SAT button is pressed, the satellite
radio reception will not be available unless an
optional satellite receiver and antenna are in-
stalled and a SiriusXM Satellite Radio service
subscription is active. Satellite radio is not avail-
able in Alaska, Hawaii and Guam.
If a compact disc is playing when the SAT button
is pressed, the compact disc will automatically be
turned off and the last radio station played will
come on.
TUNE/FOLDER (Tuning) knob:
To manually tune the radio, turn the
TUNE/FOLDER knob to the right or left.
SEEK/CAT and TRACK
tuning buttons:
For AM or FM:
Press the SEEK/CAT
button or the
TRACK
button to tune from high to low or
low to high frequencies and stop at the next
broadcasting station.
For XM:
Press the SEEK/CAT
button or the
TRACK
button to go to the first channel of
the previous or next category.
SCAN tuning:
Press the SCAN button to stop at each broad-
casting station for 5 seconds. Pressing the
SCAN button again during this five second pe-
riod will stop scan tuning and the radio will remain
tuned to that station. If the SCAN button is not
pressed within 5 seconds, scan tuning moves to
the next station.
1 to 6 Station memory operations:
Six stations can be set for the AM band. Twelve
stations can be set for the FM band (6 for FM1, 6
for FM2) . Eighteen channels can be set for the
SAT radio (6 for XM1, 6 for XM2, 6 for XM3 – if so
equipped) .
Monitor, climate, audio, phone and voice recognition systems4-89
Page 319 of 506
Your NISSAN is equipped with the Bluetooth®
Hands-Free Phone System. If you have a com-
patible Bluetooth® enabled cellular phone, you
can set up the wireless connection between your
cellular phone and the in-vehicle phone module.
With Bluetooth® wireless technology, you canmake or receive a hands-free telephone call with
your cellular phone in the vehicle.
Once your cellular phone is connected to the in-
vehicle phone module, no other phone connecting
procedure is required. Your phone is automatically
connected with the in-vehicle phone module when the ignition switch is placed in the ON position with
the previously connected cellular phone turned on
and carried in the vehicle.
You can connect up to 5 different Bluetooth®
cellular phones to the in-vehicle phone module.
However, you can talk on only one cellular phone
at a time.
Before using the Bluetooth® Hands-Free Phone
System, refer to the following notes.
● Set up the wireless connection between a
compatible cellular phone and the in-vehicle
phone module before using the hands-free
phone system.
● Some Bluetooth® enabled cellular phones
may not be recognized by the in-vehicle
phone module. Please visit
www.nissanusa.com/bluetooth for a recom-
mended phone list and connecting instruc-
tions.
● You will not be able to use a hands-free
phone under the following conditions:
– Your vehicle is outside of the cellular ser- vice area.
– Your vehicle is in an area where it is difficult to receive a cellular signal; such
as in a tunnel, in an underground parking
garage, near a tall building or in a moun-
tainous area.
LHA2476
4-128Monitor, climate, audio, phone and voice recognition systems
Page 333 of 506
phone module when the ignition switch is placed
in the ON position with the connected cellular
phone turned on and carried in the vehicle.
You can register up to 5 different Bluetooth®
cellular phones to the in-vehicle phone module.
However, you can talk on only one cellular phone
at a time.
NISSAN Voice Recognition system supports the
phone commands, so dialing a phone number
using your voice is possible. For more details, see
“NISSAN Voice Recognition System” in this sec-
tion.
Before using the Bluetooth® Hands-Free Phone
System, refer to the following notes.● Set up the wireless connection between a
cellular phone and the in-vehicle phone
module before using the hands-free phone
system.
● Some Bluetooth® enabled cellular phones
may not be recognized by the in-vehicle
phone module. Please visit
www.nissanusa.com/bluetooth for a recom-
mended phone list and connecting.
● You will not be able to use a hands-free
phone under the following conditions:
– Your vehicle is outside of the cellular ser- vice area. – Your vehicle is in an area where it is
difficult to receive cellular signal; such as
in a tunnel, in an underground parking
garage, near a tall building or in a moun-
tainous area.
– Your cellular phone is locked to prevent it from being dialed.
● When the radio wave condition is not ideal
or ambient sound is too loud, it may be
difficult to hear the other person’s voice dur-
ing a call.
● Immediately after the ignition switch is
placed in the ON position, it may be impos-
sible to receive a call for a short period of
time.
● Do not place the cellular phone in an area
surrounded by metal or far away from the
in-vehicle phone module to prevent tone
quality degradation and wireless connection
disruption.
● While a cellular phone is connected through
the Bluetooth® wireless connection, the
battery power of the cellular phone may dis-
charge quicker than usual. The Bluetooth®
Hands-Free Phone System cannot charge
cellular phones. ●
If the hands-free phone system seems to be
malfunctioning, see “Troubleshooting guide”
in this section. You can also visit
www.nissanusa.com/bluetooth for trouble-
shooting help.
● Some cellular phones or other devices may
cause interference or a buzzing noise to
come from the audio system speakers. Stor-
ing the device in a different location may
reduce or eliminate the noise.
● Refer to the cellular phone owner’s manual
regarding the telephone charges, cellular
phone antenna and body, etc.
● The signal strength display on the monitor
will not coincide with the signal strength
display of some cellular phones.
● If reception between callers is unclear, ad-
justing the incoming or outgoing call volume
may improve the clarity. See “Call volume” in
this section.
4-142Monitor, climate, audio, phone and voice recognition systems
Page 403 of 506
To shut off the engine in an emergency situation
while driving, perform the following procedure:
– Rapidly push the push-button ignition switch 3consecutive times in less than 1.5 seconds, or
– Push and hold the push-button ignition switch for more than 2 seconds.
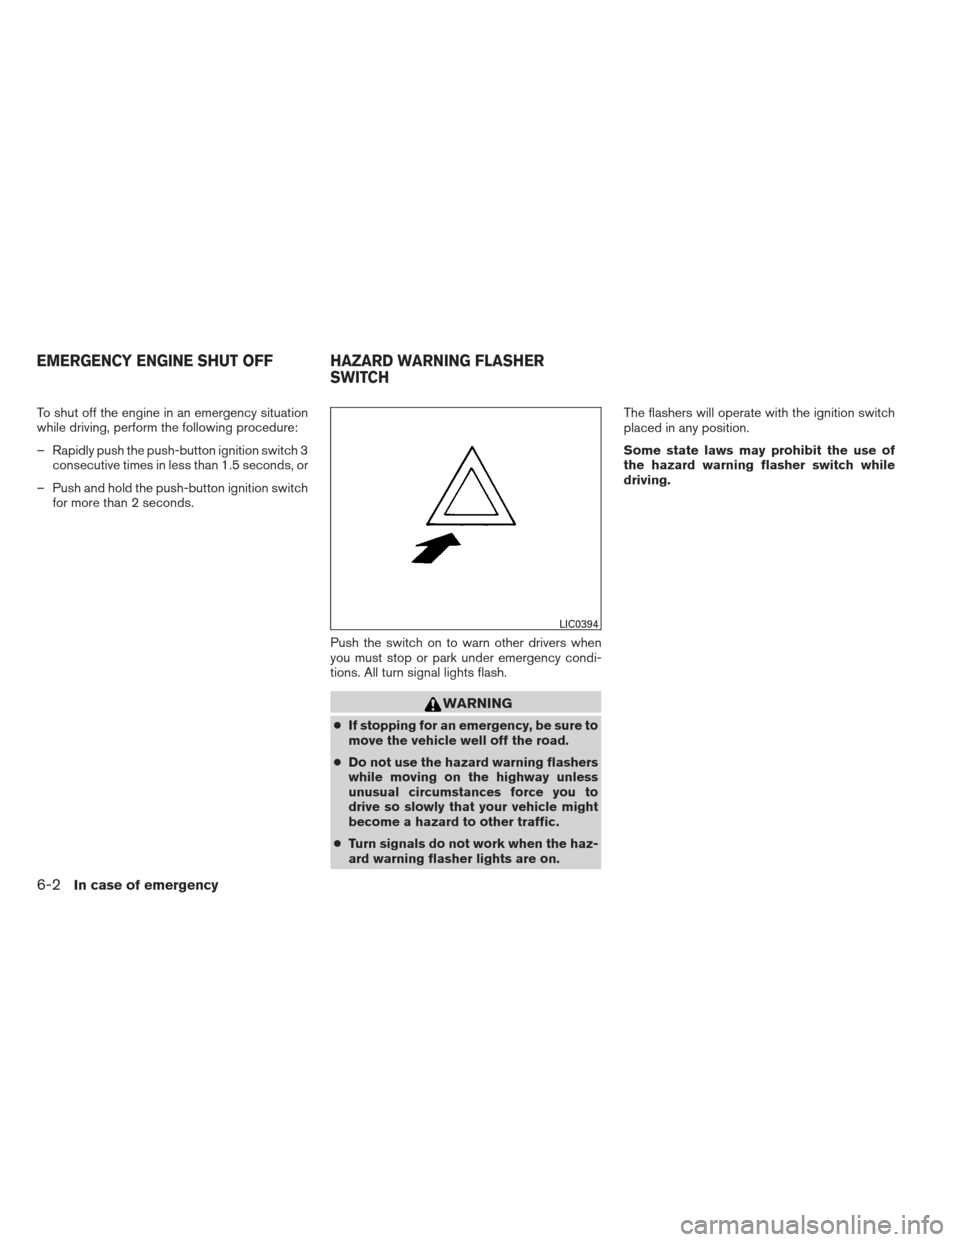
Push the switch on to warn other drivers when
you must stop or park under emergency condi-
tions. All turn signal lights flash.
WARNING
●If stopping for an emergency, be sure to
move the vehicle well off the road.
● Do not use the hazard warning flashers
while moving on the highway unless
unusual circumstances force you to
drive so slowly that your vehicle might
become a hazard to other traffic.
● Turn signals do not work when the haz-
ard warning flasher lights are on. The flashers will operate with the ignition switch
placed in any position.
Some state laws may prohibit the use of
the hazard warning flasher switch while
driving.
LIC0394
EMERGENCY ENGINE SHUT OFF HAZARD WARNING FLASHER
SWITCH
6-2In case of emergency
Page 404 of 506
TIRE PRESSURE MONITORING
SYSTEM (TPMS)
This vehicle is equipped with the Tire Pressure
Monitoring System (TPMS) . It monitors tire pres-
sure of all tires except the spare. When the low
tire pressure warning light is lit, and the CHECK
TIRE PRESSURE warning appears in the vehicle
information display, one or more of your tires is
significantly under-inflated. If equipped, the sys-
tem also displays pressure of all tires (except the
spare tire) on the display screen by sending a
signal from a sensor that is installed in each
wheel. If the vehicle is being driven with low tire
pressure, the TPMS will activate and warn you of
it by the low tire pressure warning light. This
system will activate only when the vehicle is
driven at speeds above 16 MPH (25 km/h). For
more details, refer to “Warning/indicator lights
and audible reminders” in the “Instruments and
controls” section and “Tire Pressure Monitoring
System (TPMS)” in the “Starting and driving”
section.
WARNING
●Radio waves could adversely affect
electric medical equipment. Those who
use a pacemaker should contact the
electric medical equipment manufac-
turer for the possible influences before
use.
● If the low tire pressure warning light
illuminates while driving, avoid sudden
steering maneuvers or abrupt braking,
reduce vehicle speed, pull off the road
to a safe location and stop the vehicle
as soon as possible. Driving with under-
inflated tires may permanently damage
the tires and increase the likelihood of
tire failure. Serious vehicle damage
could occur and may lead to an acci-
dent and could result in serious per-
sonal injury. Check the tire pressure for
all four tires. Adjust the tire pressure to
the recommended COLD tire pressure
shown on the Tire and Loading Informa-
tion label to turn the low tire pressure
warning light OFF. If you have a flat tire,
replace it with a spare tire as soon as
possible. ●
When a spare tire is mounted or a wheel
is replaced, tire pressure will not be
indicated, the TPMS will not function
and the low tire pressure warning light
will flash for approximately 1 minute.
The light will remain on after 1 minute.
Contact your NISSAN dealer as soon as
possible for tire replacement and/or
system resetting.
● Replacing tires with those not originally
specified by NISSAN could affect the
proper operation of the TPMS.
● Do not inject any tire liquid or aerosol
tire sealant into the tires, as this may
cause a malfunction of the tire pressure
sensors.
CHANGING A FLAT TIRE
If you have a flat tire, follow the instructions be-
low:
Stopping the vehicle
1. Safely move the vehicle off the road and
away from traffic.
2. Turn on the hazard warning flashers.
3. Park on a level surface and apply the parking brake. Move the shift selector to P (Park) .
FLAT TIRE
In case of emergency6-3