2013 NISSAN MAXIMA manual radio set
[x] Cancel search: manual radio setPage 84 of 444
TPMS malfunction:
If the TPMS is not functioning properly, the low
tire pressure warning light will flash for approxi-
mately 1 minute when the ignition switch is
placed in the ON position. The light will remain on
after the 1 minute. Have the system checked by a
NISSAN dealer. The CHECK TIRE PRESSURE
warning does not appear if the low tire pressure
warning light illuminates to indicate a TPMS mal-
function.
For additional information, see “Tire Pressure
Monitoring System (TPMS)” in the “Starting and
driving” section and “Tire pressure” in the “Main-
tenance and do-it-yourself” section in this
manual.
WARNING
●Radio waves could adversely affect
electrical medical equipment. Those
who use a pacemaker should contact
the electric medical equipment manu-
facturer for the possible influences be-
fore use.
● If the light does not illuminate with the
ignition switch in the ON position, have
the vehicle checked by a NISSAN dealer
as soon as possible. ●
If the light illuminates while driving,
avoid sudden steering maneuvers or
abrupt braking, reduce vehicle speed,
pull off the road to a safe location and
stop the vehicle as soon as possible.
Driving with under-inflated tires may per-
manently damage the tires and increase
the likelihood of tire failure. Serious ve-
hicle damage could occur and may lead
to an accident and could result in serious
personal injury. Check the tire pressure
for all four tires. Adjust the tire pressure
to the recommended COLD tire pressure
shown on the Tire and Loading Informa-
tion label located in the driver’s door
opening to turn the low tire pressure
warning light OFF. If the light still comes
on while driving after adjusting the tire
pressure, a tire may be flat. If you have a
flat tire, replace it with a spare tire as
soon as possible.
● When a spare tire is mounted or a wheel
is replaced, tire pressure will not be
indicated, the TPMS will not function
and the low tire pressure warning light
will flash for approximately 1 minute.
The light will remain on after 1 minute.
Contact your NISSAN dealer as soon as
possible for tire replacement and/or
system resetting. ●
Replacing tires with those not originally
specified by NISSAN could affect the
proper operation of the TPMS.
CAUTION
● The TPMS is not a substitute for the
regular tire pressure check. Be sure to
check the tire pressure regularly.
● If the vehicle is being driven at speeds
of less than 16 MPH (25 km/h), the
TPMS may not operate correctly.
● Be sure to install the specified size of
tires to the 4 wheels correctly.
Master warning light
When the ignition is in the ON position, the master
warning light illuminates if any of the following are
displayed on the vehicle information display.
● No key warning
● Low fuel warning
● Low windshield-washer fluid warning
● Parking brake release warning
● Door/trunk open warning
● Loose fuel cap
● Check tire pressure warning
Instruments and controls2-13
Page 160 of 444
4 Monitor, climate, audio, phone and voice
recognition systems
Control panel buttons — color screen without
Navigation System (if so equipped)..................4-4
How to use the NISSAN controller ...............4-5
How to select menus on the screen ..............4-6
How to use the STATUS button ..................4-6
How to use the INFO button .....................4-6
How to use the SETTING button .................4-9
OFF button............................. 4-15
Control panel buttons — color screen with
Navigation System (if so equipped) .................4-16
How to use the NISSAN controller ..............4-17
How to use the touch screen ...................4-17
How to select menus on the screen .............4-19
How to use the STATUS button .................4-20
How to use the INFO button ....................4-20
How to use the SETTING button ................4-24
OFF button............................. 4-31
Image viewer (if so equipped) ......................4-32
Using the image viewer ........................ 4-32
RearView Monitor (if so equipped) ..................4-34
How to read the displayed lines .................4-35How to park with predicted course lines
..........4-35
Difference between predicted and actual
distances ..................................... 4-37
How to adjust the screen .......................4-39
Operating tips ................................. 4-39
Vents ........................................... 4-40
Heater and air conditioner (automatic) (Type A) ......4-41
Automatic operation ........................... 4-42
Manual operation .............................. 4-43
Operating tips ................................. 4-43
Heater and air conditioner (automatic) (Type B) ......4-44
Automatic operation ........................... 4-45
Manual operation .............................. 4-46
Operating tips ................................. 4-46
Servicing air conditioner ........................... 4-47
Audio system .................................... 4-47
Radio ........................................ 4-47
FM radio reception ............................ 4-48
AM radio reception ............................ 4-48
Satellite radio reception (if so equipped) . . . ......4-48
Audio operation precautions ....................4-49
Page 161 of 444
FM/AM radio with compact disc (CD)
changer (if so equipped).......................4-64
FM/AM/SAT radio with compact disc (CD)
player (if so equipped) ......................... 4-69
FM/AM/SAT radio with CD/DVD player
(if so equipped) ............................... 4-76
Digital Versatile Disc (DVD) Player
Operation (models with Navigation System) ......4-84
USB interface (models without Navigation
System) (if so equipped) .......................4-87
USB interface (models with Navigation
System) ...................................... 4-88
iPod®* player operation without Navigation
System (if so equipped) ........................ 4-92
iPod®* player operation with Navigation
System (if so equipped) ........................ 4-94
Bluetooth® streaming audio (if so equipped) .....4-98
CD care and cleaning ......................... 4-101
Steering wheel switch for audio control .........4-102
Antenna ..................................... 4-103
Car phone or CB radio . . ......................... 4-104
Bluetooth® Hands-Free Phone System without
Navigation System (if so equipped) ................4-104
Regulatory Information ........................ 4-106Using the system
............................. 4-106
Control buttons .............................. 4-108
Getting started ............................... 4-109
List of voice commands ....................... 4-111
Voice Adaptation (VA) mode ...................4-115
Manual control ............................... 4-116
Troubleshooting guide ........................ 4-117
Bluetooth® Hands-Free Phone System with
Navigation System (if so equipped) ................4-118
Regulatory Information ........................ 4-120
Voice commands ............................. 4-120
Connecting procedure ........................ 4-120
Vehicle phonebook ........................... 4-122
Handset phonebook .......................... 4-124
Making a call ................................. 4-125
Receiving a call .............................. 4-125
During a call ................................. 4-126
Ending
a call ................................. 4-127
Phone settings ............................... 4-127
Bluetooth settings ............................ 4-128
Call volume .................................. 4-129
NISSAN Voice Recognition System
(if so equipped) . . . .............................. 4-130
Page 225 of 444
●Artist name displays the name of the artist of
the song playing.
● Album title displays the title of the album of
the song playing.
FM/AM radio operation
FM/AM band select:
Pressing the AM·FM button will change the band
as follows:
AM →FM1 →FM2 →AM
When the AM·FM button is pressed while the
ignition switch is in the ACC or ON position, the
radio will come on at the station last played.
The last station played will also come on when
the VOL/ON·OFF control knob is pressed ON.
If a compact disc is playing when the AM·FM
button is pressed, the compact disc will auto-
matically be turned off and the last radio station
played will come on.
The FM stereo indicator ST will illuminate during
FM stereo reception. When the stereo broadcast
signal is weak, the radio will automatically change
from stereo to monaural reception.
TUNE/FOLDER (Tuning) knob:
To manually tune the radio, turn the
TUNE/FOLDER knob to the right or left.
SEEK/CAT and TRACK tuning buttons:
Press the SEEK/CAT
button or the
TRACK
button to tune from high to low or
low to high frequencies and stop at the next
broadcasting station.
SCAN tuning:
Press the SCAN button to stop at each broad-
casting station for 5 seconds. Pressing the
SCAN button again during this 5-second period
will stop scan tuning and the radio will remain
tuned to that station. If the SCAN button is not
pressed within 5 seconds, scan tuning moves to
the next station.
1 to 6 Station memory operations:
Twelve stations can be set for the FM band (6 for
FM1, 6 for FM2) and six stations can be set for
the AM band.
1. Choose the radio band AM, FM1 or FM2 using the AM·FM select button.
2. Tune to the desired station using manual, SEEK or SCAN tuning. Press and hold any
of the desired station memory buttons (1 –
6) until a beep sound is heard. 3. The channel indicator will then come on and
the sound will resume. Programming is now
complete.
4. Other buttons can be set in the same man- ner.
If the battery cable is disconnected or if the fuse
opens, the radio memory will be canceled. In that
case, reset the desired stations.
Compact disc (CD) changer operation
Place the ignition switch in the ACC or ON
position and press the LOAD button, then press
one of the CD insert (1 – 6) slots. Insert the
compact disc into the slot with the label side
facing up. The compact disc will be guided auto-
matically into the slot and start playing.
If the radio is already operating, it will automati-
cally turn off and the compact disc will play.
If the system has been turned off while a compact
disc was playing, pressing the VOL/ON·OFF
control knob will start the compact disc.
LOAD button:
To insert a CD in the CD changer, press the
LOAD button for less than 1.5 seconds. Select
the loading slot by pressing the CD insert select
button (1 – 6) , then insert the CD.
4-66Monitor, climate, audio, phone and voice recognition systems
Page 231 of 444
When the AUX button is pressed while the igni-
tion switch is in the ACC or ON position, the
radio will come on at the station last played.
The last station played will also come on when
the VOL/ON·OFF control knob is pressed ON.
*When the AUX button is pressed, the satellite
radio mode will be skipped unless an optional
satellite receiver and antenna are installed and a
SiriusXM Satellite Radio service subscription is
active. Satellite radio is not available in Alaska,
Hawaii and Guam.
If a compact disc is playing when the AUX button
is pressed, the compact disc will automatically be
turned off and the last radio station played will
come on.
TUNE/FOLDER (Tuning) knob:
To manually tune the radio, turn the
TUNE/FOLDER knob to the right or left.
SEEK/CAT and TRACKtuning buttons:
Press the SEEK/CAT
button or the
TRACK
button to tune from high to low or
low to high frequencies and stop at the next
broadcasting station. SCAN tuning:
Press the SCAN button to stop at each broad-
casting station for 5 seconds. Pressing the
SCAN button again during this five second pe-
riod will stop scan tuning and the radio will remain
tuned to that station. If the SCAN button is not
pressed within 5 seconds, scan tuning moves to
the next station.
1 to 6 Station memory operations:
Six stations can be set for the AM band. Twelve
stations can be set for the FM band (6 for FM1, 6
for FM2) . Eighteen stations can be set for the XM
band (6 for XM1, 6 for XM2, 6 for XM3) .
1. Choose the radio band AM, FM1 or FM2 using the FM·AM select button or choose
the satellite band SAT1 or SAT2 using the
AUX button.
2. Tune to the desired station using manual, SEEK or SCAN tuning. Press and hold any
of the desired station memory buttons (1 –
6) until a beep sound is heard.
3. The channel indicator will then come on and the sound will resume. Programming is now
complete.
4. Other buttons can be set in the same man- ner. If the battery cable is disconnected, or if the fuse
opens, the radio memory will be canceled. In that
case, reset the desired stations.
Radio data system (RDS):
RDS stands for Radio Data System, and is a data
information service transmitted by some radio
stations on the FM band (not AM band) . Cur-
rently, most RDS stations are in large cities, but
many stations are now considering broadcasting
RDS data.
RDS can display:
● Station call sign, such as “WHFR 98.3”.
● Station name, such as “The Groove”.
● Music or programming type such as “Clas-
sical”, “Country”, or “Rock”.
When the “Text” key is selected with the NISSAN
controller on the display while the radio is playing,
additional information is displayed on the screen.
If the station broadcasts RDS information, the
RDS icon is displayed.Compact disc (CD) player operation
Place the ignition in the ACC or ON position and
insert the compact disc into the slot with the label
side facing up. The compact disc will be guided
automatically into the slot and start playing.
4-72Monitor, climate, audio, phone and voice recognition systems
Page 237 of 444
●Song displays the ID3 encoded tag of the
song name.
● Album displays the ID3 encoded tag of the
album name.
● Artist displays the ID3 encoded tag of the
artist’s name.
Some of this text might not display while playing a
regular CD.
FM/AM/SAT radio operation
FM/AM band select:
Pressing the FM·AM button will change the band
as follows:
AM →FM1 →FM2 →AM
When the FM·AM button is pressed while the
ignition switch is in the ACC or ON position, the
radio will come on at the station last played.
The last station played will also come on when
the VOL/ON·OFF control knob is pressed ON.
If a compact disc is playing when the FM·AM
button is pressed, the compact disc will auto-
matically be turned off and the last radio station
played will come on.
The FM stereo indicator STEREO will illuminate
during FM stereo reception. When the stereo broadcast signal is weak, the radio will automati-
cally change from stereo to monaural reception.
SAT band select:
Pressing the SAT button will change the band as
follows:
XM1*
→XM2* →XM3* →XM1 (satellite, if so
equipped)
When the SAT button is pressed while the igni-
tion switch is in the ACC or ON position, the
radio will come on at the station last played.
The last station played will also come on when
the VOL/ON·OFF control knob is pressed ON.
*When the SAT button is pressed, the satellite
radio reception will not be available unless an
optional satellite receiver and antenna are in-
stalled and a SiriusXM Satellite Radio service
subscription is active. Satellite radio is not avail-
able in Alaska, Hawaii and Guam.
If a compact disc is playing when the SAT button
is pressed, the compact disc will automatically be
turned off and the last radio station played will
come on.
TUNE/FOLDER (Tuning) knob:
To manually tune the radio, turn the
TUNE/FOLDER knob to the right or left.
SEEK/CAT and TRACK
tuning buttons:
For AM or FM:
Press the SEEK/CAT
button or the
TRACK
button to tune from high to low or
low to high frequencies and stop at the next
broadcasting station.
For XM:
Press the SEEK/CAT
button or the
TRACK
button to go to the first channel of
the previous or next category.
SCAN tuning:
Press the SCAN button to stop at each broad-
casting station for 5 seconds. Pressing the
SCAN button again during this five second pe-
riod will stop scan tuning and the radio will remain
tuned to that station. If the SCAN button is not
pressed within 5 seconds, scan tuning moves to
the next station.
1 to 6 Station memory operations:
Six stations can be set for the AM band. Twelve
stations can be set for the FM band (6 for FM1, 6
for FM2) . Eighteen channels can be set for the
SAT radio (6 for XM1, 6 for XM2, 6 for XM3 – if so
equipped) .
4-78Monitor, climate, audio, phone and voice recognition systems
Page 238 of 444
1. Choose the radio band AM, FM1 or FM2using the FM·AM select button, or choose
the satellite band XM1, XM2 or XM3 using
the SAT button.
2. Tune to the desired station using manual, SEEK or SCAN tuning. Press and hold any
of the desired station memory buttons (1 –
6) until the preset number is updated on the
display and the sound is briefly muted.
3. The channel indicator will then come on and the sound will resume. Programming is now
complete.
4. Other buttons can be set in the same man- ner.
If the battery cable is disconnected, or if the fuse
opens, the radio memory will be canceled. In that
case, reset the desired stations.
List (AM and FM)
Select the “List” key using the NISSAN controller
or touchscreen to see a list of the presets in the
AM, FM1 or FM2 preset banks. Menu (SiriusXM Satellite Radio, if so
equipped)
Select the “Menu” key using the NISSAN control-
ler or touchscreen to see a list of options:
● Preset List – Displays the list of presets.
Press and hold the touchscreen or ENTER
button on the NISSAN controller to save a
preset.
● Customize Channel List – deselect chan-
nels to skip while using the TUNE/FOLDER
knob.
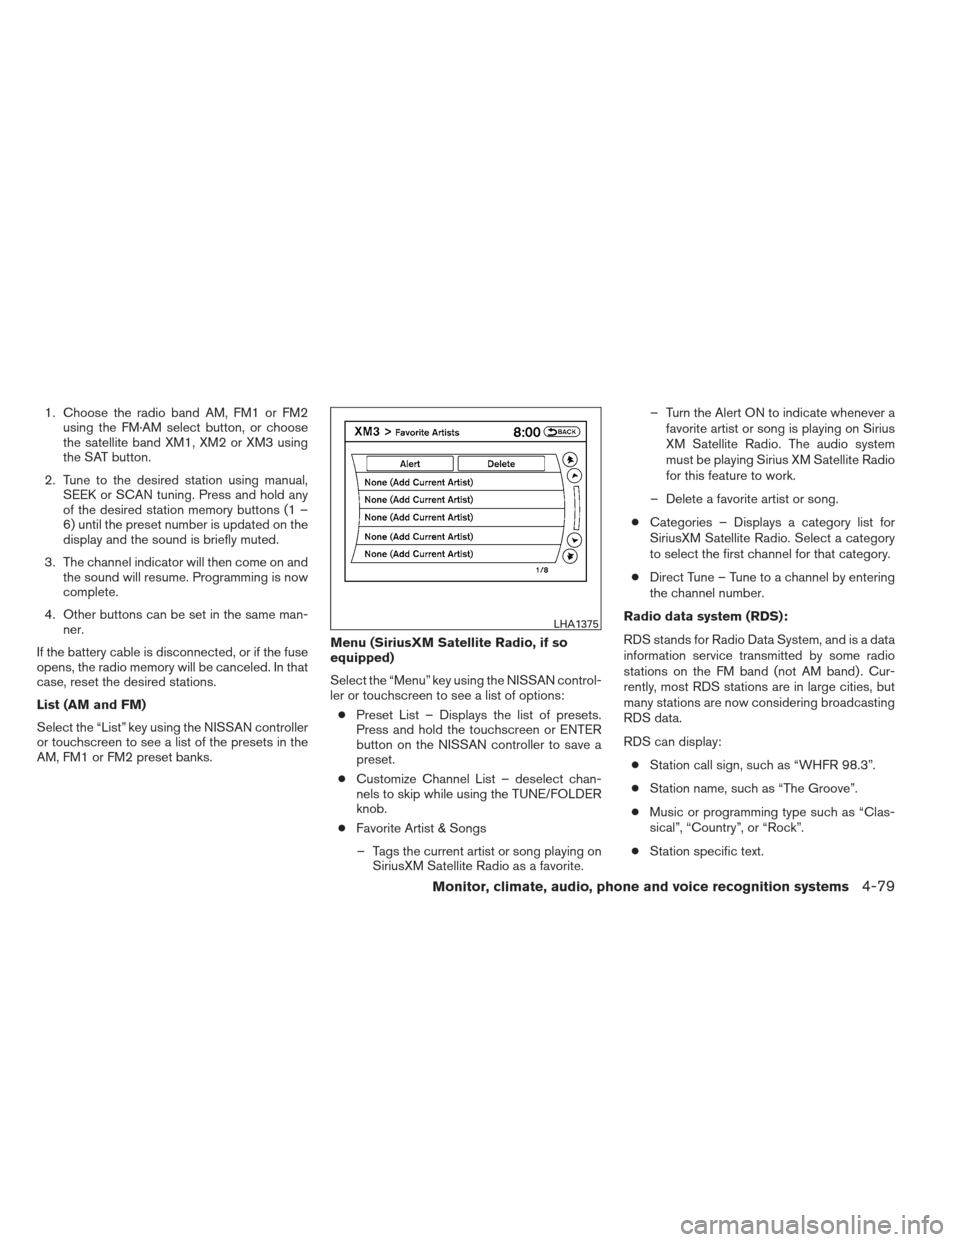
● Favorite Artist & Songs
– Tags the current artist or song playing on SiriusXM Satellite Radio as a favorite. – Turn the Alert ON to indicate whenever a
favorite artist or song is playing on Sirius
XM Satellite Radio. The audio system
must be playing Sirius XM Satellite Radio
for this feature to work.
– Delete a favorite artist or song.
● Categories – Displays a category list for
SiriusXM Satellite Radio. Select a category
to select the first channel for that category.
● Direct Tune – Tune to a channel by entering
the channel number.
Radio data system (RDS):
RDS stands for Radio Data System, and is a data
information service transmitted by some radio
stations on the FM band (not AM band) . Cur-
rently, most RDS stations are in large cities, but
many stations are now considering broadcasting
RDS data.
RDS can display: ● Station call sign, such as “WHFR 98.3”.
● Station name, such as “The Groove”.
● Music or programming type such as “Clas-
sical”, “Country”, or “Rock”.
● Station specific text.
LHA1375
Monitor, climate, audio, phone and voice recognition systems4-79
Page 278 of 444
phone module when the ignition switch is placed
in the ON position with the connected cellular
phone turned on and carried in the vehicle.
You can register up to 5 different Bluetooth®
cellular phones to the in-vehicle phone module.
However, you can talk on only one cellular phone
at a time.
NISSAN Voice Recognition system supports the
phone commands, so dialing a phone number
using your voice is possible. For more details, see
“NISSAN Voice Recognition System” in this sec-
tion.
Before using the Bluetooth® Hands-Free Phone
System, refer to the following notes.● Set up the wireless connection between a
cellular phone and the in-vehicle phone
module before using the hands-free phone
system.
● Some Bluetooth® enabled cellular phones
may not be recognized by the in-vehicle
phone module. Please visit
www.nissanusa.com/bluetooth for a recom-
mended phone list and connecting.
● You will not be able to use a hands-free
phone under the following conditions:
– Your vehicle is outside of the cellular ser- vice area. – Your vehicle is in an area where it is
difficult to receive cellular signal; such as
in a tunnel, in an underground parking
garage, near a tall building or in a moun-
tainous area.
– Your cellular phone is locked to prevent it from being dialed.
● When the radio wave condition is not ideal
or ambient sound is too loud, it may be
difficult to hear the other person’s voice dur-
ing a call.
● Immediately after the ignition switch is
placed in the ON position, it may be impos-
sible to receive a call for a short period of
time.
● Do not place the cellular phone in an area
surrounded by metal or far away from the
in-vehicle phone module to prevent tone
quality degradation and wireless connection
disruption.
● While a cellular phone is connected through
the Bluetooth® wireless connection, the
battery power of the cellular phone may dis-
charge quicker than usual. The Bluetooth®
Hands-Free Phone System cannot charge
cellular phones. ●
If the hands-free phone system seems to be
malfunctioning, see “Troubleshooting guide”
in this section. You can also visit
www.nissanusa.com/bluetooth for trouble-
shooting help.
● Some cellular phones or other devices may
cause interference or a buzzing noise to
come from the audio system speakers. Stor-
ing the device in a different location may
reduce or eliminate the noise.
● Refer to the cellular phone owner’s manual
regarding the telephone charges, cellular
phone antenna and body, etc.
● The signal strength display on the monitor
will not coincide with the signal strength
display of some cellular phones.
● If reception between callers is unclear, ad-
justing the incoming or outgoing call volume
may improve the clarity. See “Call volume” in
this section.
Monitor, climate, audio, phone and voice recognition systems4-119