Page 10 of 402
1. Charge port lid (P 3-18)
2. Hood (P 3-16)
3. Headlight and turn signal lights— Switch operation (P 2-42)
— Bulb replacement (P 8-22)
4. Windshield wiper and washer — Switch operation (P 2-38) — Blade replacement (P 8-13)
— Window washer fluid (P 8-10)
5. Side camera (if so equipped) (See LEAF Navigation System Owner’s Manual.)
6. Outside mirrors (P 3-23)
7. Power windows (P 2-54)
8. License plate installation (P 9-9) 9. Front camera (if so equipped) (See LEAF
Navigation System Owner’s Manual.)
10. Recovery hook (P 6-15)
11. Fog lights* — Switch operation (P 2-45)
— Bulb replacement (P 8-23)
12. Tires — Wheels and tires (P 8-26, P. 9-6)
— Flat tire (P 6-3)
— Tire Pressure Monitoring System (TPMS)
(P 2-16, P. 5-2)
13. Doors — Keys (P 3-2)
— Door locks (P 3-3)
— NISSAN Intelligent Key® system (P 3-6)
— Security system (P 2-35)
14. Child safety rear door lock ( if so equipped) (P 3-6)
EXTERIOR FRONT
Illustrated table of contents0-3
Page 11 of 402
1. Rear view camera* (See LEAF NavigationSystem Owner’s Manual.)
2. Rear window wiper and washer — Switch operation (P 2-40)
— Window washer fluid (P 8-10) 3. High-mounted stop light
— Bulb replacement (P 8-23)
4. Rear window defroster (P 2-41)
5. Solar cell module* (P EV-30) 6. Antenna (P 4-44)
— Satellite radio antenna (See LEAF Naviga-
tion System Owner’s Manual.)
7. Rear combination lights — Bulb replacement (P 8-23)
8. Rear hatch (P 3-17) — NISSAN Intelligent Key® system (P 3-6)
EXTERIOR REAR
0-4Illustrated table of contents
Page 227 of 402

When the shift selector is shifted into the R
(Reverse) position, the monitor display shows a
rearward view from the vehicle.
WARNING
The system is designed as an aid to the driver in detecting large stationary ob-
jects to help avoid damaging the ve-
hicle. The system will not detect small
objects below the bumper, and may
not detect objects close to the bumper
or on the ground.
The RearView Monitor is a conve- nience but it is not a substitute for
proper backing. Always turn and check
that it is safe to do so before backing
up. Always back up slowly.
Objects viewed in the RearView Moni- tor differ from actual distance because
a wide-angle lens is used.
Make sure that the hatch is securely closed when backing up.
Do not put anything on the rearview camera. The rearview camera is in-
stalled on top of the hatch. When washing the vehicle with high
pressure water, be sure not to spray it
around the camera. Otherwise, water
may enter the camera unit causing wa-
ter condensation on the lens, a mal-
function, fire or an electric shock.
Do not strike the camera. It is a preci- sion instrument. Otherwise, it may
malfunction or cause damage result-
ing in a fire or an electric shock.
CAUTION
There is a plastic cover over the camera.
Do not scratch the cover when cleaning
dirt or snow from the cover.
HOW TO READ THE DISPLAYED
LINES
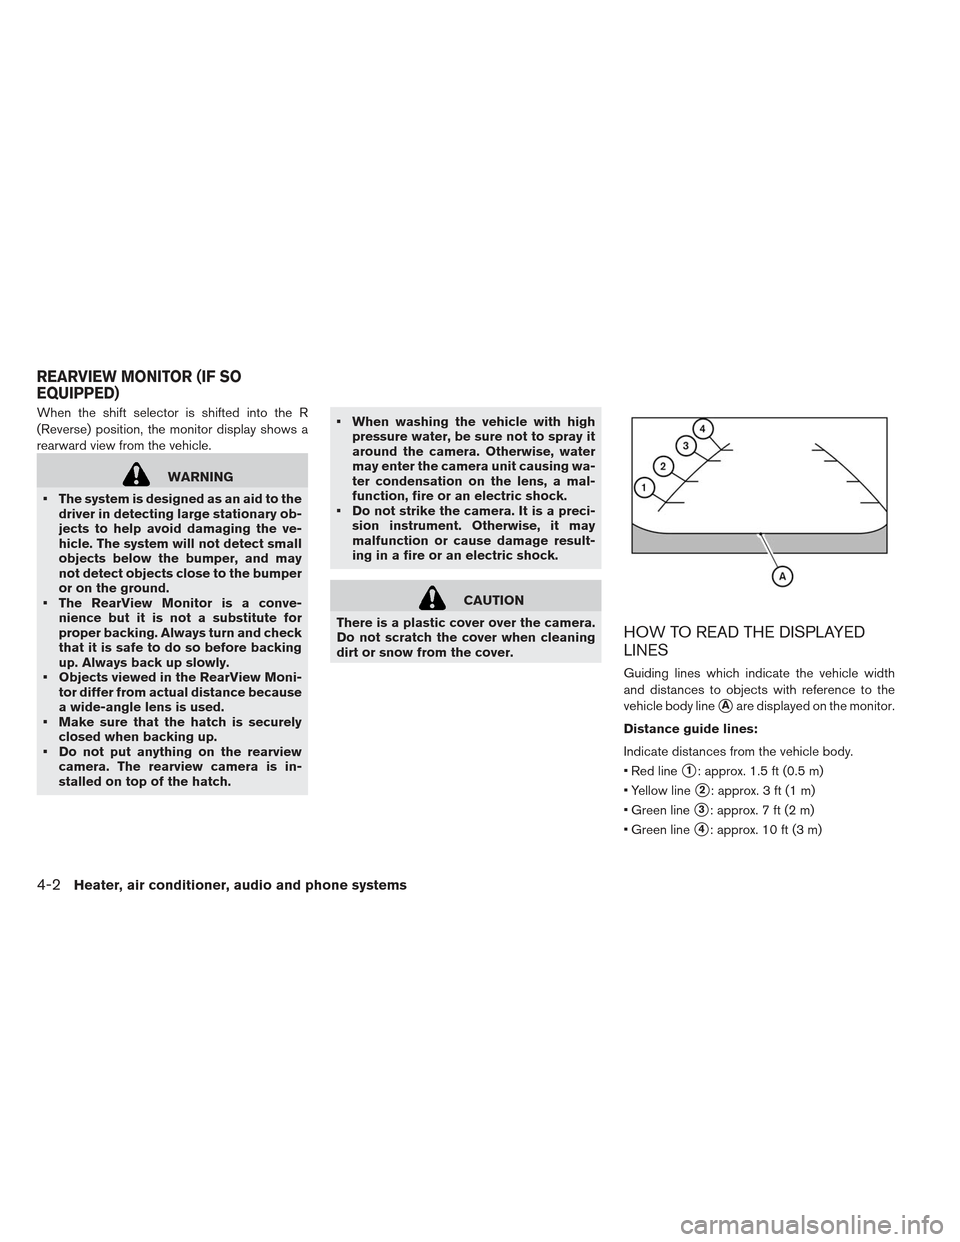
Guiding lines which indicate the vehicle width
and distances to objects with reference to the
vehicle body line
�Aare displayed on the monitor.
Distance guide lines:
Indicate distances from the vehicle body.
Red line
�1: approx. 1.5 ft (0.5 m)
Yellow line
�2: approx. 3 ft (1 m)
Green line
�3: approx. 7 ft (2 m)
Green line
�4: approx. 10 ft (3 m)
REARVIEW MONITOR (IF SO
EQUIPPED)
4-2Heater, air conditioner, audio and phone systems
Page 230 of 402

the position�Aif the object projects over the
actual backing up course.
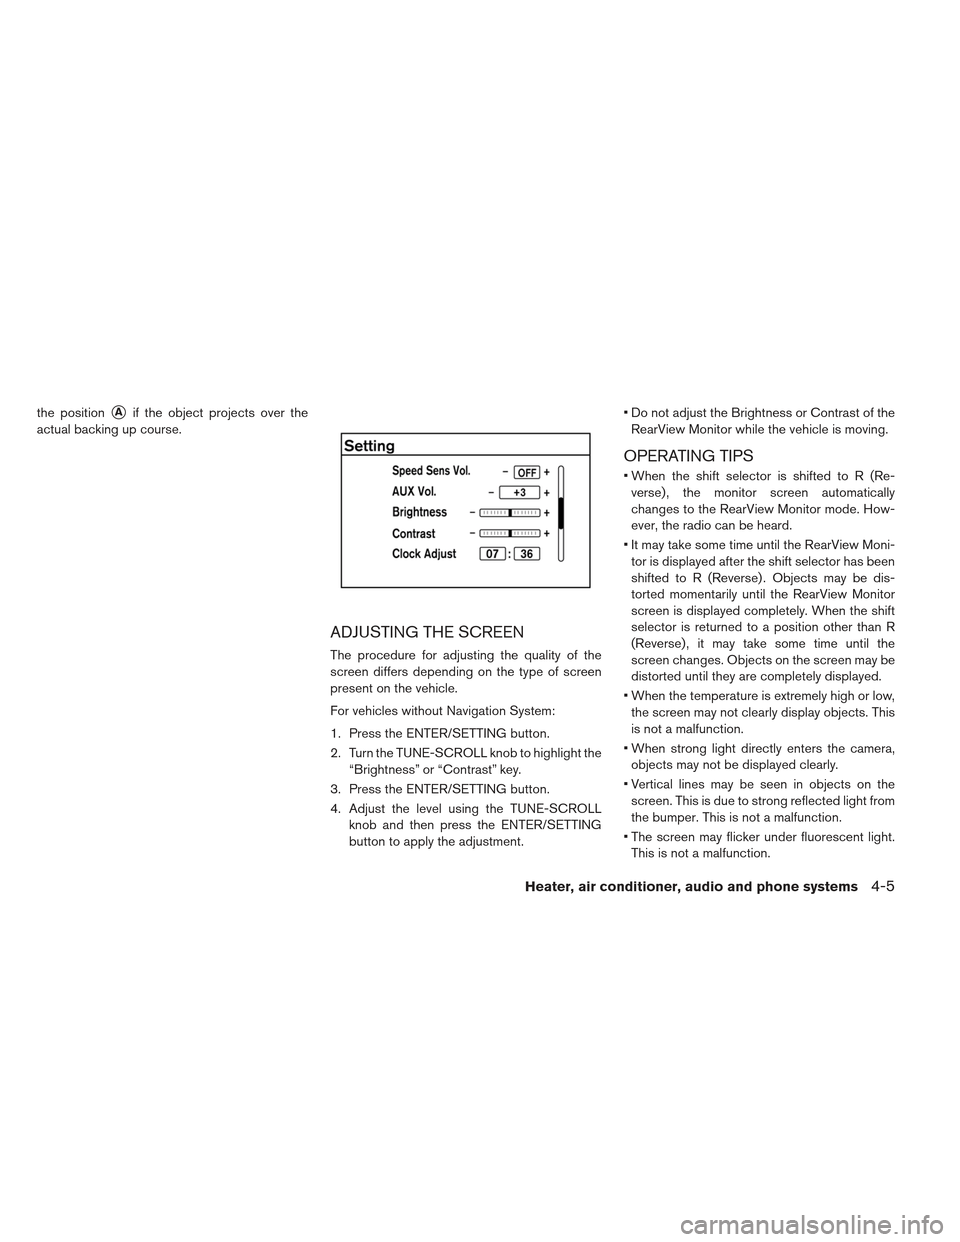
ADJUSTING THE SCREEN
The procedure for adjusting the quality of the
screen differs depending on the type of screen
present on the vehicle.
For vehicles without Navigation System:
1. Press the ENTER/SETTING button.
2. Turn the TUNE-SCROLL knob to highlight the “Brightness” or “Contrast” key.
3. Press the ENTER/SETTING button.
4. Adjust the level using the TUNE-SCROLL knob and then press the ENTER/SETTING
button to apply the adjustment. Do not adjust the Brightness or Contrast of the
RearView Monitor while the vehicle is moving.
OPERATING TIPS
When the shift selector is shifted to R (Re-verse) , the monitor screen automatically
changes to the RearView Monitor mode. How-
ever, the radio can be heard.
It may take some time until the RearView Moni- tor is displayed after the shift selector has been
shifted to R (Reverse) . Objects may be dis-
torted momentarily until the RearView Monitor
screen is displayed completely. When the shift
selector is returned to a position other than R
(Reverse) , it may take some time until the
screen changes. Objects on the screen may be
distorted until they are completely displayed.
When the temperature is extremely high or low, the screen may not clearly display objects. This
is not a malfunction.
When strong light directly enters the camera, objects may not be displayed clearly.
Vertical lines may be seen in objects on the screen. This is due to strong reflected light from
the bumper. This is not a malfunction.
The screen may flicker under fluorescent light. This is not a malfunction.
Heater, air conditioner, audio and phone systems4-5
Page 231 of 402

The colors of objects on the RearView Monitormay differ somewhat from those of the actual
object.
When the contrast of objects is low at night, pressing the SETTING button may not change
the brightness.
Objects on the monitor may not be clear in a dark place or at night.
If dirt, rain or snow attaches to the camera, the RearView Monitor may not display objects.
Clean the camera.
Do not use body wax on the camera window. If body wax does get on the camera window, wipe
off the wax with a clean cloth dampened with
mild detergent diluted with water.
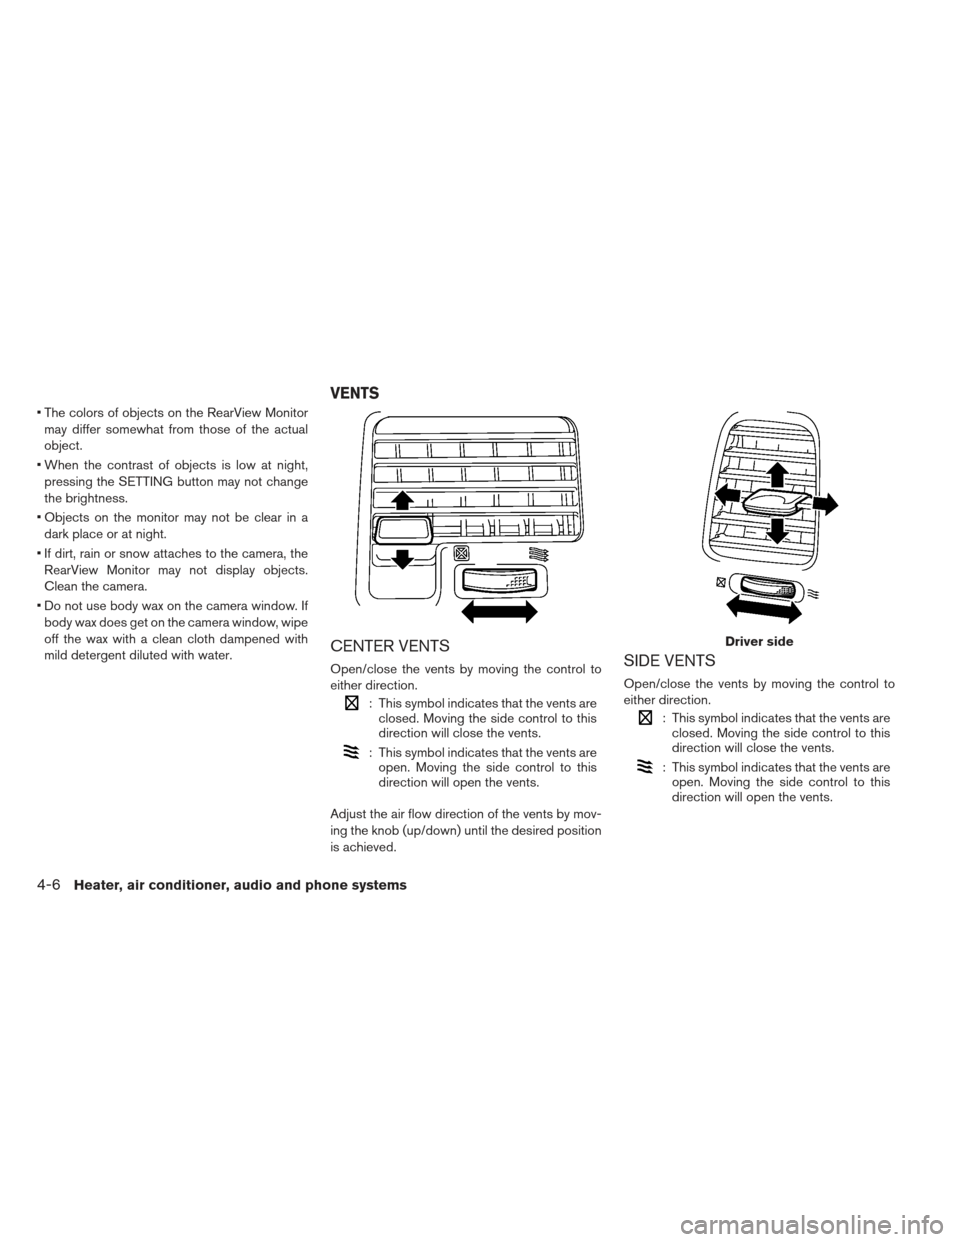
CENTER VENTS
Open/close the vents by moving the control to
either direction.
: This symbol indicates that the vents are closed. Moving the side control to this
direction will close the vents.
: This symbol indicates that the vents areopen. Moving the side control to this
direction will open the vents.
Adjust the air flow direction of the vents by mov-
ing the knob (up/down) until the desired position
is achieved.
SIDE VENTS
Open/close the vents by moving the control to
either direction.
: This symbol indicates that the vents are closed. Moving the side control to this
direction will close the vents.
: This symbol indicates that the vents areopen. Moving the side control to this
direction will open the vents.
Driver side
VENTS
4-6Heater, air conditioner, audio and phone systems