2013 NISSAN GT-R fuel
[x] Cancel search: fuelPage 3 of 24

TABLE OF CONTENTS
Additional Information about your vehicle is also available in your Owner’s Manual, Multi Function Display Owner’s Manual and at www.nissanusa.com.
New SYSTe M FeaTureS
RearView Monitor ............................................... 2
USB/iPod
® Interface ............................................ 2
DVD Player .................................................... 2
XM NavTraffic
® and XM NavWeather™ (if so equipped) ............... 3
eSS eNTial iNF orMa TioN
Fuel-Filler Cap ................................................. 4
Tire Pressure Monitoring System (TPMS) ...........................4
Unique Noises ................................................. 5
Vehicle Modifications ............................................ 5
Vehicle Dynamic Control (VDC) ................................... 5
Fir ST Drive Fea TureS
NISSAN Intelligent Key
® System .................................. 6
Trunk Lid Release ............................................... 7
Seat Adjustments .............................................. 7
Outside Mirror Control Switch .................................... 8
Starting/Stopping the Engine ..................................... 8
Headlight Control Switch ........................................ 8
Windshield Wiper/Washer Switch ................................. 9
Automatic Climate Controls ..................................... 10
FM/AM/XM
® Satellite Radio with CD/DVD Player ...................11
Clock Set/Adjustment .......................................... 12
Cruise Control ................................................ 13
Fuel-Filler Door ................................................ 13
S YST eM GuiDe
Drive Computer ............................................... 14
Bluetooth
® Hands-free Phone System ............................. 14
Navigation System ............................................. 17
HomeLink
® Universal Transceiver ................................. 20
• A cellular telephone should not be used for any purpose while
driving so full attention may be given to vehicle operation.
• Always wear your seat belt.
• Supplemental air bags do not replace proper seat belt usage.
• Children 12 and under should always ride in the rear seat
properly secured in child restraints or seat belts according to
their age and weight.
• Do not drink and drive.
For more information, refer to the “Safety –– Seats, seat belts and
supplemental restraint system (section 1)” and the “Starting and
driving (section 5)” of your Owner’s Manual and the “ audio System
(section 3)” of your Multi Function Display Owner’s Manual.
To view detailed
instructional videos, go to
www.nissanownersinfo.mobi/2013/gtr or snap this barcode with an appropriate barcode reader.
Page 6 of 24

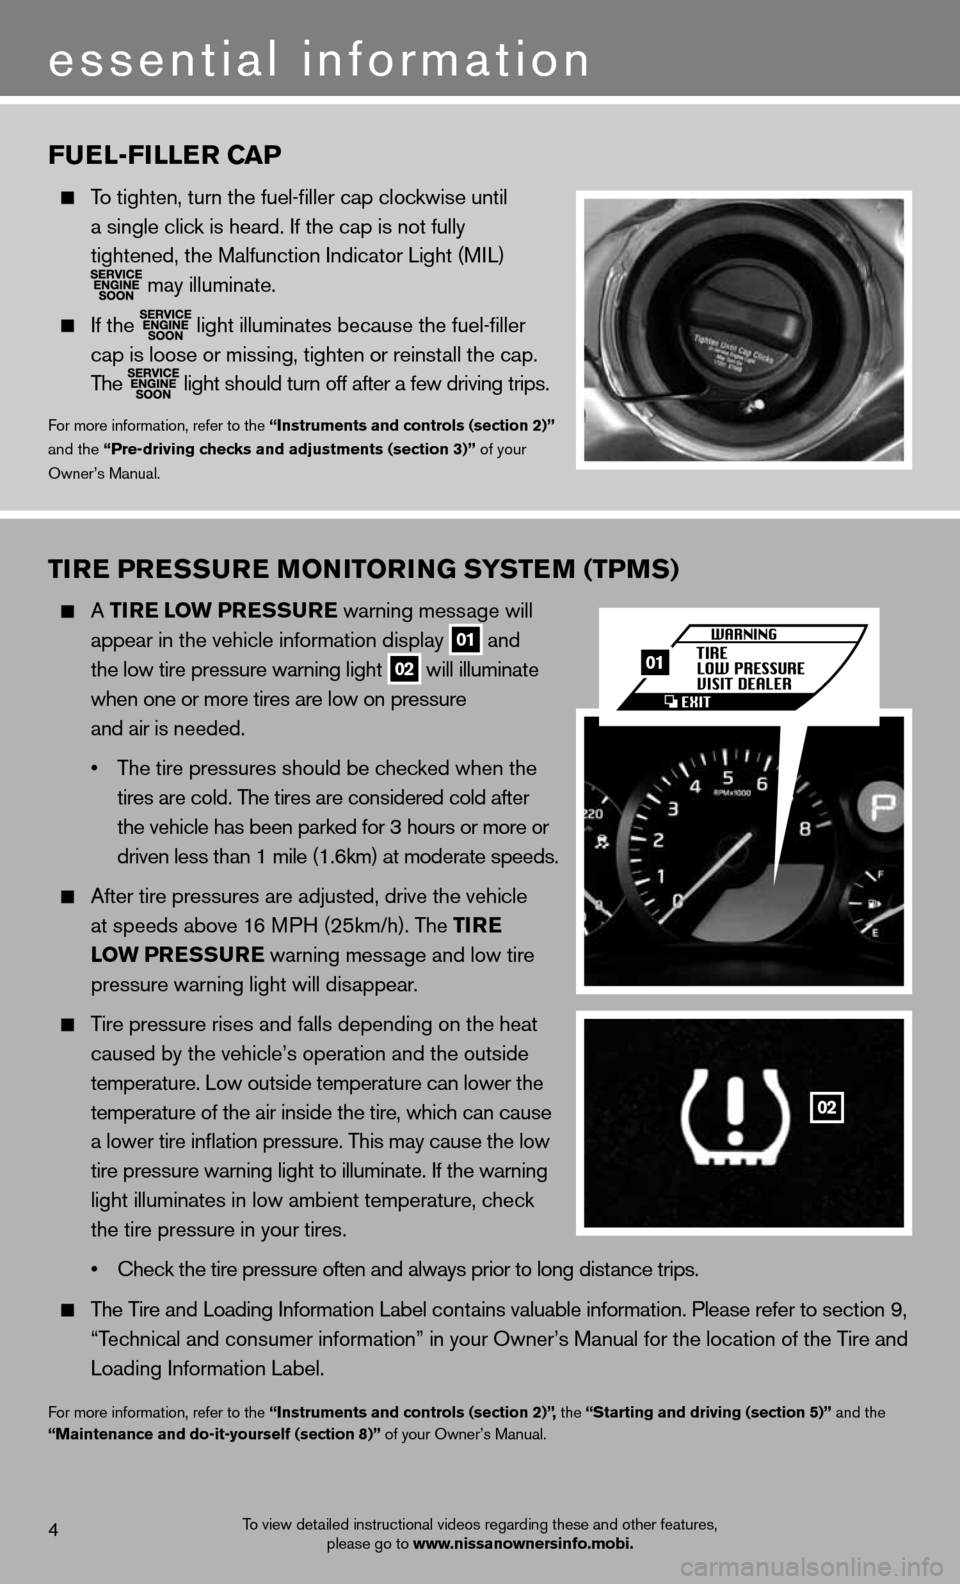
Tire PreSSure M oNiTori NG SYSTe M (TPMS)
A Tire l ow PreSS ure warning message will
appear in the vehicle information display
01 and
the low tire pressure warning light 02 will illuminate
when one or more tires are low on pressure
and air is needed.
• The tire pressures should be checked when the
tires are cold. The tires are considered cold after
the vehicle has been parked for 3 hours or more or
driven less than 1 mile (1.6km) at moderate speeds.
After tire pressures are adjusted, drive the vehicle
at speeds above 16 MPH (25km/h). The T ire
low PreSS ure warning message and low tire
pressure warning light will disappear.
Tire pressure rises and falls depending on the heat
caused by the vehicle’s operation and the outside
temperature. Low outside temperature can lower the
temperature of the air inside the tire, which can cause
a lower tire inflation pressure. This may cause the low
tire pressure warning light to illuminate. If the warning
light illuminates in low ambient temperature, check
the tire pressure in your tires.
• Check the tire pressure often and always prior to long distance trips.
The Tire and Loading Information Label contains valuable information. Please refer to section 9,
“Technical and consumer information” in your Owner’s Manual for the lo\
cation of the Tire and
Loading Information Label.
For more information, refer to the “instruments and controls (section 2)”, the “Starting and driving (section 5)” and the
“Maintenance and do-it-yourself (section 8)” of your Owner’s Manual.
Fuel-Filler caP
To tighten, turn the fuel-filler cap clockwise until
a single click is heard. If the cap is not fully
tightened, the Malfunction Indicator Light (MIL)
may illuminate.
If the
light illuminates because the fuel-filler
cap is loose or missing, tighten or reinstall the cap.
The
light should turn off after a few driving trips.
For more information, refer to the “instruments and controls (section 2)”
and the “Pre-driving checks and adjustments (section 3)” of your
Owner’s Manual.
4
essential information
To view detailed instructional videos regarding these and other features, please go to www.nissanownersinfo.mobi.
02
01
Page 15 of 24

cruiSe coNTrol
The cruise control system enables you to set a
constant cruising speed above 25 MPH.
The system will automatically maintain the set speed
until you tap the brake pedal, accelerate, cancel or
turn the system off.
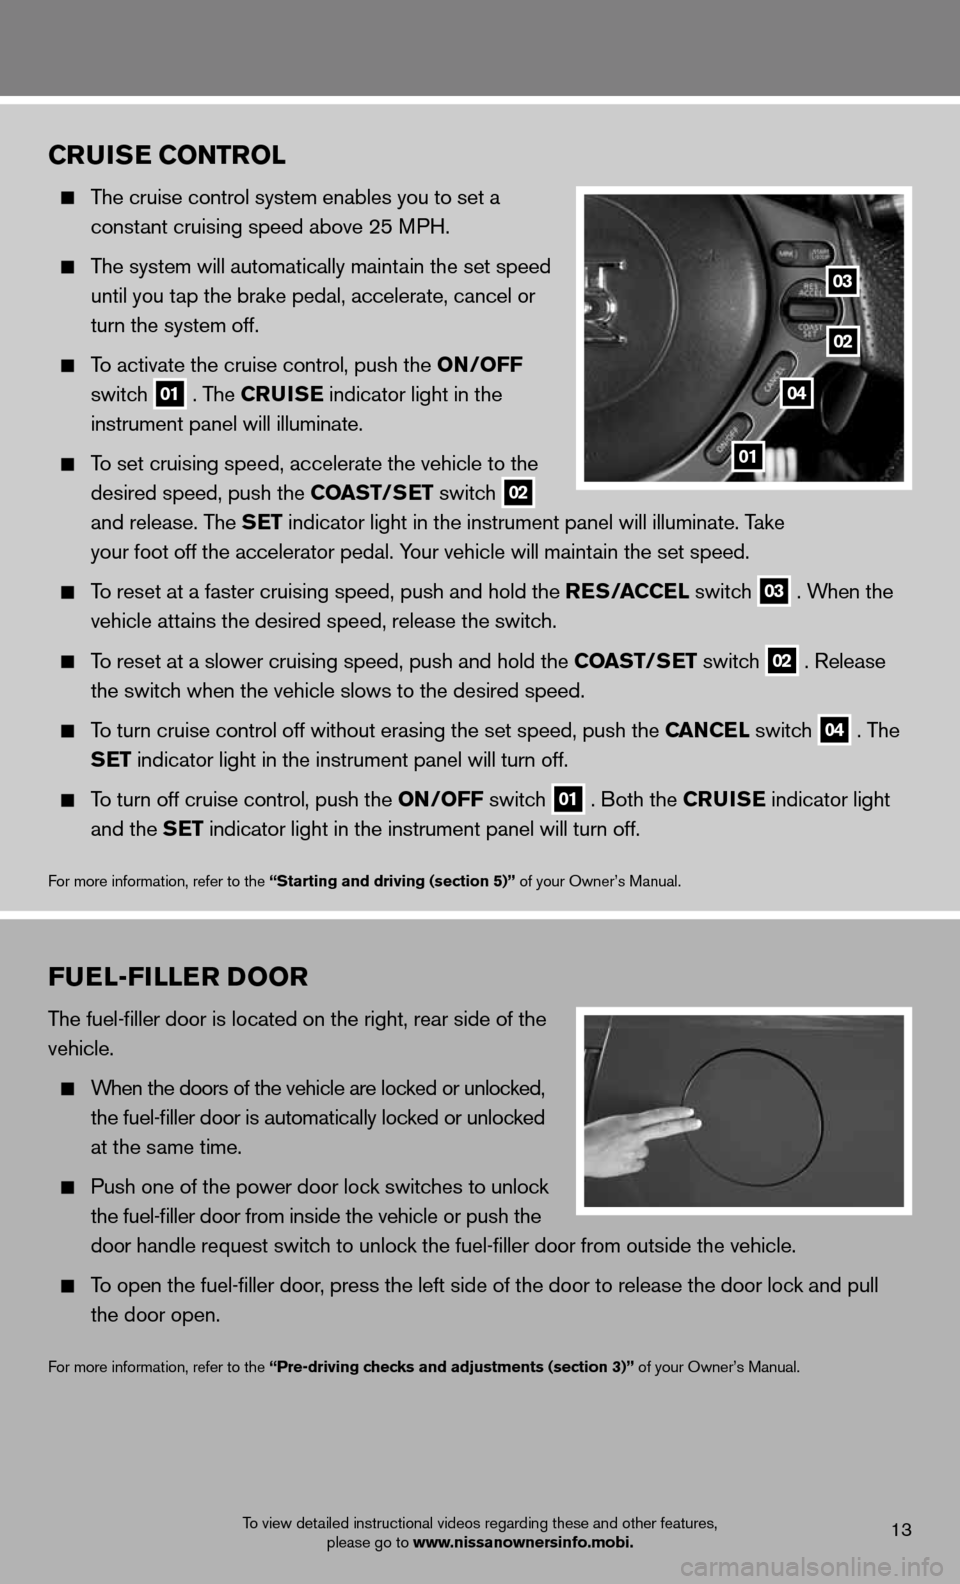
To activate the cruise control, push the oN/oFF
switch
01 . The cruiSe
indicator light in the
instrument panel will illuminate.
To set cruising speed, accelerate the vehicle to the
desired speed, push the coaST/S eT switch
02
and release. The S
eT indicator light in the instrument panel will illuminate. Take
your foot off the accelerator pedal. Your vehicle will maintain the set speed.
To reset at a faster cruising speed, push and hold the reS/ accel switch
03 . When the
vehicle attains the desired speed, release the switch.
To reset at a slower cruising speed, push and hold the coaST/S eT switch
02 . Release
the switch when the vehicle slows to the desired speed.
To turn cruise control off without erasing the set speed, push the caN cel switch
04 . The
SeT indicator light in the instrument panel will turn off.
To turn off cruise control, push the oN/oFF switch
01 . Both the cruiSe
indicator light
and the S eT indicator light in the instrument panel will turn off.
For more information, refer to the “Starting and driving (section 5)” of your Owner’s Manual.
01
02
03
04
To view detailed instructional videos regarding these and other features,
please go to www.nissanownersinfo.mobi.13
Fuel-Filler D oor
The fuel-filler door is located on the right, rear side of the
vehicle.
When the doors of the vehicle are locked or unlocked,
the fuel-filler door is automatically locked or unlocked
at the same time.
Push one of the power door lock switches to unlock
the fuel-filler door from inside the vehicle or push the
door handle request switch to unlock the fuel-filler door from outside the vehicle.
To open the fuel-filler door, press the left side of the door to release the door lock and pull
the door open.
For more information, refer to the “Pre-driving checks and adjustments (section 3)” of your Owner’s Manual.
Page 16 of 24

Drive coMPuTer
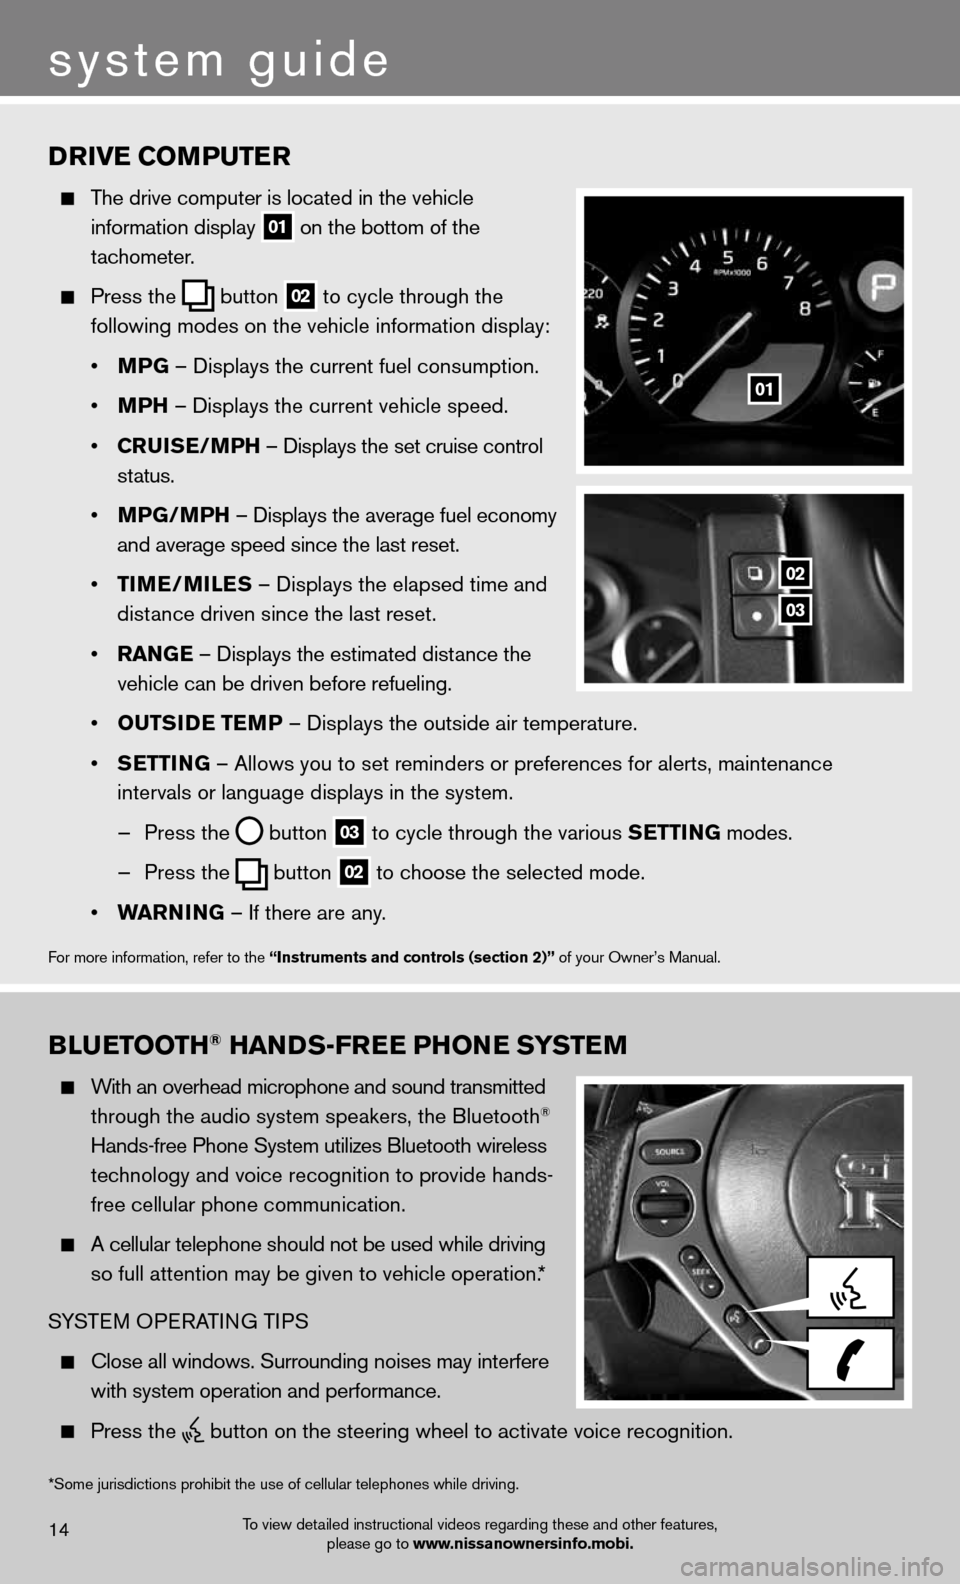
The drive computer is located in the vehicle
information display
01 on the bottom of the
tachometer.
Press the
button
02 to cycle through the
following modes on the vehicle information display:
• MPG – Displays the current fuel consumption.
• MPh – Displays the current vehicle speed.
• cruiSe/MP h – Displays the set cruise control
status.
• MPG/MP h – Displays the average fuel economy
and average speed since the last reset.
• TiMe/MileS – Displays the elapsed time and
distance driven since the last reset.
• raNG e – Displays the estimated distance the
vehicle can be driven before refueling.
• ouTS iD e Te MP – Displays the outside air temperature.
• SeTTi NG – Allows you to set reminders or preferences for alerts, maintenance\
intervals or language displays in the system.
— Press the
button
03 to cycle through the various S
eTTiNG modes.
— Press the
button
02 to choose the selected mode.
• warNiNG – If there are any.
For more information, refer to the “instruments and controls (section 2)” of your Owner’s Manual.
01
02
03
system guide
To view detailed instructional videos regarding these and other features,
please go to www.nissanownersinfo.mobi.14
BlueT ooTh® haNDS-Free PhoN e SYSTeM
With an overhead microphone and sound transmitted
through the audio system speakers, the Bluetooth®
Hands-free Phone System utilizes Bluetooth wireless
technology and voice recognition to provide hands-
free cellular phone communication.
A cellular telephone should not be used while driving
so full attention may be given to vehicle operation.*
SYSTEM OPERATING TIPS
Close all windows. Surrounding noises may interfere
with system operation and performance.
Press the
button on the steering wheel to activate voice recognition.
*Some jurisdictions prohibit the use of cellular telephones while drivin\
g.