2013 NISSAN GT-R door lock
[x] Cancel search: door lockPage 139 of 346
2-44Instruments and controls
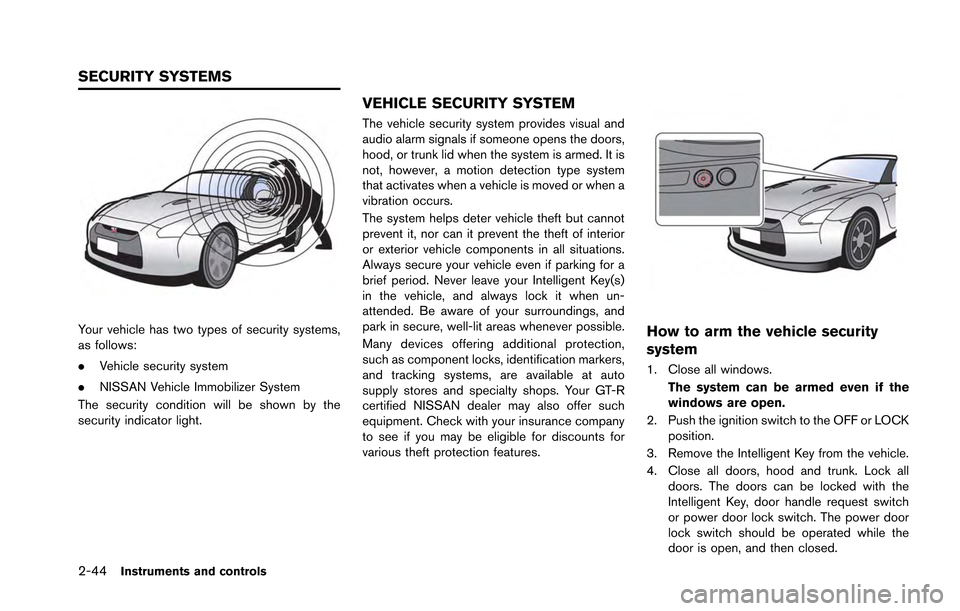
Your vehicle has two types of security systems,
as follows:
.Vehicle security system
. NISSAN Vehicle Immobilizer System
The security condition will be shown by the
security indicator light.
VEHICLE SECURITY SYSTEM
The vehicle security system provides visual and
audio alarm signals if someone opens the doors,
hood, or trunk lid when the system is armed. It is
not, however, a motion detection type system
that activates when a vehicle is moved or when a
vibration occurs.
The system helps deter vehicle theft but cannot
prevent it, nor can it prevent the theft of interior
or exterior vehicle components in all situations.
Always secure your vehicle even if parking for a
brief period. Never leave your Intelligent Key(s)
in the vehicle, and always lock it when un-
attended. Be aware of your surroundings, and
park in secure, well-lit areas whenever possible.
Many devices offering additional protection,
such as component locks, identification markers,
and tracking systems, are available at auto
supply stores and specialty shops. Your GT-R
certified NISSAN dealer may also offer such
equipment. Check with your insurance company
to see if you may be eligible for discounts for
various theft protection features.
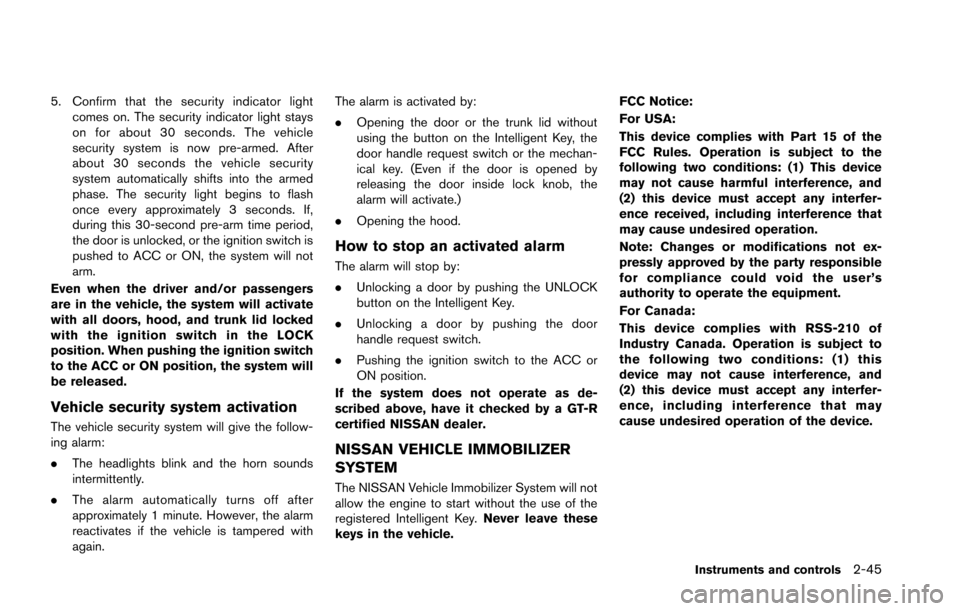
How to arm the vehicle security
system
1. Close all windows. The system can be armed even if the
windows are open.
2. Push the ignition switch to the OFF or LOCK position.
3. Remove the Intelligent Key from the vehicle.
4. Close all doors, hood and trunk. Lock all doors. The doors can be locked with the
Intelligent Key, door handle request switch
or power door lock switch. The power door
lock switch should be operated while the
door is open, and then closed.
SECURITY SYSTEMS
Page 140 of 346
5. Confirm that the security indicator lightcomes on. The security indicator light stays
on for about 30 seconds. The vehicle
security system is now pre-armed. After
about 30 seconds the vehicle security
system automatically shifts into the armed
phase. The security light begins to flash
once every approximately 3 seconds. If,
during this 30-second pre-arm time period,
the door is unlocked, or the ignition switch is
pushed to ACC or ON, the system will not
arm.
Even when the driver and/or passengers
are in the vehicle, the system will activate
with all doors, hood, and trunk lid locked
with the ignition switch in the LOCK
position. When pushing the ignition switch
to the ACC or ON position, the system will
be released.
Vehicle security system activation
The vehicle security system will give the follow-
ing alarm:
. The headlights blink and the horn sounds
intermittently.
. The alarm automatically turns off after
approximately 1 minute. However, the alarm
reactivates if the vehicle is tampered with
again. The alarm is activated by:
.
Opening the door or the trunk lid without
using the button on the Intelligent Key, the
door handle request switch or the mechan-
ical key. (Even if the door is opened by
releasing the door inside lock knob, the
alarm will activate.)
. Opening the hood.
How to stop an activated alarm
The alarm will stop by:
.Unlocking a door by pushing the UNLOCK
button on the Intelligent Key.
. Unlocking a door by pushing the door
handle request switch.
. Pushing the ignition switch to the ACC or
ON position.
If the system does not operate as de-
scribed above, have it checked by a GT-R
certified NISSAN dealer.
NISSAN VEHICLE IMMOBILIZER
SYSTEM
The NISSAN Vehicle Immobilizer System will not
allow the engine to start without the use of the
registered Intelligent Key. Never leave these
keys in the vehicle. FCC Notice:
For USA:
This device complies with Part 15 of the
FCC Rules. Operation is subject to the
following two conditions: (1) This device
may not cause harmful interference, and
(2) this device must accept any interfer-
ence received, including interference that
may cause undesired operation.
Note: Changes or modifications not ex-
pressly approved by the party responsible
for compliance could void the user’s
authority to operate the equipment.
For Canada:
This device complies with RSS-210 of
Industry Canada. Operation is subject to
the following two conditions: (1) this
device may not cause interference, and
(2) this device must accept any interfer-
ence, including interference that may
cause undesired operation of the device.
Instruments and controls2-45
Page 146 of 346
CAUTION
Use low beams when there are cars
approaching from the opposite direc-
tion, during city driving and at similar
times.
Battery saver system
A chime will sound when the driver side door is
opened with the light switch in theorposition and the ignition switch in the ACC,
OFF or LOCK position. (“Light reminder
chime” page 2-31)
When the headlight switch is in the
orposition while the ignition switch is in the ON
position, the lights will automatically turn off 45
seconds after the ignition switch has been
pushed to the OFF position.
When the headlight switch remains in the
orposition after the lights automatically turn
off, the lights will turn on when the ignition
switch is pushed to the ON position.
NOTICE
. When you turn on the headlight
switch again after the lights auto-
matically turn off, the lights will not
turn off automatically. Be sure to
turn the light switch to the OFF
position when you leave the vehicle
for extended periods of time, other-
wise the battery will be discharged.
. Never leave the light switch on
when the engine is not running for
extended periods of time even if the
headlights turn off automatically.
Daytime running light system
The daytime running lights automatically illumi-
nate when the engine is started with the parking
brake released. The daytime running lights
operate with the headlight switch in the OFF
position. Turn the headlight switch to the
position for full illumination when driving at night.
If the parking brake is applied before the engine
is started, the daytime running lights do not
illuminate. The daytime running lights illuminate
once the parking brake is released. The daytime
running lights will remain on until the ignition
switch is pushed to the OFF position.
WARNING
When the daytime running light system
is active, tail lights on your vehicle are
not on. It is necessary at dusk to turn on
your headlights. Failure to do so could
cause an accident injuring yourself and
others.
Instruments and controls2-51
Page 152 of 346
CAUTION
Do not use for anything other than
glasses.
NOTICE
Do not leave glasses in the sunglasses
holder while parking in direct sunlight.
The heat may damage the glasses.
DOOR POCKET
Door pockets are located inside the driver’s side
and passenger’s side doors.
NOTICE
Do not grasp the door pockets to open
and close the doors. Doing so may
damage the pockets.
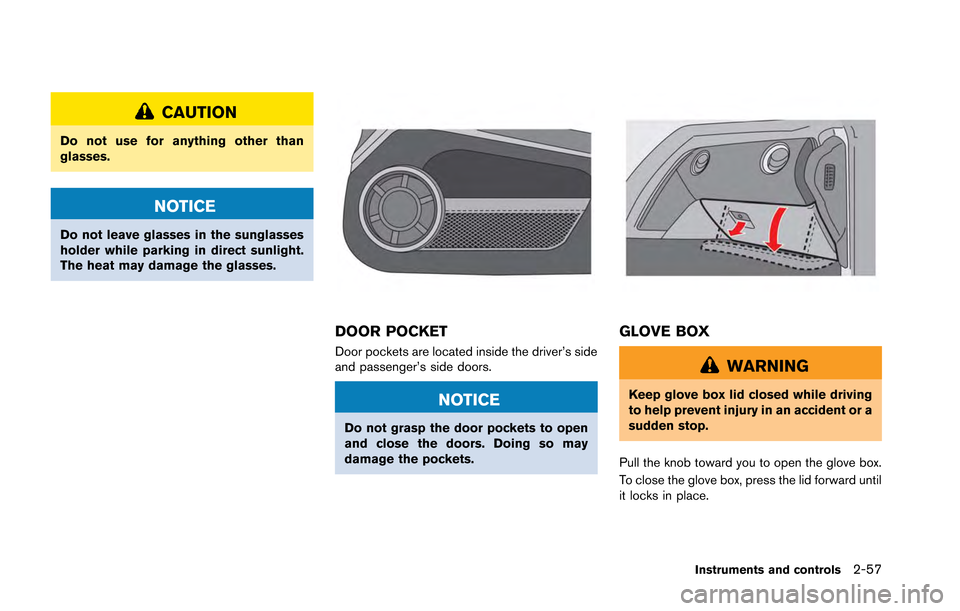
GLOVE BOX
WARNING
Keep glove box lid closed while driving
to help prevent injury in an accident or a
sudden stop.
Pull the knob toward you to open the glove box.
To close the glove box, press the lid forward until
it locks in place.
Instruments and controls2-57
Page 154 of 346
NOTICE
Do not place items that are more than 2
lb (1 kg) on the hook.
POWER WINDOWS
WARNING
.Make sure that all passengers have
their hands, etc. inside the vehicle
while it is in motion and before
closing the windows. Use the win-
dow lock switch to prevent unex-
pected use of the power windows.
. Do not leave children unattended
inside the vehicle. They could un-
knowingly activate switches or con-
trols and become trapped in the
window. Unattended children could
become involved in serious acci-
dents.
The power windows operate when the ignition
switch is in the ON position or for about 45
seconds after the ignition switch is pushed to
the LOCK position. If the driver’s or front
passenger’s door is opened during this period
of about 45 seconds, power to the windows is
canceled.
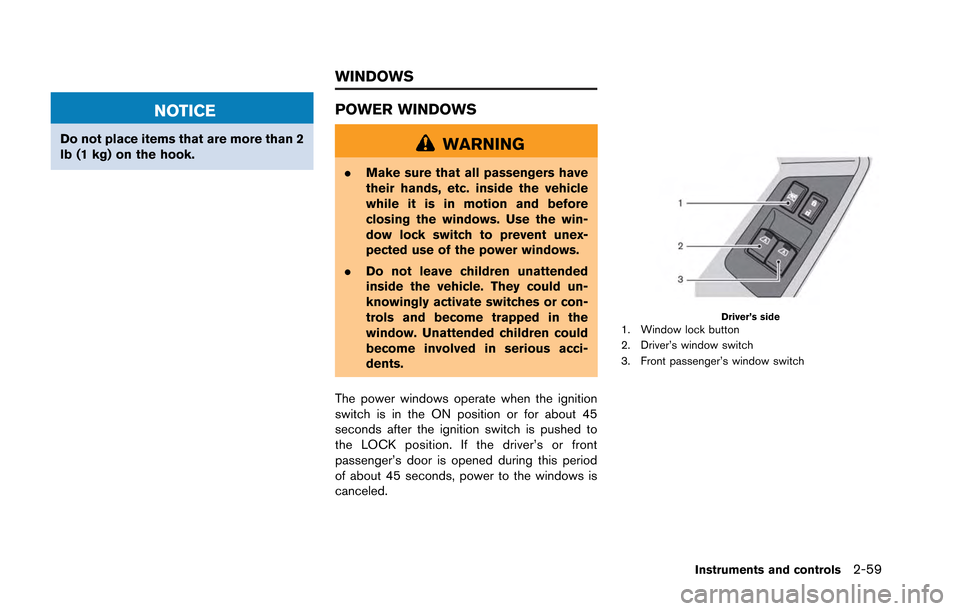
Driver’s side1. Window lock button
2. Driver’s window switch
3. Front passenger’s window switch
Instruments and controls2-59
WINDOWS
Page 155 of 346
2-60Instruments and controls
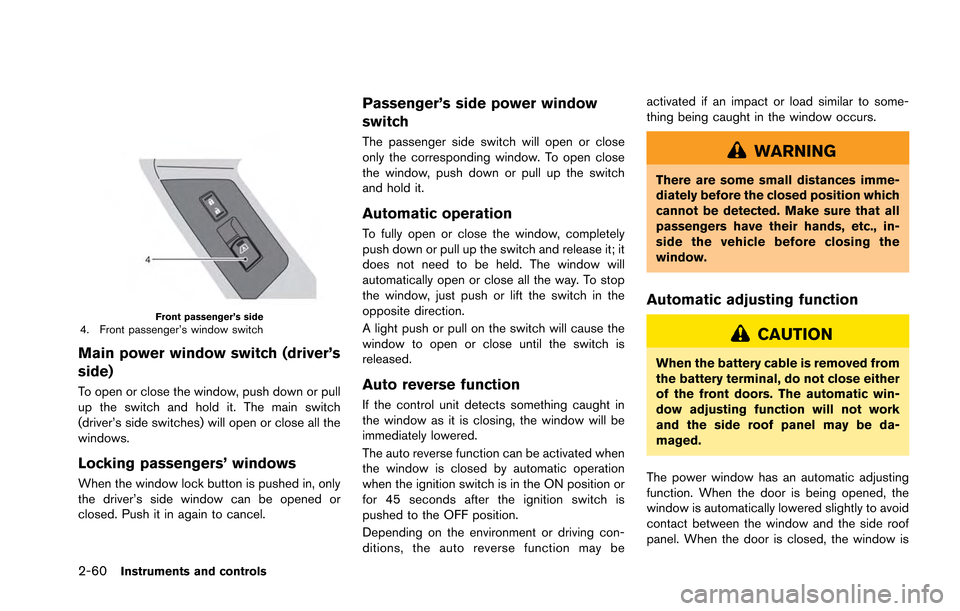
Front passenger’s side4. Front passenger’s window switch
Main power window switch (driver’s
side)
To open or close the window, push down or pull
up the switch and hold it. The main switch
(driver’s side switches) will open or close all the
windows.
Locking passengers’ windows
When the window lock button is pushed in, only
the driver’s side window can be opened or
closed. Push it in again to cancel.
Passenger’s side power window
switch
The passenger side switch will open or close
only the corresponding window. To open close
the window, push down or pull up the switch
and hold it.
Automatic operation
To fully open or close the window, completely
push down or pull up the switch and release it; it
does not need to be held. The window will
automatically open or close all the way. To stop
the window, just push or lift the switch in the
opposite direction.
A light push or pull on the switch will cause the
window to open or close until the switch is
released.
Auto reverse function
If the control unit detects something caught in
the window as it is closing, the window will be
immediately lowered.
The auto reverse function can be activated when
the window is closed by automatic operation
when the ignition switch is in the ON position or
for 45 seconds after the ignition switch is
pushed to the OFF position.
Depending on the environment or driving con-
ditions, the auto reverse function may beactivated if an impact or load similar to some-
thing being caught in the window occurs.
WARNING
There are some small distances imme-
diately before the closed position which
cannot be detected. Make sure that all
passengers have their hands, etc., in-
side the vehicle before closing the
window.
Automatic adjusting function
CAUTION
When the battery cable is removed from
the battery terminal, do not close either
of the front doors. The automatic win-
dow adjusting function will not work
and the side roof panel may be da-
maged.
The power window has an automatic adjusting
function. When the door is being opened, the
window is automatically lowered slightly to avoid
contact between the window and the side roof
panel. When the door is closed, the window is
Page 157 of 346
2-62Instruments and controls
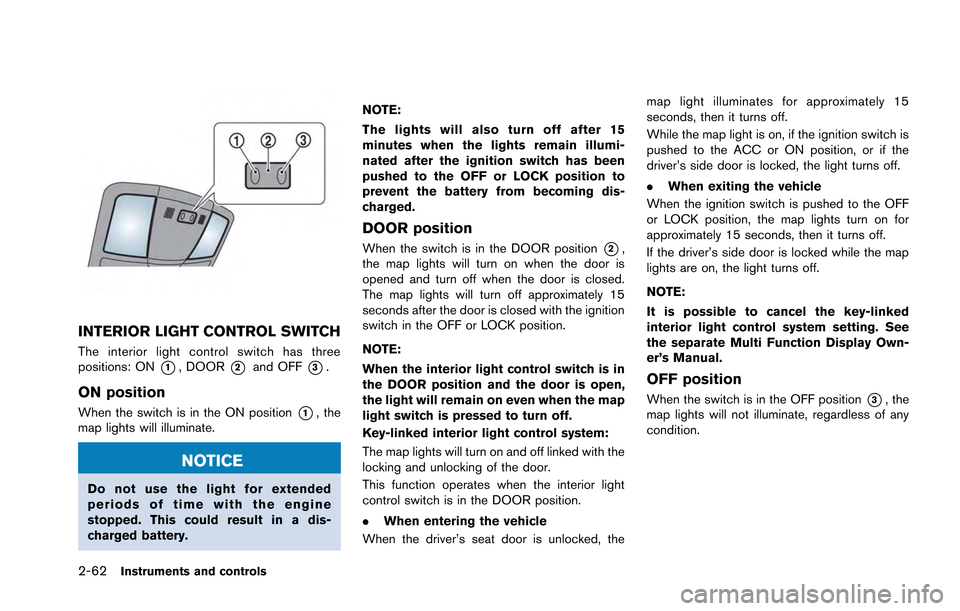
INTERIOR LIGHT CONTROL SWITCH
The interior light control switch has three
positions: ON
*1, DOOR*2and OFF*3.
ON position
When the switch is in the ON position*1, the
map lights will illuminate.
NOTICE
Do not use the light for extended
periods of time with the engine
stopped. This could result in a dis-
charged battery. NOTE:
The lights will also turn off after 15
minutes when the lights remain illumi-
nated after the ignition switch has been
pushed to the OFF or LOCK position to
prevent the battery from becoming dis-
charged.
DOOR position
When the switch is in the DOOR position*2,
the map lights will turn on when the door is
opened and turn off when the door is closed.
The map lights will turn off approximately 15
seconds after the door is closed with the ignition
switch in the OFF or LOCK position.
NOTE:
When the interior light control switch is in
the DOOR position and the door is open,
the light will remain on even when the map
light switch is pressed to turn off.
Key-linked interior light control system:
The map lights will turn on and off linked with the
locking and unlocking of the door.
This function operates when the interior light
control switch is in the DOOR position.
. When entering the vehicle
When the driver’s seat door is unlocked, the map light illuminates for approximately 15
seconds, then it turns off.
While the map light is on, if the ignition switch is
pushed to the ACC or ON position, or if the
driver’s side door is locked, the light turns off.
.
When exiting the vehicle
When the ignition switch is pushed to the OFF
or LOCK position, the map lights turn on for
approximately 15 seconds, then it turns off.
If the driver’s side door is locked while the map
lights are on, the light turns off.
NOTE:
It is possible to cancel the key-linked
interior light control system setting. See
the separate Multi Function Display Own-
er’s Manual.
OFF position
When the switch is in the OFF position*3, the
map lights will not illuminate, regardless of any
condition.
Page 158 of 346
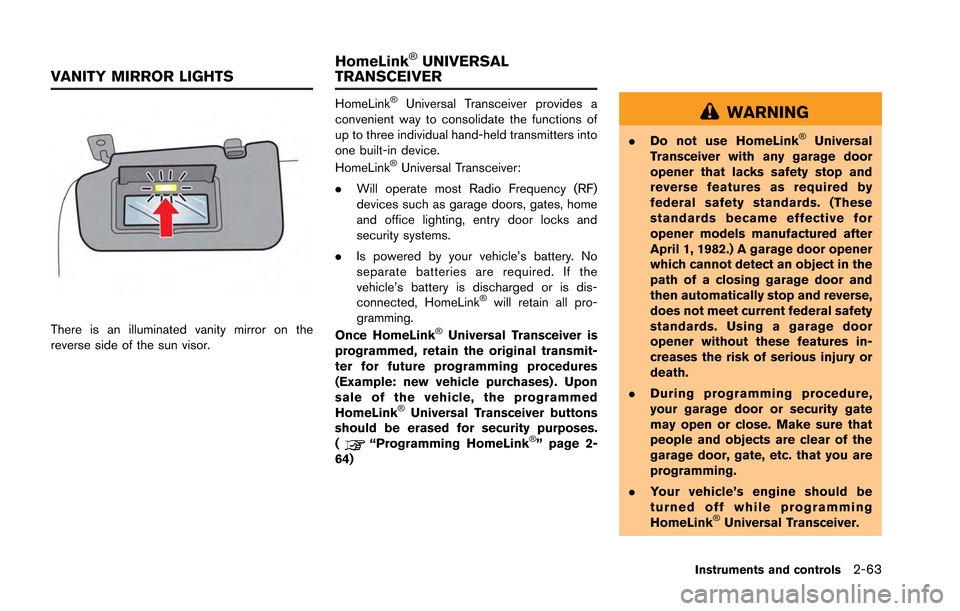
There is an illuminated vanity mirror on the
reverse side of the sun visor.
HomeLink®Universal Transceiver provides a
convenient way to consolidate the functions of
up to three individual hand-held transmitters into
one built-in device.
HomeLink
®Universal Transceiver:
. Will operate most Radio Frequency (RF)
devices such as garage doors, gates, home
and office lighting, entry door locks and
security systems.
. Is powered by your vehicle’s battery. No
separate batteries are required. If the
vehicle’s battery is discharged or is dis-
connected, HomeLink
®will retain all pro-
gramming.
Once HomeLink
®Universal Transceiver is
programmed, retain the original transmit-
ter for future programming procedures
(Example: new vehicle purchases) . Upon
sale of the vehicle, the programmed
HomeLink
®Universal Transceiver buttons
should be erased for security purposes.
(
“Programming HomeLink®” page 2-
64)
WARNING
. Do not use HomeLink®Universal
Transceiver with any garage door
opener that lacks safety stop and
reverse features as required by
federal safety standards. (These
standards became effective for
opener models manufactured after
April 1, 1982.) A garage door opener
which cannot detect an object in the
path of a closing garage door and
then automatically stop and reverse,
does not meet current federal safety
standards. Using a garage door
opener without these features in-
creases the risk of serious injury or
death.
. During programming procedure,
your garage door or security gate
may open or close. Make sure that
people and objects are clear of the
garage door, gate, etc. that you are
programming.
. Your vehicle’s engine should be
turned off while programming
HomeLink
®Universal Transceiver.
Instruments and controls2-63
VANITY MIRROR LIGHTS HomeLink
®UNIVERSAL
TRANSCEIVER