2013 NISSAN GT-R AUX
[x] Cancel search: AUXPage 17 of 315
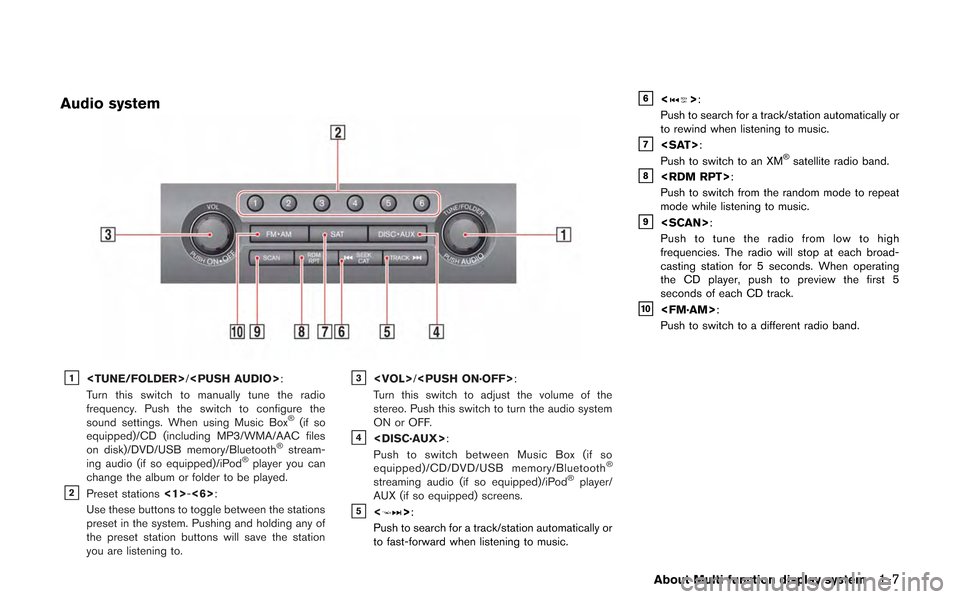
Audio system
&1
Turn this switch to manually tune the radio
frequency. Push the switch to configure the
sound settings. When using Music Box
®(if so
equipped)/CD (including MP3/WMA/AAC files
on disk)/DVD/USB memory/Bluetooth
®stream-
ing audio (if so equipped)/iPod®player you can
change the album or folder to be played.
&2Preset stations <1>-<6>:
Use these buttons to toggle between the stations
preset in the system. Pushing and holding any of
the preset station buttons will save the station
you are listening to.
&3
Turn this switch to adjust the volume of the
stereo. Push this switch to turn the audio system
ON or OFF.
&4
Push to switch between Music Box (if so
equipped)/CD/DVD/USB memory/Bluetooth
®
streaming audio (if so equipped)/iPod®player/
AUX (if so equipped) screens.
&5<>:
Push to search for a track/station automatically or
to fast-forward when listening to music.
&6<>:
Push to search for a track/station automatically or
to rewind when listening to music.
&7
Push to switch to an XM®satellite radio band.&8
Push to switch from the random mode to repeat
mode while listening to music.
&9
Push to tune the radio from low to high
frequencies. The radio will stop at each broad-
casting station for 5 seconds. When operating
the CD player, push to preview the first 5
seconds of each CD track.
&10
Push to switch to a different radio band.
About Multi function display system1-7
Page 140 of 315
3-12Audio system
FM-AM-SAT RADIO WITH COM-
PACT DISC (CD) PLAYER
The satellite radio mode requires an active XM
Satellite Radio subscription. The satellite radio is
not available in Alaska, Hawaii and Guam.
It may take some time to receive the activation
signal after subscribing the XM Satellite Radio.
After receiving the activation signal, an available
channel list will be automatically updated in the
radio. For XM, push the ignition switch from
LOCK to ACC to update the channel list.
Audio main operation
Head unit:
The auto loudness circuit enhances the low and
high frequency ranges automatically in both
radio reception and CD playback.
ON·OFF/Volume control:
Push the ignition switch to the ACC or ON
position, and then push the ON·OFF button
while the system is off to turn on the last audio
source (i.e. FM or CD) , which was playing
immediately before the system was turned off.
While the system is on, pushing the ON·OFF
button turns the system off.
Turn the VOL control knob to adjust the volume.Adjusting tone quality and speaker bal-
ance:
To adjust Bass, Treble, Balance and Fade, push
the Audio control knob. When the display shows
the setting you want to change (Bass, Treble,
Balance and Fade) , rotate the Audio control
knob to set the desired setting.
“Audio settings” (page 7-3)
Switching the display:
Pushing
as follows:
iPod
®/USB ?CD/DVD ?Music Box (if so
equipped) ?Bluetooth®streaming audio (if so
equipped) ?AUX (if so equipped) ?iPod®/
USB
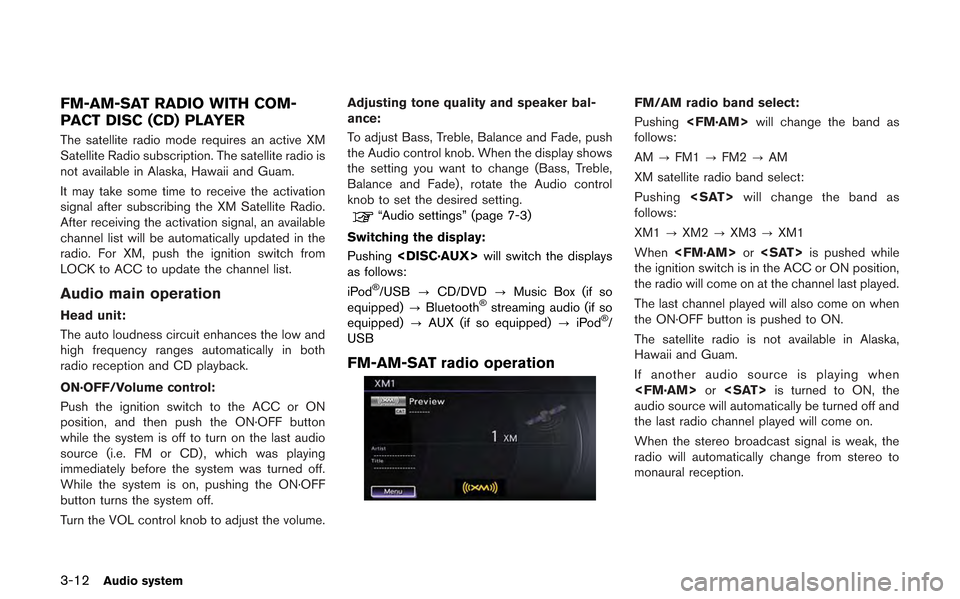
FM-AM-SAT radio operation
FM/AM radio band select:
Pushing
follows:
AM ?FM1 ?FM2 ?AM
XM satellite radio band select:
Pushing
follows:
XM1 ?XM2 ?XM3 ?XM1
When
the ignition switch is in the ACC or ON position,
the radio will come on at the channel last played.
The last channel played will also come on when
the ON·OFF button is pushed to ON.
The satellite radio is not available in Alaska,
Hawaii and Guam.
If another audio source is playing when
audio source will automatically be turned off and
the last radio channel played will come on.
When the stereo broadcast signal is weak, the
radio will automatically change from stereo to
monaural reception.
Page 142 of 315
![NISSAN GT-R 2013 R35 Multi Function Display Owners Manual 3-14Audio system
.Favorite Artists & Songs
Stores the current artist or song that is being
played. Touch [Alert] to be reminded when
the stored artist or song is playing on a
station while listening t NISSAN GT-R 2013 R35 Multi Function Display Owners Manual 3-14Audio system
.Favorite Artists & Songs
Stores the current artist or song that is being
played. Touch [Alert] to be reminded when
the stored artist or song is playing on a
station while listening t](/manual-img/5/316/w960_316-141.png)
3-14Audio system
.Favorite Artists & Songs
Stores the current artist or song that is being
played. Touch [Alert] to be reminded when
the stored artist or song is playing on a
station while listening to XM.
. Categories
Selecting a category will go to the first
channel in that category as defined by XM
Radio.
. Direct Tune
Inputs the channel number by using a
keypad.
Compact Disc (CD) player operation
Push the ignition switch to the ACC or ON
position and insert the Compact Disc (CD) into
the slot with the label side facing up. The CD will
be guided automatically into the slot and start
playing.
After loading the CD, the number of tracks on the CD and the play time will appear on the
display.
If the radio is already operating, it will auto-
matically turn off and the CD will play.
If the system has been turned off while the CD
was playing, pushing the ON·OFF button will
start the CD.
Do not use 3.1 in (8 cm) discs.
PLAY:
When
off and the CD loaded, the system will turn on
and the CD will start to play.
When
loaded and the radio playing, the radio will
automatically be turned off and the CD will start
to play.
Menu:
When [Menu] on the display is selected while
the CD is being played, the menu screen will be
displayed. The following menu options are
available.
. Folder List (for CD with compressed audio
files)
Displays the folder list.
. Track List
Displays the track list. .
Play Mode
Select a play mode from the following items.
— Normal
— 1 Folder Repeat (for CD with com-
pressed audio files)
— 1 Track Repeat
— 1 Disc Random
— 1 Folder Random (for CD with com- pressed audio files)
. Record to Music Box (for CD) (if so
equipped)
Select to choose specific songs on the CD
to record to the Music Box.
. Title Text Priority (for CD)
Set the priority to CDDB (Compact Disc
Data Base) to acquire track information from
the Gracenote Database, or set the priority
to CD-TEXT to acquire the information from
CDs.
. Automatic Recording (for CD) (if so
equipped)
When this item is turned to ON, the Music
Box automatically starts recording when a
CD is inserted.
. Recording Quality (for CD) (if so equipped)
The larger number (132) will increase the
recorded sound quality while taking up more
space on the Music Box leaving less room
Page 144 of 315
3-16Audio system
CAUTION
.Only operate the DVD while the
vehicle engine is running. Operating
the DVD for extended periods of
time with the engine OFF can dis-
charge the vehicle battery.
. Do not allow the system to get wet.
Excessive moisture such as spilled
liquids may cause the system to
malfunction.
. While playing VIDEO-CD media, this
DVD player does not guarantee
complete functionality of all VI-
DEO-CD formats.
Display settings
To adjust the front display mode, push
select [Others] and then select [Display].
To adjust the display ON/OFF, brightness, tint,
color and contrast, select [Display Adjustment]
and then select each key.
Then you can adjust each item using the center
dial. After changes have been made push
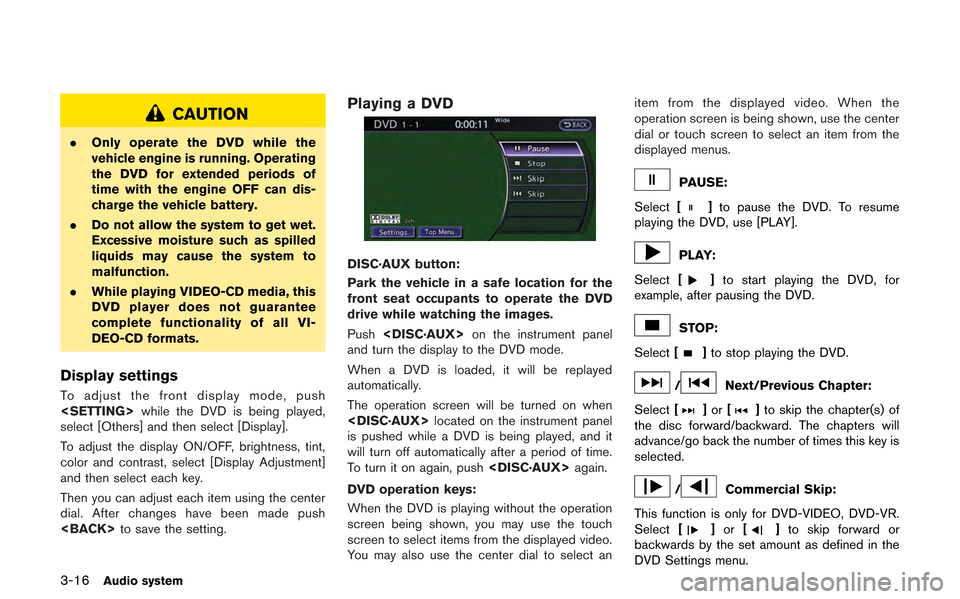
Playing a DVD
DISC·AUX button:
Park the vehicle in a safe location for the
front seat occupants to operate the DVD
drive while watching the images.
Push
and turn the display to the DVD mode.
When a DVD is loaded, it will be replayed
automatically.
The operation screen will be turned on when
is pushed while a DVD is being played, and it
will turn off automatically after a period of time.
To turn it on again, push
DVD operation keys:
When the DVD is playing without the operation
screen being shown, you may use the touch
screen to select items from the displayed video.
You may also use the center dial to select an item from the displayed video. When the
operation screen is being shown, use the center
dial or touch screen to select an item from the
displayed menus.
PAUSE:
Select [
]to pause the DVD. To resume
playing the DVD, use [PLAY].
PLAY:
Select [
]to start playing the DVD, for
example, after pausing the DVD.
STOP:
Select [
]to stop playing the DVD.
/Next/Previous Chapter:
Select [
]or []to skip the chapter(s) of
the disc forward/backward. The chapters will
advance/go back the number of times this key is
selected.
/Commercial Skip:
This function is only for DVD-VIDEO, DVD-VR.
Select [
]or []to skip forward or
backwards by the set amount as defined in the
DVD Settings menu.
Page 146 of 315
3-18Audio system
Display:
To adjust the image quality of the screen, select
the preferred adjustment items.
Audio:
Select the preferred language for audio.
Subtitle (DVD-VIDEO, DVD-VR):
Select the preferred language for subtitles.
Display Mode (DVD-VIDEO, VIDEO-CD,
DVD-VR):
Select from the “Full”, “Wide”, “Normal” or
“Cinema” modes.
Title List (DVD-VR):
Select the preferred title from the list.
Play Mode:
Select the preferred play mode.
PG/PL Mode (DVD-VR):
Select the “PG” or “PL” mode.USB MEMORY OPERATION
Audio main operation
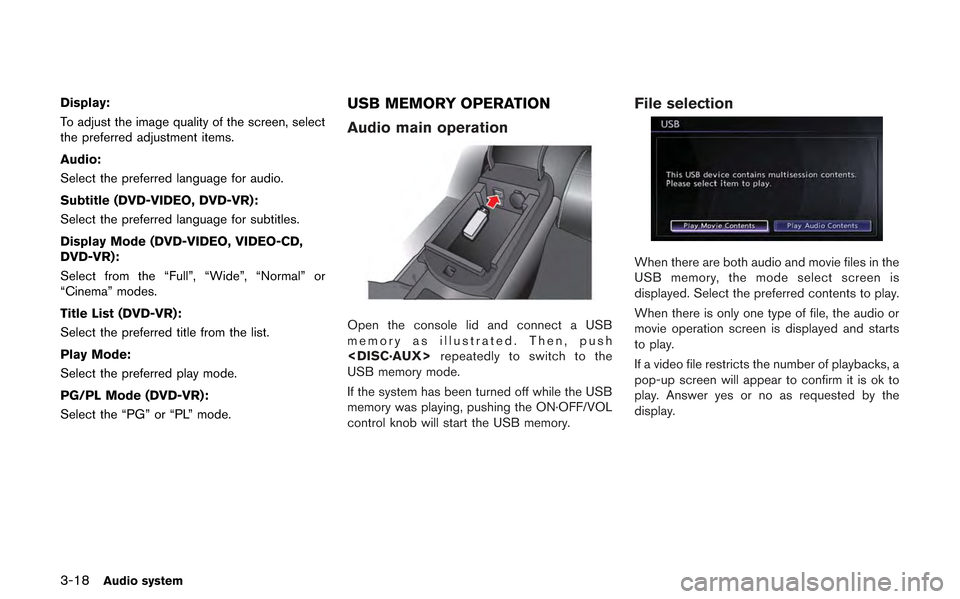
Open the console lid and connect a USB
memory as illustrated. Then, push
USB memory mode.
If the system has been turned off while the USB
memory was playing, pushing the ON·OFF/VOL
control knob will start the USB memory.
File selection
When there are both audio and movie files in the
USB memory, the mode select screen is
displayed. Select the preferred contents to play.
When there is only one type of file, the audio or
movie operation screen is displayed and starts
to play.
If a video file restricts the number of playbacks, a
pop-up screen will appear to confirm it is ok to
play. Answer yes or no as requested by the
display.
Page 147 of 315
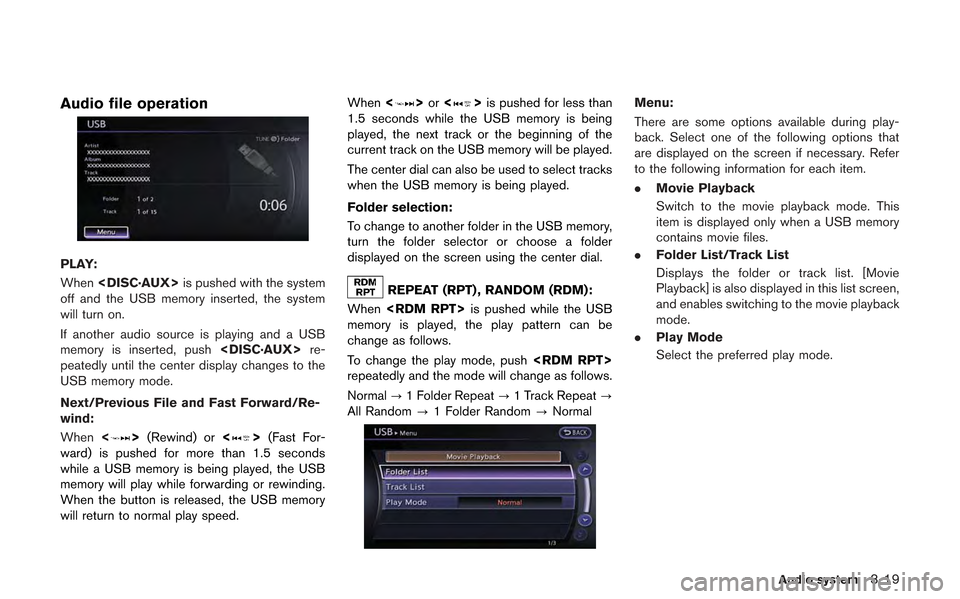
Audio file operation
PLAY:
When
off and the USB memory inserted, the system
will turn on.
If another audio source is playing and a USB
memory is inserted, push
peatedly until the center display changes to the
USB memory mode.
Next/Previous File and Fast Forward/Re-
wind:
When <
>(Rewind) or <>(Fast For-
ward) is pushed for more than 1.5 seconds
while a USB memory is being played, the USB
memory will play while forwarding or rewinding.
When the button is released, the USB memory
will return to normal play speed. When
<
>or <>is pushed for less than
1.5 seconds while the USB memory is being
played, the next track or the beginning of the
current track on the USB memory will be played.
The center dial can also be used to select tracks
when the USB memory is being played.
Folder selection:
To change to another folder in the USB memory,
turn the folder selector or choose a folder
displayed on the screen using the center dial.
REPEAT (RPT) , RANDOM (RDM):
When
memory is played, the play pattern can be
change as follows.
To change the play mode, push
repeatedly and the mode will change as follows.
Normal ?1 Folder Repeat ?1 Track Repeat ?
All Random ?1 Folder Random ?Normal
Menu:
There are some options available during play-
back. Select one of the following options that
are displayed on the screen if necessary. Refer
to the following information for each item.
. Movie Playback
Switch to the movie playback mode. This
item is displayed only when a USB memory
contains movie files.
. Folder List/Track List
Displays the folder or track list. [Movie
Playback] is also displayed in this list screen,
and enables switching to the movie playback
mode.
. Play Mode
Select the preferred play mode.
Audio system3-19
Page 148 of 315
3-20Audio system
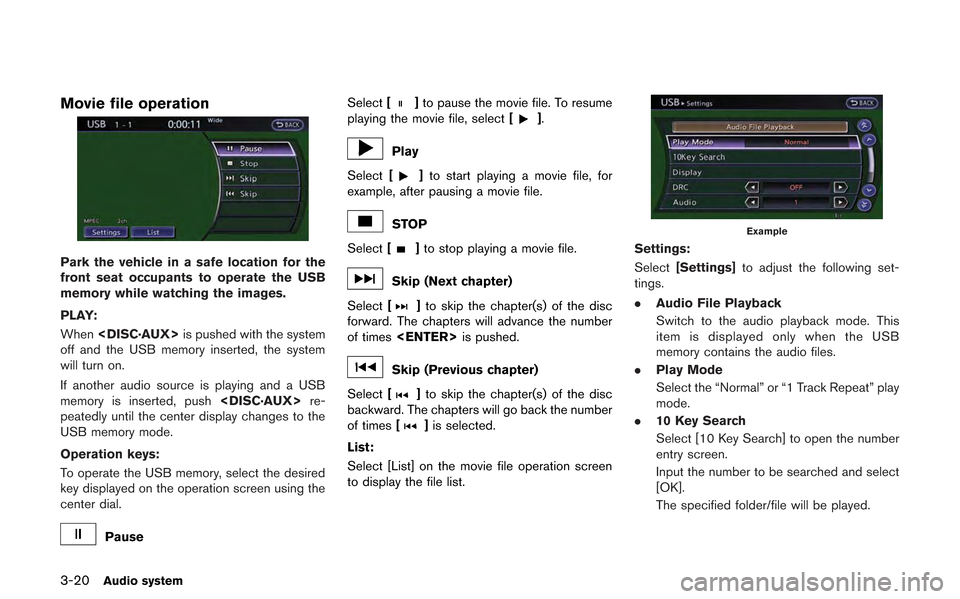
Movie file operation
Park the vehicle in a safe location for the
front seat occupants to operate the USB
memory while watching the images.
PLAY:
When
off and the USB memory inserted, the system
will turn on.
If another audio source is playing and a USB
memory is inserted, push
peatedly until the center display changes to the
USB memory mode.
Operation keys:
To operate the USB memory, select the desired
key displayed on the operation screen using the
center dial.
Pause Select
[
]to pause the movie file. To resume
playing the movie file, select [].
Play
Select [
]to start playing a movie file, for
example, after pausing a movie file.
STOP
Select [
]to stop playing a movie file.
Skip (Next chapter)
Select [
]to skip the chapter(s) of the disc
forward. The chapters will advance the number
of times
Skip (Previous chapter)
Select [
]to skip the chapter(s) of the disc
backward. The chapters will go back the number
of times [
]is selected.
List:
Select [List] on the movie file operation screen
to display the file list.
Example
Settings:
Select [Settings] to adjust the following set-
tings.
. Audio File Playback
Switch to the audio playback mode. This
item is displayed only when the USB
memory contains the audio files.
. Play Mode
Select the “Normal” or “1 Track Repeat” play
mode.
. 10 Key Search
Select [10 Key Search] to open the number
entry screen.
Input the number to be searched and select
[OK].
The specified folder/file will be played.
Page 150 of 315
![NISSAN GT-R 2013 R35 Multi Function Display Owners Manual 3-22Audio system
Connecting procedure
1. Push<SETTING> and select [Bluetooth].
2. Select [Connect Bluetooth].
3. A confirmation screen will be displayed.
Select [No].
Note: Selecting [Yes] will only c NISSAN GT-R 2013 R35 Multi Function Display Owners Manual 3-22Audio system
Connecting procedure
1. Push<SETTING> and select [Bluetooth].
2. Select [Connect Bluetooth].
3. A confirmation screen will be displayed.
Select [No].
Note: Selecting [Yes] will only c](/manual-img/5/316/w960_316-149.png)
3-22Audio system
Connecting procedure
1. Push
2. Select [Connect Bluetooth].
3. A confirmation screen will be displayed.
Select [No].
Note: Selecting [Yes] will only connect the
hands free phone portion of a Bluetooth
®
device.
4. Choose a PIN code to use with thecompatible Bluetooth®audio device using
the number input screen. The PIN code will
need to be entered into the Bluetooth
®
audio device after step 5. Select [OK].
5. The standby message screen will appear. Operate the compatible Bluetooth®audio
device. Please refer to the device’s owners
manual for the Bluetooth
®audio connection
instructions for your specific device.
When the connection is completed, the
screen will return to the Bluetooth
®setup
display.
Audio main operation
Push the ignition switch to the ACC or ON
position. Then, push
to switch to the Bluetooth
®audio mode. If the
system has been turned off while the Bluetooth®
audio device was playing, pushing the ON·OFF/
VOL control knob will start the Bluetooth®audio
device.
The ability to pause, change tracks, fast forward,
rewind, randomize and repeat music may be
different between devices. Some or all of these
functions may not be supported on each device.