2013 NISSAN GT-R ignition
[x] Cancel search: ignitionPage 162 of 315
4-2Bluetooth®Hands-Free Phone System
WARNING
.Use a phone after stopping your
vehicle in a safe location. If you
have to use a phone while driving,
exercise extreme caution at all
times so full attention may be given
to vehicle operation.
. If you are unable to devote full
attention to vehicle operation while
talking on the phone, pull off the
road to a safe location and stop
your vehicle.
CAUTION
To avoid draining the vehicle battery,
use a phone after starting the engine.
Your vehicle is equipped with Bluetooth
®
Hands-Free Phone System. If you are an owner
of a compatible Bluetooth®enabled cellular
phone, you can set up the wireless connection
between your cellular phone and the in-vehicle
phone module. With Bluetooth
®wireless tech-
nology, you can make or receive a telephone call
with your cellular phone in your pocket. Once a cellular phone is connected to the in-
vehicle phone module, no phone connecting
procedure is required anymore. Your phone is
automatically connected with the in-vehicle
phone module when the ignition switch is
pushed to the ON position with the registered
cellular phone turned on and carried in the
vehicle.
You can register up to 5 different Bluetooth
®
cellular phones in the in-vehicle phone module.
However, you can talk on only one cellular phone
at a time.
The NISSAN Voice Recognition system sup-
ports the phone commands, so dialing a phone
number using your voice is possible.
“8. Voice recognition”
Before using the Bluetooth®Hands-Free Phone
System, refer to the following notes.
. Set up the wireless connection between a
compatible cellular phone and the in-vehicle
phone module before using the Bluetooth
®
Hands-Free Phone System.
. Some Bluetooth®enabled cellular phones
may not be recognized by the in-vehicle
phone module. Please visit
www.nissanusa.com/bluetooth for a recom-
mended phone list. .
You will not be able to use a hands-free
phone under the following conditions:
— Your vehicle is outside of the telephone
service area.
— Your vehicle is in an area where it is difficult to receive radio waves; such as in
a tunnel, in an underground parking
garage, behind a tall building or in a
mountainous area.
— Your cellular phone is locked in order not to be dialed.
. When the radio wave condition is not ideal
or ambient sound is too loud, it may be
difficult to hear the other person’s voice
during a call.
. Immediately after the ignition switch is
pushed to the ON position, it may be
impossible to receive a call for a short
period of time.
. Do not place the cellular phone in an area
surrounded by metal or far away from the in-
vehicle phone module to prevent tone quality
degradation and wireless connection dis-
ruption.
. While a cellular phone is connected through
the Bluetooth
®wireless connection, the
battery power of the cellular phone may
discharge quicker than usual.
BLUETOOTH®HANDS-FREE PHONE
SYSTEM
Page 184 of 315
6-6Viewing technical information
MAINTENANCE INFORMATION
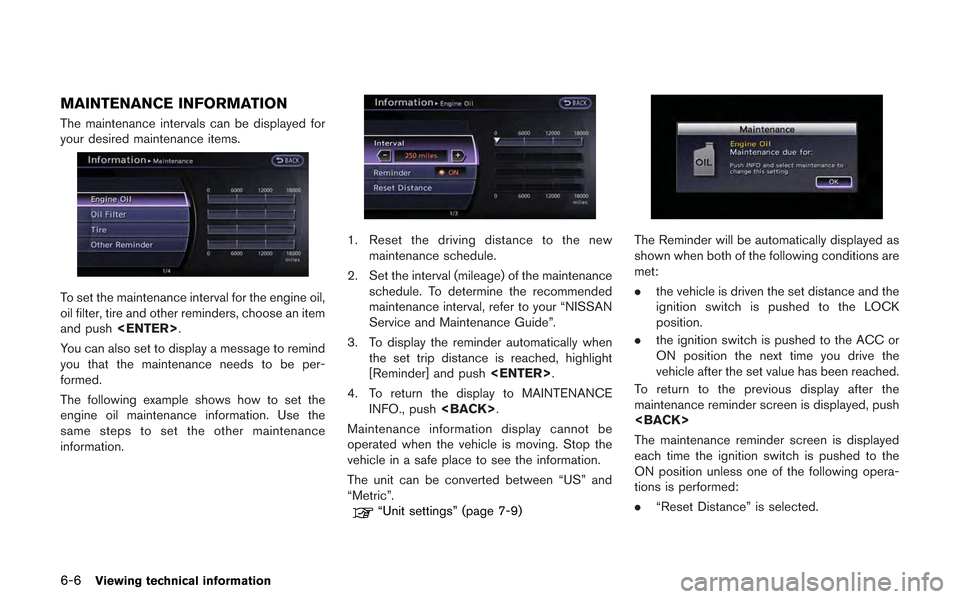
The maintenance intervals can be displayed for
your desired maintenance items.
To set the maintenance interval for the engine oil,
oil filter, tire and other reminders, choose an item
and push
You can also set to display a message to remind
you that the maintenance needs to be per-
formed.
The following example shows how to set the
engine oil maintenance information. Use the
same steps to set the other maintenance
information.
1. Reset the driving distance to the new maintenance schedule.
2. Set the interval (mileage) of the maintenance schedule. To determine the recommended
maintenance interval, refer to your “NISSAN
Service and Maintenance Guide”.
3. To display the reminder automatically when the set trip distance is reached, highlight
[Reminder] and push
4. To return the display to MAINTENANCE INFO., push
Maintenance information display cannot be
operated when the vehicle is moving. Stop the
vehicle in a safe place to see the information.
The unit can be converted between “US” and
“Metric”.
“Unit settings” (page 7-9)
The Reminder will be automatically displayed as
shown when both of the following conditions are
met:
. the vehicle is driven the set distance and the
ignition switch is pushed to the LOCK
position.
. the ignition switch is pushed to the ACC or
ON position the next time you drive the
vehicle after the set value has been reached.
To return to the previous display after the
maintenance reminder screen is displayed, push
The maintenance reminder screen is displayed
each time the ignition switch is pushed to the
ON position unless one of the following opera-
tions is performed:
. “Reset Distance” is selected.
Page 204 of 315
7-2Other settings
The navigation system can be customized to
make it easier for you to use.
BASIC OPERATION
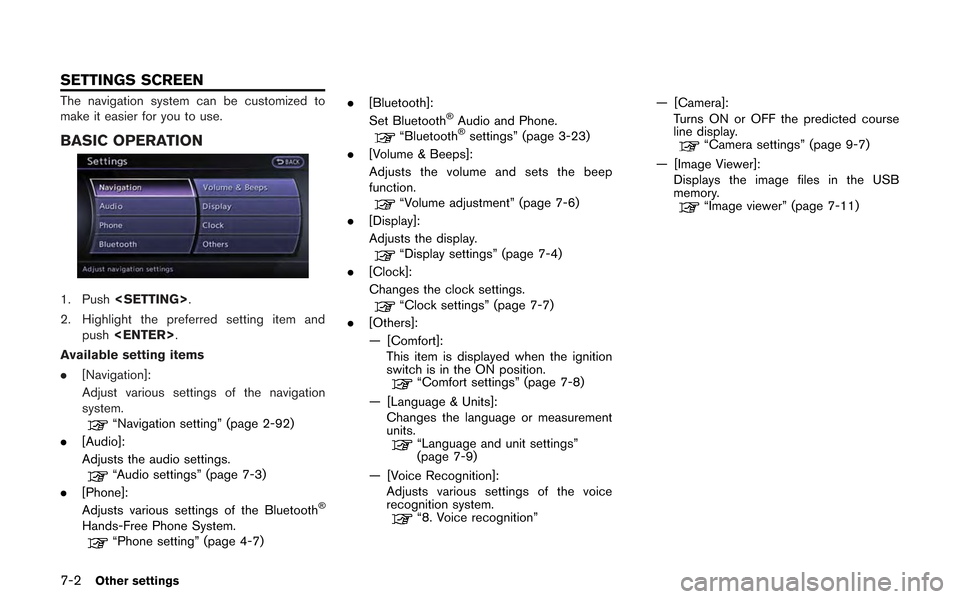
1. Push
2. Highlight the preferred setting item and push
Available setting items
. [Navigation]:
Adjust various settings of the navigation
system.
“Navigation setting” (page 2-92)
. [Audio]:
Adjusts the audio settings.
“Audio settings” (page 7-3)
. [Phone]:
Adjusts various settings of the Bluetooth
®
Hands-Free Phone System.“Phone setting” (page 4-7) .
[Bluetooth]:
Set Bluetooth
®Audio and Phone.“Bluetooth®settings” (page 3-23)
. [Volume & Beeps]:
Adjusts the volume and sets the beep
function.
“Volume adjustment” (page 7-6)
. [Display]:
Adjusts the display.
“Display settings” (page 7-4)
. [Clock]:
Changes the clock settings.
“Clock settings” (page 7-7)
. [Others]:
— [Comfort]:
This item is displayed when the ignition
switch is in the ON position.
“Comfort settings” (page 7-8)
— [Language & Units]: Changes the language or measurement
units.
“Language and unit settings”
(page 7-9)
— [Voice Recognition]: Adjusts various settings of the voice
recognition system.
“8. Voice recognition” — [Camera]:
Turns ON or OFF the predicted course
line display.
“Camera settings” (page 9-7)
— [Image Viewer]: Displays the image files in the USB
memory.
“Image viewer” (page 7-11)
SETTINGS SCREEN
Page 210 of 315
![NISSAN GT-R 2013 R35 Multi Function Display Owners Manual 7-8Other settings
— Newfoundland
— Hawaii
— Alaska
This key does not appear on the display until the
ignition switch is pushed to the ON position.
1. Push<SETTING>.
2. Highlight [Comfort] and pu NISSAN GT-R 2013 R35 Multi Function Display Owners Manual 7-8Other settings
— Newfoundland
— Hawaii
— Alaska
This key does not appear on the display until the
ignition switch is pushed to the ON position.
1. Push<SETTING>.
2. Highlight [Comfort] and pu](/manual-img/5/316/w960_316-209.png)
7-8Other settings
— Newfoundland
— Hawaii
— Alaska
This key does not appear on the display until the
ignition switch is pushed to the ON position.
1. Push
2. Highlight [Comfort] and push
3. Highlight the preferred setting item and push
selected item illuminates.
4. After setting, push
to apply the setting.
5. Push
screen. Push
Page 211 of 315
![NISSAN GT-R 2013 R35 Multi Function Display Owners Manual This changes the language and measurement
unit used in the system.
LANGUAGE SETTINGS
1. Push<SETTING>.
2. Highlight [Others] and push <ENTER>.
3. Highlight [Language & Units] and push <ENTER>.
4. High NISSAN GT-R 2013 R35 Multi Function Display Owners Manual This changes the language and measurement
unit used in the system.
LANGUAGE SETTINGS
1. Push<SETTING>.
2. Highlight [Others] and push <ENTER>.
3. Highlight [Language & Units] and push <ENTER>.
4. High](/manual-img/5/316/w960_316-210.png)
This changes the language and measurement
unit used in the system.
LANGUAGE SETTINGS
1. Push
2. Highlight [Others] and push
3. Highlight [Language & Units] and push
4. Highlight [Select Language] and push
5. Highlight the preferred setting item andpush
selected item illuminates.
Available languages
.[English]
.[Franc¸ ais]
.[Espan ˜
ol]
NOTICE
Do not change the ignition switch
position while changing the language.
Doing so may cause a system malfunc-
tion.
UNIT SETTINGS
1. Push
2. Highlight [Others] and push
3. Highlight [Language & Units] and push
4. Highlight [Select Units] and push
Other settings7-9
LANGUAGE AND UNIT SETTINGS
Page 218 of 315
8-4Voice recognition
Useful tips for correct operation
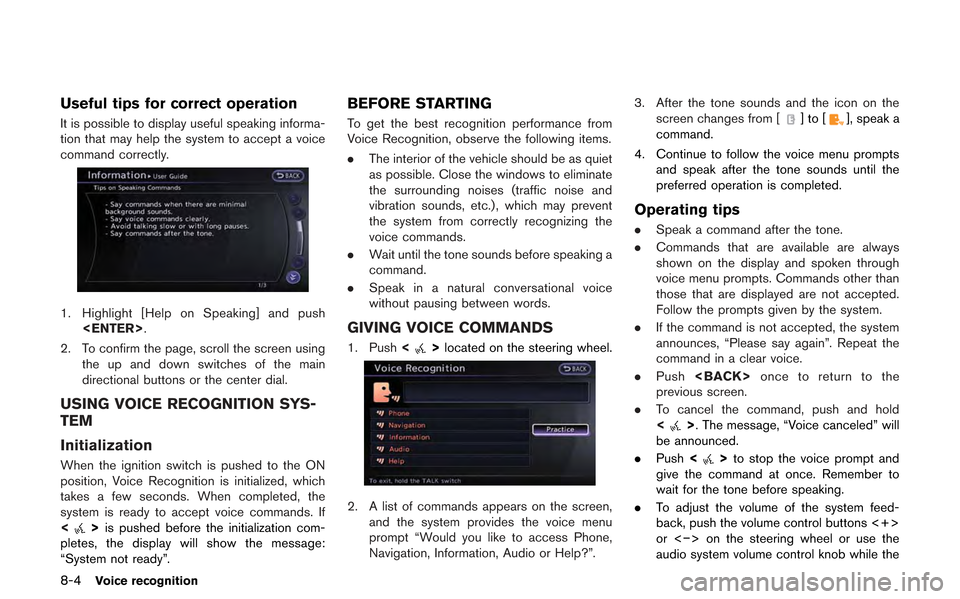
It is possible to display useful speaking informa-
tion that may help the system to accept a voice
command correctly.
1. Highlight [Help on Speaking] and push
2. To confirm the page, scroll the screen using the up and down switches of the main
directional buttons or the center dial.
USING VOICE RECOGNITION SYS-
TEM
Initialization
When the ignition switch is pushed to the ON
position, Voice Recognition is initialized, which
takes a few seconds. When completed, the
system is ready to accept voice commands. If
<
>is pushed before the initialization com-
pletes, the display will show the message:
“System not ready”.
BEFORE STARTING
To get the best recognition performance from
Voice Recognition, observe the following items.
. The interior of the vehicle should be as quiet
as possible. Close the windows to eliminate
the surrounding noises (traffic noise and
vibration sounds, etc.), which may prevent
the system from correctly recognizing the
voice commands.
. Wait until the tone sounds before speaking a
command.
. Speak in a natural conversational voice
without pausing between words.
GIVING VOICE COMMANDS
1. Push <>located on the steering wheel.
2. A list of commands appears on the screen,
and the system provides the voice menu
prompt “Would you like to access Phone,
Navigation, Information, Audio or Help?”. 3. After the tone sounds and the icon on the
screen changes from [
]to[], speak a
command.
4. Continue to follow the voice menu prompts and speak after the tone sounds until the
preferred operation is completed.
Operating tips
.Speak a command after the tone.
. Commands that are available are always
shown on the display and spoken through
voice menu prompts. Commands other than
those that are displayed are not accepted.
Follow the prompts given by the system.
. If the command is not accepted, the system
announces, “Please say again”. Repeat the
command in a clear voice.
. Push
previous screen.
. To cancel the command, push and hold
<
>. The message, “Voice canceled” will
be announced.
. Push <
>to stop the voice prompt and
give the command at once. Remember to
wait for the tone before speaking.
. To adjust the volume of the system feed-
back, push the volume control buttons <+>
or <−> on the steering wheel or use the
audio system volume control knob while the
Page 232 of 315
![NISSAN GT-R 2013 R35 Multi Function Display Owners Manual 8-18Voice recognition
to operate the learning function through this
tutorial.
1. Highlight [Adapting the System to YourVoice] and push <ENTER>. The tutorial
starts.
2. The voice guide demonstrates the NISSAN GT-R 2013 R35 Multi Function Display Owners Manual 8-18Voice recognition
to operate the learning function through this
tutorial.
1. Highlight [Adapting the System to YourVoice] and push <ENTER>. The tutorial
starts.
2. The voice guide demonstrates the](/manual-img/5/316/w960_316-231.png)
8-18Voice recognition
to operate the learning function through this
tutorial.
1. Highlight [Adapting the System to YourVoice] and push
starts.
2. The voice guide demonstrates the steps that have to be performed.
3. When the tutorial is completed, the system automatically switches to the Menu screen.
USING VOICE RECOGNITION SYS-
TEM
Initialization
When the ignition switch is pushed to the ON
position, Voice Recognition is initialized, which
takes a few seconds. When completed, the
system is ready to accept voice commands. If
<
>is pushed before the initialization com-
pletes, the display will show the message:
“System not ready”.
BEFORE STARTING
To get the best recognition performance out of
Voice Recognition, observe the following:
. The interior of the vehicle should be as quiet
as possible. Close the windows to eliminate
the surrounding noises (traffic noise and
vibration sounds, etc.), which may prevent
the system from correctly recognizing the
voice commands.
. Wait until the tone sounds before speaking a
command.
. Speak in a natural conversational voice
without pausing between words.
GIVING VOICE COMMANDS
1. Push <>located on the steering wheel.
2. A list of commands appears on the screen,
and the system announces, “Please say a
command”.
3. After the tone sounds and the icon on the screen changes from [
]to[], speak a
command.
Operating tips
. If the command is not recognized, the
system announces, “Please say again”.
Repeat the command in a clear voice.
. Push
previous screen.
. To cancel the command, push and hold
<
>. The message, “Voice canceled” will
be announced.
Page 243 of 315
the object projects over the actual backing up
course.WARNING
.Always turn and check that it is safe
to park your car before backing up.
Always back up slowly.
. Use the displayed lines as a refer-
ence. The lines are highly affected
by the number of occupants, fuel
level, vehicle position, road condi-
tion and road grade.
. If the tires are replaced with differ-
ent sized tires, the predicted course
line may not be displayed correctly.
. On a snow-covered or slippery road,
there may be a difference between
the predicted course line and the
actual course line.
. If the battery is disconnected or
becomes discharged, the predicted
course lines may be displayed in-
correctly. If this occurs, drive the
vehicle on a straight road for more
than 5 minutes.
. When the steering wheel is turned
with the ignition switch in the ACC
position, the predicted course lines
may be displayed incorrectly. .
The displayed line will appear
slightly off to the right because the
rear view camera is not installed in
the rear center of the vehicle.
. The distance guide line and the
vehicle width guide line should be
used as a reference only when the
vehicle is on a level paved surface.
The distance viewed on the monitor
is for reference only and may be
different than the actual distance
between the vehicle and displayed
objects.
. When backing up the vehicle up a
hill, objects viewed in the monitor
are further than they appear. When
backing up the vehicle down a hill,
objects viewed in the monitor are
closer than they appear. Use the
inside mirror or glance over your
shoulder to properly judge dis-
tances to other objects.
The vehicle width and predicted course
lines are wider than the actual width and
course.
Monitor system9-5
HOW TO PARK WITH PREDICTED
COURSE LINES