Page 6 of 444
Table of
ContentsIllustrated table of contents
Safety—Seats, seat belts and supplemental restraint system
Instruments and controls
Pre-driving checks and adjustments
Monitor, climate, audio, phone and voice recognition systems
Starting and driving
In case of emergency
Appearance and care
Maintenance and do-it-yourself
Technical and consumer information
Index
0
1
2
3
4
5
6
7
8
9
10
Page 38 of 444

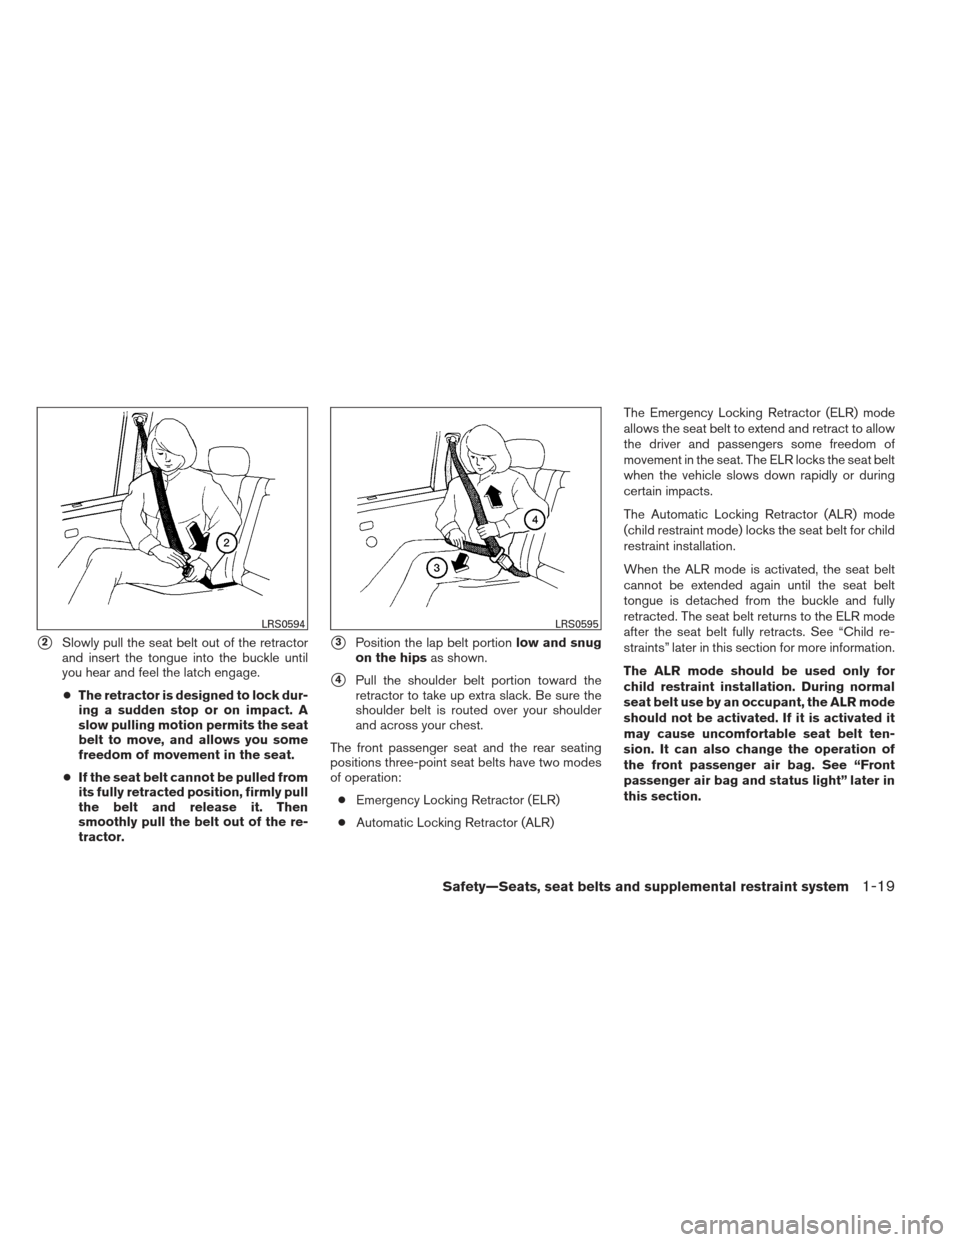
�2Slowly pull the seat belt out of the retractor
and insert the tongue into the buckle until
you hear and feel the latch engage.
● The retractor is designed to lock dur-
ing a sudden stop or on impact. A
slow pulling motion permits the seat
belt to move, and allows you some
freedom of movement in the seat.
● If the seat belt cannot be pulled from
its fully retracted position, firmly pull
the belt and release it. Then
smoothly pull the belt out of the re-
tractor.�3Position the lap belt portion low and snug
on the hips as shown.
�4Pull the shoulder belt portion toward the
retractor to take up extra slack. Be sure the
shoulder belt is routed over your shoulder
and across your chest.
The front passenger seat and the rear seating
positions three-point seat belts have two modes
of operation: ● Emergency Locking Retractor (ELR)
● Automatic Locking Retractor (ALR) The Emergency Locking Retractor (ELR) mode
allows the seat belt to extend and retract to allow
the driver and passengers some freedom of
movement in the seat. The ELR locks the seat belt
when the vehicle slows down rapidly or during
certain impacts.
The Automatic Locking Retractor (ALR) mode
(child restraint mode) locks the seat belt for child
restraint installation.
When the ALR mode is activated, the seat belt
cannot be extended again until the seat belt
tongue is detached from the buckle and fully
retracted. The seat belt returns to the ELR mode
after the seat belt fully retracts. See “Child re-
straints” later in this section for more information.
The ALR mode should be used only for
child restraint installation. During normal
seat belt use by an occupant, the ALR mode
should not be activated. If it is activated it
may cause uncomfortable seat belt ten-
sion. It can also change the operation of
the front passenger air bag. See “Front
passenger air bag and status light” later in
this section.
LRS0594LRS0595
Safety—Seats, seat belts and supplemental restraint system1-19
Page 40 of 444

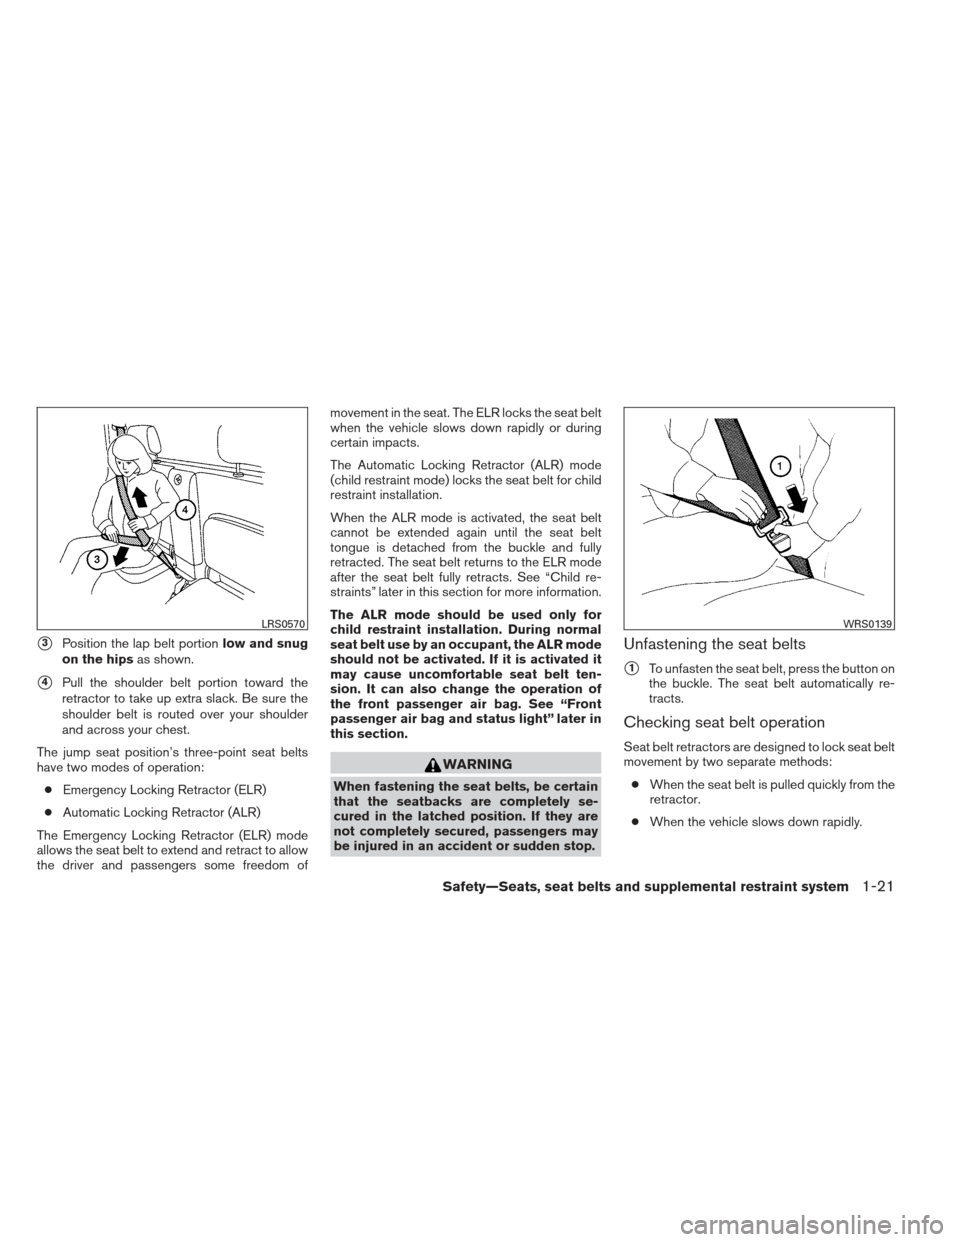
�3Position the lap belt portionlow and snug
on the hips as shown.
�4Pull the shoulder belt portion toward the
retractor to take up extra slack. Be sure the
shoulder belt is routed over your shoulder
and across your chest.
The jump seat position’s three-point seat belts
have two modes of operation: ● Emergency Locking Retractor (ELR)
● Automatic Locking Retractor (ALR)
The Emergency Locking Retractor (ELR) mode
allows the seat belt to extend and retract to allow
the driver and passengers some freedom of movement in the seat. The ELR locks the seat belt
when the vehicle slows down rapidly or during
certain impacts.
The Automatic Locking Retractor (ALR) mode
(child restraint mode) locks the seat belt for child
restraint installation.
When the ALR mode is activated, the seat belt
cannot be extended again until the seat belt
tongue is detached from the buckle and fully
retracted. The seat belt returns to the ELR mode
after the seat belt fully retracts. See “Child re-
straints” later in this section for more information.
The ALR mode should be used only for
child restraint installation. During normal
seat belt use by an occupant, the ALR mode
should not be activated. If it is activated it
may cause uncomfortable seat belt ten-
sion. It can also change the operation of
the front passenger air bag. See “Front
passenger air bag and status light” later in
this section.
WARNING
When fastening the seat belts, be certain
that the seatbacks are completely se-
cured in the latched position. If they are
not completely secured, passengers may
be injured in an accident or sudden stop.
Unfastening the seat belts
�1To unfasten the seat belt, press the button on
the buckle. The seat belt automatically re-
tracts.
Checking seat belt operation
Seat belt retractors are designed to lock seat belt
movement by two separate methods:
● When the seat belt is pulled quickly from the
retractor.
● When the vehicle slows down rapidly.
LRS0570WRS0139
Safety—Seats, seat belts and supplemental restraint system1-21
Page 57 of 444
3. Pull the shoulder belt until the belt is fullyextended. At this time, the seat belt retractor
is in the Automatic Locking Retractor (ALR)
mode (child restraint mode) . It reverts to the
Emergency Locking Retractor (ELR) mode
when the seat belt is fully retracted. 4. Allow the seat belt to retract. Pull up on the
shoulder belt to remove any slack in the belt. 5. Remove any additional slack from the seat
belt; press downward and rearward firmly in
the center of the child restraint to compress
the vehicle seat cushion and seatback while
pulling up on the seat belt.
Rear-facing – step 3
LRS0669
Rear-facing – step 4
LRS0670
Rear-facing – step 5
WRS0762
1-38Safety—Seats, seat belts and supplemental restraint system
Page 61 of 444
�3Route the seat belt tongue through the child
restraint and insert it into the buckle until you
hear and feel the latch engage.
Be sure to follow the child restraint manu-
facturer’s instructions for belt routing.�4Pull the shoulder belt until the belt is fully
extended. At this time, the seat belt retractor
is in the Automatic Locking Retractor (ALR)
mode (child restraint mode) . It reverts to the
Emergency Locking Retractor (ELR) mode
when the seat belt is fully retracted.�5Allow the seat belt to retract. Pull up on the
shoulder belt to remove any slack in the belt.
Rear-facing — step 3
LRS0545
Rear-facing — step 4
LRS0546
Rear-facing — step 5
LRS0547
1-42Safety—Seats, seat belts and supplemental restraint system
Page 69 of 444
4. Pull the shoulder belt until the belt is fullyextended. At this time, the seat belt retractor
is in the Automatic Locking Retractor (ALR)
mode (child restraint mode) . It reverts to
Emergency Locking Retractor (ELR) mode
when the seat belt is fully retracted. 5. Allow the seat belt to retract. Pull up on the
shoulder belt to remove any slack in the belt. 6. Remove any additional slack from the seat
belt; press downward and rearward firmly in
the center of the child restraint with your
knee to compress the vehicle seat cushion
and seatback while pulling up on the seat
belt.
7. Tighten the tether strap according to the manufacturer’s instructions to remove any
slack.
Forward-facing – step 4
LRS0667
Forward-facing – step 5
LRS0668
Forward-facing – step 6
WRS0681
1-50Safety—Seats, seat belts and supplemental restraint system
Page 73 of 444

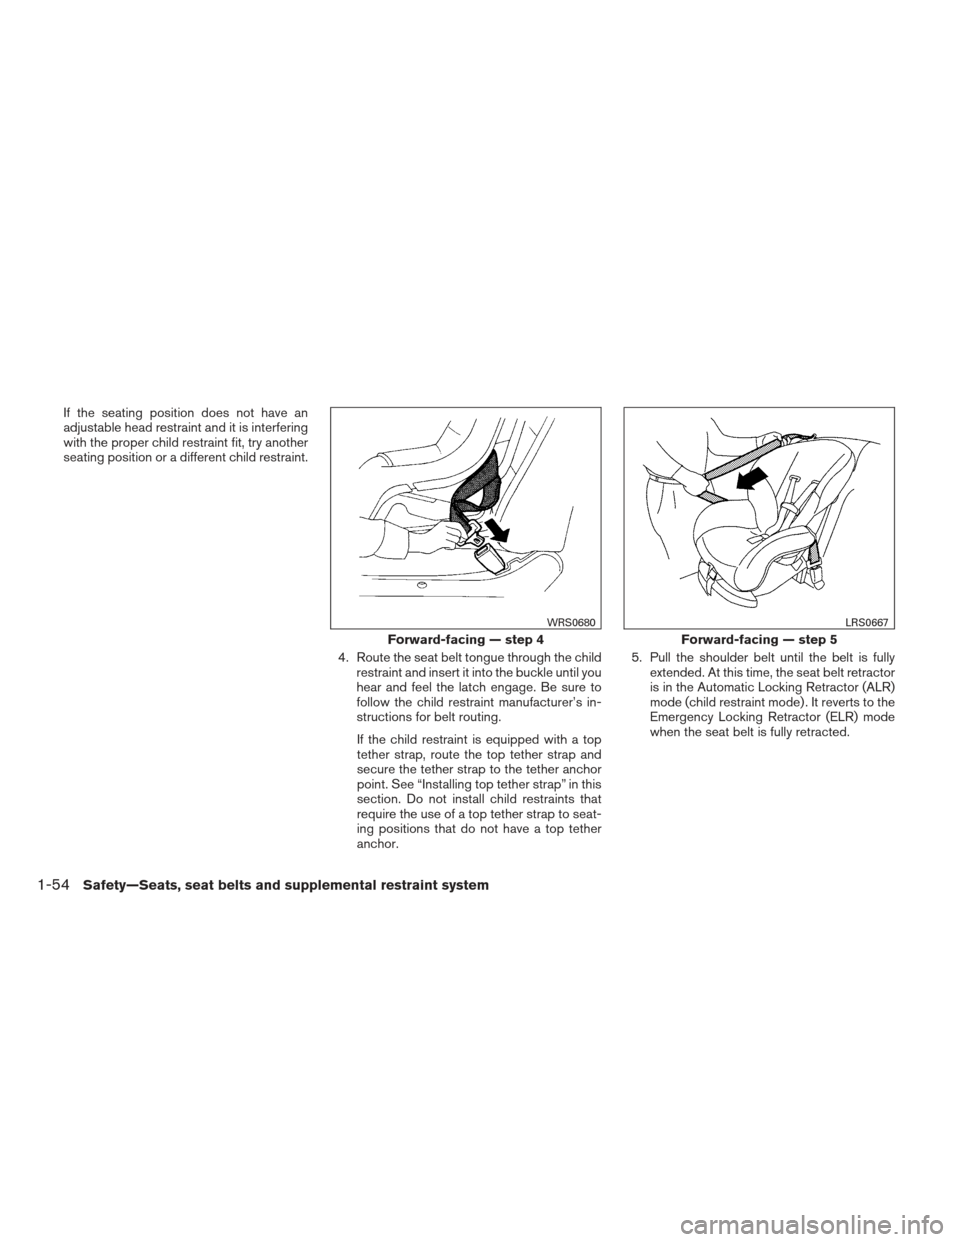
If the seating position does not have an
adjustable head restraint and it is interfering
with the proper child restraint fit, try another
seating position or a different child restraint.4. Route the seat belt tongue through the childrestraint and insert it into the buckle until you
hear and feel the latch engage. Be sure to
follow the child restraint manufacturer’s in-
structions for belt routing.
If the child restraint is equipped with a top
tether strap, route the top tether strap and
secure the tether strap to the tether anchor
point. See “Installing top tether strap” in this
section. Do not install child restraints that
require the use of a top tether strap to seat-
ing positions that do not have a top tether
anchor. 5. Pull the shoulder belt until the belt is fully
extended. At this time, the seat belt retractor
is in the Automatic Locking Retractor (ALR)
mode (child restraint mode) . It reverts to the
Emergency Locking Retractor (ELR) mode
when the seat belt is fully retracted.
Forward-facing — step 4
WRS0680
Forward-facing — step 5
LRS0667
1-54Safety—Seats, seat belts and supplemental restraint system
Page 106 of 444

CAUTION
If the gauge indicates coolant tempera-
ture near the hot (H) end of the normal
range, reduce vehicle speed to decrease
temperature. If the gauge is over the nor-
mal range, stop the vehicle as soon as
safely possible. If the engine is over-
heated, continued operation of the ve-
hicle may seriously damage the engine.
See “If your vehicle overheats” in the “In
case of emergency” section for immediate
action required.
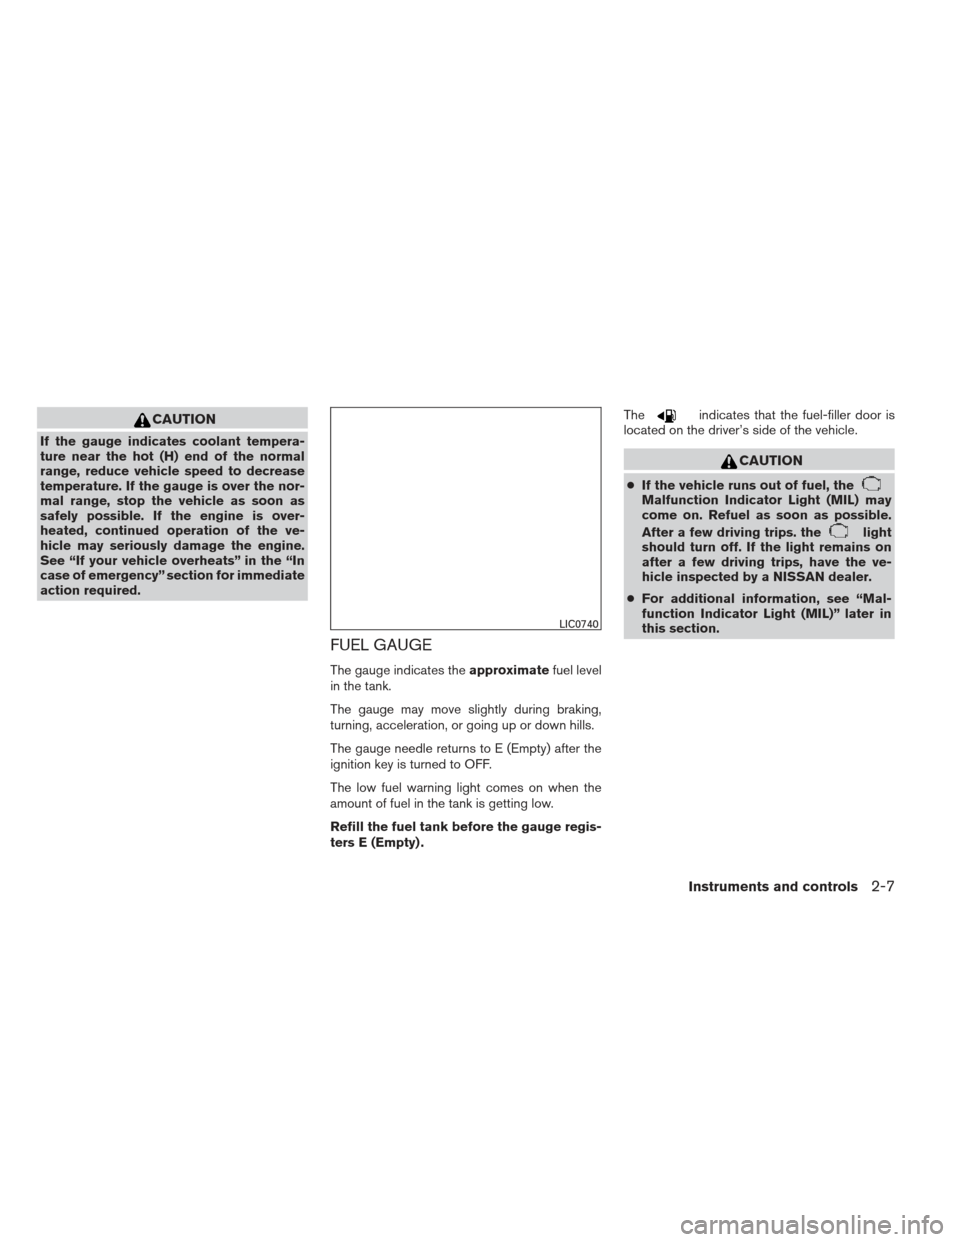
FUEL GAUGE
The gauge indicates theapproximatefuel level
in the tank.
The gauge may move slightly during braking,
turning, acceleration, or going up or down hills.
The gauge needle returns to E (Empty) after the
ignition key is turned to OFF.
The low fuel warning light comes on when the
amount of fuel in the tank is getting low.
Refill the fuel tank before the gauge regis-
ters E (Empty) . The
indicates that the fuel-filler door is
located on the driver’s side of the vehicle.
CAUTION
● If the vehicle runs out of fuel, theMalfunction Indicator Light (MIL) may
come on. Refuel as soon as possible.
After a few driving trips. the
light
should turn off. If the light remains on
after a few driving trips, have the ve-
hicle inspected by a NISSAN dealer.
● For additional information, see “Mal-
function Indicator Light (MIL)” later in
this section.
LIC0740
Instruments and controls2-7