Page 5 of 706
Overview
Center panel
N00100700183
Audio (if so equipped) P.5-46, 5-74
Digital clock (if so equipped) P.5-141
Mitsubishi Multi-Communication System (if so equipped)
Refer to the separate “Mitsubishi Multi-Communication System owner’s manual”
Hazard warning flasher
switch P.3-240Front passenger seat belt
warning light P.2-21
12 V power outlet P.3-287Electric rear window defogger
switch P.3-251
Air conditioning
P.5-16, 5-25, 5-35 Passenger’s airbag off
indicator P.2-45
Auxiliary Audio connector (RCA)
(if so equipped) P.5-125
Auxiliary Video connector (RCA)
(if so equipped) P.5-125
Front console tray
P. 3 - 2 9 6
BK0151000US.book 3 ページ 2012年3月29日 木曜日 午後6時8分
Page 6 of 706
Overview
Audio (if so equipped) P.5-46, 5-74
Digital clock (if so equipped) P.5-141
Mitsubishi Multi-Communication System (if so equipped)
Refer to the separate “Mitsubishi Multi-Communication System owner’s manual”
Hazard warning flasher
switch P.3-240Front passenger seat belt
warning light P.2-21
12 V power outlet
P. 3 - 2 8 7Electric rear window defogger switch
P. 3 - 2 5 1
Air conditioning
P.5-25, 5-35 Passenger’s airbag off
indicator P.2-45
Front console box (Upper box)
P. 3 - 2 9 7
Front console box (Lower box)
P.3-297Auxiliary Audio connector (RCA)
(if so equipped) P.5-125
Auxiliary Video connector (RCA)
(if so equipped) P.5-125
BK0151000US.book 4 ページ 2012年3月29日 木曜日 午後6時8分
Page 390 of 706
Features and controls
3-297
3
Front console boxes
(if so equipped)
N00546400058
To open, push the lid.Upper boxNOTE�The Auxiliary Audio connector (RCA) (if so equipped) or
the Auxiliary Video connector (RCA) (if so equipped) is
located in the upper box.
For details, refer to “To use the external audio input func-
tion” on page 5-125.
Lower box
CAUTION
!�Do not use the front console boxes as an ashtray.
This could cause a fire.
BK0151000US.book 297 ページ 2012年3月29日 木曜日 午後6時8分
Page 519 of 706

5-106 Comfort controls
5
To play from an iPod
N00762400074
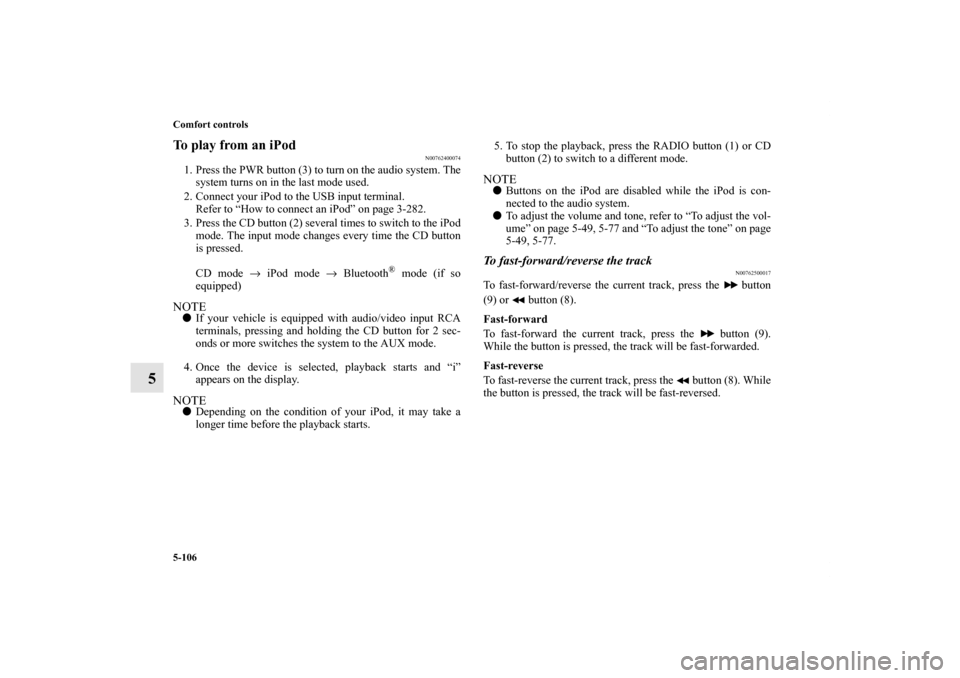
1. Press the PWR button (3) to turn on the audio system. The
system turns on in the last mode used.
2. Connect your iPod to the USB input terminal.
Refer to “How to connect an iPod” on page 3-282.
3. Press the CD button (2) several times to switch to the iPod
mode. The input mode changes every time the CD button
is pressed.
CD mode → iPod mode → Bluetooth
® mode (if so
equipped)
NOTE�If your vehicle is equipped with audio/video input RCA
terminals, pressing and holding the CD button for 2 sec-
onds or more switches the system to the AUX mode.
4. Once the device is selected, playback starts and “i”
appears on the display.NOTE�Depending on the condition of your iPod, it may take a
longer time before the playback starts.5. To stop the playback, press the RADIO button (1) or CD
button (2) to switch to a different mode.
NOTE�Buttons on the iPod are disabled while the iPod is con-
nected to the audio system.
�To adjust the volume and tone, refer to “To adjust the vol-
ume” on page 5-49, 5-77 and “To adjust the tone” on page
5-49, 5-77.To fast-forward/reverse the track
N00762500017
To fast-forward/reverse the current track, press the button
(9) or button (8).
Fast-forward
To fast-forward the current track, press the button (9).
While the button is pressed, the track will be fast-forwarded.
Fast-reverse
To fast-reverse the current track, press the button (8). While
the button is pressed, the track will be fast-reversed.
BK0151000US.book 106 ページ 2012年3月29日 木曜日 午後6時8分
Page 528 of 706

Comfort controls
5-115
5
To play from a USB memory device
N00764000074
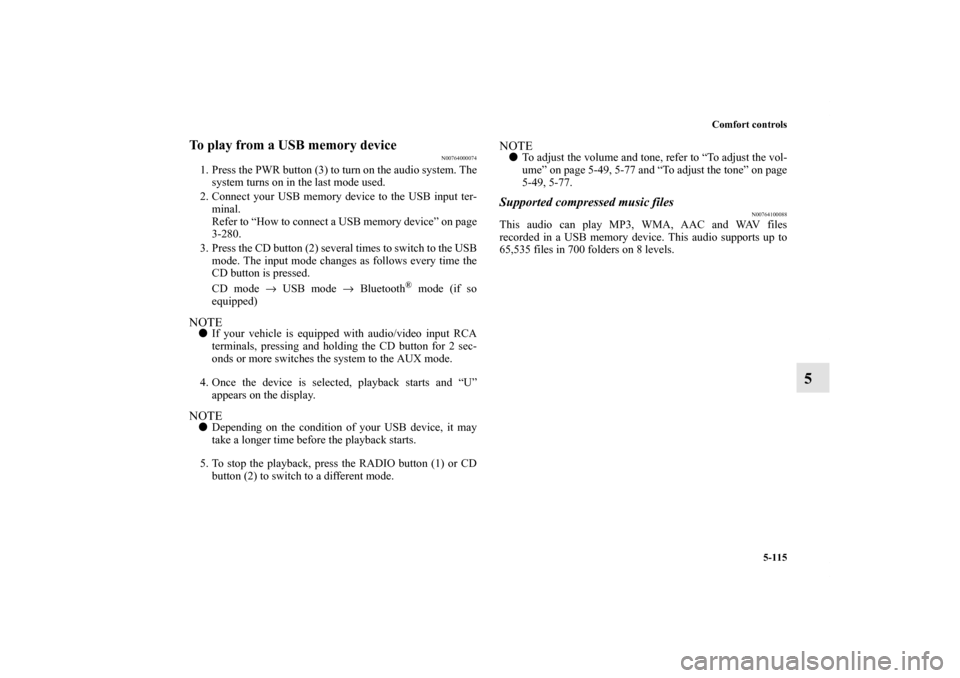
1. Press the PWR button (3) to turn on the audio system. The
system turns on in the last mode used.
2. Connect your USB memory device to the USB input ter-
minal.
Refer to “How to connect a USB memory device” on page
3-280.
3. Press the CD button (2) several times to switch to the USB
mode. The input mode changes as follows every time the
CD button is pressed.
CD mode → USB mode → Bluetooth
® mode (if so
equipped)
NOTE�If your vehicle is equipped with audio/video input RCA
terminals, pressing and holding the CD button for 2 sec-
onds or more switches the system to the AUX mode.
4. Once the device is selected, playback starts and “U”
appears on the display.NOTE�Depending on the condition of your USB device, it may
take a longer time before the playback starts.
5. To stop the playback, press the RADIO button (1) or CD
button (2) to switch to a different mode.
NOTE�To adjust the volume and tone, refer to “To adjust the vol-
ume” on page 5-49, 5-77 and “To adjust the tone” on page
5-49, 5-77.Supported compressed music files
N00764100088
This audio can play MP3, WMA, AAC and WAV files
recorded in a USB memory device. This audio supports up to
65,535 files in 700 folders on 8 levels.
BK0151000US.book 115 ページ 2012年3月29日 木曜日 午後6時8分
Page 536 of 706

Comfort controls
5-123
5
To listen to tracks from a device connected via
Bluetooth
®
N00765500063
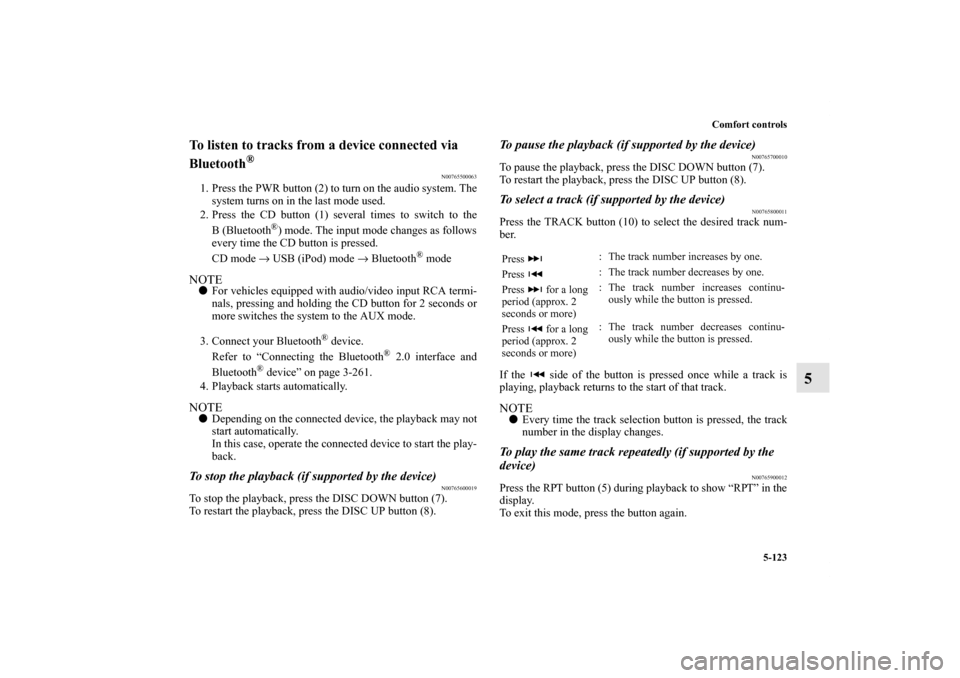
1. Press the PWR button (2) to turn on the audio system. The
system turns on in the last mode used.
2. Press the CD button (1) several times to switch to the
B(Bluetooth
®) mode. The input mode changes as follows
every time the CD button is pressed.
CD mode → USB (iPod) mode → Bluetooth
® mode
NOTE�For vehicles equipped with audio/video input RCA termi-
nals, pressing and holding the CD button for 2 seconds or
more switches the system to the AUX mode.
3. Connect your Bluetooth
® device.
Refer to “Connecting the Bluetooth
® 2.0 interface and
Bluetooth
® device” on page 3-261.
4. Playback starts automatically.
NOTE�Depending on the connected device, the playback may not
start automatically.
In this case, operate the connected device to start the play-
back.To stop the playback (if supported by the device)
N00765600019
To stop the playback, press the DISC DOWN button (7).
To restart the playback, press the DISC UP button (8).
To pause the playback (if supported by the device)
N00765700010
To pause the playback, press the DISC DOWN button (7).
To restart the playback, press the DISC UP button (8).To select a track (if supported by the device)
N00765800011
Press the TRACK button (10) to select the desired track num-
ber.
If the side of the button is pressed once while a track is
playing, playback returns to the start of that track.NOTE�Every time the track selection button is pressed, the track
number in the display changes.To play the same track repeatedly (if supported by the
device)
N00765900012
Press the RPT button (5) during playback to show “RPT” in the
display.
To exit this mode, press the button again.Press : The track number increases by one.
Press : The track number decreases by one.
Press for a long
period (approx. 2
seconds or more): The track number increases continu-
ously while the button is pressed.
Press for a long
period (approx. 2
seconds or more): The track number decreases continu-
ously while the button is pressed.
BK0151000US.book 123 ページ 2012年3月29日 木曜日 午後6時8分
Page 538 of 706
Comfort controls
5-125
5 To use the external audio input function
(if
so equipped)
N00702200120
You can listen to commercially available audio equipment,
such as a portable audio system, from your vehicle’s speakers,
by connecting the audio equipment to the audio input connec-
tors, which are external input connectors (pin jacks).NOTE�For information on using the video input connector (C),
refer to the separate owner’s manual for a Mitsubishi
Multi-Communication System.
Auxiliary Audio connector
(RCA)
Auxiliary Video connector
(RCA) Ty p e 1
Auxiliary Audio connector (RCA)
A- Left audio input connector (white)
B- Right audio input connector (red)
Auxiliary Video connector (RCA)
A- Left audio input connector (white)
B- Right audio input connector (red)
C- Video input connector (yellow)
Auxiliary Audio connector
(RCA)
Auxiliary Video connector
(RCA) Ty p e 2
BK0151000US.book 125 ページ 2012年3月29日 木曜日 午後6時8分
Page 539 of 706

5-126 Comfort controls
5
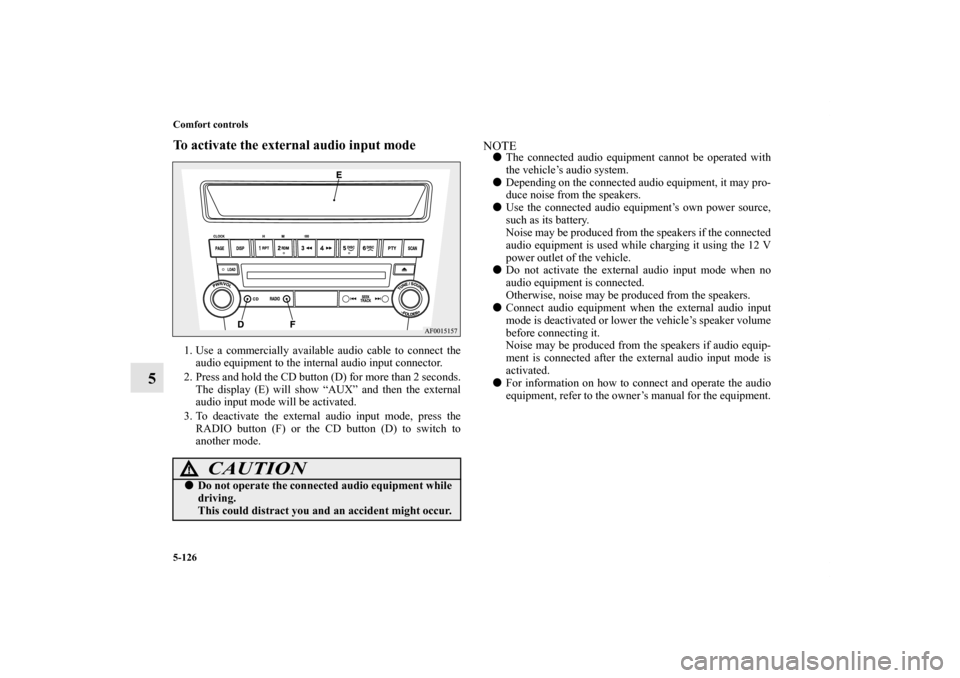
To activate the external audio input mode1. Use a commercially available audio cable to connect the
audio equipment to the internal audio input connector.
2. Press and hold the CD button (D) for more than 2 seconds.
The display (E) will show “AUX” and then the external
audio input mode will be activated.
3. To deactivate the external audio input mode, press the
RADIO button (F) or the CD button (D) to switch to
another mode.
NOTE�The connected audio equipment cannot be operated with
the vehicle’s audio system.
�Depending on the connected audio equipment, it may pro-
duce noise from the speakers.
�Use the connected audio equipment’s own power source,
such as its battery.
Noise may be produced from the speakers if the connected
audio equipment is used while charging it using the 12 V
power outlet of the vehicle.
�Do not activate the external audio input mode when no
audio equipment is connected.
Otherwise, noise may be produced from the speakers.
�Connect audio equipment when the external audio input
mode is deactivated or lower the vehicle’s speaker volume
before connecting it.
Noise may be produced from the speakers if audio equip-
ment is connected after the external audio input mode is
activated.
�For information on how to connect and operate the audio
equipment, refer to the owner’s manual for the equipment.
CAUTION
!�Do not operate the connected audio equipment while
driving.
This could distract you and an accident might occur.
BK0151000US.book 126 ページ 2012年3月29日 木曜日 午後6時8分