2013 MITSUBISHI iMiEV auxiliary battery
[x] Cancel search: auxiliary batteryPage 106 of 258

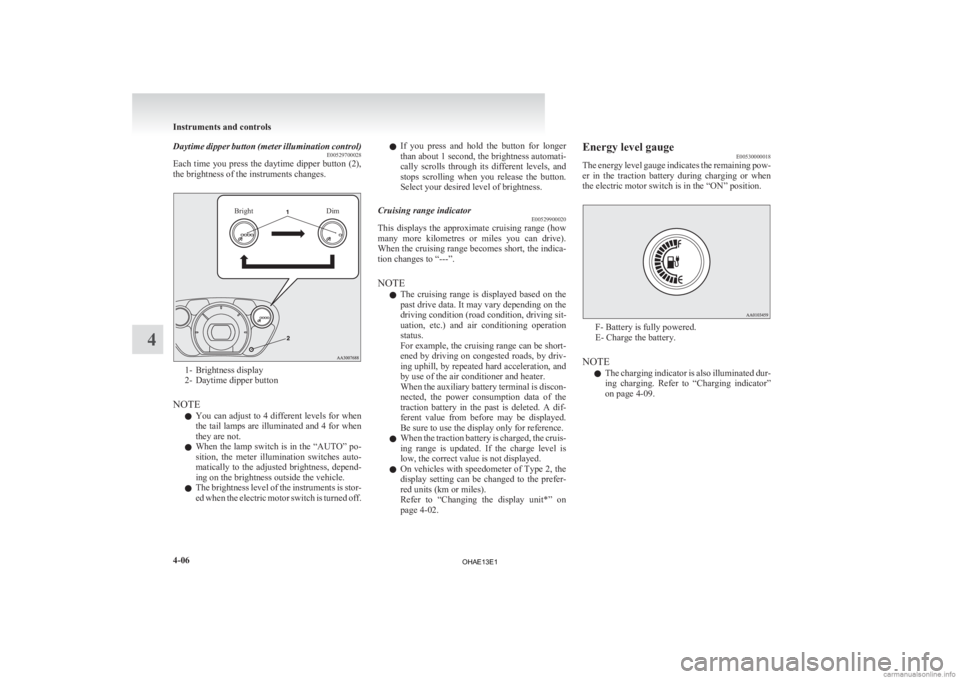
Daytime dipper button (meter illumination control)
E00529700028
Each
time you press the daytime dipper button (2),
the brightness of the instruments changes.
Bright Dim1- Brightness display
2-
Daytime dipper button
NOTE l You can adjust to 4 different levels for when
the tail lamps are illuminated and 4 for when
they are not.
l When the lamp switch is in the “AUTO” po-
sition, the meter illumination switches auto-
matically to the adjusted brightness, depend-
ing on the brightness outside the vehicle.
l The brightness level of the instruments is stor-
ed when the electric motor switch is turned off. l
If
you press and hold the button for longer
than about 1 second, the brightness automati-
cally scrolls through its different levels, and
stops scrolling when you release the button.
Select your desired level of brightness.
Cruising range indicator E00529900020
This displays the approximate cruising range (how
many
more kilometres or miles you can drive).
When the cruising range becomes short, the indica-
tion changes to “---”.
NOTE
l The cruising range is displayed based on the
past drive data. It may vary depending on the
driving condition (road condition, driving sit-
uation, etc.) and air conditioning operation
status.
For example, the cruising range can be short-
ened by driving on congested roads, by driv-
ing uphill, by repeated hard acceleration, and
by use of the air conditioner and heater.
When the auxiliary battery terminal is discon-
nected, the power consumption data of the
traction battery in the past is deleted. A dif-
ferent value from before may be displayed.
Be sure to use the display only for reference.
l When the traction battery is charged, the cruis-
ing range is updated. If the charge level is
low, the correct value is not displayed.
l On vehicles with speedometer of Type 2, the
display setting can be changed to the prefer-
red units (km or miles).
Refer to “Changing the display unit*” on
page 4-02. Energy level gauge
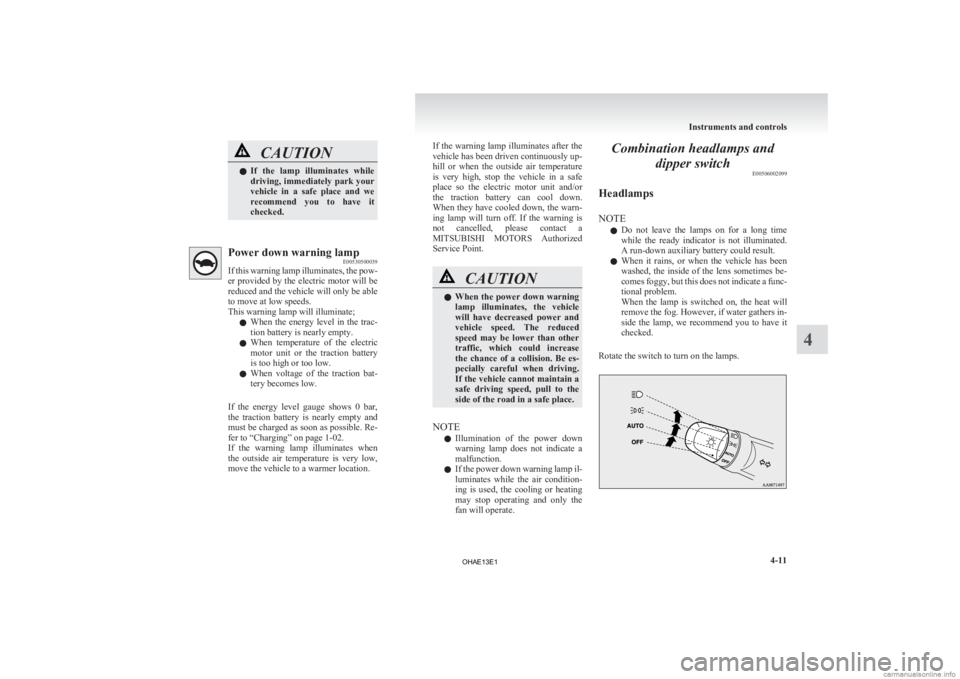
E00530000018
The
energy level gauge indicates the remaining pow-
er in the traction battery during charging or when
the electric motor switch is in the “ON” position. F- Battery is fully powered.
E- Charge the battery.
NOTE l The
charging indicator is also illuminated dur-
ing charging. Refer to “Charging indicator”
on page 4-09. Instruments and controls
4-06
4
OHAE13E1
Page 108 of 258

Indication and warning lamps
E00501502220Type 1Type 21-
Low energy warning indicator
® p. 4-07
2. Selector lever position indicator ® p. 5-10
3- High-beam indication lamp ® p. 4-09
4- Turn-signal indication lamps/Hazard warning indication lamps ® p. 4-09
5- Position lamp indication lamp ® p. 4-09
6- Front fog lamp indication lamp* ® p. 4-09
7- Service reminder ® p. 4-04
8- Driver’s and front passenger’s seat belt warning lamp ® p. 3-09
9- Supplement Restraint System (SRS) warning lamp ® p. 3-29
10- Rear fog lamp indication lamp ® p. 4-09
11- Ready indicator ® p. 4-09 12-
Auxiliary battery charge warning lamp ® p. 4-10
13- Electric power steering system (EPS) warning lamp ® p. 5-17
14- Electric motor unit warning lamp ® p. 4-10
15- Brake warning lamp ® p. 4-09
16- Anti-lock brake system (ABS) warning lamp ® p. 5-15
17- Power down warning lamp ® p. 4-11
18- Active stability control (ASC) indication lamp ® p. 5-19
19- Active stability control (ASC) OFF indication lamp ® p. 5-19
20- Charging indicator ® p. 4-09
21- Door ajar warning lamp ® p. 4-10
22- Rear passenger’s seat belt warning lamps* ® p. 3-10Instruments and controls
4-08 4
OHAE13E1
Page 110 of 258

WARNING
• The brake warning lamp does not illuminate while
the parking brake is applied
and the electric motor
switch is in the “ON” posi-
tion.
• The brake warning lamp stays on when the parking
brake is not applied.
NOTE l When
the brake warning lamp illu-
minates, the warning buzzer may
also sound.
l When the brake pedal has been re-
peatedly depressed over a short pe-
riod of time, the brake warning
lamp may come on and the brake
warning buzzer may sound. The
service brake system is working
normally, if the warning lamp
goes out and the buzzer stops
sounding after a few seconds.
l At times, you may hear the brake
electric vacuum pump for the pow-
er brakes operating when the
ready indicator illuminates or the
brake pedal is depressed.
This sound is normal and does not
indicate a malfunction. Auxiliary battery charge warn-
ing lamp
E00502701251
This
warning lamp will illuminate when
there is a fault with the charging system
of the auxiliary battery.
Normally, when the electric motor
switch is turned to the “ON” position,
this warning lamp will illuminate. Then,
when the electric motor unit is started
and the ready indicator illuminates, the
warning lamp will go out. CAUTION
l
If the warning lamp stays on af-
ter
the ready indicator illumi-
nates, there may be a problem
with the charging system for
the auxiliary battery. • Immediately park your vehi-cle in a safe place and we rec-
ommend you to have it
checked.
• Do not charge the auxiliary battery. Door ajar warning lamp
E00503300840
This
lamp illuminates when either of the
doors (also, the tailgate) is not complete-
ly closed. If the vehicle speed exceeds about
8
km/h (5 mph) with a door ajar, the warn-
ing lamp will flash 16 times and, at the
same time, the buzzer will sound 16
times to notify the driver that a door is
ajar. CAUTION
l
Before
moving your vehicle,
check that the warning lamp is
OFF.
NOTE l The
flashing of the warning lamp
and the buzzer can be disabled.
For further information, we recom-
mend you to consult a
MITSUBISHI MOTORS Author-
ized Service Point.
l When the driver’s door is open,
the door ajar warning buzzer does
not sound because the electric mo-
tor reminder or selector lever re-
minder sounds. Electric motor unit warning
lamp
E00530400012
This
warning lamp will illuminate when
there is a fault at the high voltage area.
Refer to “Service precautions” on page
8-06. Instruments and controls
4-10
4
OHAE13E1
Page 111 of 258

CAUTION
l
If the lamp illuminates while
driving, immediately park your
vehicle in a safe place and we
recommend you to have it
checked. Power down warning lamp
E00530500039
If
this warning lamp illuminates, the pow-
er provided by the electric motor will be
reduced and the vehicle will only be able
to move at low speeds.
This warning lamp will illuminate;
l When the energy level in the trac-
tion battery is nearly empty.
l When temperature of the electric
motor unit or the traction battery
is too high or too low.
l When voltage of the traction bat-
tery becomes low.
If the energy level gauge shows 0 bar,
the traction battery is nearly empty and
must be charged as soon as possible. Re-
fer to “Charging” on page 1-02.
If the warning lamp illuminates when
the outside air temperature is very low,
move the vehicle to a warmer location. If the warning lamp illuminates after the
vehicle has been driven continuously up-
hill
or when the outside air temperature
is very high, stop the vehicle in a safe
place so the electric motor unit and/or
the traction battery can cool down.
When they have cooled down, the warn-
ing lamp will turn off. If the warning is
not cancelled, please contact a
MITSUBISHI MOTORS Authorized
Service Point. CAUTION
l
When
the power down warning
lamp illuminates, the vehicle
will have decreased power and
vehicle speed. The reduced
speed may be lower than other
traffic, which could increase
the chance of a collision. Be es-
pecially careful when driving.
If the vehicle cannot maintain a
safe driving speed, pull to the
side of the road in a safe place.
NOTE l Illumination
of the power down
warning lamp does not indicate a
malfunction.
l If the power down warning lamp il-
luminates while the air condition-
ing is used, the cooling or heating
may stop operating and only the
fan will operate. Combination headlamps and
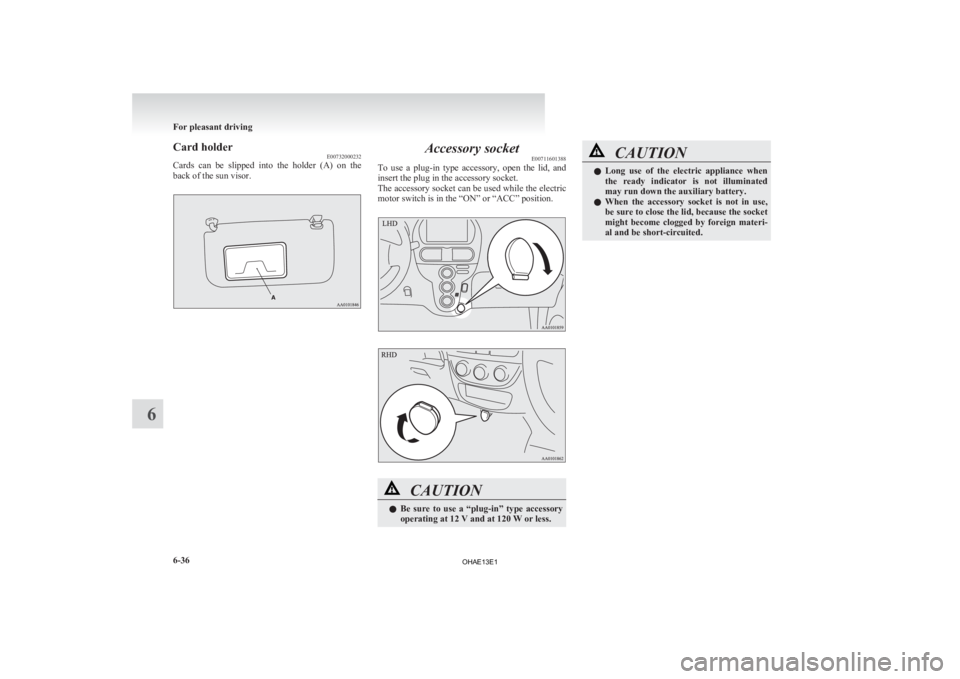
dipper switch E00506002099
Headlamps
NOTE l Do
not leave the lamps on for a long time
while the ready indicator is not illuminated.
A run-down auxiliary battery could result.
l When it rains, or when the vehicle has been
washed, the inside of the lens sometimes be-
comes foggy, but this does not indicate a func-
tional problem.
When the lamp is switched on, the heat will
remove the fog. However, if water gathers in-
side the lamp, we recommend you to have it
checked.
Rotate the switch to turn on the lamps. Instruments and controls
4-11 4
OHAE13E1
Page 154 of 258

Radio control panel and display
E007089012311- FM (FM1/FM2/FM3) indicator
2-
RADIO (FM/MW/LW selection) button
3- MEMORY (Memory selection) button
4- POWER (On-Off) button
5- SEEK (Up-seek) button
6- SEEK (Down-seek) button
To listen to the radio E00709000900
1. Press
the POWER button until it beeps to
turn the audio system on and off. The system
turns on in the last mode used.
2. Press the RADIO button to select the desired band.
3. Press the SEEK button to tune to a station, or
press the MEMORY button either or
to recall a station memorised. To tune the radio
E00709100640
Automatic tuning
After
pressing the SEEK button, a receivable sta-
tion will be automatically selected and reception of
the station will begin.
Manual tuning
The frequency changes every time the SEEK but-
ton is pressed. Press the button to select the desired
station.
To enter frequencies into the memory E00716101186
Manual setting
You
can assign a maximum of 18 stations in the
FM band (6 FM1, 6 FM2 and 6 FM3 stations) and
6 stations each in the MW and LW band to the
MEMORY button. (Stations already assigned to
the MEMORY button are replaced by any newly as-
signed stations.) Follow the steps described below.
1. Press
the SEEK button to tune to the frequen-
cy you wish to keep in the memory. 2.
Press
the MEMORY button either or
until it beeps.
The
sound will be momentarily interrupted
while the frequency is being entered into the
memory.
3. The preset memory setting is retrieved by pressing the button and then releasing it with-
in 2 seconds.
NOTE l Disconnecting the auxiliary battery terminal
erases all the radio frequencies stored in the
memory.
Automatic setting
With the method, all manually set stations in the
band currently selected for reception are replaced
with stations in the same band that are automatical-
ly selected in order of signal strength. The radio au-
tomatically selects 6 stations in the FM band (FM3
station only) and 6 stations each in the MW and
LW band.
Follow the steps described below. 1. With the radio mode selected, hold down theRADIO button for 2 seconds or longer. The
6 stations with the best signal strength will au-
tomatically be assigned to the MEMORY but-
ton, with the lowest-frequency station being
assigned to the lowest-number.
2. When you subsequently press a MEMORY button to select a channel number, the radio
will begin receiving the station assigned to
that number. For pleasant driving
6-12
6
OHAE13E1
Page 174 of 258

Automatic mode
The
automatic adjustment mode can set the local
time automatically by using the signal from local
RDS stations. In this mode, the CT indicator (A) is
shown in the display. Refer to “Radio data system
(RDS)” on page 6-13. Manual mode
The
manual mode is also available in case the auto-
matic mode shows the incorrect time when the ad-
jacent local RDS stations are located in a different
time zone. Refer to “Radio data system (RDS)” on
page 6-13. A-
(Clock) button
B- SEEK (clock adjustment up) button
C- SEEK (clock adjustment down) button
1. Press
and hold the button and the clock
display flashes.
2. Press
the SEEK button to adjust the “hours”
digit.
If you keep pressing the button, fast-forward
begins.
3. When the “hours” digit is adjusted, press the clock button to flash the “minutes” digit.
Press the SEEK button to adjust the “mi-
nutes” digit.
If you keep pressing the button, fast-forward
begins.
4. When the time is set, press the clock button to stop the clock display from flashing. NOTE
l Reset
the time after the auxiliary battery ter-
minals are disconnected and reconnected.
l Seconds do not appear in the clock display,
but after adjusting the “minutes” setting, the
clock begins to operate from 0 seconds. For pleasant driving
6-32
6
OHAE13E1
Page 178 of 258

Card holder
E00732000232
Cards
can be slipped into the holder (A) on the
back of the sun visor. Accessory socket
E00711601388
To
use a plug-in type accessory, open the lid, and
insert the plug in the accessory socket.
The accessory socket can be used while the electric
motor switch is in the “ON” or “ACC” position. CAUTION
l
Be
sure to use a “plug-in” type accessory
operating at 12 V and at 120 W or less. CAUTION
l
Long
use of the electric appliance when
the ready indicator is not illuminated
may run down the auxiliary battery.
l When the accessory socket is not in use,
be sure to close the lid, because the socket
might become clogged by foreign materi-
al and be short-circuited. For pleasant driving
6-36
6
OHAE13E1
Page 179 of 258

Interior lamps
E007120012201- Room lamp (rear)
2-
Map & room lamps (front)
NOTE l If you leave the lamps on when the ready in-
dicator is not illuminated, you will run down
the auxiliary battery.
Before you leave the vehicle, make sure that
the lamps are turned off. Map & room lamps (front)
E00717300609
Room lamp 1- (DOOR)
lThe
lamp illuminates when a door or the
tailgate is opened. It goes off about 15 sec-
onds after the door or tailgate is closed
(delayed off function).
However, the lamp goes off immediately
in the following cases: • When the electric motor switch isturned to the “ON” position.
• When the central door lock function is used to lock the vehicle.
• When the remote control switch of the keyless entry system is used to
lock the vehicle.
l If the lamp is left switched on with the
electric motor switch in the “LOCK” or
“ACC” position and a door or the tailgate
is opened, it goes off automatically after
approximately 30 minutes.
The lamp will illuminate again after it au-
tomatically goes off in the following cases: • When
the electric motor switch is
turned to the “ON” position.
• When the remote control switch of the keyless entry system is operated.
• When any of the doors or the tailgate is opened after all doors and the tail-
gate are closed.
NOTE l When the key is removed while the doors
and tailgate are closed, the lamp is illumina-
ted and after about 15 seconds it goes off.
l The time until the lamp goes off (delayed
off) can be adjusted. For details, please con-
sult a MITSUBISHI MOTORS Authorized
Service Point.
l The auto cut-out function can be deactivated.
For details, please consult a MITSUBISHI
MOTORS Authorized Service Point.
2- The lamp stays off regardless of whether the
doors and tailgate are open or closed. For pleasant driving
6-37 6
OHAE13E1