2013 MERCEDES-BENZ SLS AMG COUPE GT set clock
[x] Cancel search: set clockPage 107 of 286

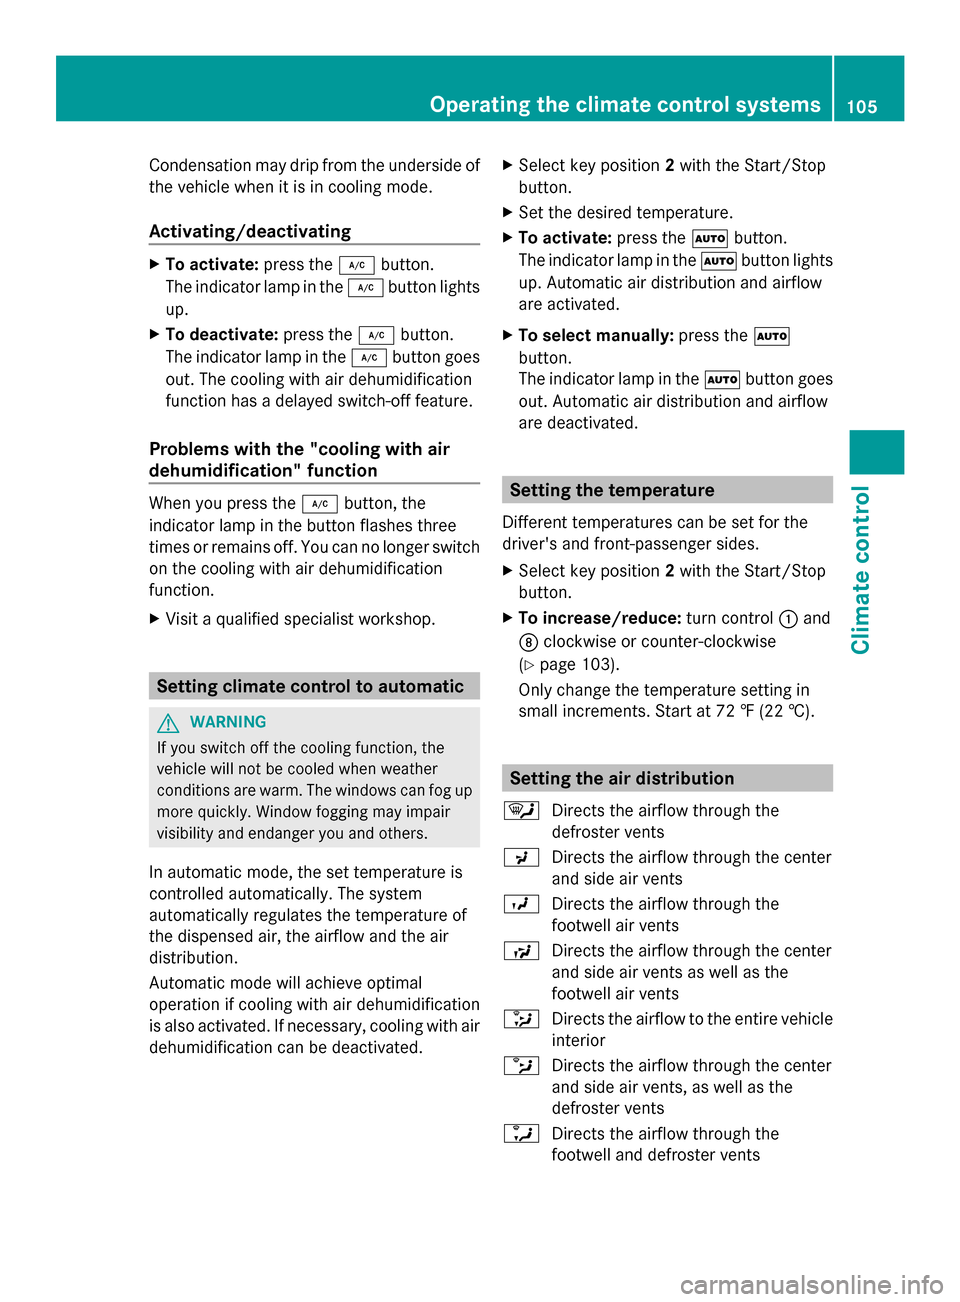
Condensation may drip from the underside of
the vehicle when it is in cooling mode.
Activating/deactivating X
To activate: press the005Abutton.
The indicator lamp in the 005Abutton lights
up.
X To deactivate: press the005Abutton.
The indicator lamp in the 005Abutton goes
out. The cooling with air dehumidification
function has a delayed switch-off feature.
Problems with the "cooling with air
dehumidification" function When you press the
005Abutton, the
indicator lamp in the button flashes three
times or remains off. You can no longer switch
on the cooling with air dehumidification
function.
X Visit a qualified specialist workshop. Setting climate control to automatic
G
WARNING
If you switch off the cooling function, the
vehicle will not be cooled when weather
conditions are warm. The windows can fog up
more quickly. Window fogging may impair
visibility and endanger you and others.
In automatic mode, the set temperature is
controlled automatically. The system
automatically regulates the temperature of
the dispensed air, the airflow and the air
distribution.
Automatic mode will achieve optimal
operation if cooling with air dehumidification
is also activated. If necessary, cooling with air
dehumidification can be deactivated. X
Select key position 2with the Start/Stop
button.
X Set the desired temperature.
X To activate: press the0058button.
The indicator lamp in the 0058button lights
up. Automatic air distribution and airflow
are activated.
X To select manually: press the0058
button.
The indicator lamp in the 0058button goes
out. Automatic air distribution and airflow
are deactivated. Setting the temperature
Different temperatures can be set for the
driver's and front-passenger sides.
X Select key position 2with the Start/Stop
button.
X To increase/reduce: turn control0043and
006C clockwise or counter-clockwise
(Y page 103).
Only change the temperature setting in
small increments. Start at 72 ‡ (22 †). Setting the air distribution
0061 Directs the airflow through the
defroster vents
009C Directs the airflow through the center
and side air vents
009B Directs the airflow through the
footwell air vents
009F Directs the airflow through the center
and side air vents as well as the
footwell air vents
008F Directs the airflow to the entire vehicle
interior
0087 Directs the airflow through the center
and side air vents, as well as the
defroster vents
0086 Directs the airflow through the
footwell and defroster vents Operating the climate control systems
105Climate control Z
Page 108 of 286

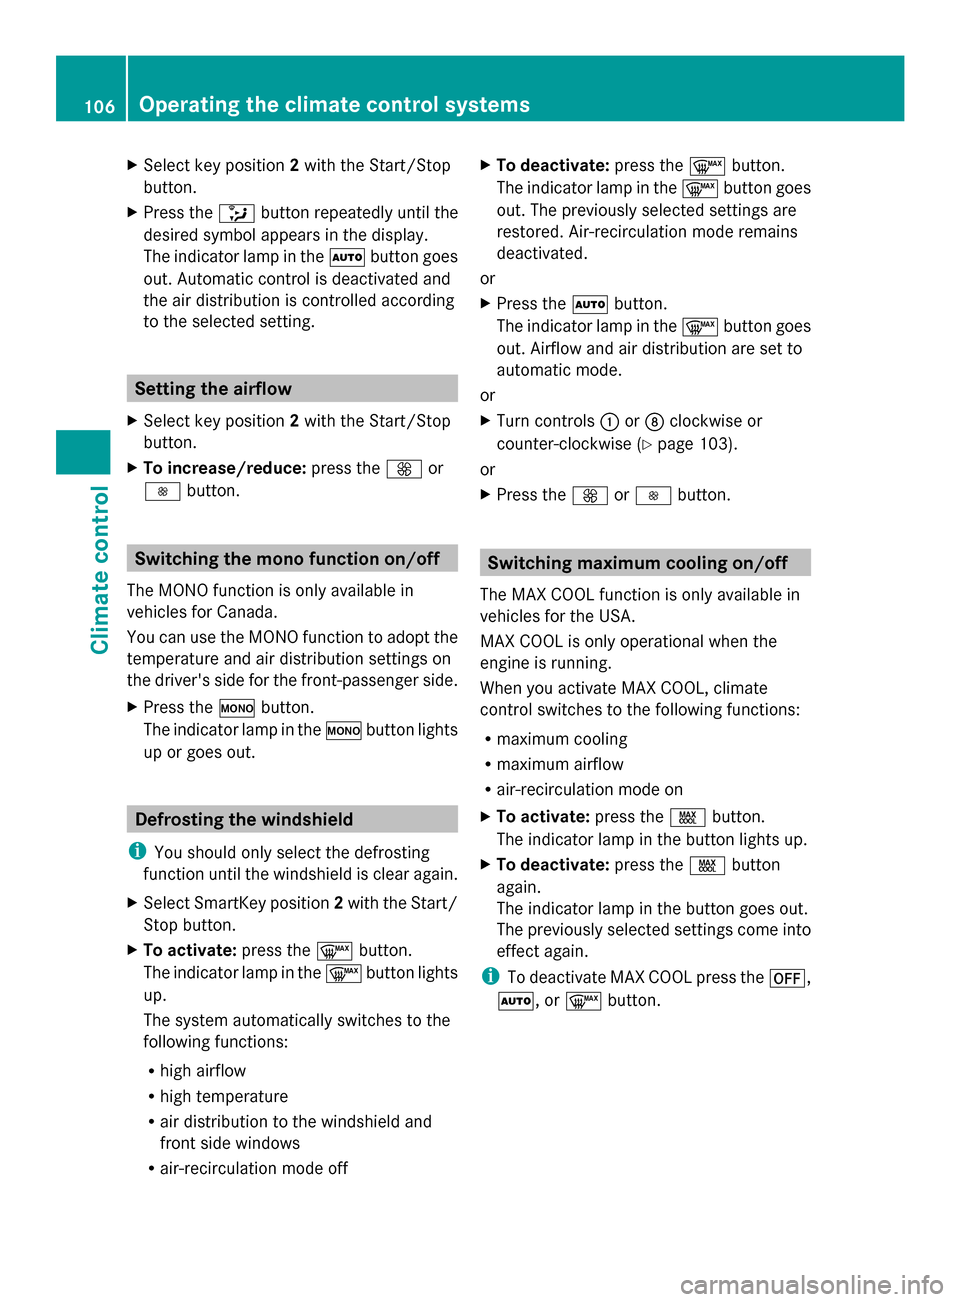
X
Select key position 2with the Start/Stop
button.
X Press the 008Fbutton repeatedly until the
desired symbol appears in the display.
The indicator lamp in the 0058button goes
out. Automatic control is deactivated and
the air distribution is controlled according
to the selected setting. Setting the airflow
X Select key position 2with the Start/Stop
button.
X To increase/reduce: press the0097or
0095 button. Switching the mono function on/off
The MONO function is only available in
vehicles for Canada.
You can use the MONO function to adopt the
temperature and air distribution settings on
the driver's side for the front-passenger side.
X Press the 005Bbutton.
The indicator lamp in the 005Bbutton lights
up or goes out. Defrosting the windshield
i You should only select the defrosting
function until the windshield is clear again.
X Select SmartKey position 2with the Start/
Stop button.
X To activate: press the0064button.
The indicator lamp in the 0064button lights
up.
The system automatically switches to the
following functions:
R high airflow
R high temperature
R air distribution to the windshield and
front side windows
R air-recirculation mode off X
To deactivate: press the0064button.
The indicator lamp in the 0064button goes
out. The previously selected settings are
restored. Air-recirculation mode remains
deactivated.
or
X Press the 0058button.
The indicator lamp in the 0064button goes
out. Airflow and air distribution are set to
automatic mode.
or
X Turn controls 0043or006C clockwise or
counter-clockwise ( Ypage 103).
or
X Press the 0097or0095 button. Switching maximum cooling on/off
The MAX COOL function is only available in
vehicles for the USA.
MAX COOL is only operational when the
engine is running.
When you activate MAX COOL, climate
control switches to the following functions:
R maximum cooling
R maximum airflow
R air-recirculation mode on
X To activate: press the00C9button.
The indicator lamp in the button lights up.
X To deactivate: press the00C9button
again.
The indicator lamp in the button goes out.
The previously selected settings come into
effect again.
i To deactivate MAX COOL press the 0078,
0058, or 0064button. 106
Operating the climate control systemsClimate control
Page 123 of 286

Drive
program Characteristic
Driving mode
RS
RACE
START Optimal vehicle
acceleration from a
standstill
X
Turn drive program selector switch 0043until
the desired drive program is shown in the
multifunction display.
i RScannot be selected during normal
driving. For further information on RACE
START, see (Y page 121). Steering wheel paddle shifters
In transmission position D, you can use the
steering wheel paddle shifters to restrict or
derestrict the transmission shift range. One
of the automatic drive programs, C,Sor S+,
must be selected in order to do so.
In manual drive program M, you need to
change gear yourself using the steering wheel
paddle shifters. At low engine speeds, the
transmission shifts down automatically.
i GT model: in manual drive program M,
the transmission shift and response times
are significantly shorter with sportier and
more aggressive gear changes. 0043
Left steering wheel paddle shifter
(DOWN): shift down/restrict shift range
0044 Right steering wheel paddle shifter (UP):
shift up/derestrict shift range RACE START
RACE START enables optimal acceleration
from a standing start under suitable high-grip
road surface conditions.
RACE START is intended solely for activation
on dedicated race circuits.
Conditions for activation You can activate RACE START if:
R
the doors are closed
R the engine is running and the engine and
transmission are at operating temperature
(Y page 157)
R SPORT handling mode is switched on
(Y page 56)
R the steering wheel is in the straight-ahead
position
R the vehicle is stationary and the brake
pedal is depressed (left foot)
R the transmission is set to D
Activating RACE START X
Depress the brake pedal with your left foot
and keep it depressed.
X Turn the drive program selector switch
clockwise (Y page 120) until the RS
indicator on the switch lights up in red.
The multifunction display shows the
message RACE STARTConfirm: Paddle RACE STARTConfirm: Paddle
UPCancel: Paddle DOWN
UPCancel: Paddle DOWN.
i If the conditions for activation are not
fulfilled, RACE START is canceled. The
RACE START Not Possible RACE START Not Possible message
appears in the multifunction display.
X To cancel: pull the left-hand steering wheel
paddle shifter (DOWN) (Y page 121).
The multifunction display shows the RACE
RACE
START Canceled
START Canceled message.
X To confirm: pull the right-hand steering
wheel paddle shifter (UP) ( Ypage 121).
The RACE START Available Depress
RACE START Available Depress
gas pedal
gas pedal message appears in the
multifunction display. AMG SPEEDSHIFT DCT 7-speed sports transmission
121Driving and parking Z
Page 219 of 286

X
Set the Start/Stop button to key position
2.
X Check the coolant temperature display in
the "AMG" menu (Y page 157).
The coolant temperature must be below
158 ‡ (70 †). X
Slowly turn cap 0043half a turn counter-
clockwise and allow excess pressure to
escape.
X Turn cap 0043further counter-clockwise and
remove it.
If the coolant is at the level of the marker
bar in the filler neck when cold, there is
enough coolant in coolant expansion
tank 0044.
If the coolant level is approximately 0.6 in
(1.5 cm) above the marker bar in the filler
neck when warm, there is enough coolant
in coolant expansion tank 0044.
X If necessary, add coolant that has been
tested and approved by Mercedes-Benz.
X Replace cap 0043and turn it clockwise as far
as it will go.
You will find further information about coolant
in the "Technical data" section
(Y page 280).
Windshield washer system and
headlamp cleaning system G
WARNING
If antifreeze comes into contact with hot
components in the engine compartment, it
may ignite. There is a risk of fire and injury. Let the engine cool down before you add
antifreeze. Make sure that antifreeze is not
spilled next to the filler neck. Thoroughly
clean the antifreeze from components before
starting the engine.
G
WARNING
Windshield washer concentrate is highly
flammable. If it comes into contact with hot
engine components or the exhaust system it
could ignite. There is a risk of fire and injury.
Make sure that no windshield washer
concentrate is spilled next to the filler neck.
The washer fluid reservoir is used for both the
windshield washer system and the headlamp
cleaning system. X
To open: pull cap0043upwards by the tab.
X Add the premixed washer fluid.
X To close: press cap 0043onto the filler neck
until it engages.
Further information on windshield washer
fluid/antifreeze (Y page 281). Maintenance
Service interval display
Service messages Information on the type of service and service
intervals (see the separate Maintenance
Booklet). Maintenance
217Maintenance and care Z
Page 232 of 286

X
Do not remove any foreign objects which
have penetrated the tire, e.g. screws or
nails.
X Take the TIREFIT kit out of the trunk
(Y page 228). X
Open the TIREFIT kit and remove "max.
80 km/h" sticker 006C.
X Affix sticker 006Cwithin the driver's field of
vision.
i If TIREFIT leaks out, allow it to dry. It can
then be removed like a layer of film.
If you get TIREFIT on your clothing, have it
cleaned as soon as possible with
perchloroethylene.
Comply with the manufacturer's safety
instructions on the tire inflation compressor
label and on the tire sealant bottle.
i You will also find operating instructions
0087 in the lid of the TIREFIT kit.
X Pull the cable and filler hose 006Dout of the
housing. X
Unscrew flanged cap 0083. X
Unscrew the cap from tire sealant
bottle 0043. Make sure that the aluminum
film is not damaged when doing so. X
Screw tire sealant bottle 0043clockwise
tightly onto flange seal 006E.
This pierces the aluminum film.
X Remove the cap from the valve on the faulty
tire.
X Make sure that pressure release screw 006B
is closed.
X Remove the dust protection cap from filler
hose 006D. X
Screw the end of filler hose 006Donto tire
valve 006F.
X Make sure that on/off switch 0044on the tire
inflation compressor is set to 0.
X Insert connector 0085into the 12 V cigarette
lighter socket ( Ypage 199).
X Select key position 2with the Start/Stop
button ( Ypage 113).
i The battery discharges during tire
inflation compressor usage. For this 230
Flat tireBreakdown assistance