2013 MERCEDES-BENZ SL-CLASS ROADSTER change wheel
[x] Cancel search: change wheelPage 217 of 572
Activating/deactivating Active Blind
Spot Assist
X
Press the = or ; button on the
steering wheel to select the DriveAssist
menu.
X Press the 9 or : button to select
Blind Spot Asst..
X Press a.
The current selection is displayed.
X To activate/deactivate: press a
again.
For further information about Active Blind
Spot Assist, see (Y page 195).
Activating/deactivating Active Lane
Keeping Assist X
Press the = or ; button on the
steering wheel to select the DriveAssist
menu.
X Press the 9 or : button to select
Lane Keep. Asst.
X Press a.
The current selection is displayed.
X Press the a button to confirm.
X Press : or 9 to set Off, Standard
or Adaptive.
X Press the a button to save the setting.
When Active Lane Keeping Assist is activated,
the Ã
symbol
appears in the multifunction
display when the ignition is on.
For further information about Active Lane
Keeping Assist, see ( Y page 199).Service menu In the
Serv menu, you have the following
options:
R call up display messages (Y
page 223)
R restart the tire pressure loss warning
system (Y page 533)
R check the tire pressure electronically
(Y page 534)
R call up the service due date Settings menu
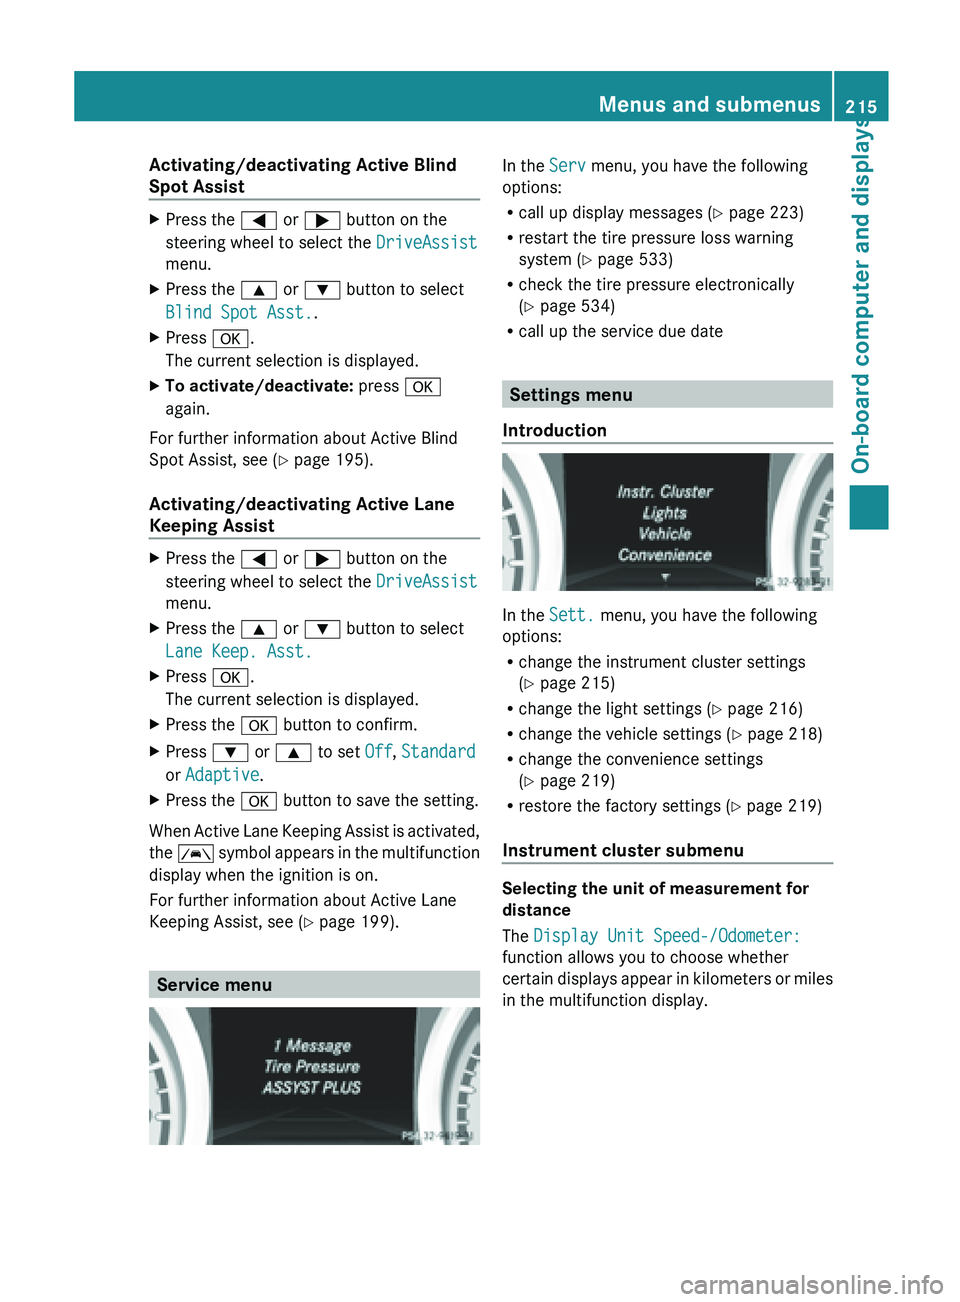
Introduction In the
Sett. menu, you have the following
options:
R change the instrument cluster settings
(Y page 215)
R change the light settings ( Y page 216)
R change the vehicle settings ( Y page 218)
R change the convenience settings
(Y page 219)
R restore the factory settings (
Y page 219)
Instrument cluster submenu Selecting the unit of measurement for
distance
The Display Unit Speed-/Odometer:
function allows you to choose whether
certain
displays
appear in kilometers or miles
in the multifunction display. Menus and submenus
215
On-board computer and displays Z
Page 279 of 572
X
Select Rear View Camera and press W to
confirm.
X Select Activation by R gear and press
W to confirm.
The function is switched on O or off ª,
depending on the previous status.
Switching the sound on or off Audio/video source sound
X
Press the 8 button on COMAND or on
the multifunction steering wheel.
The sound from the respective audio or
video source is switched on or off.
i When the sound is off, the system
displays the , icon in the status line.
When you change the audio or video
source, or adjust the volume, sound
automatically switches on again.
i Even if
the sound is switched off, you will
still hear navigation system
announcements.
Switching off navigation announcements
X Navigation announcements: press the
8 button during the announcement.
Switching navigation announcements
back on
X Press the 8 button again.
The navigation announcements are active
again:
R
if COMAND is switched off/on with the
q control knob.
R or after starting route guidance Adjusting the volume Adjusting the volume for the audio or
video source
X
Turn the q control knob
or
X Press the W or X button on the
multifunction steering wheel.
The volume
of the currently selected audio
or video source changes.
You can also adjust the volume for the
following:
R navigation announcements
R phone calls
R voice output of the Voice Control System
(see the separate operating instructions)
Adjusting the volume for navigation
announcements
During a navigation announcement:
X Turn the q control knob
or
X Press the W or X button on the
multifunction steering wheel.
Adjusting the volume for phone calls
You can adjust the volume for hands-free
mode during a telephone call.
X Turn the q control knob
or
X Press the W or X button on the
multifunction steering wheel. At a glance
277
COMAND Z
Page 333 of 572
X
To begin route calculation: select Start
in the menu by turning cVd the COMAND
controller and press W to confirm.
COMAND attempts to align the recorded
route with the digital map. Changing route names and icons
X
Select Edit in the menu by turning cVd
the COMAND controller and press W to
confirm.
X To change the route name: select
Rename and press W to confirm.
i The name cannot be changed while the
vehicle is in motion.
X To change the icon: select Change Icon
and press W to confirm.
X Information for both entries can be found
under "Managing categories for personal
POIs"( Y page 317).
To change direction for route
calculation: you can set the icon for the
route to the starting point or to the
destination, thereby changing the direction
for route calculation.
During route calculation, one-way streets or
turn restrictions, for example, are taken into
account. Therefore, the outward and return
routes may differ from each other.
X Select Swap in the menu by turning cVd
the COMAND controller and press W to
confirm. X
To delete a route: select Delete in the
menu by turning cVd the COMAND
controller and press W to confirm.
A prompt
appears asking whether the route
should be deleted.
X Select Yes or No and press W to confirm.
If you
select Yes, the route will be deleted.
If you select No, the process will be
canceled.
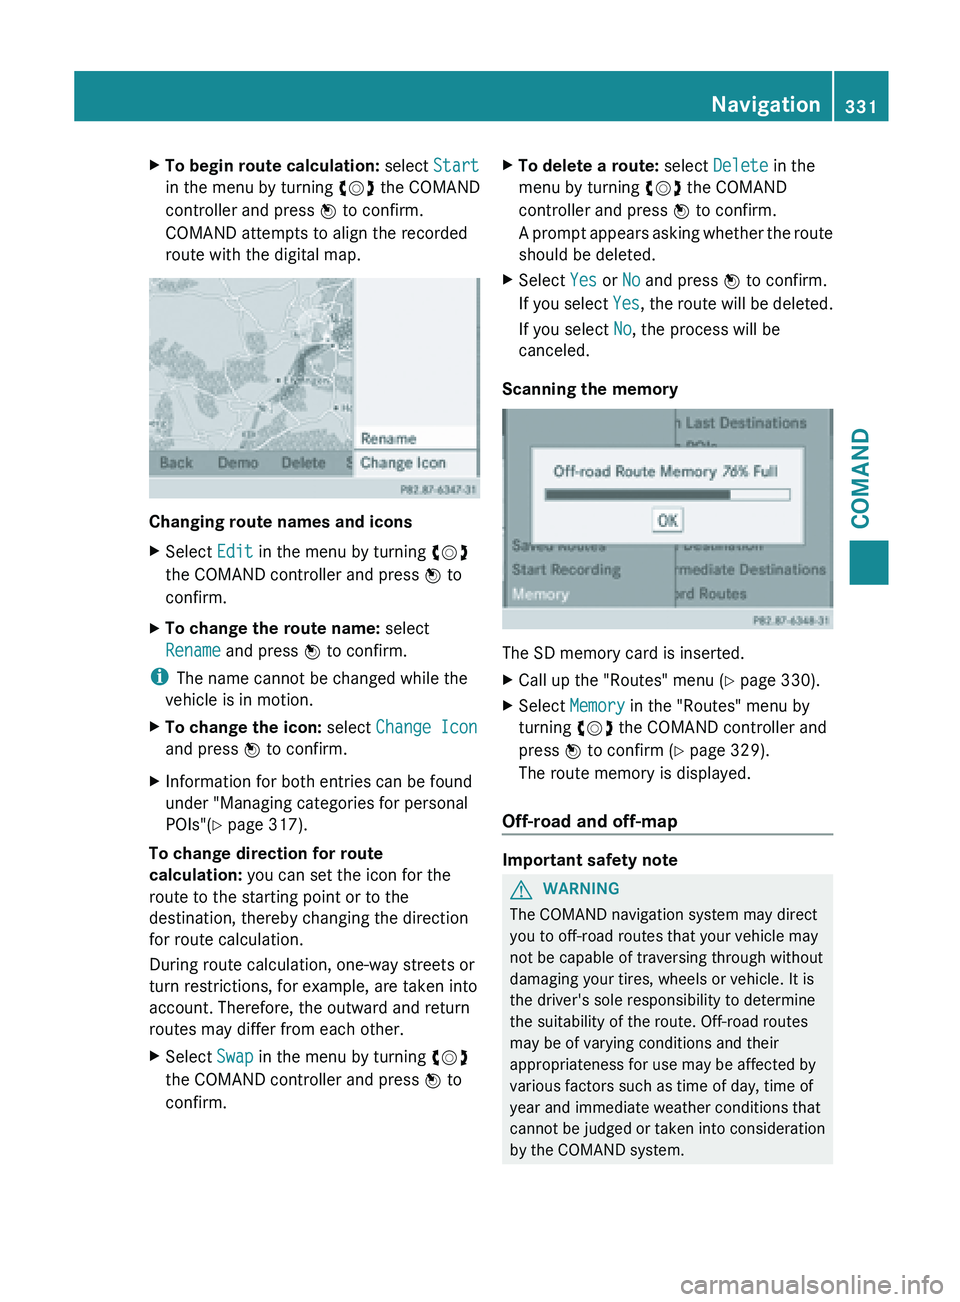
Scanning the memory The SD memory card is inserted.
X
Call up the "Routes" menu ( Y page 330).
X Select Memory in the "Routes" menu by
turning cVd the COMAND controller and
press W to confirm (
Y page 329).
The route memory is displayed.
Off-road and off-map Important safety note
G
WARNING
The COMAND navigation system may direct
you to off-road routes that your vehicle may
not be capable of traversing through without
damaging your tires, wheels or vehicle. It is
the driver's sole responsibility to determine
the suitability of the route. Off-road routes
may be of varying conditions and their
appropriateness for use may be affected by
various factors such as time of day, time of
year and immediate weather conditions that
cannot be
judged or taken into consideration
by the COMAND system. Navigation
331
COMAND Z
Page 369 of 572
characters in the character bar and press
W to confirm each one.
or
X Press the corresponding key on the
COMAND number keypad.
Every character selected will be
transmitted immediately.
X To send a phone book entry as a DTMF
sequence: select Name
by turning cVd the
COMAND controller and press W to
confirm.
X Select the desired phone book entry and
press W to confirm.
The entry is sent as a DTMF character
string.
X To return to the call display: select
Back and press W to confirm.
i You can also send DTMF tones using the
Voice Control System (see the separate
operating instructions).
Calls with several participants Rejecting or accepting a waiting call
The mobile phone network provider must
support
and
activate the call-waiting function.
Depending on the mobile phone used, the
system behavior differs when accepting a
call.
If you have a call in progress and receive
another call, a new window appears in the
display. You also hear a tone. You can accept
or reject the call.
X To reject: select Reject and press W to
confirm.
or
X Press the ~ button on COMAND or on
the multifunction steering wheel.
X To accept: select Accept and press W to
confirm.
or
X Press the 6 button on COMAND or on
the multifunction steering wheel. The system behavior after accepting the
incoming
call
depends on your mobile phone.
R The mobile phone supports the call waiting
function (via Bluetooth ®
) when:
the previously active call is held. You can
then switch back and forth between both
calls (toggling) ( Y page 368).
R The mobile phone does not support the call
waiting function (via Bluetooth ®
) when:
the previously active call is ended.
This is also the case if you accept the
waiting call using Voice Control (see the
separate operating instructions).
The COMAND display changes. If you
continue to operate functions on the mobile
phone, the COMAND display may differ from
that of the mobile phone.
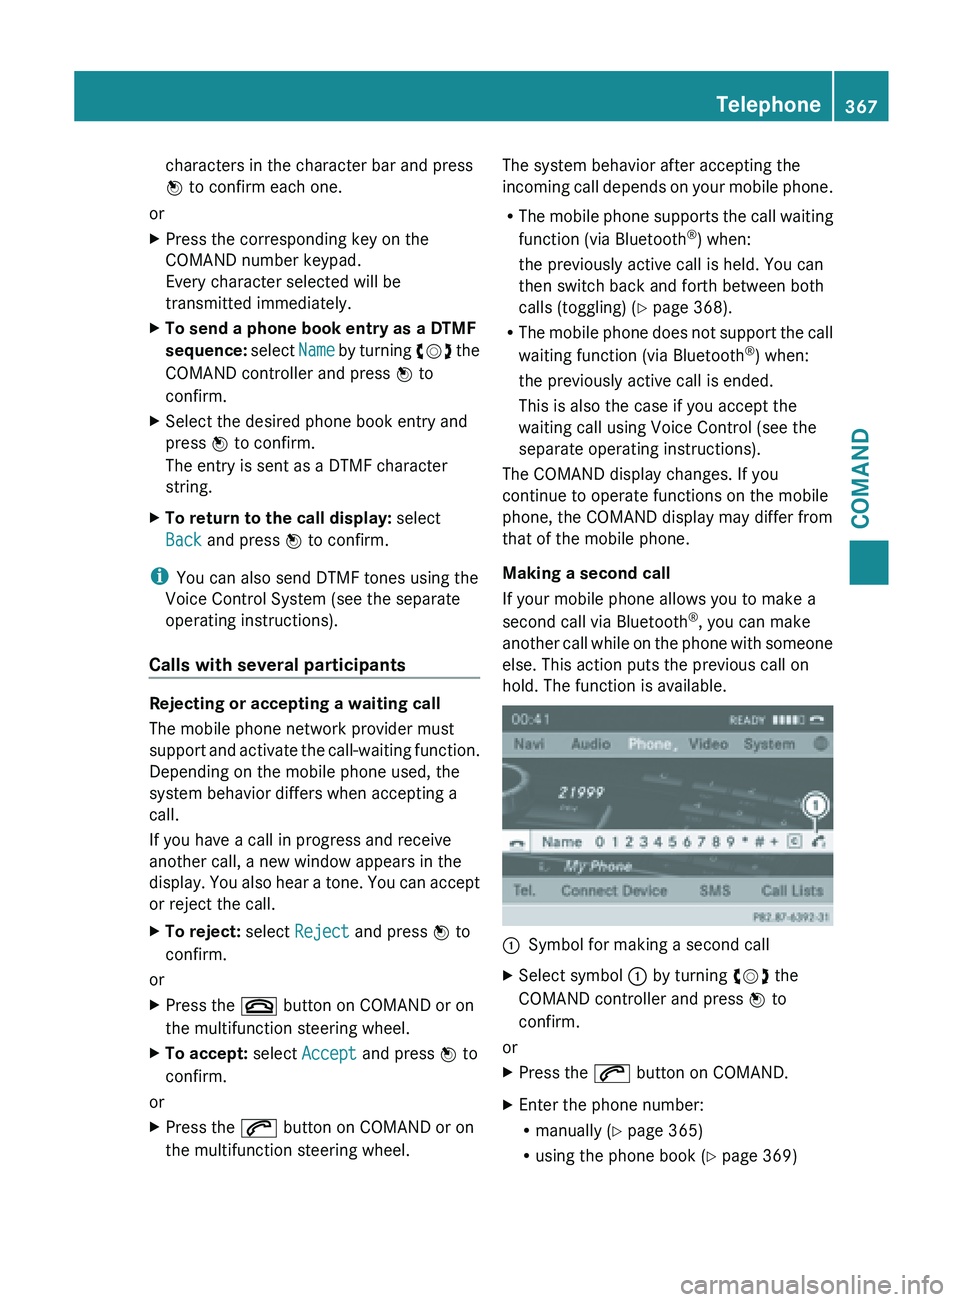
Making a second call
If your mobile phone allows you to make a
second call via Bluetooth ®
, you can make
another call while on the phone with someone
else. This action puts the previous call on
hold. The function is available. :
Symbol for making a second call
X Select symbol : by turning cVd the
COMAND controller and press W to
confirm.
or
X Press the 6 button on COMAND.
X Enter the phone number:
R
manually (Y
page 365)
R using the phone book ( Y page 369) Telephone
367
COMAND Z
Page 490 of 572
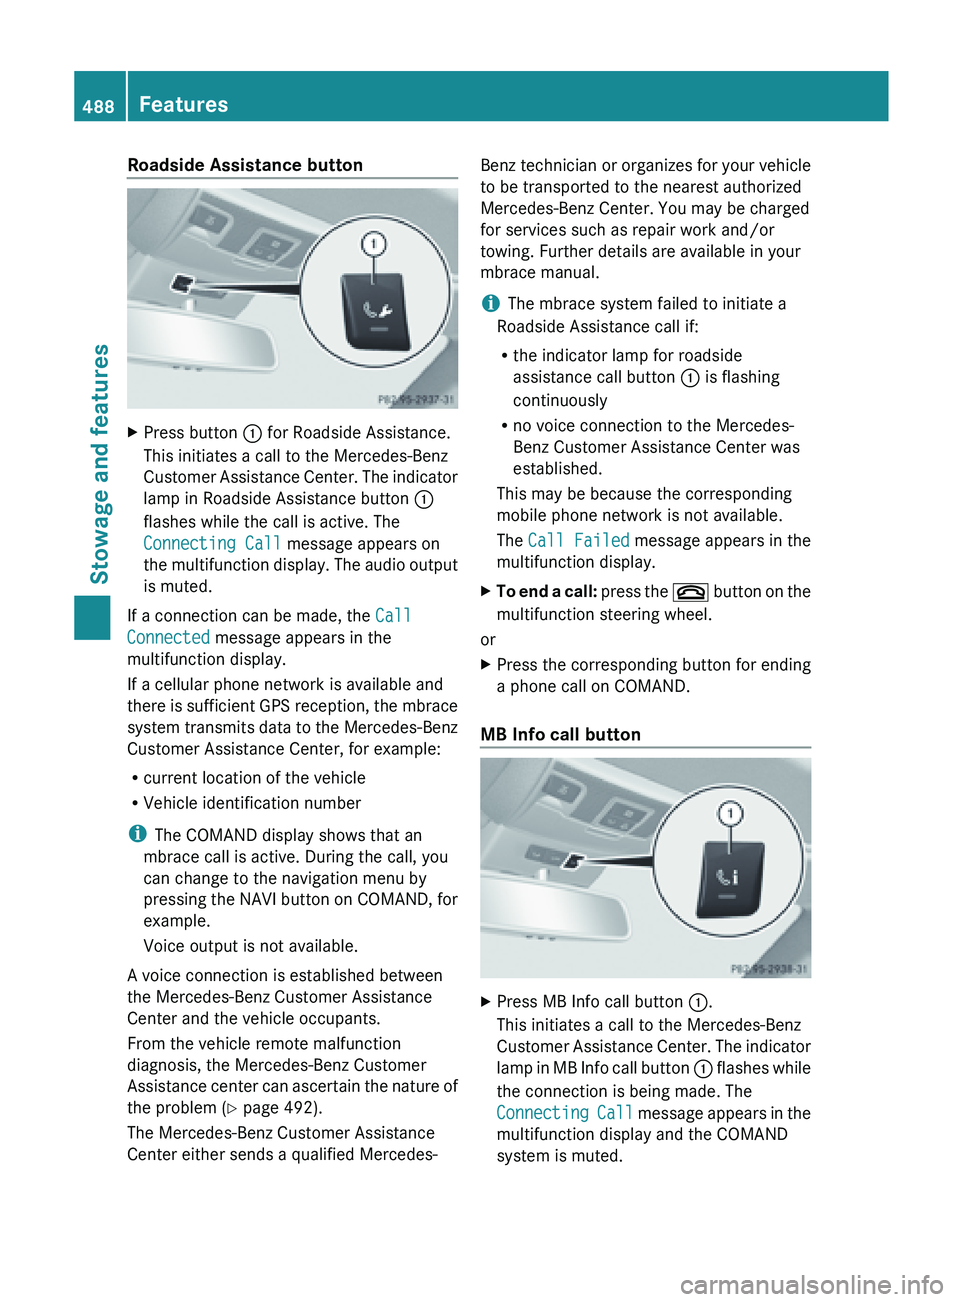
Roadside Assistance button
X
Press button : for Roadside Assistance.
This initiates a call to the Mercedes-Benz
Customer Assistance
Center. The indicator
lamp in Roadside Assistance button :
flashes while the call is active. The
Connecting Call message appears on
the multifunction display. The audio output
is muted.
If a connection can be made, the Call
Connected message appears in the
multifunction display.
If a cellular phone network is available and
there is
sufficient GPS reception, the mbrace
system transmits data to the Mercedes-Benz
Customer Assistance Center, for example:
R current location of the vehicle
R Vehicle identification number
i The COMAND display shows that an
mbrace call is active. During the call, you
can change to the navigation menu by
pressing the NAVI button on COMAND, for
example.
Voice output is not available.
A voice connection is established between
the Mercedes-Benz Customer Assistance
Center and the vehicle occupants.
From the vehicle remote malfunction
diagnosis, the Mercedes-Benz Customer
Assistance center can ascertain the nature of
the problem ( Y page 492).
The Mercedes-Benz Customer Assistance
Center either sends a qualified Mercedes- Benz technician or organizes for your vehicle
to be transported to the nearest authorized
Mercedes-Benz Center. You may be charged
for services such as repair work and/or
towing. Further details are available in your
mbrace manual.
i
The mbrace system failed to initiate a
Roadside Assistance call if:
R the indicator lamp for roadside
assistance call button : is flashing
continuously
R no voice connection to the Mercedes-
Benz Customer Assistance Center was
established.
This may be because the corresponding
mobile phone network is not available.
The Call Failed message appears in the
multifunction display.
X To end a call: press
the ~ button on the
multifunction steering wheel.
or
X Press the corresponding button for ending
a phone call on COMAND.
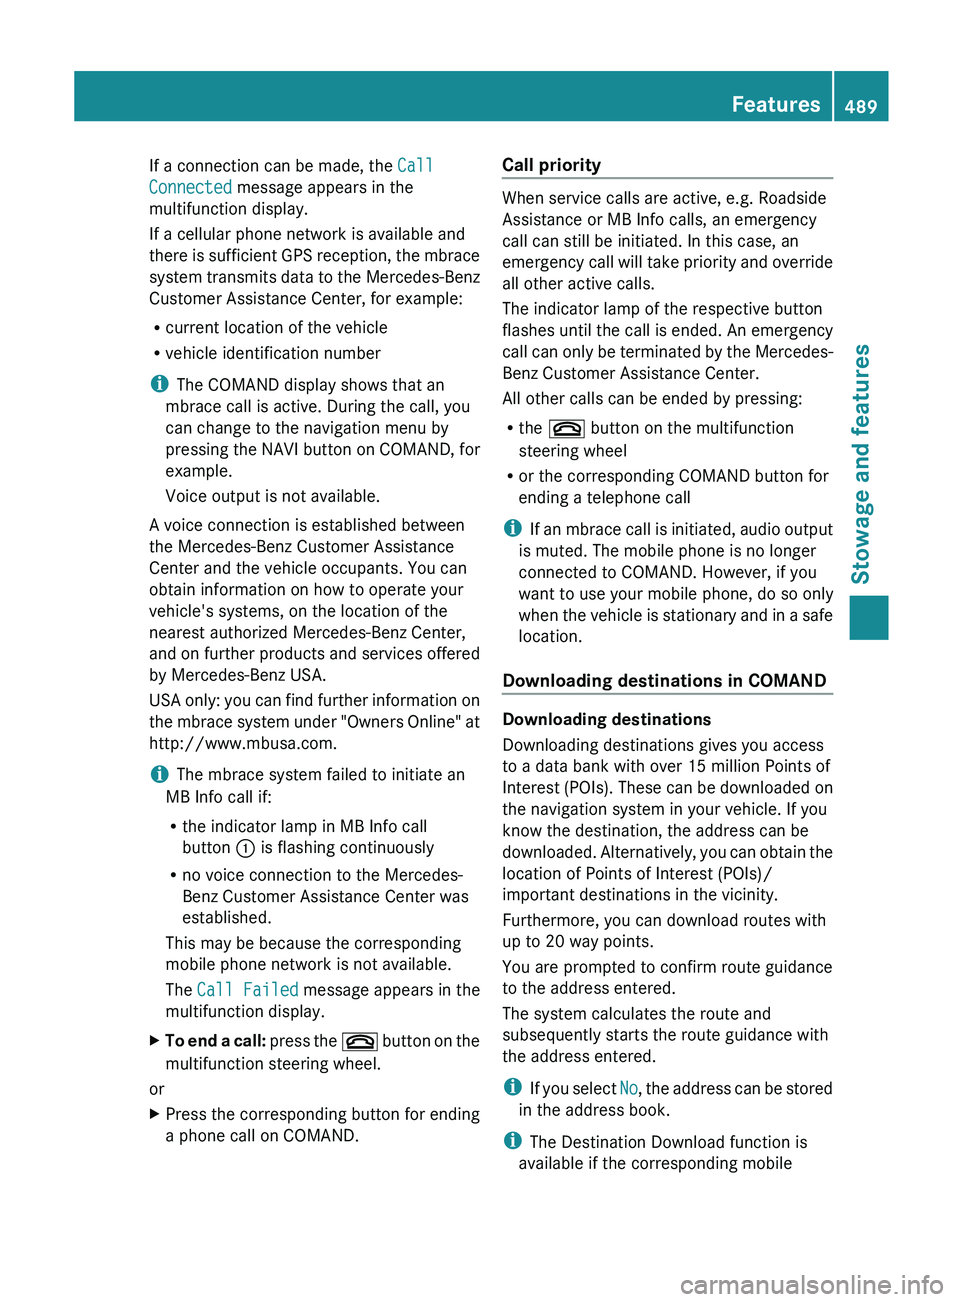
MB Info call button X
Press MB Info call button :.
This initiates a call to the Mercedes-Benz
Customer Assistance
Center. The indicator
lamp in MB Info call button : flashes while
the connection is being made. The
Connecting Call message appears in the
multifunction display and the COMAND
system is muted. 488
Features
Stowage and features
Page 491 of 572
If a connection can be made, the
Call
Connected message appears in the
multifunction display.
If a cellular phone network is available and
there is
sufficient GPS reception, the mbrace
system transmits data to the Mercedes-Benz
Customer Assistance Center, for example:
R current location of the vehicle
R vehicle identification number
i The COMAND display shows that an
mbrace call is active. During the call, you
can change to the navigation menu by
pressing the NAVI button on COMAND, for
example.
Voice output is not available.
A voice connection is established between
the Mercedes-Benz Customer Assistance
Center and the vehicle occupants. You can
obtain information on how to operate your
vehicle's systems, on the location of the
nearest authorized Mercedes-Benz Center,
and on further products and services offered
by Mercedes-Benz USA.
USA only: you can find further information on
the mbrace system under "Owners Online" at
http://www.mbusa.com.
i The mbrace system failed to initiate an
MB Info call if:
R the indicator lamp in MB Info call
button : is flashing continuously
R no voice connection to the Mercedes-
Benz Customer Assistance Center was
established.
This may be because the corresponding
mobile phone network is not available.
The Call Failed message appears in the
multifunction display.
X To end a call: press
the ~ button on the
multifunction steering wheel.
or
X Press the corresponding button for ending
a phone call on COMAND. Call priority When service calls are active, e.g. Roadside
Assistance or MB Info calls, an emergency
call can still be initiated. In this case, an
emergency
call
will take priority and override
all other active calls.
The indicator lamp of the respective button
flashes until the call is ended. An emergency
call can only be terminated by the Mercedes-
Benz Customer Assistance Center.
All other calls can be ended by pressing:
R the ~ button on the multifunction
steering wheel
R or the corresponding COMAND button for
ending a telephone call
i If an mbrace call is initiated, audio output
is muted. The mobile phone is no longer
connected to COMAND. However, if you
want to use your mobile phone, do so only
when the vehicle is stationary and in a safe
location.
Downloading destinations in COMAND Downloading destinations
Downloading destinations gives you access
to a data bank with over 15 million Points of
Interest
(POIs).
These can be downloaded on
the navigation system in your vehicle. If you
know the destination, the address can be
downloaded. Alternatively, you can obtain the
location of Points of Interest (POIs)/
important destinations in the vicinity.
Furthermore, you can download routes with
up to 20 way points.
You are prompted to confirm route guidance
to the address entered.
The system calculates the route and
subsequently starts the route guidance with
the address entered.
i If you select No, the address can be stored
in the address book.
i The Destination Download function is
available if the corresponding mobile Features
489
Stowage and features Z
Page 507 of 572
X
Before cleaning the display, make sure that
it is switched off and has cooled down.
X Clean the display surface using a
commercially available microfiber cloth
and TFT/LCD display cleaner.
X Dry the display surface using a dry
microfiber cloth.
Cleaning the plastic trim G
WARNING
When cleaning the steering wheel boss and
dashboard, do not use cockpit sprays or
cleaning agents
containing solvents. Cleaning
agents containing solvents cause the surface
to become porous, and as a result, plastic
parts may break away and be thrown around
the interior when an air bag is deployed, which
may result in severe injuries.
! Do not affix the following to plastic
surfaces:
R stickers
R films
R scented oil bottles or similar items
You can otherwise damage the plastic.
! Do not allow cosmetics, insect repellent
or sunscreen to come into contact with the
plastic trim. This maintains the high-quality
look of the surfaces.
X Wipe the plastic trim with a damp, lint-free
cloth, e.g. a microfiber cloth.
X Heavy soiling: use car care and cleaning
products recommended and approved by
Mercedes-Benz.
The surface
may change color temporarily.
Wait until the surface is dry again.
Cleaning the steering wheel and gear or
selector lever X
Thoroughly wipe with a damp cloth or use
leather care agents that have been
recommended and
approved by Mercedes-
Benz. Cleaning genuine wood and trim
elements !
Do not
use solvent-based cleaning agents
such as tar remover, wheel cleaners,
polishes or waxes. There is otherwise a risk
of damaging the surface.
! Do not use chrome polish on trim pieces.
The trim pieces have a chrome look but are
mostly made of anodized aluminum and
can lose their shine if chrome polish is
used. Use a damp, lint-free cloth instead
when cleaning the trim pieces.
If the chrome-plated trim pieces are very
dirty, you can use a chrome polish. If you
are unsure as to whether the trim pieces
are chrome-plated or not, consult an
authorized Mercedes-Benz Center.
X Wipe the wooden trim and trim pieces with
a damp, lint-free cloth, e.g. a microfiber
cloth.
X Heavy soiling: use car care and cleaning
products recommended and approved by
Mercedes-Benz.
Cleaning the seat covers !
Observe the following when cleaning:
R clean genuine leather covers carefully
with a damp cloth and then wipe the
covers down
with a dry cloth. Make sure
that the leather does not become
soaked. It may otherwise become rough
and cracked. Only use leather care
agents that have been tested and
approved by Mercedes-Benz. You can
obtain these from a qualified specialist
workshop.
R clean artificial leather covers with a cloth
moistened with a solution containing 1%
detergent (e.g. dish washing liquid).
R clean cloth covers with a microfiber cloth
moistened with a solution containing 1%
detergent (e.g. dish washing liquid). Rub
carefully and always wipe entire seat
sections to avoid leaving visible lines. Care
505
Maintenance and care Z
Page 511 of 572
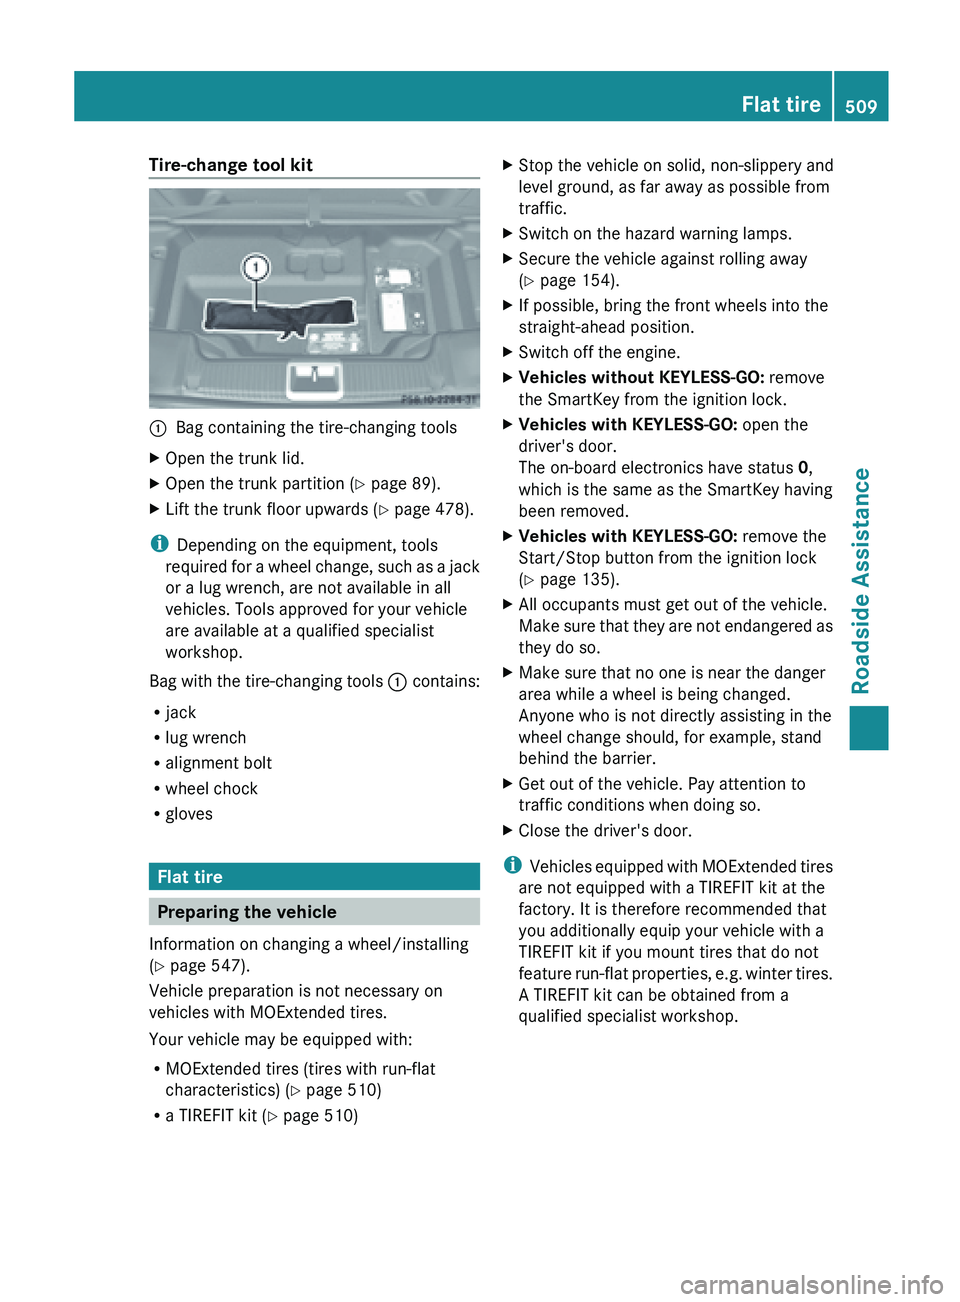
Tire-change tool kit
:
Bag containing the tire-changing tools
X Open the trunk lid.
X Open the trunk partition ( Y page 89).
X Lift the trunk floor upwards (Y page 478).
i Depending on the equipment, tools
required for
a wheel change, such as a jack
or a lug wrench, are not available in all
vehicles. Tools approved for your vehicle
are available at a qualified specialist
workshop.
Bag with the tire-changing tools : contains:
R jack
R lug wrench
R alignment bolt
R wheel chock
R gloves Flat tire
Preparing the vehicle
Information on changing a wheel/installing
(Y page 547).
Vehicle preparation is not necessary on
vehicles with MOExtended tires.
Your vehicle may be equipped with:
R MOExtended tires (tires with run-flat
characteristics) (Y page 510)
R a TIREFIT kit (Y page 510) X
Stop the vehicle on solid, non-slippery and
level ground, as far away as possible from
traffic.
X Switch on the hazard warning lamps.
X Secure the vehicle against rolling away
(Y page 154).
X If possible, bring the front wheels into the
straight-ahead position.
X Switch off the engine.
X Vehicles without KEYLESS-GO: remove
the SmartKey from the ignition lock.
X Vehicles with KEYLESS-GO: open the
driver's door.
The on-board electronics have status 0,
which is the same as the SmartKey having
been removed.
X Vehicles with KEYLESS-GO: remove the
Start/Stop button from the ignition lock
(Y page 135).
X All occupants must get out of the vehicle.
Make sure
that they are not endangered as
they do so.
X Make sure that no one is near the danger
area while a wheel is being changed.
Anyone who is not directly assisting in the
wheel change should, for example, stand
behind the barrier.
X Get out of the vehicle. Pay attention to
traffic conditions when doing so.
X Close the driver's door.
i Vehicles equipped
with MOExtended tires
are not equipped with a TIREFIT kit at the
factory. It is therefore recommended that
you additionally equip your vehicle with a
TIREFIT kit if you mount tires that do not
feature run-flat properties, e.g. winter tires.
A TIREFIT kit can be obtained from a
qualified specialist workshop. Flat tire
509
Roadside Assistance