2013 MERCEDES-BENZ S-CLASS SEDAN warning light
[x] Cancel search: warning lightPage 100 of 536

panorama roof with power tilt/sliding panel
is closed. The front and rear roller sunblinds
can be operated individually.
Operating the front roller sunblind
G
WARNING
When opening or closing the front roller
sunblind, make sure no one is in danger of
being injured by the opening or closing
procedure.
The front roller sunblind is equipped with
automatic
operation and the anti-entrapment
feature. If the movement of the front roller
sunblind is blocked during the closing
procedure, the front roller sunblind will stop
and retract slightly.
The opening or closing of the front roller
sunblind can be immediately halted by
releasing the roof panel switch or, if the roof
panel switch was moved past the resistance
point and released, by moving the roof panel
switch in any direction. Overhead control panel
:
To open
; To open
= To close
X Turn the SmartKey to position 1
or 2 in the
ignition lock.
X Press or pull the 3 switch in the
corresponding direction.
i If you press the 3 switch beyond the
point
of resistance, an automatic opening/
closing process is started in the corresponding direction. You can stop
automatic operation by operating the
switch again.
Operating the rear roller sunblind Operating from the front
G
WARNING
When opening or closing the rear roller
sunblind, make sure no one is in danger of
being injured by the opening or closing
procedure.
The rear roller sunblind is equipped with
automatic
operation and the anti-entrapment
feature. If the movement of the rear roller
sunblind is blocked during the closing
procedure, the rear roller sunblind will stop
and retract slightly.
The opening and closing of the rear roller
sunblind can be immediately halted by
pressing the sunblind switch again. Overhead control panel
X
To open or close: press button :.
The rear roller sunblind opens or closes
fully.
X To stop: press button : again.
i You
must first open or close the rear roller
sunblind fully before you can move it in the
other direction.
Operating from the rear compartment G
WARNING
When opening or closing the rear roller
sunblind, make sure no one is in danger of 98
Sliding sunroof
Opening/closing
Page 102 of 536
X
Make sure that the rear roller sunblind can
be opened fully again
(Y page 98).
X If this is not the case, repeat the steps
above again. Problems with the sliding sunroof
Your vehicle may be equipped with a sliding
sunroof or a panorama roof with power tilt/
sliding panel. In the following section, the
term
"sliding sunroof" refers to both types of
sliding sunroof.
Problem: the sunroof cannot be closed
and you cannot see the cause. G
WARNING
You could be severely or even fatally injured
when closing the sliding sunroof with
increased closing force or if the anti-
entrapment
feature is deactivated. Make sure
that nobody can become trapped when
closing the sliding sunroof.
If the sliding sunroof is obstructed during
closing and reopens again slightly:
X Immediately after the sliding sunroof
blocks, pull the 3 switch in the
overhead control panel down to the point
of resistance and hold it until the sliding
sunroof is closed.
The
sliding sunroof is closed with increased
force.
If the sliding sunroof is obstructed again
during closing and reopens again slightly:
X Immediately after the sliding sunroof
blocks, pull the 3 switch in the
overhead control panel down to the point
of resistance and hold it until the sliding
sunroof is closed.
The sliding sunroof is closed without the
anti-entrapment feature. G
WARNING
Pressing and holding the sliding sunroof
switch to close the sliding sunroof
immediately after it had been blocked two times will cause the sliding sunroof to close
without the anti-entrapment feature for as
long as you hold the switch.
! If the sliding sunroof still cannot be
opened or closed as a result of a
malfunction, contact a qualified specialist
workshop. 100
Sliding sunroof
Opening/closing
Page 105 of 536

Seats
Important safety notes
G
WARNING
In order to avoid possible loss of vehicle
control, all seat, head restraint, steering
wheel and rear view mirror adjustments, as
well as fastening of seat belts, must be done
before setting the vehicle in motion. G
WARNING
Do not adjust the driver's seat while driving.
Adjusting the seat while driving could cause
the driver to lose control of the vehicle.
Never
travel in a moving vehicle with the seat
backrest in an excessively reclined position as
this can be dangerous. You could slide under
the seat belt in a collision. If you slide under
it, the seat belt would apply force at the
abdomen or neck. This could cause serious or
fatal injuries. The seat backrest and seat belts
provide the best restraint when the wearer is
in a position that is as upright as possible and
seat belts are properly positioned on the
body. G
WARNING
Your seat belt must be adjusted so that you
can correctly fasten your seat belt.
Observe the following points:
R adjust
the seat backrest until your arms are
slightly angled when holding the steering
wheel.
R adjust the seat to a comfortable seating
position that still allows you to reach the
accelerator/brake pedal safely. The
position should be as far back as possible
with the driver still able to operate the
controls properly.
R adjust the head restraint so that it is as
close to the head as possible and the center of the head restraint supports the back of
the head at eye level.
R never place hands under the seat or near
any moving parts while a seat is being
adjusted.
Failure to do so could result in an accident
and/or serious personal injury. G
WARNING
The electrically adjustable seats can be
operated
at any time. Therefore, do not leave
children unattended in the vehicle, or with
access to an unlocked vehicle. A child's
unsupervised access to a vehicle could result
in an accident and/or serious personal injury. G
WARNING
According to accident statistics, children are
safer when properly restrained in the rear
seating positions than in the front seating
position. Thus, we strongly recommend that
children
be placed in the rear seats whenever
possible. Regardless of seating position,
children 12 years old and under must be
seated and properly secured in an
appropriately sized infant restraint, toddler
restraint, or booster seat recommended for
the size and weight of the child. For additional
information, see "Children in the vehicle".
A child's risk of serious or fatal injuries is
significantly increased if the child restraints
are not properly secured in the vehicle and/
or the child is not properly secured in the child
restraint. G
WARNING
For your protection, drive only with properly
positioned head restraints.
Adjust
the head restraint so that it is as close
to the head as possible and the center of the
head restraint supports the back of the head
at eye level. This will reduce the potential for
injury to the head and neck in the event of an
accident or similar situation. Seats
103
Seats, steering wheel and mirrors
Z
Page 108 of 536

You can use the override button to disable
this function
(Y page 67).
The button is located in the rear door on the
front-passenger side. :
To select the front-passenger seat or rear-
compartment seat
; Seat height
= Head restraint height
? Backrest angle
A Seat fore-and-aft adjustment
X To select the front-passenger seat:
press button :.
The front-passenger seat is selected if the
indicator lamp in the button lights up.
X Adjust the front-passenger seat with
buttons ;, =, ? and A.
X To select the rear-compartment seat:
press button :.
The rear-compartment seat is selected
again. Adjusting the head restraints
Adjusting the head restraint height
electrically X
To adjust the head restraint height:
slide
the switch for head restraint adjustment
(Y page 104) up or down in the direction of
the arrow. Adjusting the NECK-PRO head
restraints Adjusting
X
Pull or push the bottom of NECK-PRO head
restraint :.
Resetting
The NECK-PRO head restraints are moved
forwards
in the event of a rear collision in the
direction of travel and have to be reset
afterwards ( Y page 56).
Adjusting NECK-PRO luxury head
restraints Adjusting
G
WARNING
When folding back the side cushions, do not
hold the area between the side cushion and
the cushion holder. There is a danger of
becoming trapped. You can adjust side bolsters
:
of the NECK-
PRO luxury head restraints individually. 106
Seats
Seats, steering wheel and mirrors
Page 111 of 536
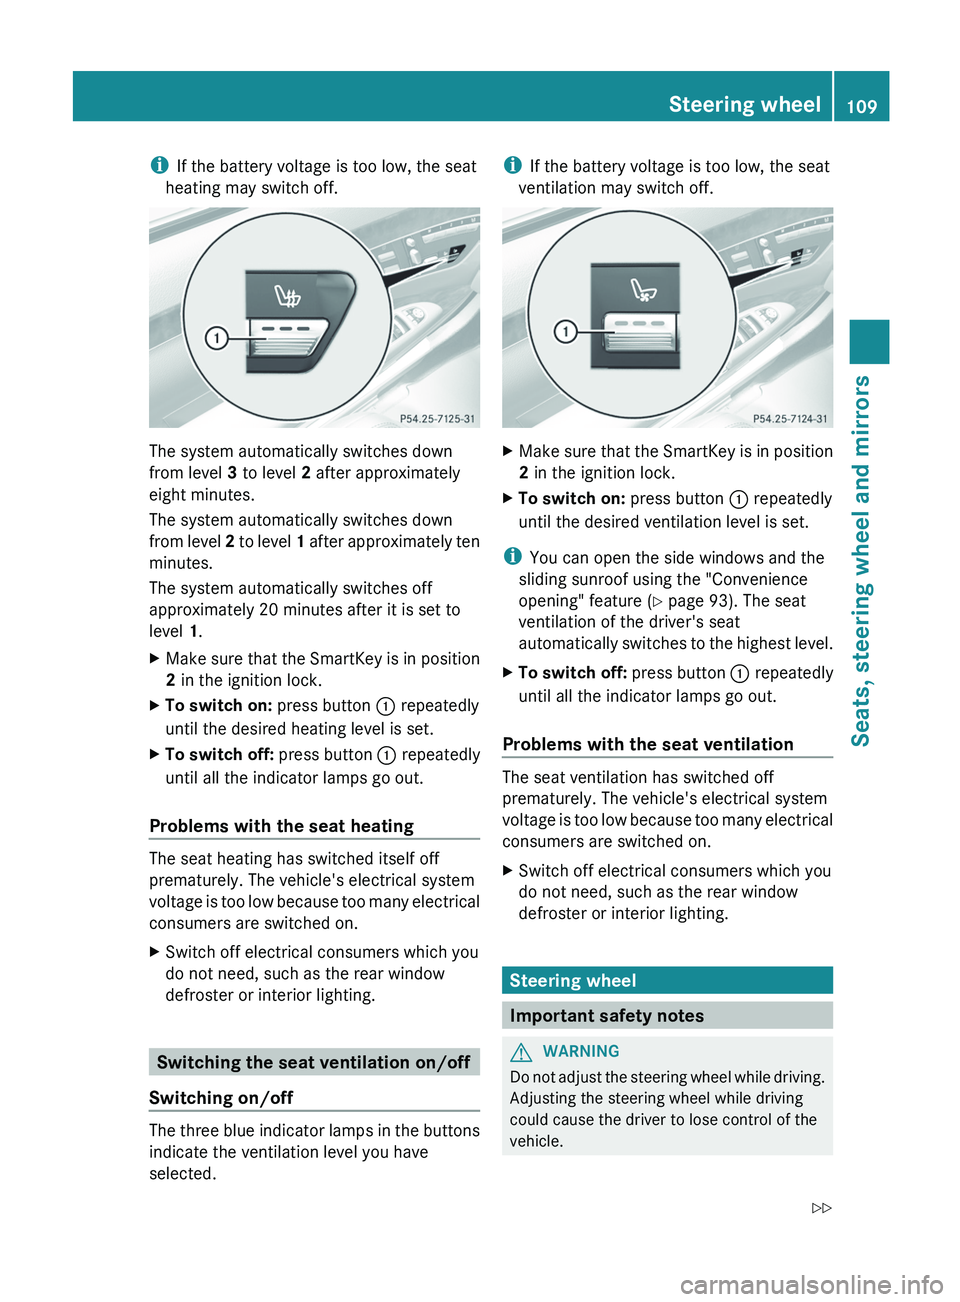
i
If the battery voltage is too low, the seat
heating may switch off. The system automatically switches down
from level 3 to level 2 after approximately
eight minutes.
The system automatically switches down
from
level 2 to level 1 after approximately ten
minutes.
The system automatically switches off
approximately 20 minutes after it is set to
level 1.
X Make sure that the SmartKey is in position
2 in the ignition lock.
X To switch on: press button : repeatedly
until the desired heating level is set.
X To switch off: press button : repeatedly
until all the indicator lamps go out.
Problems with the seat heating The seat heating has switched itself off
prematurely. The vehicle's electrical system
voltage
is too low because too many electrical
consumers are switched on.
X Switch off electrical consumers which you
do not need, such as the rear window
defroster or interior lighting. Switching the seat ventilation on/off
Switching on/off The three blue indicator lamps in the buttons
indicate the ventilation level you have
selected. i
If the battery voltage is too low, the seat
ventilation may switch off. X
Make sure that the SmartKey is in position
2 in the ignition lock.
X To switch on: press button : repeatedly
until the desired ventilation level is set.
i You can open the side windows and the
sliding sunroof using the "Convenience
opening" feature ( Y page 93). The seat
ventilation of the driver's seat
automatically
switches to the highest level.
X To switch off: press button : repeatedly
until all the indicator lamps go out.
Problems with the seat ventilation The seat ventilation has switched off
prematurely. The vehicle's electrical system
voltage
is too low because too many electrical
consumers are switched on.
X Switch off electrical consumers which you
do not need, such as the rear window
defroster or interior lighting. Steering wheel
Important safety notes
G
WARNING
Do not adjust the steering wheel while driving.
Adjusting the steering wheel while driving
could cause the driver to lose control of the
vehicle. Steering wheel
109
Seats, steering wheel and mirrors
Z
Page 112 of 536

The electrical steering wheel adjustment
feature can be operated at any time.
Therefore, do not leave children unattended
in the vehicle, or with access to an unlocked
vehicle. A child's unsupervised access to a
vehicle could result in an accident and/or
serious personal injury.
Adjusting the steering wheel
:
To adjust the steering wheel position
(fore-and-aft adjustment)
; To adjust the steering wheel height
i Other topics:
R EASY-ENTRY/EXIT feature
(Y page 110)
R storing settings
(Y page 113)
R operating the on-board computer
(Y page 373) Steering wheel heating
Switching on/off The steering-wheel heating heats the leather
areas of the steering wheel. X
Make sure that the SmartKey is in position
2 in the ignition lock.
X To switch on/off: turn the lever in the
direction of arrow : or ;.
Indicator lamp = lights up or goes out.
Vehicles without KEYLESS-GO: when you
remove the SmartKey from the ignition lock,
the steering wheel heating is deactivated.
Vehicles
with KEYLESS-GO: when you switch
off the ignition and open the driver's door, the
steering wheel heating is deactivated.
i The steering wheel heating is deactivated
when the temperature in the vehicle
interior is higher than 86 ‡ (30 †).
i The steering wheel heating is switched off
automatically after about 24 minutes. EASY-ENTRY/EXIT system
Important safety notes The EASY-ENTRY/EXIT feature makes getting
in and out of your vehicle easier.
You can activate and deactivate the EASY-
ENTRY/EXIT feature using COMAND
(Y page 262).
G
WARNING
You must make sure no one can become
trapped or injured by the moving steering
wheel and driver's seat when the EASY-
ENTRY/EXIT feature is activated. 110
Steering wheel
Seats, steering wheel and mirrors
Page 114 of 536

X
Make sure that the SmartKey is in position
1 or 2 in the ignition lock.
X Press button ; for the right-hand exterior
mirror or button = for the left-hand
exterior mirror.
The indicator lamp lights up in the button
that has been pressed.
X Press adjustment button : up, down, to
the right or to the left until the exterior
mirror
is set to a position that provides you
with a good overview of traffic conditions.
Folding the exterior mirrors in or out
electrically X
Make sure that the SmartKey is in position
1 or 2 in the ignition lock.
X Briefly press button :.
Both exterior mirrors fold in or out.
i Make sure that the exterior mirrors are
always folded out fully while the vehicle is
in motion, as they may otherwise vibrate. Folding the exterior mirrors in or out
automatically When the "Automatic mirror folding" function
is activated in COMAND (Y page 262):
R
the
exterior mirrors fold in automatically as
soon as you lock the vehicle from the
outside.
R the exterior mirrors fold out again
automatically as soon as you unlock the
vehicle and then open the driver's or front-
passenger door.
i The mirrors do not fold out if they have
been folded in manually.
Exterior mirror out of position If an exterior mirror has been pushed out of
position, proceed as follows:
X
Press the mirror-folding button
(Y page
112) repeatedly until you hear the
mirrors engage in position.
The mirror housing is engaged again and
you can adjust the exterior mirrors as usual
(Y page 111). Automatic anti-glare mirrors
G
WARNING
If incident light from headlamps is prevented
from striking the sensor in the rear-view
mirror,
for instance, by luggage piled too high
in the vehicle, the mirror's automatic anti-
glare function will not operate.
Incident light could then blind you. This may
distract you from the traffic conditions and,
as a result, you may cause an accident.
The rear-view mirror and the exterior mirror
on the driver's side automatically go into anti-
glare mode if the ignition is switched on and
incident light from headlamps strikes the
sensor in the rear-view mirror.
The mirrors do not go into anti-glare mode if
reverse gear is engaged or the interior lighting
is switched on. 112
Mirrors
Seats, steering wheel and mirrors
Page 152 of 536

change accordingly. If the selected language
is
not supported by the Voice Control System,
"English" will be selected.
X Select Vehicle by turning cVd the
COMAND controller and press W to
confirm.
X Select System and press W to confirm.
X Select Language and press W to confirm.
The list of languages appears. The # dot
indicates the current setting.
X Select the language by turning cVd the
COMAND controller and press W to
confirm.
COMAND
loads the selected language and
sets it. Reset function
You can reset COMAND to the factory
settings. Amongst other things, this will
delete all personal data (e.g. station presets,
address book entries, entries in the
destination
memory and in the list of previous
destinations in the navigation system).
Resetting is recommended before selling or
transferring ownership of your vehicle, for
example.
X Select Vehicle
in the main function bar by
turning cVd the COMAND controller and
press W to confirm.
X Select System by turning cVd the
COMAND controller and press W to
confirm.
X Select Reset and press W to confirm.
A
prompt appears asking whether you wish
to reset.
X Select Yes or No and press W to confirm.
If
you select No, the process will be aborted.
If you select Yes, another prompt appears
asking whether you really wish to reset.
X Select Yes or No and press W to confirm.
If
you select Yes, a message will be shown.
COMAND is reset and restarted. If you select
No,
the process will be aborted. Navigation
Introduction
Safety notes G
WARNING
For safety reasons, only enter a destination
when the vehicle is stationary. When the
vehicle
is in motion, a passenger should enter
the destination. Study manual and select
route before driving.
Bear in mind that at a speed of just 30 mph
(approximately 50 km/h), your vehicle is
covering a distance of 44 feet (approximately
14 m) every second.
COMAND calculates the route to the
destination without taking account of the
following:
R Traffic lights
R Stop and right-of-way-signs
R Lane merging
R Parking or stopping prohibited areas
R Other road and traffic rules and regulations
R Narrow bridges G
WARNING
COMAND may give incorrect navigation
commands
if the data in the digital map does
not correspond with the actual road/traffic
situation. Digital maps do not cover all areas
nor all routes within an area. For example, if
the traffic routing has been changed or the
direction of a one-way road has been
reversed.
For this reason, you must always observe
applicable road and traffic rules and
regulations during your journey. Road and
traffic rules and regulations always have
priority over the navigation commands
generated by the system. 150
Navigation
COMAND