2013 MERCEDES-BENZ S-CLASS SEDAN sensor
[x] Cancel search: sensorPage 114 of 536

X
Make sure that the SmartKey is in position
1 or 2 in the ignition lock.
X Press button ; for the right-hand exterior
mirror or button = for the left-hand
exterior mirror.
The indicator lamp lights up in the button
that has been pressed.
X Press adjustment button : up, down, to
the right or to the left until the exterior
mirror
is set to a position that provides you
with a good overview of traffic conditions.
Folding the exterior mirrors in or out
electrically X
Make sure that the SmartKey is in position
1 or 2 in the ignition lock.
X Briefly press button :.
Both exterior mirrors fold in or out.
i Make sure that the exterior mirrors are
always folded out fully while the vehicle is
in motion, as they may otherwise vibrate. Folding the exterior mirrors in or out
automatically When the "Automatic mirror folding" function
is activated in COMAND (Y page 262):
R
the
exterior mirrors fold in automatically as
soon as you lock the vehicle from the
outside.
R the exterior mirrors fold out again
automatically as soon as you unlock the
vehicle and then open the driver's or front-
passenger door.
i The mirrors do not fold out if they have
been folded in manually.
Exterior mirror out of position If an exterior mirror has been pushed out of
position, proceed as follows:
X
Press the mirror-folding button
(Y page
112) repeatedly until you hear the
mirrors engage in position.
The mirror housing is engaged again and
you can adjust the exterior mirrors as usual
(Y page 111). Automatic anti-glare mirrors
G
WARNING
If incident light from headlamps is prevented
from striking the sensor in the rear-view
mirror,
for instance, by luggage piled too high
in the vehicle, the mirror's automatic anti-
glare function will not operate.
Incident light could then blind you. This may
distract you from the traffic conditions and,
as a result, you may cause an accident.
The rear-view mirror and the exterior mirror
on the driver's side automatically go into anti-
glare mode if the ignition is switched on and
incident light from headlamps strikes the
sensor in the rear-view mirror.
The mirrors do not go into anti-glare mode if
reverse gear is engaged or the interior lighting
is switched on. 112
Mirrors
Seats, steering wheel and mirrors
Page 122 of 536
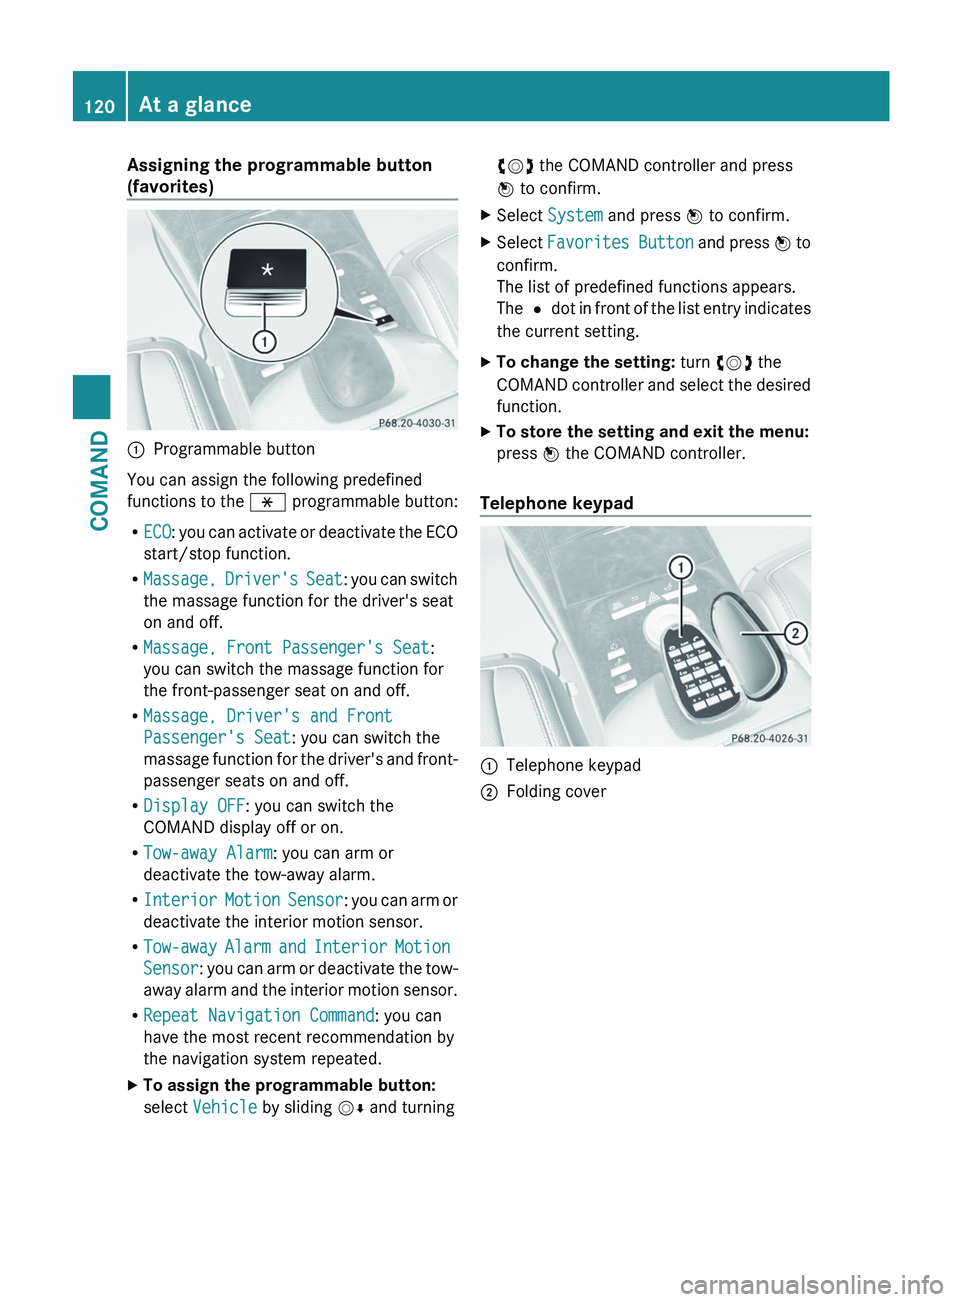
Assigning the programmable button
(favorites)
:
Programmable button
You can assign the following predefined
functions to the h programmable button:
R ECO:
you can activate or deactivate the ECO
start/stop function.
R Massage, Driver's Seat: you can switch
the massage function for the driver's seat
on and off.
R Massage, Front Passenger's Seat:
you can switch the massage function for
the front-passenger seat on and off.
R Massage, Driver's and Front
Passenger's Seat: you can switch the
massage function for the driver's and front-
passenger seats on and off.
R Display OFF: you can switch the
COMAND display off or on.
R Tow-away Alarm: you can arm or
deactivate the tow-away alarm.
R Interior Motion Sensor : you can arm or
deactivate the interior motion sensor.
R Tow-away Alarm and Interior Motion
Sensor: you can arm or deactivate the tow-
away alarm and the interior motion sensor.
R Repeat Navigation Command: you can
have the most recent recommendation by
the navigation system repeated.
X To assign the programmable button:
select Vehicle by sliding VÆ and turningcVd the COMAND controller and press
W to confirm.
X Select System and press W to confirm.
X Select Favorites
Button and press W to
confirm.
The list of predefined functions appears.
The # dot in front of the list entry indicates
the current setting.
X To change the setting: turn cVd the
COMAND
controller and select the desired
function.
X To store the setting and exit the menu:
press W the COMAND controller.
Telephone keypad :
Telephone keypad
; Folding cover120
At a glance
COMAND
Page 124 of 536

Navi Audio Telephone Video Vehicle
Mode FM/AM radio Video DVD ECO
Map orientation Sat radio AUX Multicontour
seat/lumbar
settings
Point of interest
symbols on the map Disc Video off Rear window
blind
Traffic symbols on the
map Memory card EASY-ENTRY/
EXIT system
Text information on
map MUSIC
REGISTER Exterior
lighting
delayed
switch-off
O Topographical
map Media
Interface Interior
lighting
delayed
switch-off
O City view USB Ambient
lighting
O Freeway
information Rear O Automatic
mirror fold-in
function
O Volume reduction AUX O Locator
lighting
SIRIUS service Audio off O Automatic
locking
Map version O Interior
motion sensor
O Tow-away
alarm
O Trunk lid
opening height
restriction
SPLITVIEW
SPLITVIEW allows you to simultaneously use
different COMAND functions on the front-
passenger side and on the driver's side.
Depending on the viewing angle of the display
(from the driver's seat or from the front-
passenger seat), you will see two different
displays.122
At a glanceCOMAND
Page 145 of 536

Indicator lamp displays
The indicator lamp displays the following
possible stati for the batteries and
headphones:
Display Status
Green The batteries are fine.
Red The batteries are almost
discharged.
Continuou
sly lit
either
green or
red The headphones are switched
on
and connected to a screen. Flashes
either
green or
red The headphones are
searching for the connection
to a screen.
No display
(dark) The headphones are switched
off or the batteries are
discharged.
Connecting additional headphones
You can connect an additional set of corded
headphones to each rear-compartment
screen (Y page 139).
Changing batteries
Batteries are required for the remote control
and
for the two sets of cordless headphones.
Changing batteries ( Y page 247)System settings
Display settings
Switching the display on/off X
Select Vehicle by turning cVd the
COMAND controller and press W to
confirm.
X Select Display OFF by turning cVd the
COMAND controller and press W to
confirm. X
To switch on the display: press W or
cVd turn the COMAND controller.
Display design Your COMAND display features optimized
designs for operation during daytime and
night-time hours. You can customize the
design to suit your personal preferences by
manually
selecting day or night design or opt
for an automatic setting.
X Select Vehicle by turning cVd the
COMAND controller and press W to
confirm.
X Select System by turning cVd the
COMAND controller and press W to
confirm.
X Select Display and press W to confirm.
X Select Day Mode, Night Mode or
Automatic by turning cVd the COMAND
controller and press W to confirm.
The # icon indicates the current setting. Design Explanation
Day Mode The display is set
permanently to day
design.
Night Mode The display is set
permanently to night
design.
Automatic The display design
changes depending on
the brightness around
the vehicle.
i
In the Automatic setting, COMAND
evaluates the readings from the automatic
vehicle light sensor and switches between
the display designs automatically. System settings
143
COMAND Z
Page 282 of 536

Cornering light function
The cornering light function improves the
illumination of the road over a wide angle in
the
direction you are turning, enabling better
visibility in tight bends, for example. It can
only be activated when the low-beam
headlamps are switched on.
Active:
R if you are driving at speeds below
25 mph (40 km/h) and switch on the turn
signals or turn the steering wheel.
R if you are driving at speeds between
25 mph (40 km/h) and
45 mph (70 km/h) or turn the steering
wheel.
Not active: if you are driving at speeds above
25 mph (40 km/h) or switch off the turn
signal or turn the steering wheel to the
straight-ahead position.
The cornering light function may remain lit for
a short time, but is automatically switched off
after no more than three minutes. Adaptive Highbeam Assist
You can use this function to set the
headlamps
to change between low beam and
high beam automatically. The system
recognizes vehicles with their lights on, either
approaching from the opposite direction or
traveling in front of your vehicle, and
consequently switches the headlamps from
high beam to low beam. The system automatically adapts the low-
beam headlamp range depending on the
distance to the other vehicle. Once the
system
no longer detects any other vehicles,
it reactivates the high-beam headlamps.
The system's optical sensor is located behind
the windshield near the overhead control
panel. X
To activate: activate the Adaptive
Highbeam Assist function using the on-
board computer ( Y page 386).
X Turn the light switch to c.
X Press the combination switch beyond the
pressure
point in the direction of arrow :
(Y page 279).
If it is dark and the light sensor activates
the low-beam headlamps, the _
indicator lamp in the instrument cluster
lights up.
If you drive faster than approximately
28 mph (45 km/h):
the headlamp range is set automatically
depending on the distance between the
vehicle and other road users.
If you drive faster than approximately
35 mph (55 km/h) and no other road users
are identified: 280
Exterior lighting
Lights and windshield wipers
Page 283 of 536

the high-beam headlamps are switched on
automatically. The
K indicator lamp in
the instrument cluster also lights up.
When
you drive slower than approximately
30 mph (45 km/h) or if other road users
are identified or if the roads are sufficiently
illuminated:
the high-beam headlamps are switched off
automatically. The K indicator lamp in
the instrument cluster goes out. The _
indicator lamp in the instrument cluster
stays on.
X To deactivate: move the combination
switch back to its normal position.
The _ indicator lamp in the instrument
cluster goes out. G
WARNING
The Adaptive Highbeam Assist is only an aid
intended to support you while driving. The
driver is and remains responsible for proper
vehicle lighting in accordance with the
prevailing light, sight and traffic conditions.
The system may be impaired or unavailable
when
R visibility
is poor, e.g. due to snow, rain, fog,
or heavy spray
R the optical sensor area of the windshield is
dirty, fogged up, or covered by a sticker for
example
The system cannot recognize the following
road users:
R Road users without a lighting system of
their own, e.g. pedestrians
R Road users with dim lighting of their own,
e.g. cyclists
R Road users whose lighting is obstructed,
e.g. road users behind a guardrail
R In some seldom cases, even road users with
a lighting system of their own may be
recognized too late or not at all.
The automatic high-beam headlamps will then
not be deactivated or it will be activated in
spite of preceding or oncoming road users. This could endanger you and/or others and
cause
an accident. Always pay close attention
to the traffic situation and switch off the high
beam manually if necessary. Headlamps fogged up on the inside
The headlamps may fog up on the inside if
there is high atmospheric humidity.
X Drive with the headlamps switched on.
The level of moisture diminishes,
depending
on the length of the journey and
the weather conditions (humidity and
temperature).
If the level of moisture does not diminish:
X Have the headlamps checked at a qualified
specialist workshop. Interior lighting
Overview of interior lighting
Front overhead control panel
:
p
Switches the left-hand reading lamp
on/off
; u Switches the rear interior lighting
on/off
= c Switches the front interior lighting
on/off
? | Switches the automatic interior
lighting control on/off
A p Switches the right-hand reading
lamp on/off Interior lighting
281
Lights and windshield wipers Z
Page 287 of 536

Windshield wipers
Switching the windshield wipers on/
off
G
WARNING
Wiper blades are components that are subject
to wear and tear. Replace the wiper blades
twice
a year, preferably in the spring and fall.
Otherwise the windshield will not be wiped
properly. As a result, you may not be able to
observe surrounding traffic conditions and
could cause an accident.
! Do not operate the windshield wipers
when the windshield is dry, as this could
damage the wiper blades. Moreover, dust
that has collected on the windshield can
scratch the glass if wiping takes place when
the windshield is dry.
! If the windshield wipers leave smears on
the windshield after the vehicle has been
washed in an automatic car wash, wax or
other residues may be the reason for this.
Clean the windshield using washer fluid
after washing the vehicle in an automatic
car wash. Combination switch
1
$ Windshield wipers off
2 Ä Intermittent wipe, low 14
3 Å Intermittent wipe, high 15
4 ° Continuous wipe, slow 5
¯ Continuous wipe, fast
B í Single wipe/ î To wipe the
windshield using washer fluid
X Switch on the ignition.
X Turn the combination switch to the
corresponding position.
! Intermittent wiping with rain sensor: due
to optical influences and the windshield
becoming dirty in dry weather conditions,
the windshield wipers may be activated
inadvertently. This could then damage the
windshield wiper blades or scratch the
windshield.
For this reason, you should always switch
off the windshield wipers in dry weather.
In
the Ä or Å position, the appropriate
wiping frequency is set automatically
according to the intensity of the rain. In
the Å position, the rain sensor is more
sensitive than in the Ä position, causing
the windshield wipers to wipe more
frequently. Replacing the wiper blades
Important safety notes G
WARNING
For safety reasons, switch off the windshield
wipers and remove the key from the ignition
lock before changing the wiper blades
(vehicles with KEYLESS-GO: make sure that
the on-board electronics are in state 0).
Otherwise,
the wiper motor could be switched
on suddenly and cause injury.
! To avoid damaging the wiper blades,
make sure that you touch only the wiper
arm of the wiper.
! Never open the hood if a windshield wiper
arm has been folded away from the
windshield.
14 Rain sensor set to low sensitivity.
15 Rain sensor set to high sensitivity. Windshield wipers
285
Lights and windshield wipers Z
Page 335 of 536

Instructions included in your vehicle literature
portfolio. You may otherwise not receive all
necessary
safety information and warning for
the operation of your vehicle. G
WARNING
The DISTRONIC PLUS requires familiarity with
its operational characteristics. We strongly
recommend that you review the following
information carefully before operating the
system. G
WARNING
When DISTRONIC brakes, the brake pedal is
pulled
back (i.e. operated automatically). The
area around the pedal must not be blocked by
obstacles:
R do not place any objects in the footwell.
R ensure that floormats and carpets are fixed
securely. In particular, do not place several
floormats on top of one another.
R do not place your foot under the brake
pedal, as it could become trapped.
Non-compliance could lead you to cause an
accident in which you and/or others could be
seriously injured. G
WARNING
The DISTRONIC PLUS is a convenience
system. Its speed adjustment reduction
capability is intended to make cruise control
more
effective and usable when traffic speeds
vary. It is not however, intended to, nor does
it, replace the need for extreme care.
The responsibility for the vehicle's speed,
distance to the preceding vehicle and, most
importantly, brake operation to ensure a safe
stopping distance, always remains with the
driver.
The DISTRONIC PLUS cannot take street and
traffic conditions into account.
Complex driving situations are not always
fully recognized by the DISTRONIC PLUS. This
could result in wrong or missing distance
warnings. If you want DISTRONIC PLUS to assist you,
the radar sensor system must be activated
(Y page 387) and operational.
If there is no vehicle driving in front of you,
DISTRONIC PLUS functions like cruise
control at a speed range between 20 mph
(Canada: 30 km/h) and 120 mph
(Canada: 200 km/h)
. If a vehicle is driving in
front of you, it functions at a speed range
between 0 mph (0 km/h) and 120 mph
(Canada: 200 km/h).
Do not use DISTRONIC PLUS while driving on
roads with steep gradients.
As DISTRONIC PLUS transmits radar waves,
it can resemble the radar detectors of the
responsible authorities. You can refer to the
applicable section in the Operator's Manual if
there are any questions concerning this.
i USA only:
This device has been approved by the FCC
as a “Vehicular Radar System”. The radar
sensor is intended for use in an automotive
radar system only. Removal, tampering, or
altering of the device will void any
warranties, and is not permitted by the
FCC. Do not tamper with, alter, or use in
any non-approved way.
Any unauthorized modification to this
device could void the user’s authority to
operate the equipment. G
WARNING
The DISTRONIC PLUS adaptive cruise control
is not a substitute for active driving
involvement. It does not react to pedestrians
or
on stationary objects, nor does it recognize
or predict the curvature and lane layout or the
movement of preceding vehicles. The
DISTRONIC PLUS can only apply a maximum
of 40% of the vehicle's braking power.
The DISTRONIC PLUS may not detect narrow
vehicles possibly driving in front of you, such
as motorcycles and vehicles driving in an
offset formation.
It is the driver's responsibility at all times to
be attentive to the road, weather and traffic Driving systems
333
Driving and parking
Z