Page 345 of 458

cargo compartment floor, fasten it with the
press studs. Roof carrier
Important safety notes G
WARNING
Whe nyou load the roof, the center of gravity
of the vehicle rises and the driving
characteristics change. If you exceed the
maximum roof load, the driving
characteristics, as well as steering and
braking, will be greatly impaired. There is a
risk of an accident.
Never exceed the maximum roof load and
adjust your driving style.
! Mercedes-Benz recommends that you
only use roof carriers that have been tested
and approved for Mercedes-Benz vehicles.
This helps to prevent damage to the
vehicle.
Position the load on the roof carrier in such
a way that the vehicle will not sustain
damage even when it is in motion.
Depending on the vehicle equipment,
ensure that when the roof carrier is
installed you can:
R raise the sliding sunroof fully
R open the panorama roof with power tilt/
sliding panel fully
R open the tailgate fully
The maximum roof load is 220 lbs(100 kg). Attaching the roof carrier X
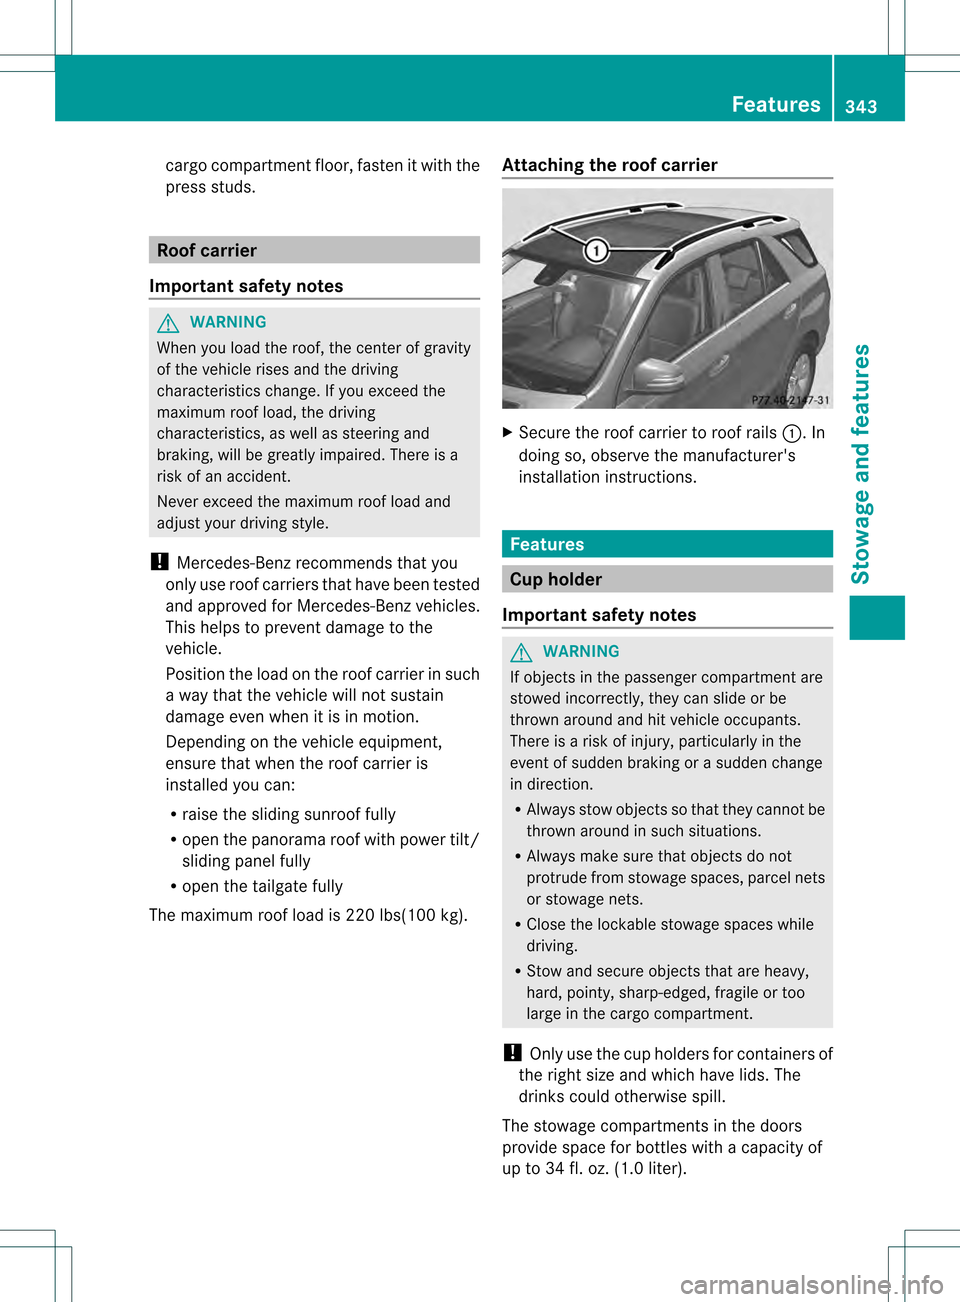
Secure the roof carrier to roof rails 0002. In
doing so, observe the manufacturer's
installation instructions. Features
Cup holder
Important safety notes G
WARNING
If objects in the passenger compartment are
stowed incorrectly, they can slide or be
thrown around and hit vehicle occupants.
There is a risk of injury, particularly in the
event of sudden braking or a sudden change
in direction.
R Always stow objects so that they cannot be
thrown around in such situations.
R Always make sure that objects do not
protrude from stowage spaces, parcel nets
or stowage nets.
R Close the lockable stowage spaces while
driving.
R Stow and secure objects that are heavy,
hard, pointy, sharp-edged, fragile or too
large in the cargo compartment.
! Only use the cup holders for containers of
the right size and which have lids. The
drinks could otherwise spill.
The stowage compartments in the doors
provide space for bottles with a capacity of
up to 34 fl. oz. (1.0 liter). Features
343Stowage and features Z
Page 382 of 458

Useful information
i This Operator's Manual describes all
models and all standard and optional
equipment of your vehicle available at the
time of publication of the Operator's
Manual. Country-specific differences are
possible. Please note that your vehicle may
not be equipped with all features
described. This also applies to safety-
related systems and functions.
i Read the information on qualified
specialist workshops: (Y page 27).Where will I find...?
First-aid kit
X
Open the tailgate.
X Remove first-aid kit 0002from the parcel net.
i Check the expiration date on the first-aid
kit at least once a year. Replace the
contents if necessary, and replace missing
items. Vehicle tool kit
General notes The vehicle tool kit can be found in the
stowage well under the cargo compartment
floor.
i
Apart from certain country-specific
variations, the vehicles are not equipped
with a tire-change tool kit .Some tools for changing a wheel are specific to the
vehicle. For more information on which
tools are required to perform a wheel
change on your vehicle, consult a qualified
specialist workshop.
Tools required for changing
awheel may
include, for example:
R Jack
R Wheel chock
R Lug wrench
R Ratchet wrench
R Alignment bolt
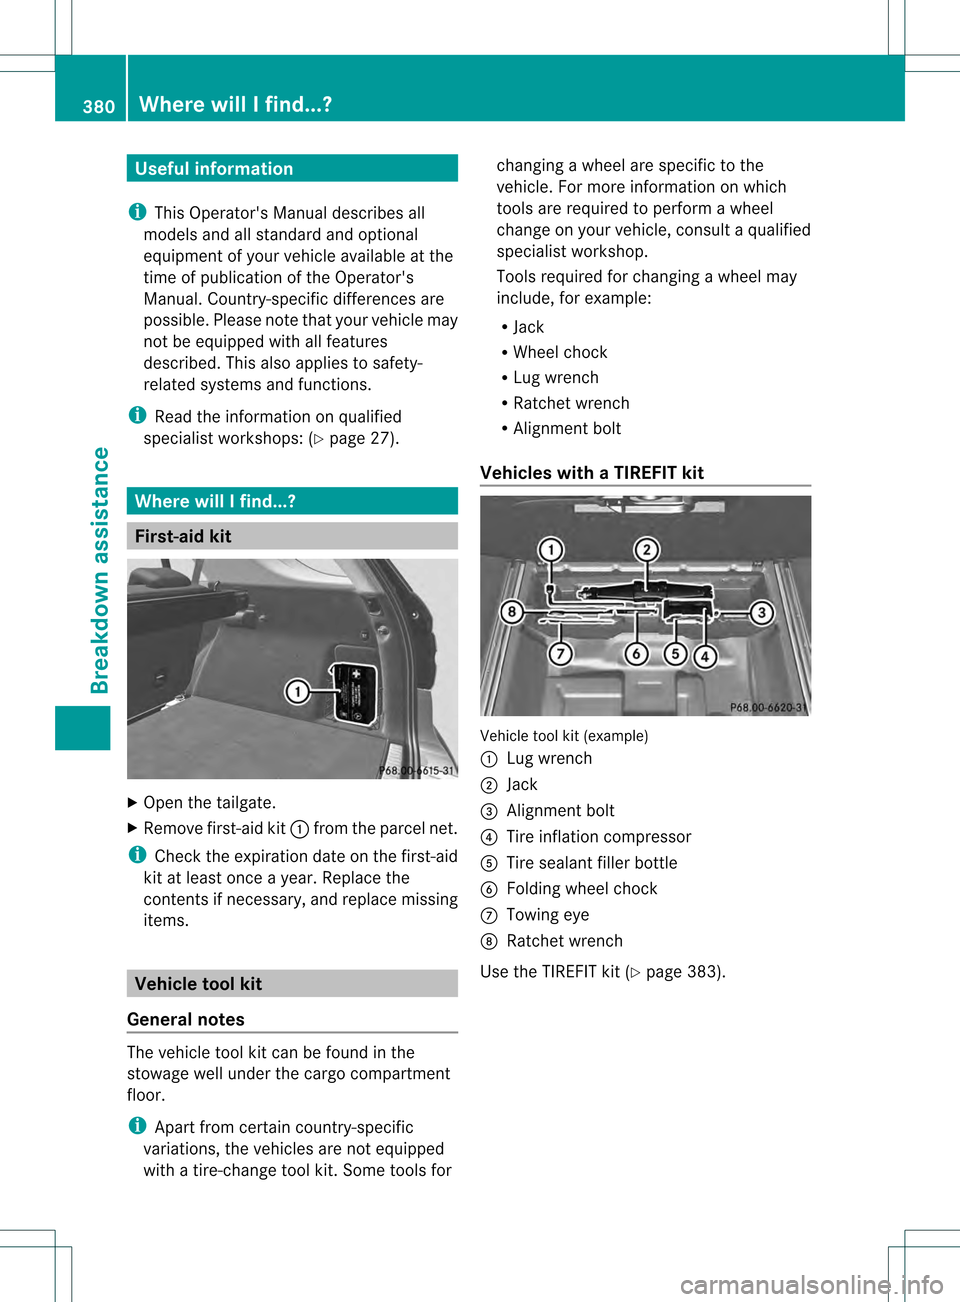
Vehicles with aTIREFIT kit Vehicle tool kit (example)
0002
Lug wrench
0003 Jack
001F Alignmen tbolt
001E Tire inflation compressor
001C Tire sealant filler bottle
001D Folding wheel chock
0011 Towing eye
0012 Ratchet wrench
Use the TIREFIT kit (Y page 383).380
Where will I find...?Breakdown assistance
Page 426 of 458

R
before raising the vehicle, secure it from
rolling away by applying the parking brake
and inserting wheel chocks. Never
disengage the parking brake while the
vehicle is raised.
R the jack must be placed on a firm, flat and
non-slip surface. On a loose surface, a
large, load-bearing underlay must be used.
On a slippery surface, a non-slip underlay
must be used, e.g. rubber mats.
R do not use wooden blocks or similar
objects as a jack underlay. Otherwise, the
jack will not be able to achieve its load-
bearing capacity due to the restricted
height.
R the maximum clearance between the
underside of the tire and the ground must
be 1.2 in (3 cm).
R never place your hands and feet under the
raised vehicle.
R never lie under the raised vehicle.
R never start the engine when the vehicle is
raised.
R never open or close a door or the tailgate
when the vehicle is raised.
R make sure that no person sare present in
the vehicle when the vehicl eis raised. X
Using lug wrench 0002, loosen the bolts on
the wheel you wish to change by abouto ne
full turn. Do not unscrew the bolts
completely. The jacking points are located jus
tbehind the
front wheel housings and just in front of the
rear wheel housings (arrows).
X Take the ratchet wrench out of the vehicle
tool kit and place it on the hexagon nut of
the jack so that the letters AUFare visible. 0003
Jacking points
001F Jack
001E Crank
X Position jack 001Fat jacking point 0003.
The alignment bolt on the jack must be
inserted into the intended jacking point
hole. 424
Changing
awheelWheels and tires
Page 440 of 458

X
Vehicles with alockable cargo
compartment floor: remove the contents
of stowage tray 0003.
X Turn the central retaining screw of stowage
tray 0003and "Minispare" emergency spare
wheel 0002counter-clockwise and remove it.
X Remove stowage well 0003.
X Remove "Minispare" emergency spare
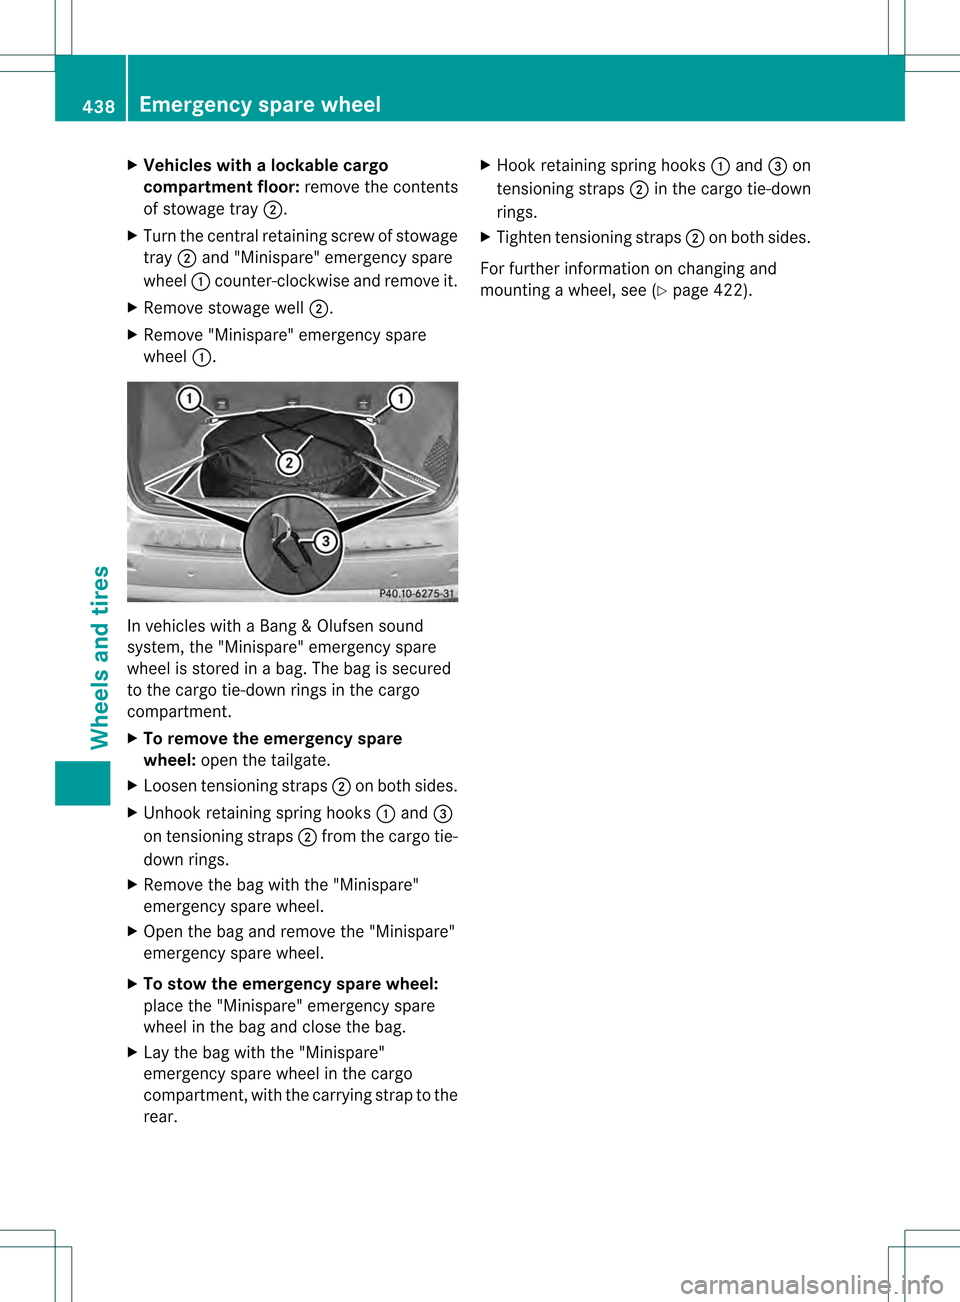
wheel 0002. In vehicles with a Bang
&Olufsen sound
system, the "Minispare" emergency spare
wheel is stored in a bag. The bag is secured
to the cargo tie-down rings in the cargo
compartment.
X To remove the emergency spare
wheel: open the tailgate.
X Loosen tensioning straps 0003on both sides.
X Unhook retaining spring hooks 0002and 001F
on tensioning straps 0003fromt he cargo tie-
down rings.
X Remove the bag with the "Minispare"
emergency spare wheel.
X Open the bag and remove the "Minispare"
emergency spare wheel.
X To stow the emergency spare wheel:
place the "Minispare" emergency spare
wheel in the bag and close the bag.
X Lay the bag with the "Minispare"
emergency spare wheel in the cargo
compartment, with the carrying strap to the
rear. X
Hook retaining spring hooks 0002and 001Fon
tensioning straps 0003in the cargo tie-down
rings.
X Tighten tensioning straps 0003on both sides.
For further information on changing and
mounting a wheel, see (Y page 422).438
Emergency spare wheelWheels and tires