2013 MERCEDES-BENZ GLK-CLASS SUV air condition
[x] Cancel search: air conditionPage 306 of 380
Exterior care
Automatic car wash G
WARNING
Braking efficiency is reduced after washing
the vehicle. There is a risk of an accident.
After the vehicle has been washed, brake
carefully while paying attention to the traffic
conditions until full braking power
is restored.
! If DISTRONIC PLUS or the HOLD function
is activated, the vehicle brakes
automatically in certain situations. To
prevent damage to the vehicle, deactivate
DISTRONIC PLUS and the HOLD function in
the following or other similar situations:
R when towing the vehicle
R in the car wash
! Never clean your vehicle in a Touchless
Automatic Car Wash as these use special
cleaning agents. These cleaning agents can
damage the paintwork or plastic parts.
! Make sure that the automatic
transmission is in position N when washing
your vehicle in a tow-through car wash. The
vehicle could be damaged if the
transmission is in another position.
! Make sure that:
R the side windows and the sliding sunroof
are fully closed.
R the ventilation/heating is switched off
(the OFF button has been pressed).
R the windshield wiper switch is in position
0.
Otherwise, the vehicle might be damaged.
You can wash the vehicle in an automatic car
wash from the very start.
If the vehicle is very dirty, pre-wash it before
cleaning it in an automatic car wash.
After using an automatic car wash, wipe off
wax from the windshield and the wiper
blades. This will prevent smears and reduce wiping noises caused by residue on the
windshield.
Washing by hand
In some countries, washing by hand is only
allowed at specially equipped washing bays.
Observe the legal requirements in all
countries concerned.
X
Do not use hot water and do not wash the
vehicle in direct sunlight.
X Use a soft sponge to clean.
X Use a mild cleaning agent, such as a car
shampoo approved by Mercedes-Benz.
X Thoroughly hose down the vehicle with a
gentle jet of water.
X Do not point the water jet directly towards
the air inlet.
X Use plenty of water and rinse out the
sponge frequently.
X Rinse the vehicle with clean water and dry
thoroughly with a chamois.
X Do not let the cleaning agent dry on the
paintwork.
When using the vehicle in winter, remove all
traces of road salt deposits carefully and as
soon as possible.
Power washers G
WARNING
The water jet from a circular jet nozzle (dirt
blasters) can cause invisible exterior
damage
to the tires or chassis components.
Components damaged in this way may fail
unexpectedly. There is a risk of an accident.
Do not use power washers with circular jet
nozzles to clean the vehicle. Have damaged
tires or chassis components replaced
immediately.
! Always maintain a distance of at least
11.8 in (30 cm) between the vehicle and the
power washer nozzle. Information about
the correct distance is available from the
equipment manufacturer. 304
Care
Maintenance and care
Page 307 of 380
Move the power washer nozzle around
when cleaning your vehicle.
Do not aim directly
at
any of the following:
R tires
R door gaps, roof gaps, joints, etc.
R electrical components
R battery
R connectors
R lights
R seals
R trim
R ventilation slots
Damaged seals or electrical components
can lead to leaks or failures.
Cleaning the wheels !
Do not use acidic wheel
cleaning products
to remove brake dust. This could damage
wheel bolts and brake components.
! Do not park the vehicle for an extended
period straight after cleaning it, particularly
after having cleaned the wheels with wheel
cleaner. Wheel cleaners could cause
increased corrosion of the brake discs and
brake pads/linings. For this reason, you
should drive for a few minutes after
cleaning. Braking heats the brake discs and
the brake pads/linings, thus drying them.
The vehicle can then be parked.
Cleaning the paintwork Scratches, corrosive deposits, areas affected
by corrosion and damage caused by
inadequate
care
cannot always
be
completely
repaired. In such cases, visit a qualified
specialist workshop.
X Remove dirt immediately, where possible,
while avoiding rubbing too hard.
X Soak insect remains with insect remover
and rinse off the treated areas afterwards.
X Soak bird droppings with water and rinse
off the treated areas afterwards. X
Remove coolant, brake fluid, tree resin,
oils, fuels and greases by rubbing gently
with a cloth soaked in petroleum ether or
lighter fluid.
X Use tar remover to remove tar stains.
X Use silicone remover to remove wax.
! Do not affix:
R stickers
R films
R magnetic plates or similar items
to painted surfaces. You could otherwise
damage the paintwork.
If water no longer forms
"beads" on the paint
surface, use the paint care products
recommended and approved by Mercedes-
Benz. This is the case approximately every
three to five months, depending on the
climate conditions and the care product used.
If the dirt has penetrated the paint surface or
if the paintwork has become dull, then the
paintwork should be cleaned. Use the
cleaning product Paint Cleaner, which has
been approved by Mercedes-Benz.
Do not use these care products in the sun or
on the hood while the hood is hot.
X Use a suitable touch-up stick, e.g. MB
Touch-Up Stick, to repair slight damage to
the paintwork quickly and provisionally.
Matte finish care If your vehicle has a clear matte finish,
observe the following instructions
in
order to
avoid damage to the paintwork due to
incorrect care.
These notes also apply to light alloy wheels
with a clear matte finish.
! Never polish the vehicle or the light alloy
wheels. Polishing causes the finish to
shine. Care
305
Maintenance and care Z
Page 336 of 380
changes by 18 ‡ (10 †), the tire pressure
changes by approximately 10 kPa (0.1 bar/
1.5 psi). Take this into account when
checking the pressure
of
warm tires and only
correct the tire pressure if it is too low for the
current operating conditions. If you check the
tire pressure when the tires are warm, the
resulting value will be higher than if the tires
were cold. This is normal. Do not reduce the
tire pressure to the value specified for cold
tires. The tire pressure would otherwise be
too low.
Observe the recommended tire pressures for
cold tires:
R on the Tire and Loading Information placard
on the B-pillar on the driver's side
R in the tire pressure table on the inside of
the fuel filler flap
R printed in yellow on the rim of the
emergency/collapsible spare wheel
(depending on vehicle equipment) Underinflated or overinflated tires
Underinflation G
WARNING
Tires with pressure that is too low can
overheat and burst as a consequence. In
addition, they also suffer from
excessive and/
or irregular wear, which can severely impair
the braking properties and the driving
characteristics. There is a risk of an accident.
Avoid tire pressures that are too low in all the
tires, including the spare wheel.
Underinflated tires may:
R wear quickly and unevenly
R have an adverse effect on fuel consumption
R overheat, leading to tire defects
R have an adverse effect on handling
characteristics Overinflation G
WARNING
Tires with excessively high pressure can burst
because they are damaged more easily by
road debris, potholes etc. In addition, they
also suffer from irregular wear, which can
severely impair the braking properties
and the
driving characteristics. There is a risk of an
accident.
Avoid tire pressures that are too high in all the
tires, including the spare wheel.
Overinflated tires may:
R have an adverse effect on handling
characteristics
R wear quickly and unevenly
R be more susceptible to damage
R have an adverse effect on ride comfort
R increase the braking distance
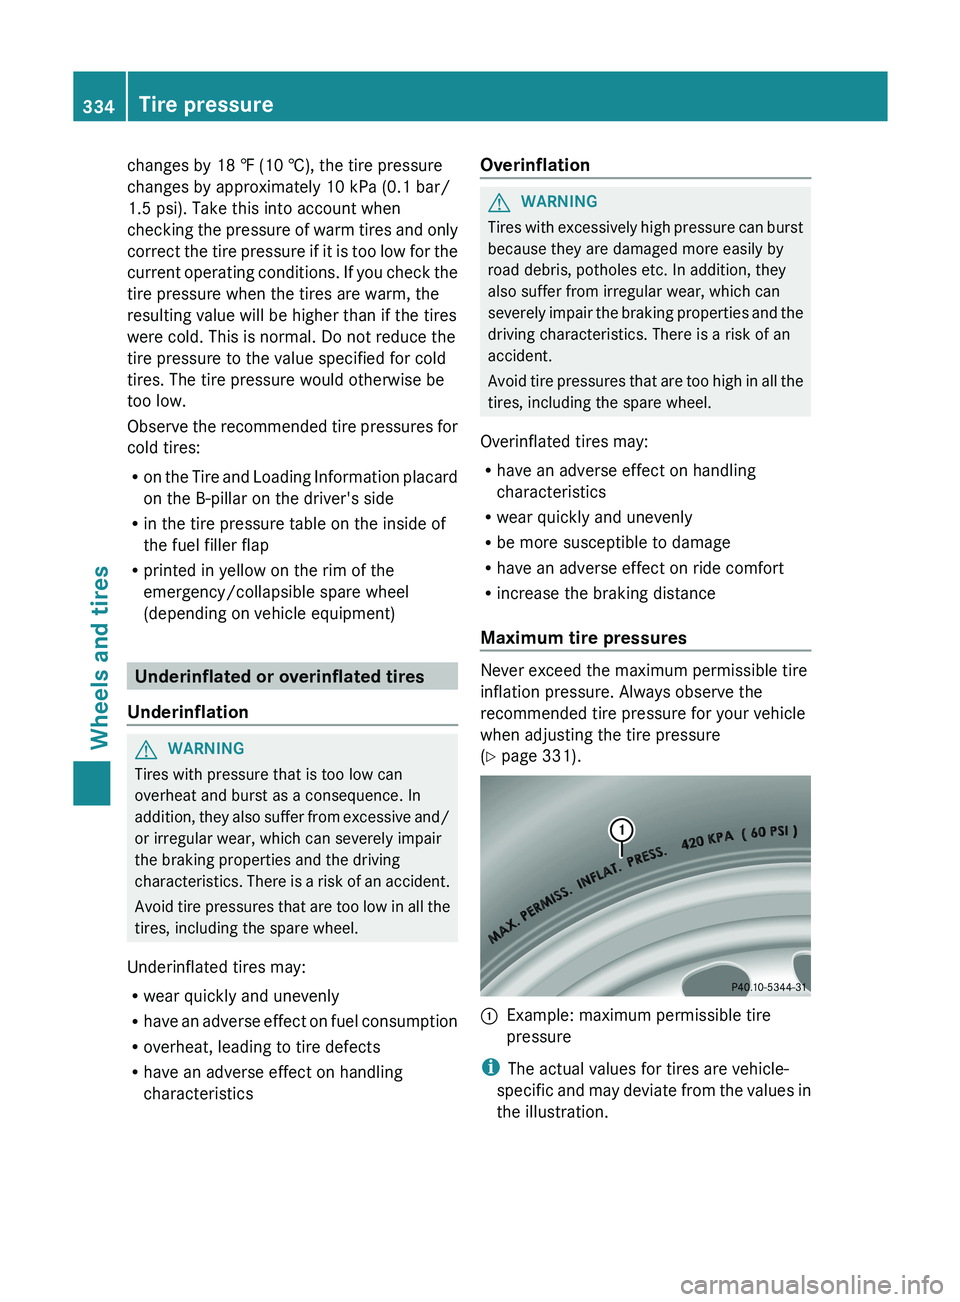
Maximum tire pressures Never exceed the maximum permissible tire
inflation pressure. Always observe the
recommended tire pressure for your vehicle
when adjusting the tire pressure
(Y page 331).
0043
Example: maximum permissible tire
pressure
i The actual values for tires are vehicle-
specific and may deviate
from
the values in
the illustration. 334
Tire pressure
Wheels and tires
Page 337 of 380
Checking the tire pressures
Important safety notes Observe the "tire pressure information"
section (
Y page 331).
Information on air pressure for the tires on
your vehicle can be found:
R on the vehicle's Tire and Loading
Information placard on the B-pillar
R on the tire pressure label on the fuel filler
flap
R in the "Tire pressure information" section
Checking tire pressures manually To determine and set the correct tire
pressure, proceed as follows:
X
Remove the valve cap of the tire that is to
be checked.
X Press the tire pressure gauge securely onto
the valve.
X Read the tire pressure and compare it with
the recommended value on the Tire and
Loading Information placard on the
B-pillar on
the driver's
side
of your vehicle.
X If necessary, increase the tire pressure to
the recommended value ( Y page 331).
X If the tire pressure is too high, release air
by pressing down the metal
pin in the valve
using the tip of a pen, for example. Then,
check the tire pressure again using the tire
pressure gauge.
X Screw the valve cap onto the valve.
X Repeat these steps for the other tires. Tire pressure loss warning system
(Canada only)
General notes While the vehicle is in motion, the tire
pressure loss warning system monitors the
set tire pressure using
the
rotational speed of
the wheels. This enables the system to detect
significant pressure loss in a tire. If the speed of rotation of a wheel changes as a result of
a loss of pressure, a corresponding warning
message will appear in the multifunction
display.
You can recognize the tire pressure loss
warning by the
Run Flat Indicator
Active Press 'OK' to Restart message
which appears in the Service menu of the
multifunction display. Further information on
the message display can be found under
"Restarting the tire pressure loss warning
system" section (
Y page 336).
Important safety notes The tire pressure warning system does not
warn you of an incorrectly set tire pressure.
Observe the notes on the recommended tire
pressure (
Y page 331).
The tire pressure loss warning system does
not replace the need to regularly check your
vehicle's tire pressures, since an
even loss of
pressure on several tires at the same time
cannot be detected by the tire pressure loss
warning system.
The tire pressure monitor is not able to warn
you of a sudden loss of pressure, e.g. if the
tire is penetrated by a foreign object. In the
event of a sudden loss of pressure, bring the
vehicle to a halt by braking carefully. Avoid
abrupt steering maneuvers.
The function of the tire pressure loss warning
system is limited or delayed if:
R snow chains are mounted on your vehicle's
tires.
R road conditions are wintry.
R you are driving on sand or gravel.
R you adopt a very sporty driving style
(cornering at high speeds or driving with
high rates of acceleration).
R you are towing a very heavy or large trailer.
R you are driving with a heavy load (in the
vehicle or on the roof). Tire pressure
335
Wheels and tires Z
Page 352 of 380
GAWR (Gross Axle Weight Rating)
The GAWR is the maximum
gross axle weight
rating. The actual load on an axle must never
exceed the gross axle weight rating. The
gross axle weight rating can be found on the
vehicle identification plate on the B-pillar on
the driver's side. Speed rating
The speed rating is part of the tire
identification. It specifies the speed
range for
which the tire is approved. GTW (Gross Trailer Weight)
The GTW is the weight of a trailer including
the weight of the load, luggage, accessories
etc. on the trailer. GVW (Gross Vehicle Weight)
The gross vehicle weight includes the weight
of the vehicle including fuel, tools, the spare
wheel, accessories installed, occupants,
luggage and the drawbar noseweight, if
applicable. The gross vehicle weight
must not
exceed the gross vehicle weight rating GVWR
as specified on the vehicle identification plate
on the B-pillar on the driver's side. GVWR (Gross Vehicle Weight Rating)
The GVWR is the maximum
permissible gross
weight of a fully loaded vehicle (the weight of
the vehicle including all accessories,
occupants, fuel, luggage and the drawbar
noseweight, if applicable). The gross vehicle
weight rating is specified on the vehicle
identification plate on the B-pillar on the
driver's side. Maximum loaded vehicle weight
The maximum weight is the sum of the curb
weight of the vehicle, the weight of the
accessories, the total load limit and the
weight of the optional equipment
installed at
the factory. Kilopascal (kPa)
Metric unit for tire pressure. 6.9 kPa
corresponds to 1 psi. Another unit for tire
pressure is bar. 100 kilopascals
(kPa) are the
equivalent of 1 bar. Load index
In addition to the load-bearing
index, the load
index may also be imprinted on the sidewall
of the tire. This specifies the load-bearing
capacity more precisely. Curb weight
The weight of a vehicle with standard
equipment including the maximum capacity
of fuel, oil and coolant.
It also includes the air-
conditioning system and optional equipment
if these are installed in the vehicle, but does
not include passengers or luggage. Maximum load rating
The maximum load rating in kilograms or
pounds is the maximum weight for which a
tire is approved. Maximum permissible tire pressure
Maximum permissible tire pressure for one
tire. 350
Definition of terms for tires and loading
Wheels and tires
Page 354 of 380

Treadwear indicators
Narrow bars (tread wear bars) that are
distributed over the tire tread.
If the tire tread
is level with the bars, the wear limit of 00CD in
(1.6 mm) has been reached. Occupant distribution
The distribution of occupants in a vehicle at
their designated seating positions. Total load limit
Nominal load and luggage load plus 68 kg
(150 lbs)
multiplied by
the number of seats in
the vehicle. Changing a wheel
Flat tire
You can find
information on
what to do in the
event of a flat tire in the "Flat tire" section
(Y page 312).
Information on driving with MOExtended tires
in the event of a flat tire can be found under
"MOExtended tires (tires with run-flat
characteristics" (Y page 313). Rotating the wheels
G
WARNING
Interchanging the front and rear wheels may
severely impair the driving characteristics if
the wheels or tires have
different dimensions.
The wheel brakes or suspension components
may also be damaged. There is a risk of
accident.
Rotate front and rear wheels only if the wheels
and tires are of the same dimensions.
! On vehicles equipped with a tire pressure
monitor, electronic components are
located in the wheel. Tire-mounting tools should not be used
near the valve. This could damage the
electronic components.
Only have tires changed at a qualified
specialist workshop.
Always observe the instructions and safety
notes in the "Mounting a wheel" section
(Y page 353).
The wear patterns on the front and rear tires
differ, depending on the operating
conditions.
Rotate the wheels before a clear wear pattern
has formed on the tires. Front tires typically
wear more on the shoulders and the rear tires
in the center.
If your vehicle's tire configuration allows, you
can rotate the wheels according to the
intervals in the tire manufacturer's warranty
book in your vehicle documents. If no
warranty book is available, the tires should be
rotated every 3,000 to 6,000 miles (5,000 to
10,000 km), or earlier if tire wear requires. Do
not change the direction of wheel rotation.
Clean the contact surfaces of the wheel and
the brake disc thoroughly every time a wheel
is rotated. Check the tire pressures.
Information on changing tires and mounting
the spare wheel ( Y page 352). Direction of rotation
Tires with a specified direction of rotation
have additional benefits, e.g. if
there is a risk
of hydroplaning. You will only gain these
benefits if the correct direction of rotation is
maintained.
An arrow on the sidewall of the tire indicates
its correct direction of rotation. Storing wheels
Store wheels that are not
being used in a cool,
dry and preferably dark place. Protect the
tires from oil, grease, gasoline and diesel. 352
Changing a wheel
Wheels and tires