2013 MERCEDES-BENZ GLK-CLASS SUV display
[x] Cancel search: displayPage 66 of 380

operation is possible using the switches in
the rear compartment.
Driving safety systems
Overview of driving safety systems
In this section, you will
find information about
the following driving safety systems:
R ABS ( Anti-lock Braking System)
R BAS ( Brake Assist System)
R BAS PLUS ( Brake Assist System Plus)
R ESP ®
(Electronic Stability Program)
R EBD ( Electronic Brake force Distribution)
R PRE-SAFE ®
Brake Important safety notes
If you fail to adapt your driving style or
become distracted, the driving safety
systems can neither reduce the risk of
accident nor override the laws of physics.
Driving safety systems are merely aids
designed to assist driving. You are
responsible for the distance to the vehicle in
front, for vehicle speed and for braking in
good time. Always adapt your
driving style to
suit the prevailing road and weather
conditions and maintain a safe distance from
the vehicle in front. Drive carefully.
i The driving safety systems described only
work as effectively as possible when there
is adequate contact between the tires and
the road surface. Please pay special
attention to the notes on tires,
recommended minimum tire tread depths,
etc. (Y page 328).
In wintry driving conditions, always use
winter tires (M+S tires) and if necessary,
snow chains. Only in this way will the
driving safety systems described in this
section work as effectively as possible. ABS (Anti-lock Braking System)
Important safety notes i
Observe the "Important safety notes"
section ( Y page 64). G
WARNING
If ABS is faulty, the wheels could lock when
braking. The steerability and braking
characteristics may be severely impaired.
Additionally, further driving safety systems
are deactivated. There is an
increased danger
of skidding and accidents.
Drive on carefully. Have ABS checked
immediately at a qualified specialist
workshop.
When ABS is malfunctioning, other systems,
including driving safety systems, will also
become inoperative. Observe the information
on the ABS warning lamp ( Y page 259) and
display messages which may be shown in the
instrument cluster (Y page 232).
ABS regulates brake pressure in such a way
that the wheels do not lock when you brake.
This allows you to continue steering the
vehicle when braking.
ABS works from a speed of about 5 mph
(8 km/h) upwards, regardless of road-surface
conditions. ABS works on slippery surfaces,
even if you only brake gently.
The yellow 0025 ABS warning lamp in the
instrument cluster lights up when the ignition
is switched on. It goes out when the engine is
running.
Braking X
If ABS intervenes: continue to depress the
brake pedal vigorously until the braking
situation is over.
X To make a full brake application:
depress the brake pedal with full force.
If ABS intervenes when braking, you will feel
a pulsing in the brake pedal.
The pulsating brake pedal can be an
indication of hazardous road conditions, and 64
Driving safety systemsSafety
Page 69 of 380

If the
00E5 warning lamp and the 00BB
warning lamp are lit continuously,
ESP®
is not
available due to a malfunction.
Observe the information on warning lamps
(Y page 261) and display messages which
may be shown in the instrument cluster
(Y page 232).
i Only use wheels with the recommended
tire sizes. Only then will ESP ®
function
properly.
Characteristics of ESP General information
ESP
®
is activated automatically when the
engine is started.
If ESP ®
intervenes, the 00E5 ESP®
warning
lamp flashes in the instrument cluster.
If ESP ®
intervenes:
X Do not deactivate ESP ®
under any
circumstances.
X Only depress the accelerator pedal as far
as necessary when pulling away.
X Adapt your driving style to suit the
prevailing road and weather conditions.
Vehicles with the ECO start/stop function
The ECO start/stop function switches the
engine off automatically when the vehicle
stops moving. The engine starts
automatically when the driver wants to pull
away again. ESP ®
remains in its previously
selected status. Example: if ESP ®
was
deactivated before the engine was switched
off, ESP ®
remains deactivated when the
engine is switched on again.
Deactivating/activating ESP ®Important safety notes
You can select between the following states
of ESP:
R
ESP ®
is activated.
R ESP ®
is deactivated. G
WARNING
If you deactivate ESP ®
, ESP ®
no longer
stabilizes the vehicle. There is an increased
risk of skidding and an accident.
Only deactivate ESP ®
in the situations
described in the following.
It may be best to deactivate ESP ®
in the
following situations:
R when using snow chains
R in deep snow
R on sand or gravel
i Activate ESP ®
as soon as the situations
described above no longer apply.
ESP®
will
otherwise not be able to stabilize the
vehicle if the vehicle starts to skid or a
wheel starts to spin.
Deactivating/activating ESP ® X
To switch off: press button 0043.
The 00BB ESP ®
OFF warning lamp in the
instrument cluster lights up.
X To switch on: press button 0043.
The 00BB ESP ®
OFF warning lamp in the
instrument cluster goes out.
Characteristics when ESP ®
is deactivated
If ESP ®
is
deactivated and one or more wheels
start to spin, the 00E5 ESP®
warning lamp in
the instrument cluster flashes. In such
situations, ESP ®
will not stabilize the vehicle. Driving safety systems
67
Safety Z
Page 70 of 380

If you deactivate ESP
®
:
R ESP ®
no longer improves driving stability.
R the engine's torque is
no
longer limited and
the drive wheels are able to spin. The
spinning of the wheels results in a cutting
action, which provides better grip.
R traction control is still activated.
R ESP ®
still provides support when you
brake.
Deactivating/activating ESP ®Important safety notes
You can select between the following
statuses of ESP:
R
ESP ®
is activated.
R SPORT handling mode is activated.
R ESP ®
is deactivated. G
WARNING
When SPORT handling mode is activated,
there is a greater risk of skidding and
accidents.
Only activate SPORT handling mode in the
situations described in the following. G
WARNING
If you deactivate ESP ®
, ESP ®
no longer
stabilizes the vehicle. There is an increased
risk of skidding and an accident.
Only deactivate ESP ®
in the situations
described in the following.
In the following
situations, it
may be better to
activate SPORT handling mode or deactivate
ESP ®
:
R when using snow chains
R in deep snow
R on sand or gravel
R on designated roads when the vehicle's
own oversteering and understeering
characteristics are desired Driving in SPORT handling mode or without
ESP
®
requires an extremely qualified and
experienced driver.
i Activate ESP ®
as soon as the situations
described above no longer apply.
ESP®
will
otherwise not be able to stabilize the
vehicle if the vehicle starts to skid or a
wheel starts to spin.
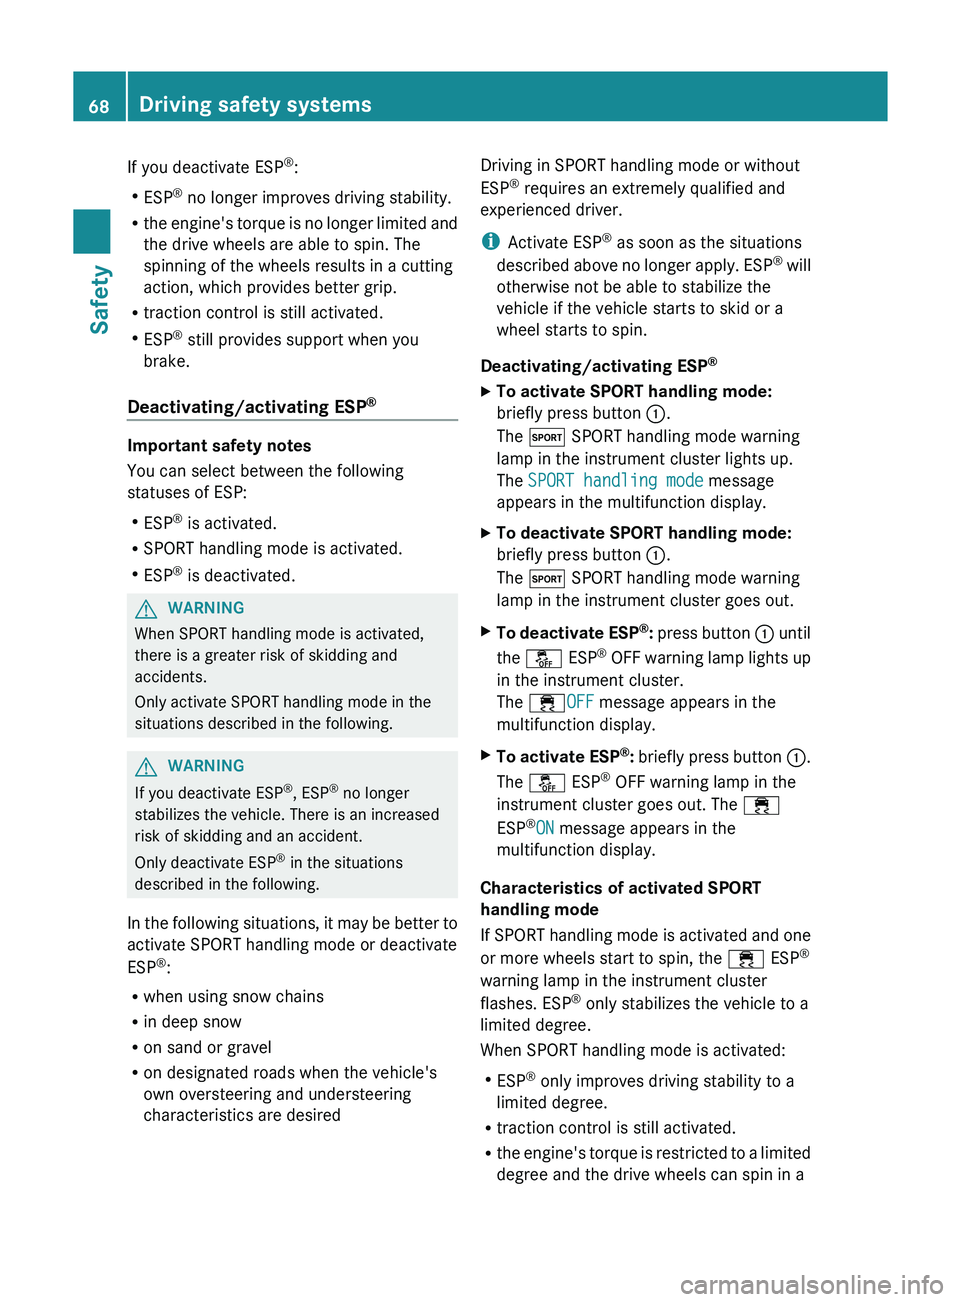
Deactivating/activating ESP ®
X To activate SPORT handling mode:
briefly press button 0043.
The 0074 SPORT handling mode warning
lamp in the instrument cluster lights up.
The SPORT handling mode message
appears in the multifunction display.
X To deactivate SPORT handling mode:
briefly press button 0043.
The 0074 SPORT handling mode warning
lamp in the instrument cluster goes out.
X To deactivate ESP ®
: press button
0043 until
the 00BB
ESP®
OFF warning lamp lights up
in the instrument cluster.
The 00E5OFF message appears in the
multifunction display.
X To activate ESP ®
: briefly press button 0043.
The
00BB ESP ®
OFF warning lamp in the
instrument cluster goes out. The 00E5
ESP ®
ON message appears in the
multifunction display.
Characteristics of activated SPORT
handling mode
If SPORT handling mode is
activated and one
or more wheels start to spin, the 00E5 ESP ®
warning lamp in the instrument cluster
flashes. ESP ®
only stabilizes the vehicle to a
limited degree.
When SPORT handling mode is activated:
R ESP ®
only improves driving stability to a
limited degree.
R traction control is still activated.
R the engine's torque is restricted to a limited
degree and the drive wheels can spin in a68
Driving safety systems
Safety
Page 71 of 380

controlled manner. The spinning of the
wheels results in a cutting action, which
provides better grip.
R ESP ®
still provides support when you
brake.
Characteristics when ESP ®
is deactivated
If
ESP ®
is deactivated and one or more wheels
start to spin, the 00E5 ESP®
warning lamp in
the instrument cluster does not flash. In such
situations, ESP ®
will not stabilize the vehicle.
If you deactivate ESP ®
:
R ESP ®
no longer improves driving stability.
R the engine's torque is no longer limited and
the drive wheels are able to spin without
restriction. The spinning of the wheels
results in a cutting action, which provides
better grip.
R traction control is still activated.
R PRE-SAFE ®
Brake is no longer available;
nor is it activated if you brake with
assistance from ESP ®
.
R ESP ®
still provides support when you
brake.
ESP ®
trailer stabilization G
WARNING
If road and weather conditions are poor,
trailer stabilization will not be
able to prevent
the vehicle/trailer combination from
swerving. Trailers with a high center of gravity
can tip over before ESP ®
can detect this.
There is a risk of an accident.
Always adapt your driving style to the
prevailing road and weather conditions.
If your vehicle with trailer (vehicle/trailer
combination) begins to lurch, you can only
stabilize the vehicle/trailer combination by
depressing the brake firmly.
In this situation, ESP ®
assists you and can
detect if the vehicle/trailer combination
begins to lurch. ESP ®
slows the vehicle down
by braking and limiting the engine output until the vehicle/trailer combination has
stabilized.
Trailer
stabilization is active above
speeds of
about 40 mph (65 km/h).
Trailer stabilization does not work if ESP ®
is
deactivated because of a malfunction. EBD (electronic brake force
distribution)
i Observe the "Important safety notes"
section ( Y page 64). G
WARNING
If EBD has malfunctioned, the rear wheels can
still lock, e.g. under full braking. This
increases the risk of skidding
and an accident.
You should therefore adapt your driving style
to the different handling characteristics. Have
the brake system checked at a qualified
specialist workshop.
Observe information regarding indicator and
warning lamps ( Y page 259) as well as
display messages ( Y page 233).
EBD monitors and controls the brake
pressure on the rear wheels to improve
driving stability while braking. PRE-SAFE
®
Brake
i Observe the "Important safety notes"
section ( Y page 64).
PRE-SAFE ®
Brake is only available
in vehicles
with DISTRONIC PLUS.
If PRE-SAFE ®
Brake is to aid you, the radar
sensor system must be:
R activated (Y page 229)
R operational
With the help of the radar sensor system,
PRE-SAFE ®
Brake can detect obstacles that
are in front of your vehicle for an extended
period of time.
PRE-SAFE ®
Brake can help you to minimize
the risk of a collision with a vehicle ahead or Driving safety systems
69
Safety Z
Page 73 of 380

R
interference by other radar sources
R there are strong radar reflections, for
example in parking garages
R a narrow vehicle traveling in front, e.g. a
motorbike
R a vehicle traveling in front
on a different line
relative to the center of your vehicle G
WARNING
PRE-SAFE ®
Brake does not react:
R to people or animals
R to oncoming vehicles
R to crossing traffic
R when cornering
As a result, PRE-SAFE ®
Brake may neither
give warnings nor intervene in all critical
situations. There is a risk of an accident.
Always pay careful attention to the traffic
situation and be ready to brake.
In order to maintain an appropriate distance
from the vehicle in front and thus prevent a
collision, you must apply the
brakes yourself.
X To activate/deactivate: activate or
deactivate PRE-SAFE ®
Brake in the on-
board computer ( Y page 225).
When PRE-SAFE ®
Brake is activated, the
00C7 symbol appears in the multifunction
display as long as the HOLD function is
deactivated ( Y page 179).
On vehicles with Parking Guidance, the
00C7 symbol is displayed when position P
is engaged or you are driving faster than
22 mph (35 km/h ).
Following damage to the front end of the
vehicle, have the configuration
and
operation
of the radar sensors checked at a qualified
specialist workshop. This also applies to
collisions at low speeds where there is no
visible damage to the front of the vehicle. Theft deterrent locking system
Immobilizer
The immobilizer prevents your vehicle from
being started without the correct SmartKey.
When leaving the vehicle, always take the
SmartKey with you and lock the vehicle. The
engine can be started by anyone with a valid
SmartKey that is left inside the vehicle.
X To activate with the SmartKey: remove
the SmartKey from the ignition lock.
X To activate with KEYLESS-GO: switch the
ignition off and open the driver's door.
X To deactivate: switch on the ignition.
i The immobilizer is always deactivated
when you start the engine.
In the event that the engine cannot be
started when the starter battery is fully
charged, the immobilizer may be faulty.
Contact an authorized Mercedes-Benz
Center or call 1-800-FOR-MERCedes
(in the
USA) or 1-800-387-0100 (in Canada). ATA (anti-theft alarm system)
A visual and audible alarm is triggered if the
alarm system is armed and you open:
R a door
R the vehicle with the mechanical key
R the tailgate
R the hood
The alarm is not switched off, even if you
close the open door that triggered it, for
example. Theft deterrent locking system
71
Safety Z
Page 98 of 380

Useful information
i This Operator's Manual describes all
models and all standard and optional
equipment of your vehicle available at the
time of publication of the Operator's
Manual. Country-specific differences are
possible. Please note that your
vehicle may
not be equipped with all features
described. This also applies to safety-
related systems and functions.
i Read the information on qualified
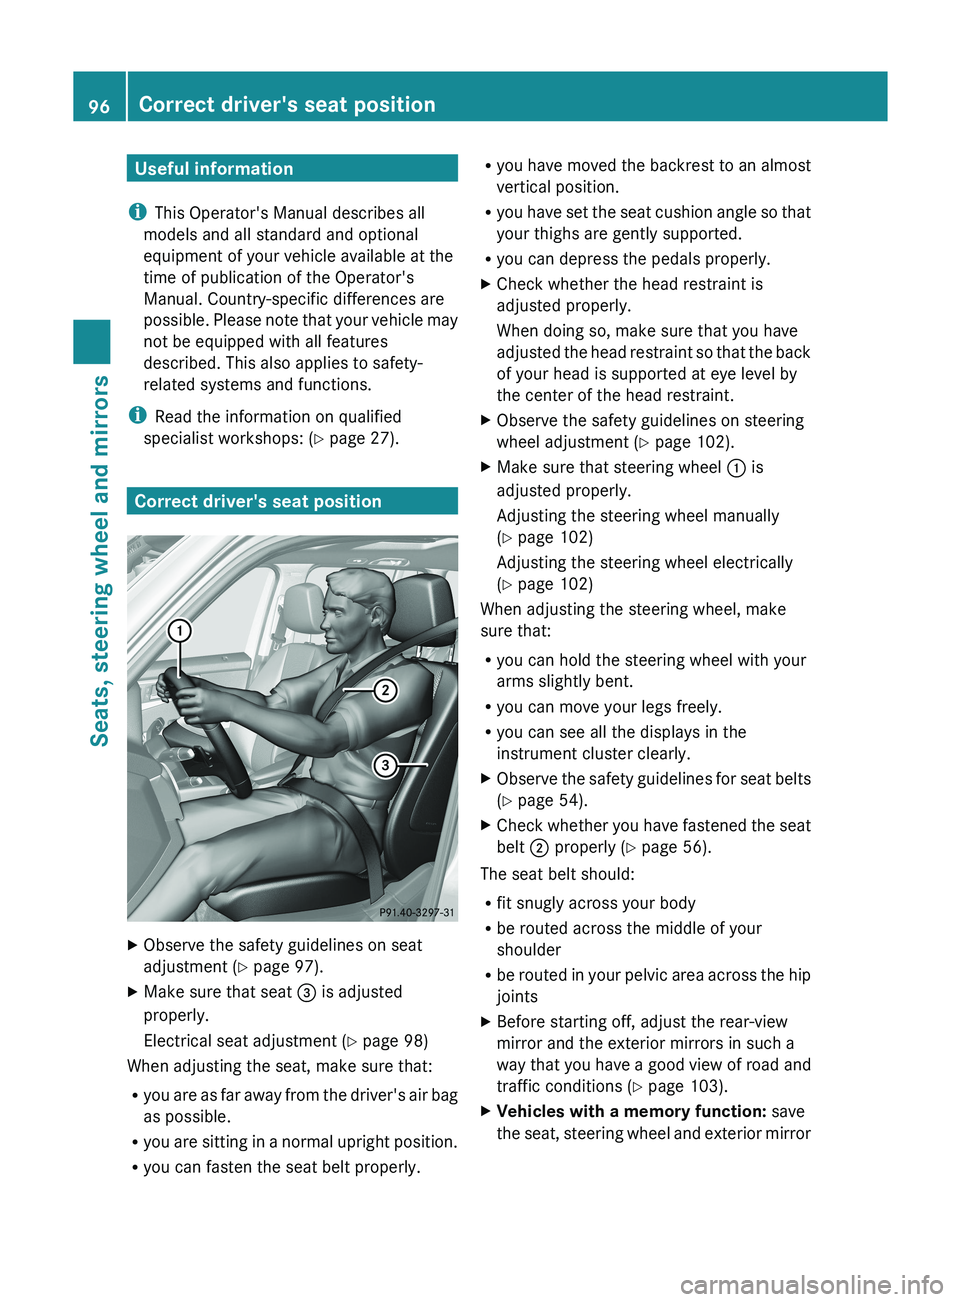
specialist workshops: ( Y page 27).Correct driver's seat position
X
Observe the safety guidelines on seat
adjustment ( Y page 97).
X Make sure that seat 0087 is adjusted
properly.
Electrical seat adjustment ( Y page 98)
When adjusting the seat, make sure that:
R you are as far away
from the driver's air bag
as possible.
R you are sitting in a normal upright position.
R you can fasten the seat belt properly. R
you have moved the backrest
to an almost
vertical position.
R you have set the seat cushion angle so that
your thighs are gently supported.
R you can depress the pedals properly.
X Check whether the head restraint is
adjusted properly.
When doing so, make sure that you have
adjusted the head restraint so
that the back
of your head is supported at eye level by
the center of the head restraint.
X Observe the safety guidelines on steering
wheel adjustment ( Y page 102).
X Make sure that steering wheel 0043 is
adjusted properly.
Adjusting the steering wheel manually
(Y page 102)
Adjusting the steering wheel electrically
(Y page 102)
When adjusting the steering wheel, make
sure that:
R you can hold the steering wheel with your
arms slightly bent.
R you can move your legs freely.
R you can see all the displays in the
instrument cluster clearly.
X Observe the safety guidelines for seat belts
(Y page 54).
X Check whether you have fastened the seat
belt 0044 properly ( Y page 56).
The seat belt should:
R fit snugly across your body
R be routed across the middle of your
shoulder
R be routed in your
pelvic
area across the hip
joints
X Before starting off, adjust the rear-view
mirror and the exterior mirrors in such a
way that you have a
good view of road and
traffic conditions (Y page 103).
X Vehicles with a memory function: save
the seat, steering wheel and
exterior mirror96
Correct driver's seat position
Seats, steering wheel and mirrors
Page 132 of 380

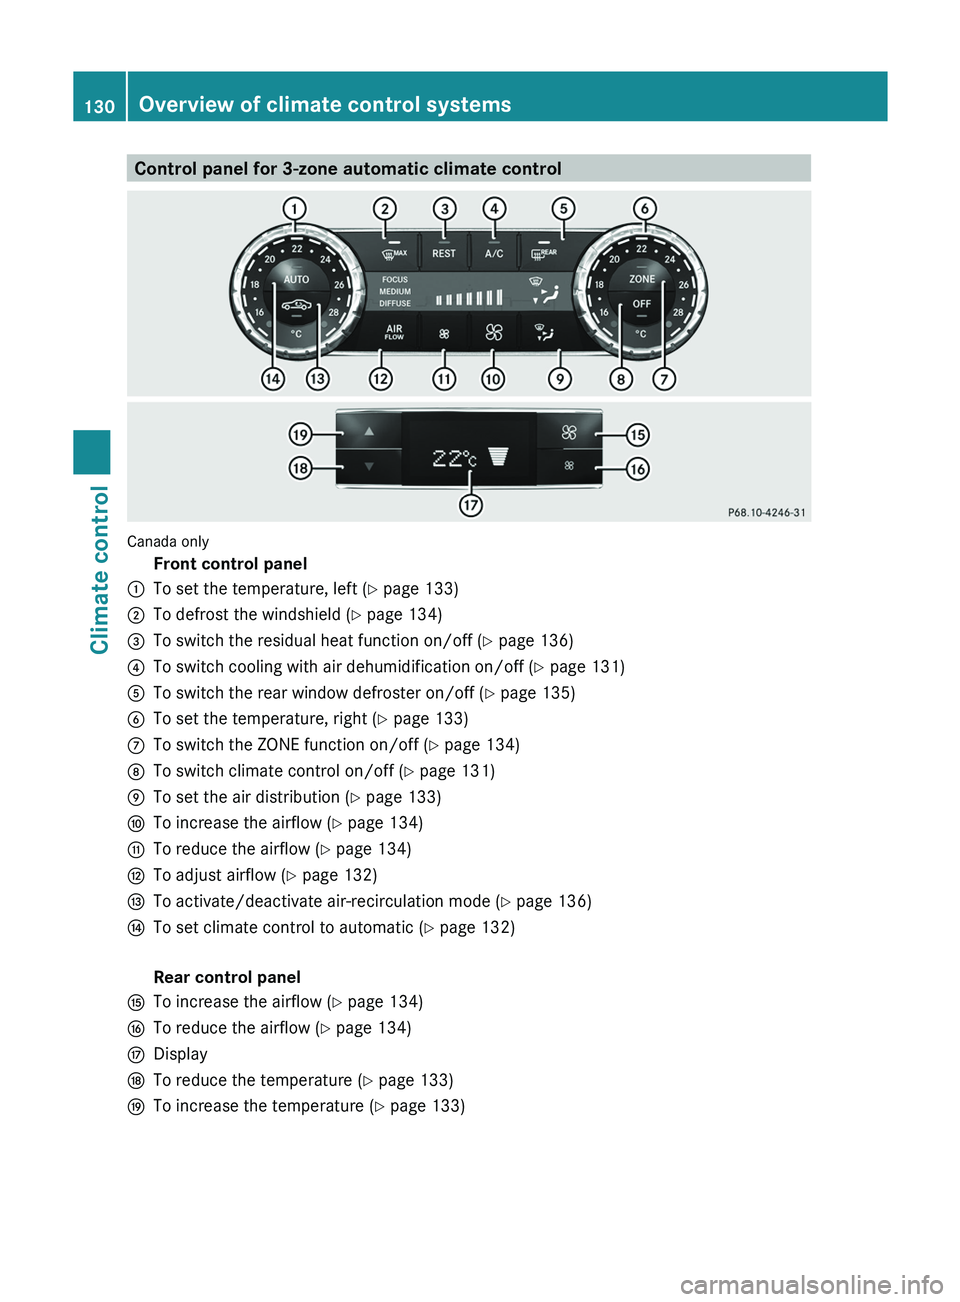
Control panel for 3-zone automatic climate control
Canada only
Front control panel
0043 To set the temperature, left (Y page 133)
0044 To defrost the windshield (Y page 134)
0087 To switch the residual heat function on/off (Y page 136)
0085 To switch cooling with air dehumidification on/off ( Y page 131)
0083 To switch the rear window defroster on/off (Y page 135)
0084 To set the temperature, right (Y page 133)
006B To switch the ZONE function on/off (Y page 134)
006C To switch climate control on/off (Y page 131)
006D To set the air distribution ( Y page 133)
006E To increase the airflow ( Y page 134)
006F To reduce the airflow ( Y page 134)
0070 To adjust airflow ( Y page 132)
0071 To activate/deactivate air-recirculation mode ( Y page 136)
0072 To set climate control to automatic ( Y page 132)
Rear control panel
0073 To increase the airflow ( Y page 134)
0074 To reduce the airflow ( Y page 134)
0075 Display
0076 To reduce the temperature ( Y page 133)
0077 To increase the temperature ( Y page 133)130
Overview of climate control systemsClimate control
Page 134 of 380

dehumidified according to the temperature
selected.
Condensation may drip from
the
underside of
the vehicle when it is in cooling mode. This is
normal and not a sign that there is a
malfunction.
Activating/deactivating X
To activate: press the 005A button.
The indicator lamp in the 005A
button lights
up.
i When the "Cooling with air
dehumidification" function is activated,
one of the indicator lamps on the auxiliary
heating button will light up
on vehicles with
auxiliary heating.
X To deactivate: press the 005A button.
The indicator lamp in the 005A
button goes
out. The "Cooling with air dehumidification"
function has a delayed switch-off feature.
Problems with the "Cooling with air
dehumidification" function When you press the
005A button, the
indicator lamp in the button flashes three
times or remains off. You
can no longer switch
on the cooling with air dehumidification
function.
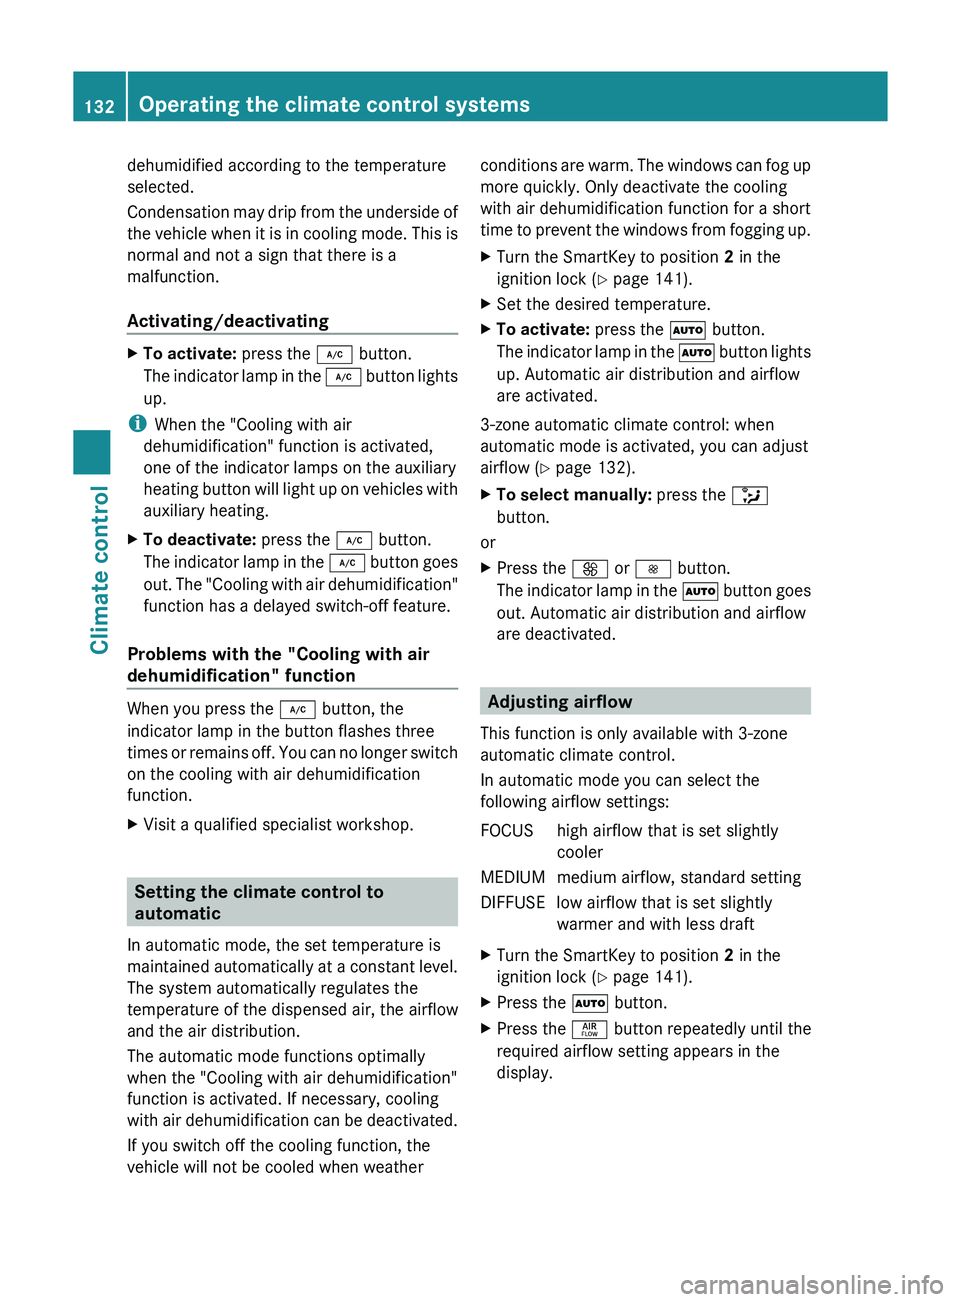
X Visit a qualified specialist workshop. Setting the climate control to
automatic
In automatic mode, the set temperature is
maintained automatically at a constant
level.
The system automatically regulates the
temperature of the dispensed air, the airflow
and the air distribution.
The automatic mode functions optimally
when the "Cooling with air dehumidification"
function is activated. If necessary, cooling
with air dehumidification can be deactivated.
If you switch off the cooling function, the
vehicle will not be cooled when weather conditions are warm. The windows can fog up
more quickly. Only deactivate the cooling
with air dehumidification function for a short
time
to prevent the windows
from fogging up.
X Turn the SmartKey to position 2 in the
ignition lock (Y page 141).
X Set the desired temperature.
X To activate: press the 0058 button.
The indicator lamp in the 0058
button lights
up. Automatic air distribution and airflow
are activated.
3-zone automatic climate control: when
automatic mode is activated, you can adjust
airflow (Y page 132).
X To select manually: press the 008F
button.
or
X Press the
0097 or 0095 button.
The indicator lamp in the 0058
button goes
out. Automatic air distribution and airflow
are deactivated. Adjusting airflow
This function is only available with 3-zone
automatic climate control.
In automatic mode you can select the
following airflow settings:
FOCUS high airflow that is set slightly cooler
MEDIUM medium airflow, standard setting
DIFFUSE low airflow that is set slightly warmer and with less draft
X Turn the SmartKey to position 2 in the
ignition lock (Y page 141).
X Press the 0058 button.
X Press the 00F0 button repeatedly until the
required airflow setting appears in the
display. 132
Operating the climate control systems
Climate control