2013 MERCEDES-BENZ GLK-CLASS SUV windshield wipers
[x] Cancel search: windshield wipersPage 125 of 380
X
Remove the SmartKey from the ignition
lock.
X Fold wiper arm 0043 away from the rear
window until it engages.
X Position wiper blade 0044 at a right angle to
wiper arm 0043.
X Hold wiper arm 0043 and press wiper
blade 0044 in the direction of the arrow until
it releases.
X Remove wiper blade 0044.
Installing the wiper blade
X Place new wiper blade 0044 onto wiper
arm 0043.
X Hold wiper arm 0043 and press wiper
blade 0044 in the opposite direction to the
arrow until it engages.
X Make sure that wiper blade 0044 is seated
correctly.
X Position wiper blade 0044 parallel to wiper
arm 0043.
X Fold wiper arm 0043 back onto the rear
window. Windshield wipers
123Lights and windshield wipers Z
Page 126 of 380
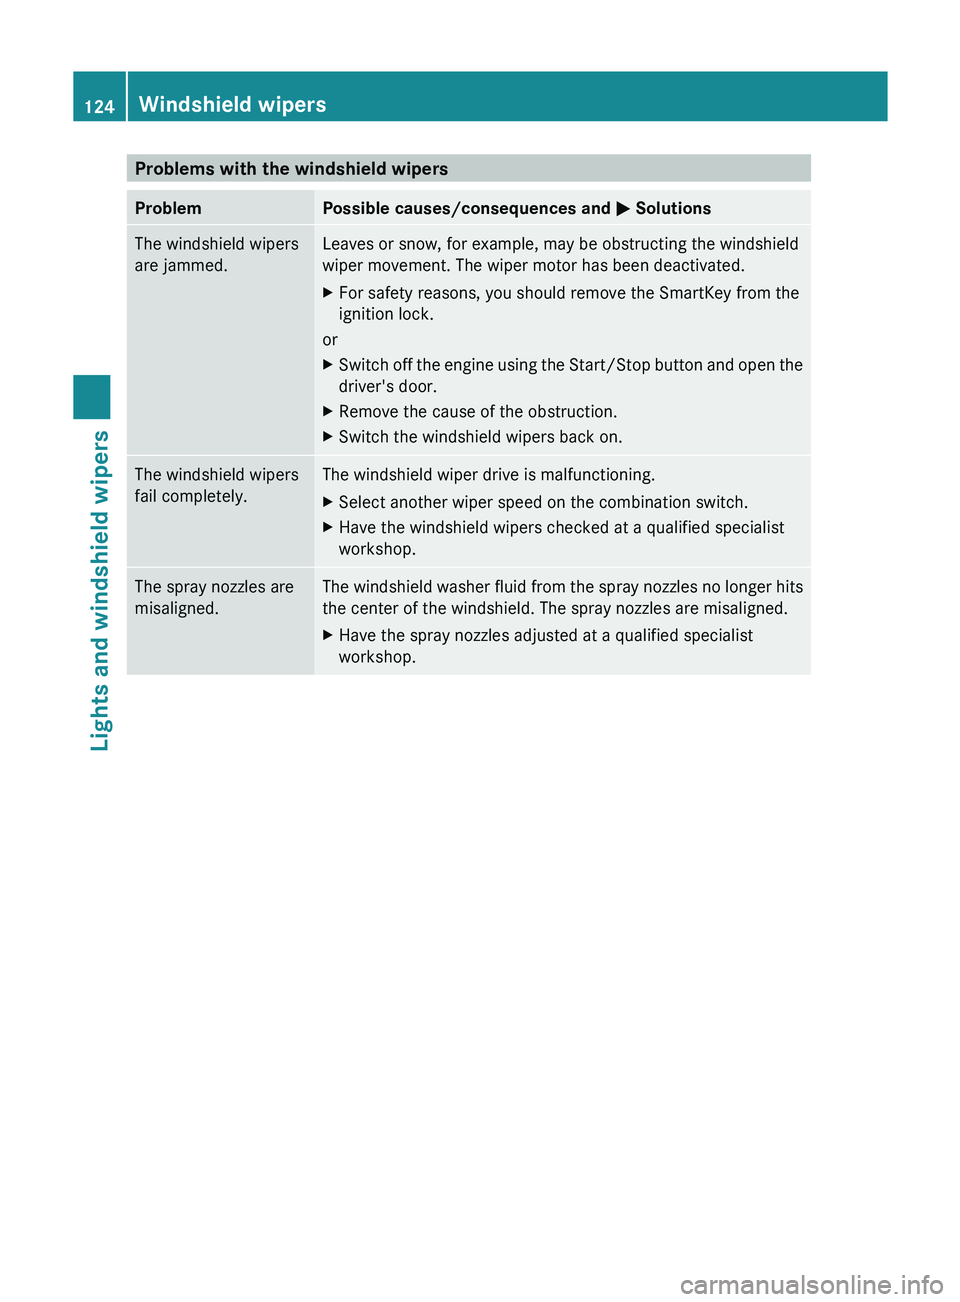
Problems with the windshield wipers
Problem Possible causes/consequences and
0050 SolutionsThe windshield wipers
are jammed. Leaves or snow, for example, may be obstructing the windshield
wiper movement. The wiper motor has been deactivated.
X
For safety reasons, you should remove the SmartKey from the
ignition lock.
or
X Switch off the engine using the Start/Stop button and open the
driver's door.
X Remove the cause of the obstruction.
X Switch the windshield wipers back on. The windshield wipers
fail completely. The windshield wiper drive is malfunctioning.
X
Select another wiper speed on the combination switch.
X Have the windshield wipers checked at a qualified specialist
workshop. The spray nozzles are
misaligned. The windshield washer fluid from the spray nozzles no longer hits
the center of the windshield. The spray nozzles are misaligned.
X
Have the spray nozzles adjusted at a qualified specialist
workshop.124
Windshield wipersLights and windshield wipers
Page 137 of 380

X
Press the 0058 button.
The indicator lamp in the 0064
button goes
out. Airflow and air distribution are set to
automatic mode.
or
X Turn temperature control 0043 or 0084
clockwise or counter-clockwise
(Y page 127), ( Y page 130).
or
X Press the 0097 or 0095 button. MAX COOL maximum cooling
The MAX COOL function is only available in
vehicles for the USA.
MAX COOL is only operational when the
engine is running.
When you activate MAX COOL, climate
control switches to the following functions:
R maximum cooling
R maximum airflow
R air-recirculation mode on
X To activate: press the 00C9 button.
The indicator lamp in the button lights up.
X To activate: press the 00C9 button again.
The indicator lamp goes out.
The previously
selected settings are restored. Defrosting the windows
Windows fogged up on the inside X
Activate the 005A cooling with air
dehumidification function.
X Activate automatic mode 0058.
X Adjust the side air vents so that the warmed
air is directed to the side windows.
X If the windows continue to fog up, activate
the "windshield defrosting" function
(Y page 134).
i You should only select this setting until
the windshield is clear again. Windows fogged up on the outside X
Activate the windshield wipers.
X Press the 008F button repeatedly until the
009B or 009C symbol appears in the
display.
X Adjust the side air vents so that no air is
directed to the side windows. Rear window defroster
Activating/deactivating The rear window defroster has a high current
draw. You should therefore switch it off as
soon as the rear window is clear. Otherwise,
the rear window defroster switches off
automatically after several minutes.
If the battery voltage is too low, the rear
window defroster may switch off.
X
Turn the SmartKey to position 2 in the
ignition lock (Y page 141).
X Press the 006C button.
The indicator lamp in the 006C
button lights
up or goes out. Operating the climate control systems
135Climate control
Page 143 of 380
for example, the power steering and the brake
boosting effect. You will
require
considerably
more effort to steer and brake. There is a risk
of an accident.
Do not switch off the ignition while driving. G
WARNING
If the parking brake has not been fully
released when driving, the parking
brake can:
R overheat and cause a fire
R lose its hold function.
There is a risk of fire and an accident. Release
the parking brake fully before driving off.
! Warm up the engine quickly. Do not use
the engine's full performance until it has
reached operating temperature.
Only shift the automatic transmission to
the desired drive position when the vehicle
is stationary.
Where possible, avoid spinning the drive
wheels when pulling away on slippery
roads. You could otherwise damage the
drive train. Key positions
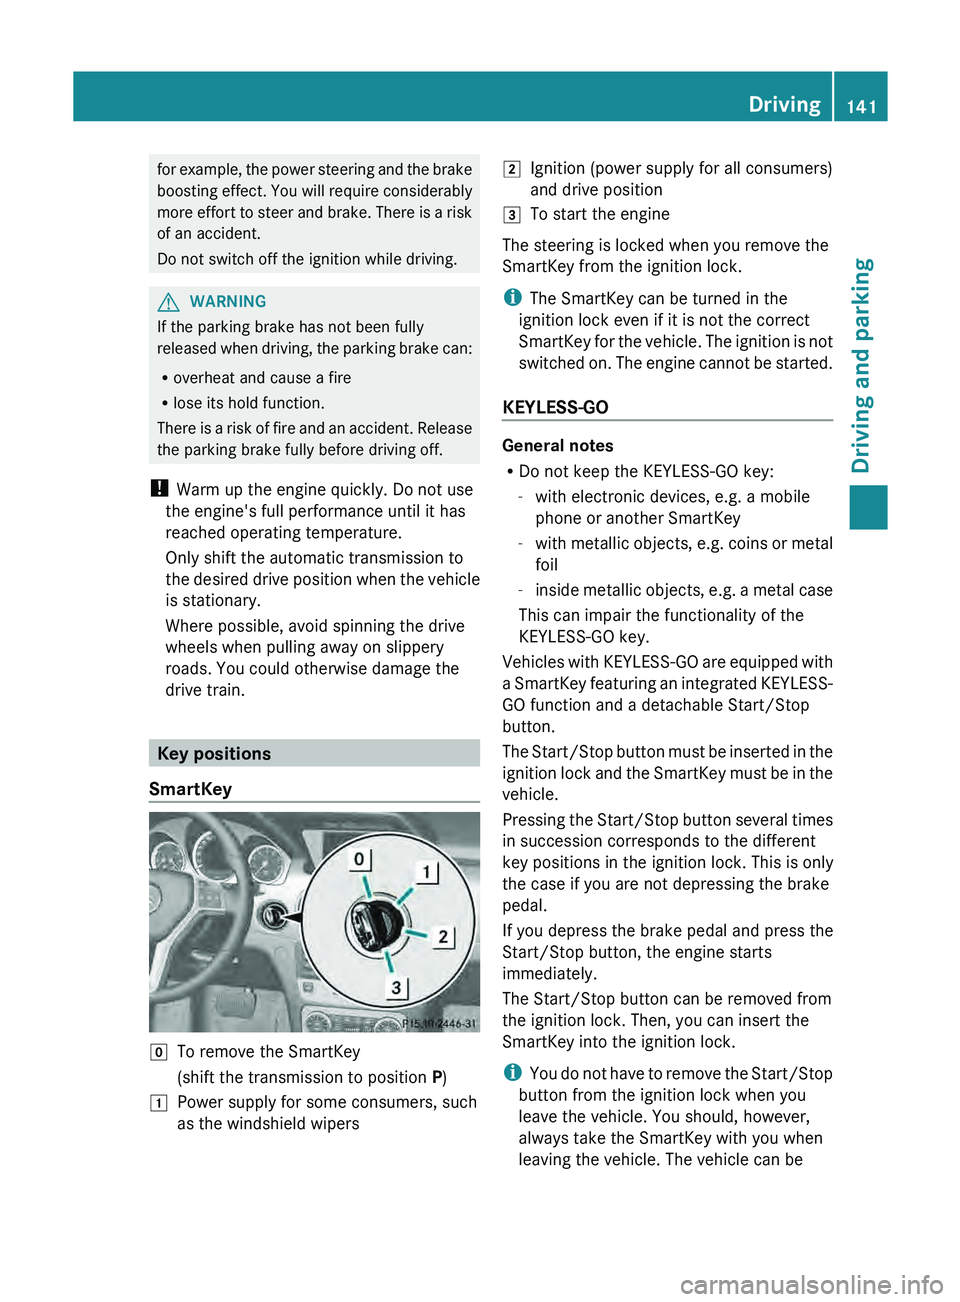
SmartKey 005A
To remove the SmartKey
(shift the transmission to position P)
0047 Power supply for some consumers, such
as the windshield wipers 0048
Ignition (power supply for all consumers)
and drive position
0049 To start the engine
The steering is locked when you remove the
SmartKey from the ignition lock.
i The SmartKey can be turned in the
ignition lock even if it is not the correct
SmartKey for the vehicle. The
ignition is not
switched on. The engine cannot be started.
KEYLESS-GO General notes
R
Do not keep the KEYLESS-GO key:
-with electronic devices, e.g. a mobile
phone or another SmartKey
- with metallic
objects, e.g.
coins
or metal
foil
- inside metallic objects, e.g. a metal case
This can impair the functionality of the
KEYLESS-GO key.
Vehicles with KEYLESS-GO are equipped with
a SmartKey featuring an integrated KEYLESS-
GO function and a detachable Start/Stop
button.
The Start/Stop button must be inserted in the
ignition lock and the SmartKey must be in the
vehicle.
Pressing the Start/Stop button several times
in succession corresponds to the different
key positions in the ignition lock. This is only
the case if you are not depressing the brake
pedal.
If you depress the brake pedal and press the
Start/Stop button, the engine starts
immediately.
The Start/Stop button can be removed from
the ignition lock. Then, you can insert the
SmartKey into the ignition lock.
i You do not have to remove the Start/Stop
button from the ignition lock when you
leave the vehicle. You should, however,
always take the SmartKey with you when
leaving the vehicle. The vehicle can be Driving
141
Driving and parking Z
Page 144 of 380
started with the Start/Stop button if the
SmartKey is in the vehicle. Electrically
powered equipment can be operated.
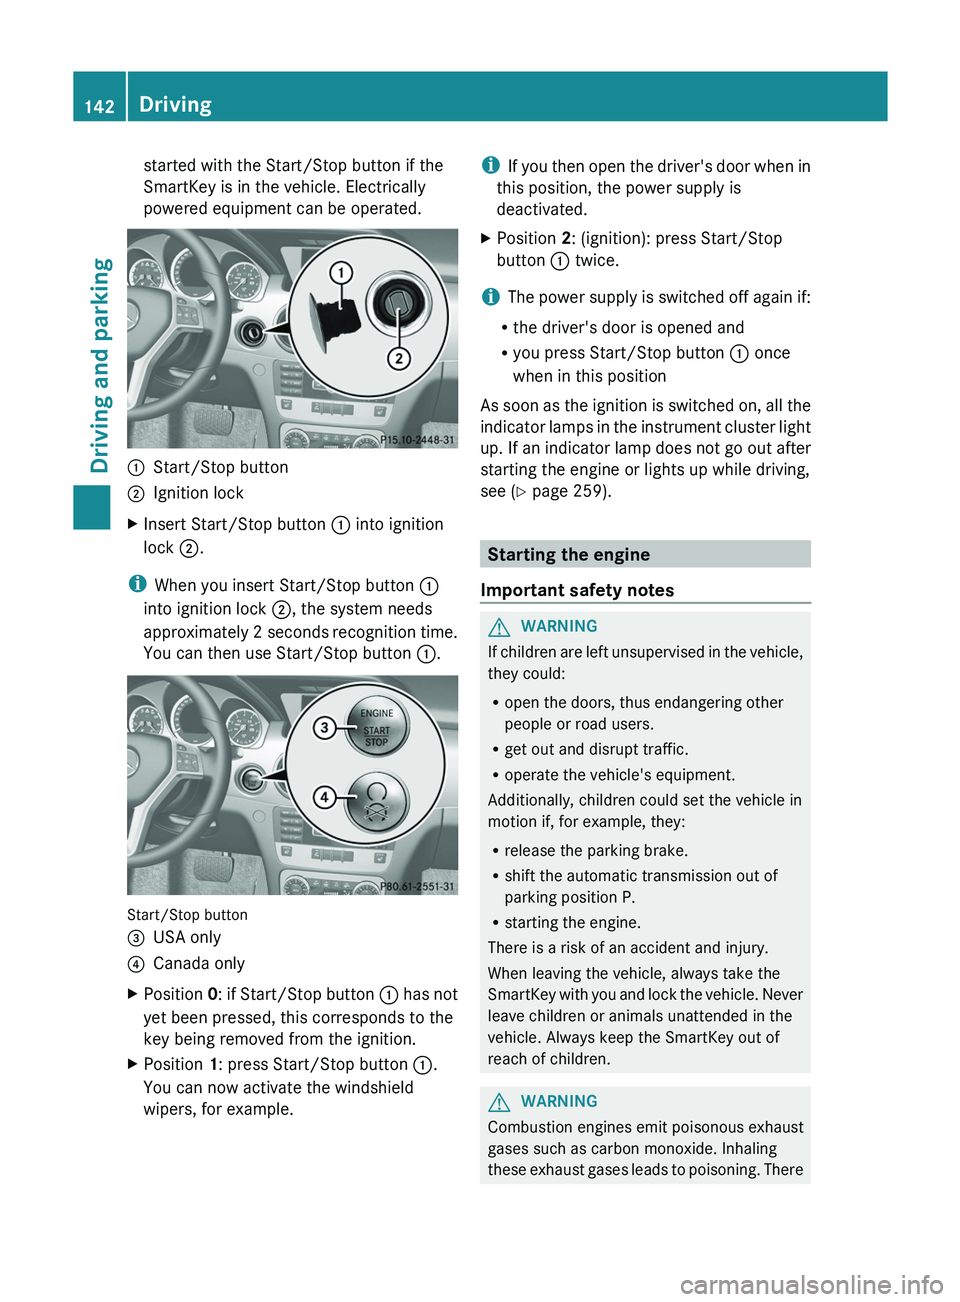
0043
Start/Stop button
0044 Ignition lock
X Insert Start/Stop button 0043 into ignition
lock 0044.
i When you insert Start/Stop button 0043
into ignition lock 0044, the system needs
approximately 2 seconds recognition
time.
You can then use Start/Stop button 0043
.Start/Stop button
0087
USA only
0085 Canada only
X Position 0: if Start/Stop button
0043 has not
yet been pressed, this corresponds to the
key being removed from the ignition.
X Position
1: press Start/Stop button 0043.
You can now activate the windshield
wipers, for example. i
If you then open the
driver's door when in
this position, the power supply is
deactivated.
X Position 2: (ignition): press Start/Stop
button 0043 twice.
i The power supply is switched off again if:
R the driver's door is opened and
R you press Start/Stop button 0043 once
when in this position
As soon as
the ignition is switched on, all the
indicator lamps in the instrument cluster light
up. If an indicator lamp does not go out after
starting the engine or lights up while driving,
see ( Y page 259). Starting the engine
Important safety notes G
WARNING
If children are left unsupervised in the vehicle,
they could:
R open the doors, thus endangering other
people or road users.
R get out and disrupt traffic.
R operate the vehicle's equipment.
Additionally, children could set the vehicle in
motion if, for example, they:
R release the parking brake.
R shift the automatic transmission out of
parking position P.
R starting the engine.
There is a risk of an accident and injury.
When leaving the vehicle, always take the
SmartKey with you and lock
the vehicle. Never
leave children or animals unattended in the
vehicle. Always keep the SmartKey out of
reach of children. G
WARNING
Combustion engines emit poisonous exhaust
gases such as carbon monoxide. Inhaling
these exhaust gases leads to
poisoning. There142
Driving
Driving and parking
Page 297 of 380
X
Push a round pen into opening
0087(Y page 294) for approximately three
seconds.
The zone currently selected appears in
compass display 0044(Y page 294).
X To select the zone: push
a round
pen into
opening 0087(Y page 294) until the desired
zone is selected.
If, after a few seconds, the display in
compass display 0044(Y page 294) changes
direction, the zone has been selected.
Calibrating the compass X
Make sure that there is sufficient space for
you to drive in a circle without impeding
traffic.
In order to calibrate the compass correctly,
do the following:
R calibrate the compass in the open and not
in the vicinity of steel structures or high-
voltage transmission lines.
R switch off electrical consumers such
as the
climate control, windshield wipers or rear
window defroster.
R close all doors and the tailgate.
X Switch on the ignition.
X Push a round pen into opening
0087(Y page 294) for approximately six
seconds, until symbol C is shown in
compass display 0044(Y page 294).
X Drive your vehicle in a full circle at
approximately 3 mph (5 km/h) to 6 mph
(10 km/h).
When the
calibration has successfully been
completed, the current direction is shown
in compass display 0044(Y page 294).Floormat on the driver's side
G
WARNING
Objects in the driver's footwell can restrict the
pedal travel or obstruct a depressed pedal. The operating and road safety of the vehicle
is jeopardized. There is a risk of an accident.
Make sure that all objects in the vehicle are
stowed correctly, and that they cannot enter
the driver's footwell. Install the floormats
securely and as specified in order to ensure
sufficient clearance for the
pedals.
Do not use
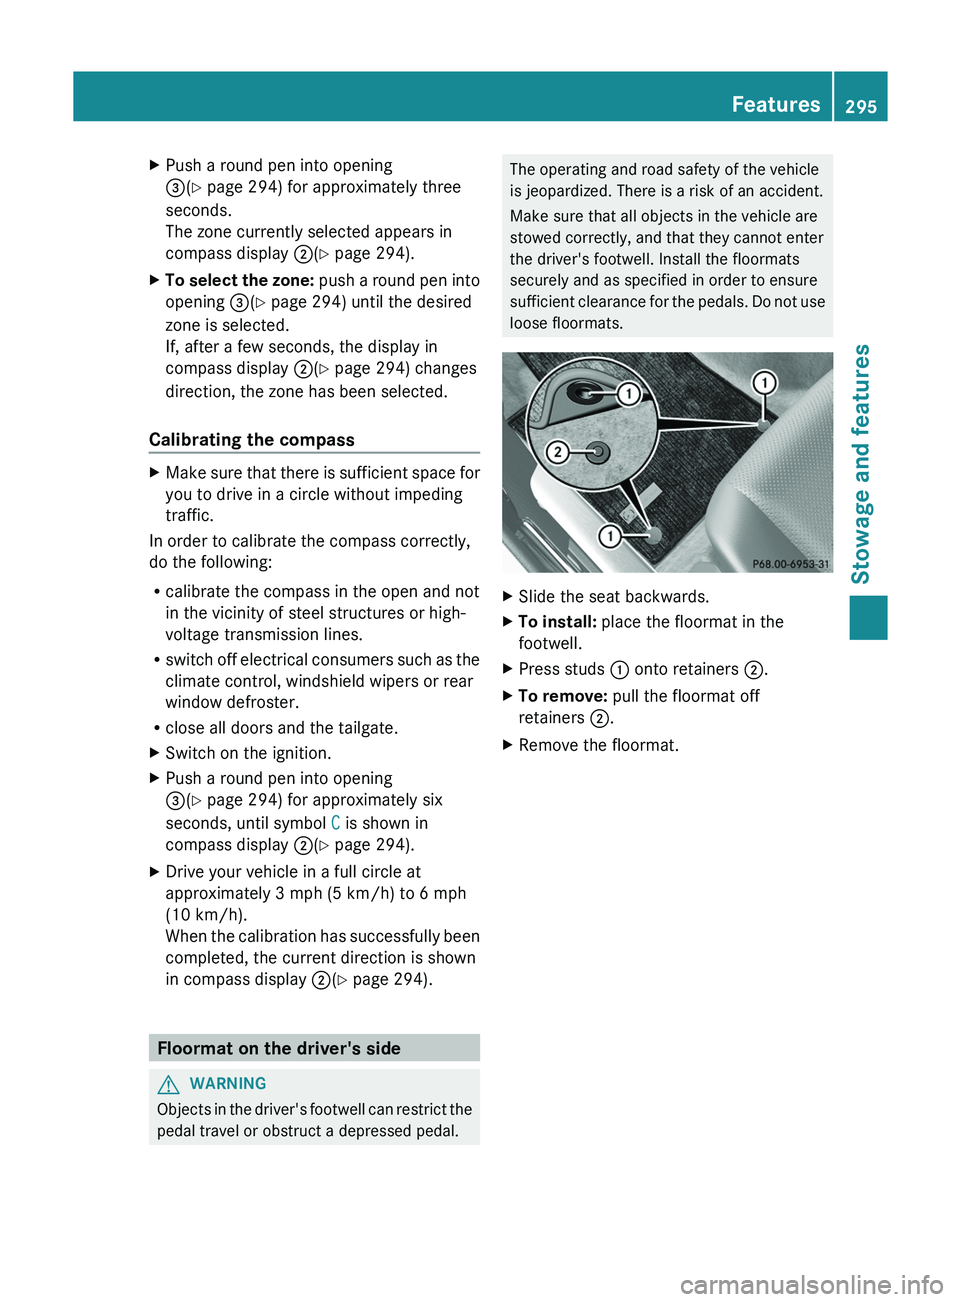
loose floormats. X
Slide the seat backwards.
X To install: place the floormat in the
footwell.
X Press studs 0043 onto retainers 0044.
X To remove: pull the floormat off
retainers 0044.
X Remove the floormat. Features
295
Stowage and features Z
Page 302 of 380
If you need to do any work inside the engine
compartment,
R
switch off the ignition
R never reach into the area where there is a
risk of danger from moving components,
such as the fan rotation area
R keep clothing away from moving parts G
WARNING
The ignition system and the fuel injection
system work under high voltage.
If you touch
components which are under voltage, you
could get an electric shock. There is a risk of
injury.
Never touch components of the ignition
system or fuel injection system when the
ignition is switched on.
Opening the hood G
WARNING
The windshield wipers and wiper linkage
could be set in motion.
When the hood is open, you or others could
be injured by the wiper linkage.
Make sure that the windshield wipers are
switched off. Remove the SmartKey or make
sure that no ignition position has been
selected with KEYLESS-GO. All indicator
lamps must be off in the instrument panel.
! Make sure that
the windshield
wipers are
not folded away from the windshield. You
could otherwise damage the windshield
wipers or the hood.
X Make sure that the windshield wipers are
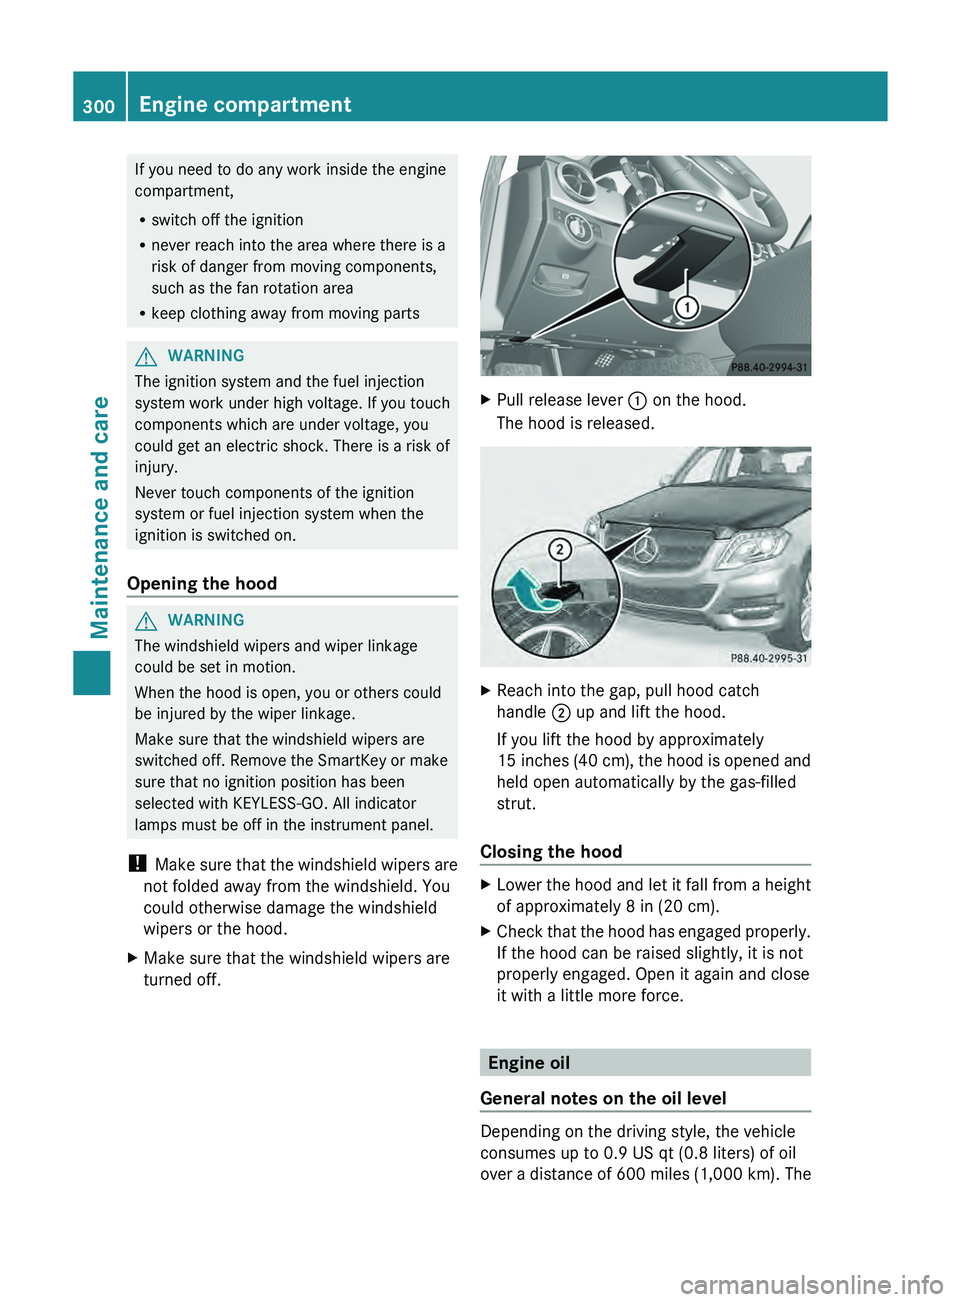
turned off. X
Pull release lever 0043 on the hood.
The hood is released. X
Reach into the gap, pull hood catch
handle 0044 up and lift the hood.
If you lift the hood by approximately
15 inches (40 cm
), the
hood is opened and
held open automatically by the gas-filled
strut.
Closing the hood X
Lower the hood and let it fall from a height
of approximately 8 in (20 cm).
X Check that the hood
has engaged properly.
If the hood can be raised slightly, it is not
properly engaged. Open it again and close
it with a little more force. Engine oil
General notes on the oil level Depending on the driving style, the vehicle
consumes up to 0.9 US qt
(0.8 liters) of oil
over a
distance of
600 miles (1,000 km). The300
Engine compartment
Maintenance and care
Page 308 of 380
!
The following may cause the paint to
become shiny and thus reduce the matte
effect:
R Vigorous rubbing with unsuitable
materials.
R Frequent use of car washes.
R Washing the vehicle in direct sunlight.
! Never use paint cleaner, buffing or
polishing products, or gloss preserver,
e.g.
wax. These products are only suitable for
high-gloss surfaces. Their use on vehicles
with matte finish leads to considerable
surface damage (shiny, spotted areas).
Always have paintwork repairs carried out
at a qualified specialist workshop.
! Do not use wash programs with a hot wax
treatment under any circumstances.
i The vehicle should preferably be washed
by hand using a soft sponge, car shampoo
and plenty of water.
i Use only insect remover and car shampoo
from the range of recommended and
approved Mercedes-Benz care products.
Cleaning the windows G
WARNING
You could become trapped by the windshield
wipers if they start moving
while cleaning the
windshield or wiper blades. There is a risk of
injury.
Always switch off the windshield wipers and
the ignition before cleaning the windshield or
wiper blades.
! Only fold the windshield wipers away from
the windshield when vertical. Otherwise,
you will damage the hood.
! Do not use dry cloths, abrasive products,
solvents or cleaning agents containing
solvents to clean the inside of the windows.
Do not touch the insides of the windows
with hard objects, e.g. an ice scraper or ring. There is otherwise a risk of damaging
the windows.
! Clean the water drainage channels
of the
windshield and the rear window at regular
intervals. Deposits such as leaves, petals
and pollen may under certain
circumstances prevent water from draining
away. This can lead to corrosion damage
and damage to electronic components.
X Clean the inside and outside of the
windows with a damp cloth and a cleaning
product that is recommended and
approved by Mercedes-Benz.
Cleaning wiper blades G
WARNING
You could become trapped by the windshield
wipers if they start moving
while cleaning the
windshield or wiper blades. There is a risk of
injury.
Always switch off the windshield wipers and
the ignition before cleaning the windshield or
wiper blades.
! Only fold the windshield wipers away from
the windshield when vertical. Otherwise,
you will damage the hood.
! Do not pull the wiper blade. Otherwise,
the wiper blade could be damaged.
! Do not clean wiper blades too often and
do not rub them too hard. Otherwise, the
graphite coating could be damaged. This
could cause wiper noise.
! Hold the wiper arm securely when folding
back. The windshield could be damaged if
the wiper arm smacks against it suddenly.
X Fold the windshield wiper arms away from
the windshield.
X Carefully clean the wiper blades with a
damp cloth.
X Fold the windshield wiper arms back again
before switching on the ignition.306
Care
Maintenance and care