2013 MERCEDES-BENZ GLK-Class emergency towing
[x] Cancel search: emergency towingPage 7 of 378

ATTENTION ASSIST
Activating/deactivating .................225
Display message ............................ 247
Function/notes ............................. 197
Audio menu (on-board
computer) .......................................... 222
Audio system see separate operating instructions
Authorized Centers
see Qualified specialist workshop
Authorized Mercedes-Benz Center
see Qualified specialist workshop
Authorized workshops
see Qualified specialist workshop
AUTO lights
Display message ............................ 242
see Lights
Automatic engine start (ECO start/
stop function) .................................... 145
Automatic engine switch-off (ECO
start/stop function) ..........................145
Automatic headlamp mode ..............111
Automatic transmission Automatic drive program ...............152
Changing gea r............................... 151
DIRECT SELECT leve r..................... 148
Display message ............................ 254
Driving tips .................................... 151
Emergency running mode ..............154
Engaging drive position .................. 150
Engaging neutra l............................ 149
Engaging par kposition
automatically ................................. 149
Engaging revers egear ................... 149
Engaging the par kposition ............ 149
Kickdow n....................................... 151
Overview ........................................ 148
Problem (malfunction) ...................154
Progra mselecto rbutton ................ 151
Pulling away ................................... 143
Shift range s................................... 152
Starting the engine ........................143
Steering wheel paddle shifters ......152
Trailer towing ................................. 151
Transmissio nposition display ........149
Transmission positions ..................150
Automatic transmission
emergency mode ............................... 154 B
Backup lamp Changing bulbs .............................. 120
Display message ............................ 241
Bag hook ............................................ 274
Ball coupling Installing ........................................ 210
Removing ....................................... 213
Storing ........................................... 213
BAS (Brake Assist System) .................65
BAS PLUS (Brake Assist System
PLUS) .................................................... 65
Battery (SmartKey) Checking .......................................... 77
Important safety notes ....................76
Replacing ......................................... 77
Battery (vehicle)
Charging ........................................ 316
Display message ............................ 245
Important safety notes ..................314
Jump starting ................................. 318
Blinds
see Roller sunblind
Blin dSpot Assist
Activating/deactivating .................225
Display message ............................ 249
Notes/function .............................. 198
Trailer towing ................................. 200
see Active Blind Spot Assist
BlueTEC
Adding DEF .................................... 158
BlueTEC (DEF) .................................... 369
Brake Assist see BAS (Brake Assist System)
Brake fluid
Display message ............................ 234
Notes ............................................. 370
Brake lamps
Display message ............................ 240
Brakes
ABS .................................................. 64
BAS .................................................. 65
BAS PLUS ........................................ 65
Brake fluid (notes) .........................370
Display message ............................ 232
Driving tips .................................... 164
Important safety notes ..................164 Index
5
Page 11 of 378

Active Lane Keeping Assist
............205
Active Parking Assist .....................184
ATTENTION ASSIST ........................197
Blind Spot Assist ............................ 198
Cruise control ................................ 169
Display message ............................ 247
DISTRONI CPLUS ........................... 171
HOLD function ............................... 179
Lane Keeping Assist ......................200
Lane Tracking package ..................198
PARKTRONI C................................. 180
Rea rview camera .......................... 188
Driving tips
Automatic transmission .................151
Brakes ........................................... 164
Break-in period .............................. 140
DISTRONI CPLUS ........................... 177
Downhill gradient ........................... 164
Drinking and driving .......................162
Driving abroad ............................... 110
Driving in winter ............................ .166
Driving on flooded road s................ 166
Driving on sand .............................. 168
Driving on wet road s...................... 166
Driving over obstacles ...................168
Exhaust check ............................... 162
Fuel ................................................ 162
General .......................................... 162
Hydroplaning ................................. 166
Icy road surfaces ........................... 166
Limited braking efficiency on
salted road s................................... 164
Off-road driving .............................. 167
Snow chains .................................. 331
Symmetrical low bea m.................. 110
Tire ruts ......................................... 168
Towing atrailer .............................. 208
Traveling uphill ............................... 168
Wet road surface ........................... 164
DVD audio (on-board computer) ......222
DVD video (on-board computer) ......223 E
EASY-ENTRY feature Activating/deactivating .................229
Function/notes ............................. 102
EASY-EXIT feature
Crash-responsive ........................... 103
Function/notes ............................. 102
Switching on/off ........................... 229
EBD (electronic brake force
distribution)
Display message ............................ 233
Function/notes ................................ 69
ECO display
Function/notes ............................. 163
On-board computer .......................220
ECO start/stop function
Automatic engine start ..................145
Automatic engine switch-off ..........145
Deactivating/activating .................146
General information .......................144
Important safety notes ..................144
Electronic Stability Program
see ESP ®
(Electronic Stability Program)
Emergency release
Driver's door .................................... 81
Vehicle ............................................. 81
Emergency spare wheel
General notes ................................ 360
Important safety notes ..................359
Storage location ............................ 360
Stowing .......................................... 361
Technical data ............................... 362
Emergency Tensioning Devices
Function .......................................... .58
Safety guideline s............................. 41
Emergency unlocking
Tailgate ............................................ 85
Emissions control
Service and warranty information ....23
Engine
Check Engine warning lamp ........... 264
Display message ............................ 243
ECO start/stop function ................144
Engine number ............................... 365
Irregularr unning............................ 147
Jump-starting ................................. 318
Starting problems ..........................147 Index
9
Page 18 of 378

Bel
tforce limiters ............................ 58
center rear-compartment sea t......... 57
Cleaning ......................................... 309
Correct usage .................................. 55
Emergency Tensioning Devices ....... .58
Fastening ......................................... 56
Important safety guidelines .............54
Releasing ......................................... 57
Safety guidelines ............................. 41
Switching belt adjustment on/off
(on-board computer) ......................229
Warning lamp ................................. 257
Warning lamp (function) ................... 57
see Seat belts
Seats
Adjusting (electrically). ....................98
Adjusting lumba rsuppor t.............. 100
Adjusting the 4-way lumbar
support .......................................... 101
Adjusting the head restraint ............99
Cleaning the cover .........................309
Correct driver's seat position ........... 96
Folding the backres t(rear
compartment) forwards/back .......272
Folding the rear bench seat
forwards/back ............................... 272
Important safety notes ....................97
Seat heating problem ....................101
Storing settings (memory function) 106
Switching sea theating on/off .......101
Sensors (cleaning instructions) .......307
Service menu (on-board computer) .226
Service products Brake fluid ..................................... 370
Coolant (engine) ............................ 371
DEF special additive s..................... 369
Engine oil ....................................... 369
Fuel ................................................ 365
Important safety notes ..................365
Refrigerant (air-conditioning
system) .......................................... 372
Washer fluid .................................. .372
Settings
Factory (on-board computer) .........230
On-board computer .......................226
Setting the air distribution ...............133
Setting the airflow ............................134
Side impact air bag .............................45Side marker lamp (display
message)
............................................ 241
Side windows Cleaning ......................................... 306
Convenience closing feature ............88
Convenience opening feature ..........87
Important safety information ...........86
Opening/closing .............................. 87
Problem (malfunction) .....................89
Resetting ......................................... 89
Sliding sunroof
see Panorama roof with power
tilt/sliding panel
SmartKey
Changing the battery .......................77
Changing the programming .............75
Checking the battery .......................77
Convenience closing feature ............88
Convenience opening feature ..........87
Display message ............................ 256
Door central locking/unlocking .......74
Important safety notes ....................74
Loss ................................................. 78
Mechanical key ................................ 76
Positions (ignition lock) .................141
Problem (malfunction) .....................78
Starting the engine ........................143
Snow chains ...................................... 331
Sockets Center console .............................. 280
General notes ................................ 280
Luggage compartment ...................281
Rea rcompartmen t......................... 281
Spare wheel
Storage location ............................ 360
Stowing .......................................... 361
Specialist workshop ............................ 27
Special seat bel tretractor .................. 61
Speed ,controlling
see Cruise control
Speedometer
Digital ............................................ 220
In the Instrument cluster .................31
Segments ...................................... 217
Selecting the unit of measurement 226
see Instrument cluster 16
Index
Page 21 of 378

Tire bead (definition
)...................... 351
Tire pressure (definition) ................351
Tire pressures (recommended )...... 349
Tire size (data) ............................... 357
Tire size designation, load-bearing
capacity, speed rating .................... 346
Tire tread ....................................... 329
Tire tread (definition) .....................351
Total load limit (definition) .............352
Traction ......................................... 344
Traction (definition) .......................351
Trea dwear ..................................... 344
TWR (permissible trailer drawbar
noseweight) (definition) .................351
Uniform Tire Quality Grading
Standard s...................................... 344
Uniform Tire Quality Grading
Standard s(definition) .................... 349
Unladen weight (definition) ............350
Wea rindicato r(definition) .............352
Whee lrim (definition ).................... 349
see Flat tire
Top Tether ............................................ 62
Towing Important safety guidelines ...........320
Installing the towing eye ................321
Removing the towing eye. ..............321
With the rear axle raised ................322
Towing atrailer
Activ eParking Assist ..................... 188
Cleaning the trailer tow hitch ......... 308
Coupling up atrailer ...................... 210
Decoupling atrailer ....................... 212
Driving tips .................................... 208
Important safety notes ..................208
Installing the ball coupling .............210
Lights displa ymessage .................. 239
Mounting dimensions ....................374
Power supply ................................. 213
Removing the ball coupling ............213
Shift range ..................................... 151
Storing the ball coupling ................213
Trailer loads ................................... 374
Towing away
With both axles on the ground .......322
Tow-starting
Emergency engine starting ............323
Important safety notes ..................320Trailer coupling
see Towing atrailer
Trailer loads and drawbar
noseweights ...................................... 212
Trailer towing Active Blind Spot Assist .................205
Active Lane Keeping Assist .... 202, 208
Blind Spot Assist ............................ 200
PARKTRONI C................................. 183
Permissible trailer loads and
drawba rnoseweights ..................... 212
Transfer case ..................................... 154
Transmission see Automatic transmission
Transmission position display .........149
Transmission position display
(DIRECT SELECTl ever)...................... 149
Transporting the vehicle ..................322
Traveling uphill Brow of hill ..................................... 169
Driving downhill ............................. 169
Maximum gradient-climbing
capability ....................................... 169
Trim pieces (cleaning instructions) .309
Trip computer (on-board computer) 219
Trip odometer Calling up ....................................... 219
Resetting (on-board computer) ......220
see Trip odometer
Turn signals
Changing bulbs (front) ...................119
Display message ............................ 240
Switching on/off ........................... 112
see Turn signals
TWR (Tongue Weight Rating)
(definition) ......................................... 351
Type identification plate see Vehicle identification plate U
Unlocking Emergency unlocking .......................81
From inside the vehicle (central
unlocking button) ............................. 80 Index
19
Page 22 of 378

V
Vanity mirror (in the sun visor) ........ 279
Vehicle Data acquisition ............................... 28
Display message ............................ 254
Emergency locking ........................... 81
Emergency unlocking .......................81
Equipment ....................................... 23
Individua lsettings .......................... 226
Limited Warranty ............................. 28
Loading .......................................... 339
Locking (in an emergency) ...............81
Locking (SmartKey) .......................... 74
Lowering ........................................ 356
Maintenance .................................... 24
Parking for a long period ................ 161
Pulling away ................................... 143
Raising ........................................... 354
Reporting problems .........................27
Securing from rolling away ............353
Towing away .................................. 320
Transporting .................................. 322
Unlocking (in an emergency) ...........81
Unlocking (SmartKey) ......................74
Vehicle data ................................... 373
Vehicle data ....................................... 373
Vehicle dimensions ...........................373
Vehicle emergency locking ................81
Vehicle identification number see VIN
Vehicle identification plate ..............364
Vehicle tool kit .................................. 312
Video (DVD) ........................................ 223
VIN ...................................................... 364W
Warning and indicator lamps ABS ................................................ 259
Brakes ........................................... 259
Check Engine ................................. 264
Coolant .......................................... 265
Distance warning ........................... 267
DISTRONI CPLUS ........................... 267
ESP ®
.............................................. 261
ESP ®
OFF ....................................... 262
Fuel tank ........................................ 264 Overview
.......................................... 32
PASSENGER AIR BAG OFF
indicator lamp .................................. 47
Reserve fuel ................................... 264
Seat bel t........................................ 257
SRS ................................................ 263
Tire pressure monitor ....................268
Warranty ............................................ 364
Washer fluid Display message ............................ 255
Wheel bol ttightening torque ...........356
Wheel chock ...................................... 353
Wheels Changing awheel .......................... 352
Checking ........................................ 329
Cleaning ......................................... 305
Cleaning (warning) .........................353
Emergency spare wheel .................359
Important safety notes ..................328
Interchanging/changing ................352
Mounting anew wheel ................... 355
Mounting awheel .......................... 353
Removing awheel .......................... 355
Storing ........................................... 352
Tightening torque ........................... 356
Whee lsize/tir esize ....................... 357
Window curtain air bag
Display message ............................ 236
Operation ........................................ .46
Windows
see Side windows
Windshield
Defrosting ...................................... 134
see Windshield
Windshiel dwasher fluid
see Windshield washer system
Windshiel dwasher system ..............303
Notes ............................................. 372
Windshiel dwipers
Problem (malfunction) ...................124
Rea rwindow wiper ........................ 121
Replacing the wiper blades ............121
Switching on/off ........................... 120
Winte rdriving
Important safety note s.................. 330
Slippery road surfaces ...................166
Snow chains .................................. 33120
Index
Page 288 of 378

immediately after pressing the SOS button,
you do not know if mbrace has successfully
made the emergency call. In this situation,
seek additional assistance by other means.
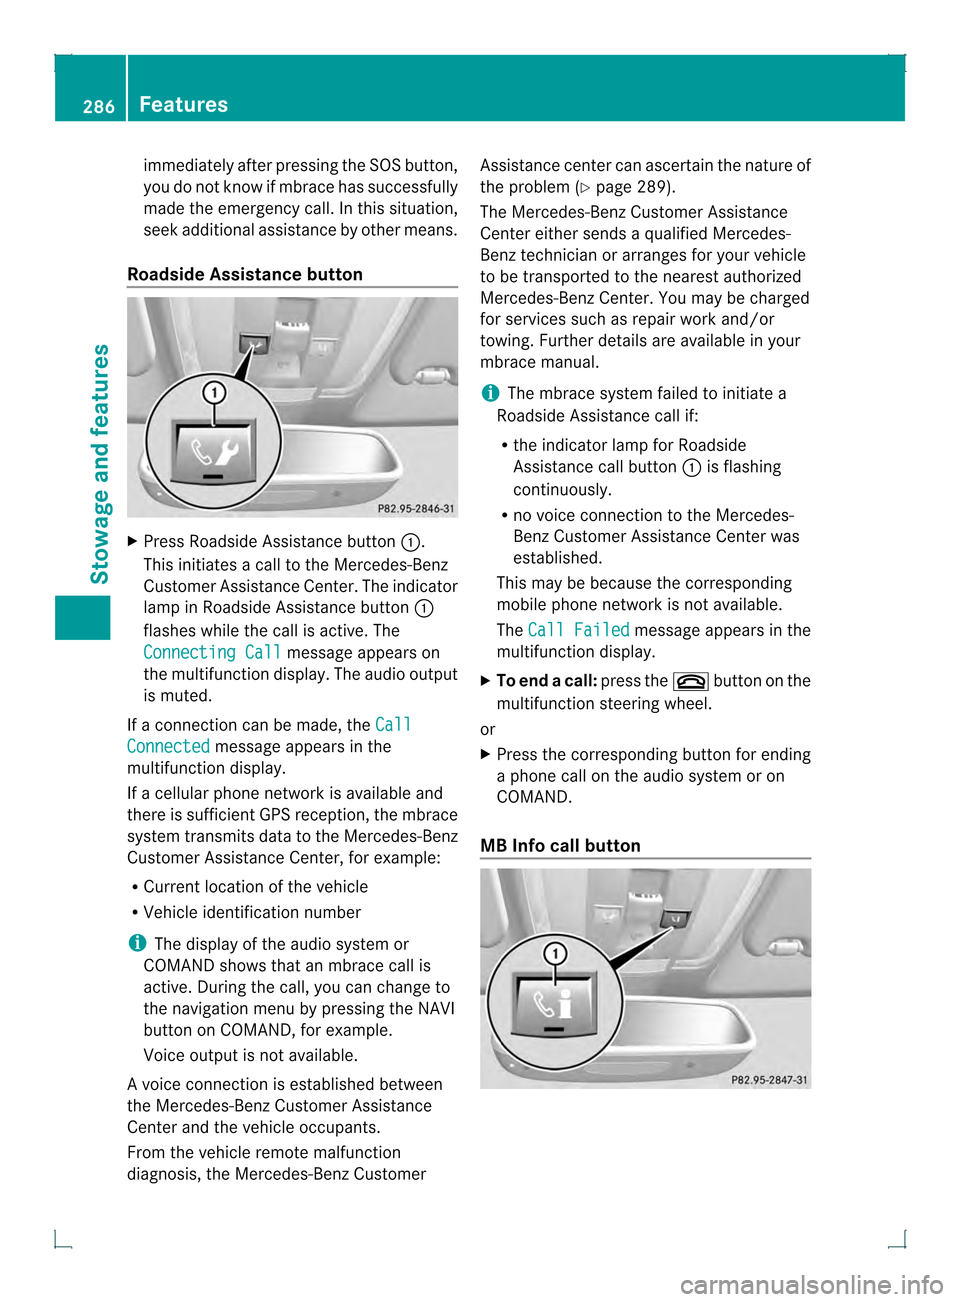
Roadside Assistance button X
Press Roadside Assistance button 0002.
This initiates a call to the Mercedes-Benz
Customer Assistance Center. The indicator
lamp in Roadside Assistance button 0002
flashes while the call is active. The
Connecting Call message appears on
the multifunction display. The audio output
is muted.
If a connection can be made, the CallConnected message appears in the
multifunction display.
If a cellular phone network is available and
there is sufficien tGPS reception, the mbrace
system transmits data to the Mercedes-Benz
Customer Assistance Center, for example:
R Current location of the vehicle
R Vehicle identification number
i The display of the audio system or
COMAND shows that an mbrace call is
active. During the call, you can change to
the navigation menu by pressing the NAVI
button on COMAND, for example.
Voice output is not available.
Av oice connection is established between
the Mercedes-Benz Customer Assistance
Center and the vehicle occupants.
From the vehicle remote malfunction
diagnosis, the Mercedes-Benz Customer Assistance center can ascertain the nature of
the problem (Y
page 289).
The Mercedes-Benz Customer Assistance
Center either sends a qualified Mercedes-
Benz technician or arranges for your vehicle
to be transported to the nearest authorized
Mercedes-Benz Center. You may be charged
for services such as repair work and/or
towing. Further details are available in your
mbrace manual.
i The mbrace system failed to initiate a
Roadside Assistance call if:
R the indicator lamp for Roadside
Assistance call button 0002is flashing
continuously.
R no voice connection to the Mercedes-
Benz Customer Assistance Center was
established.
This may be because the corresponding
mobile phone network is not available.
The Call Failed message appears in the
multifunction display.
X To end acall: press the 000Bbutton on the
multifunctio nsteering wheel.
or
X Press the corresponding button for ending
a phone call on the audio syste moron
COMAND.
MB Info call button 286
FeaturesStowage and featu
res
Page 335 of 378

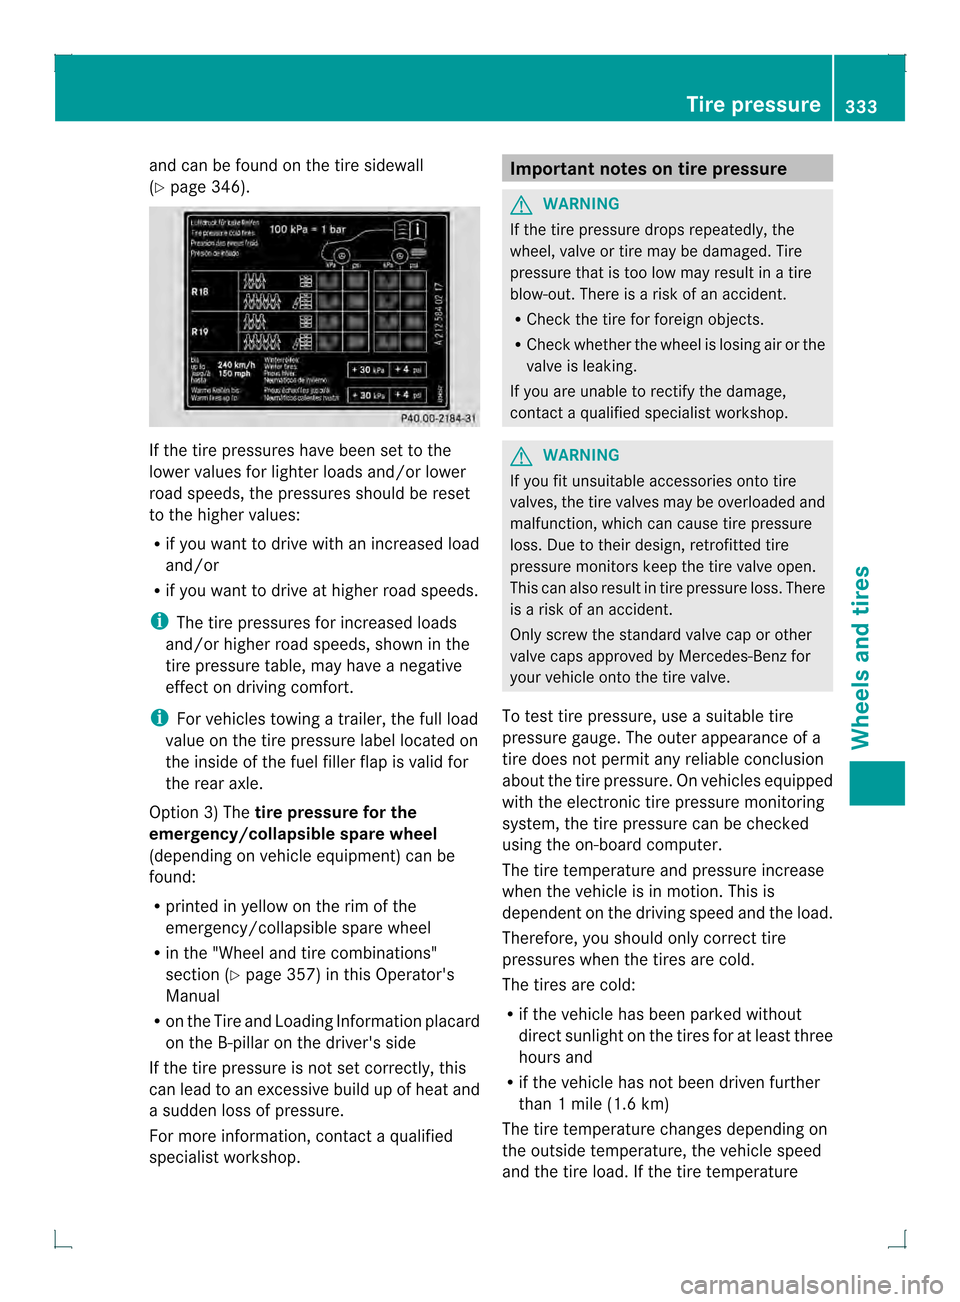
and can be found on th
etire sidewall
(Y page 346). If the tire pressures have been set to the
lower values for lighter loads and/or lower
road speeds, the pressures should be reset
to the higher values:
R if you want to drive with an increased load
and/or
R if you want to drive at higher road speeds.
i The tire pressures for increased loads
and/or higher road speeds, shown in the
tire pressure table, may have a negative
effect on driving comfort.
i For vehicles towing a trailer, the full load
value on the tire pressure label located on
the inside of the fuel filler flap is valid for
the rear axle.
Option 3) The tire pressure for the
emergency/collapsible spare wheel
(depending on vehicle equipment) can be
found:
R printed in yellow on the rim of the
emergency/collapsible spare wheel
R in the "Wheel and tire combinations"
section (Y page 357) in this Operator's
Manual
R on the Tire and Loading Information placard
on the B-pillar on the driver's side
If the tire pressure is not set correctly, this
can lead to an excessiv ebuild up of heat and
a sudde nloss of pressure.
For more information, contact a qualified
specialist workshop. Important notes on tire pressure
G
WARNING
If the tire pressure drops repeatedly, the
wheel, valve or tire may be damaged. Tire
pressure that is too low may result in a tire
blow-out. There is a risk of an accident.
R Check the tire for foreign objects.
R Check whether the wheel is losing air or the
valve is leaking.
If you are unable to rectify the damage,
contact a qualified specialist workshop. G
WARNING
If you fit unsuitable accessories onto tire
valves, the tire valves may be overloaded and
malfunction, which can cause tire pressure
loss. Due to their design, retrofitted tire
pressure monitors keep the tire valve open.
This can also result in tire pressure loss. There
is a risk of an accident.
Only screw the standard valve cap or other
valve caps approved by Mercedes-Benz for
your vehicle onto the tire valve.
To test tire pressure, use a suitable tire
pressure gauge. The outer appearance of a
tire does not permit any reliable conclusion
about the tire pressure. On vehicles equipped
with the electronic tire pressure monitoring
system, the tire pressure can be checked
using the on-board computer.
The tire temperature and pressure increase
when the vehicle is in motion .This is
dependent on the driving speed and the load.
Therefore, you should only correct tire
pressures when the tires are cold.
The tires are cold:
R if the vehicle has been parked without
direct sunlight on the tires for at least three
hours and
R if the vehicle has not been driven further
than 1 mile (1.6 km)
The tire temperature changes depending on
the outside temperature, the vehicle speed
and the tire load. If the tire temperature Tire pressure
333Wheels and tires Z
Page 363 of 378

X
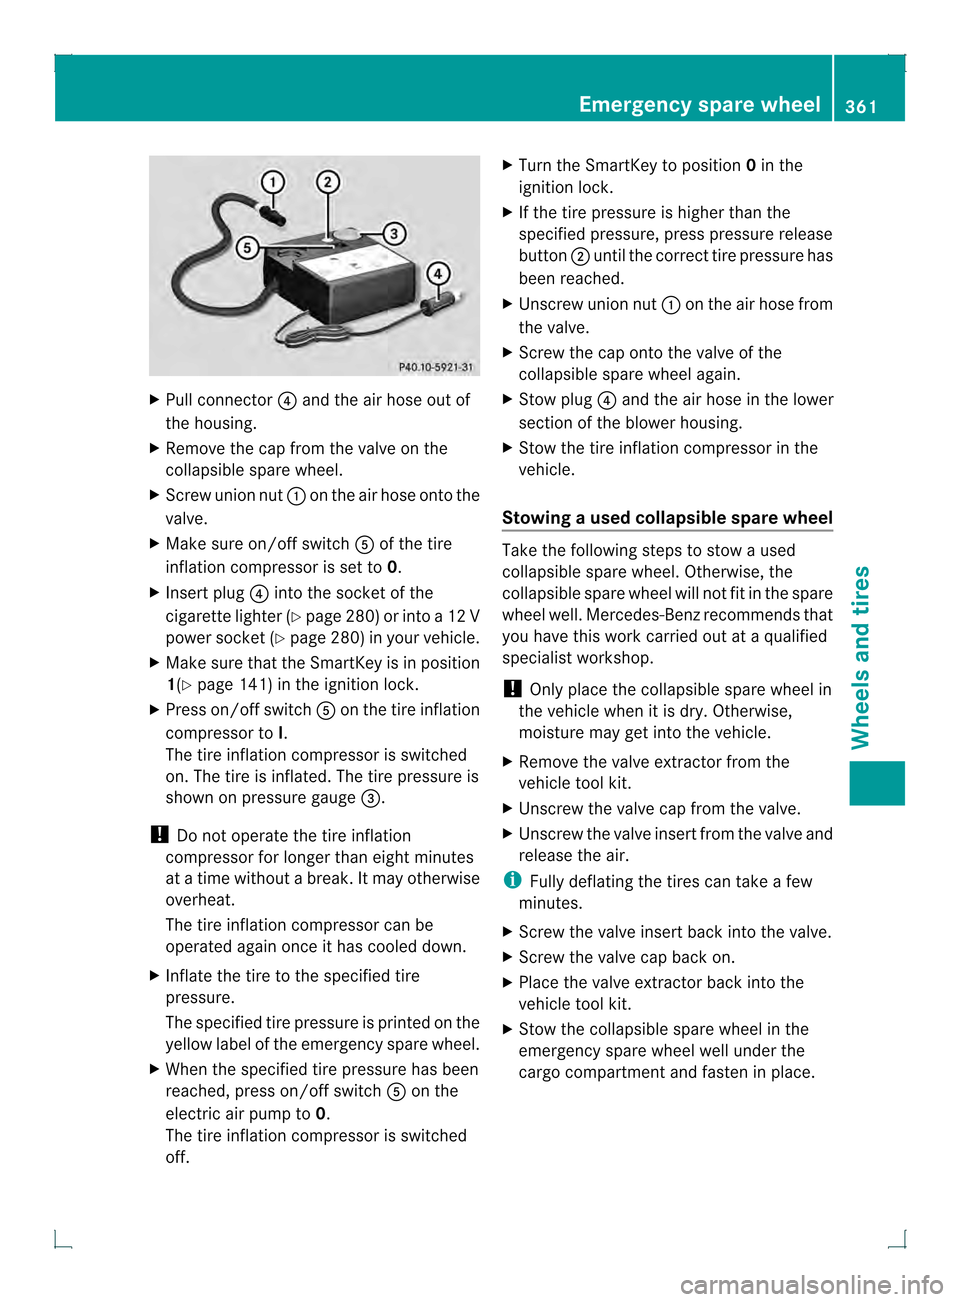
Pull connector 0020and the air hose out of
the housing.
X Remove the cap from the valve on the
collapsible spare wheel.
X Screw union nut 0002on the air hose onto the
valve.
X Make sure on/of fswitch 001Eof the tire
inflatio ncompressor is set to 0.
X Insert plug 0020into the socket of the
cigarette lighter (Y page 280) or into a 12 V
power socket (Y page 280) in your vehicle.
X Make sure that the SmartKey is in position
1(Y page 141) in the ignition lock.
X Press on/offs witch001Eon the tire inflation
compressor to I.
The tire inflatio ncompressor is switched
on. The tire is inflated. The tire pressure is
shown on pressure gauge 0021.
! Do not operate the tire inflation
compressor for longer than eight minutes
at a time without a break. It may otherwise
overheat.
The tire inflation compressor can be
operated again once it has cooled down.
X Inflate the tire to the specified tire
pressure.
The specified tire pressure is printed on the
yellow label of the emergency spare wheel.
X When the specified tire pressure has been
reached, press on/offs witch001Eon the
electric air pump to 0.
The tire inflatio ncompressor is switched
off. X
Turn the SmartKey to position 0in the
ignition lock.
X If the tire pressure is higher than the
specified pressure, press pressure release
button 0003until the correc ttire pressure has
been reached.
X Unscrew union nut 0002on the air hose from
the valve.
X Screw the cap onto the valve of the
collapsible spare wheel again.
X Stow plug 0020and the air hose in the lower
section of the blower housing.
X Stow the tire inflation compressor in the
vehicle.
Stowing aused collapsible spare wheel Take the following steps to stow a used
collapsible spare wheel. Otherwise, the
collapsible spare wheel will not fit in the spare
wheel well. Mercedes-Benz recommends that
you have this work carried out at a qualified
specialist workshop.
!
Only place the collapsible spare wheel in
the vehicle when it is dry. Otherwise,
moisture may get into the vehicle.
X Remove the valve extractor from the
vehicle tool kit.
X Unscrew the valve cap from the valve.
X Unscrew the valve insert from the valve and
release the air.
i Fully deflating the tires can take a few
minutes.
X Screw the valve insert back into the valve.
X Screw the valve cap back on.
X Place the valve extractor back into the
vehicle tool kit.
X Stow the collapsible spare wheel in the
emergency spare wheel well under the
cargo compartment and fasten in place. Emergency spare wheel
361Wheels and tires Z