2013 MERCEDES-BENZ GL steering wheel
[x] Cancel search: steering wheelPage 177 of 454
Clearing the shif
trange restriction X
Pull and hold the right-hand steering wheel
paddle shifte runtil Dis shown agai ninthe
multifunction display.
The automatic transmission shifts from the
current shift range directly to D.
or
X Use the DIRECT SELECT lever to shift the
transmission to position D.
The automatic transmission shifts from the
current shift range directly to D.
Selecting the ideal shift range X
Pull the left-hand steering wheel paddle
shifter and hold it in position.
The automatic transmission shifts to the
gear which allows optimum acceleration
and deceleration. To do this, the automatic
transmission shifts down one or more
gears. Manual drive program
Switching on the manual drive program In manual drive program
M, you can change
gear using the steering wheel paddle shifters
if the transmission is in position D.You can
see the currently selected drive program and
which gear is engaged in the multifunction
display.
X AMG vehicles: press the program selector
button (Y page 173) until Mappears in the
multifunction display.
X Vehicles with the ON&OFFROAD
package: press the program selector
button (Y page 173).
The letter Mappears in the multifunction
display. Shifting up (all vehicles except AMG
vehicles) X
Pull the right-hand steerin gwheel paddle
shifter (Y page 173).
The automatic transmission shifts up to the
next gear.
Shifting up (AMG vehicles) !
In manual drive program M, the automatic
transmission does not shift up
automatically even when the engine
limiting speed for the current gear is
reached. When the engine limiting speed is
reached, the fuel supply is cut to prevent
the engine from overrevving. Always make
sure that the engine speed does not reach
the red area of the tachometer. There is
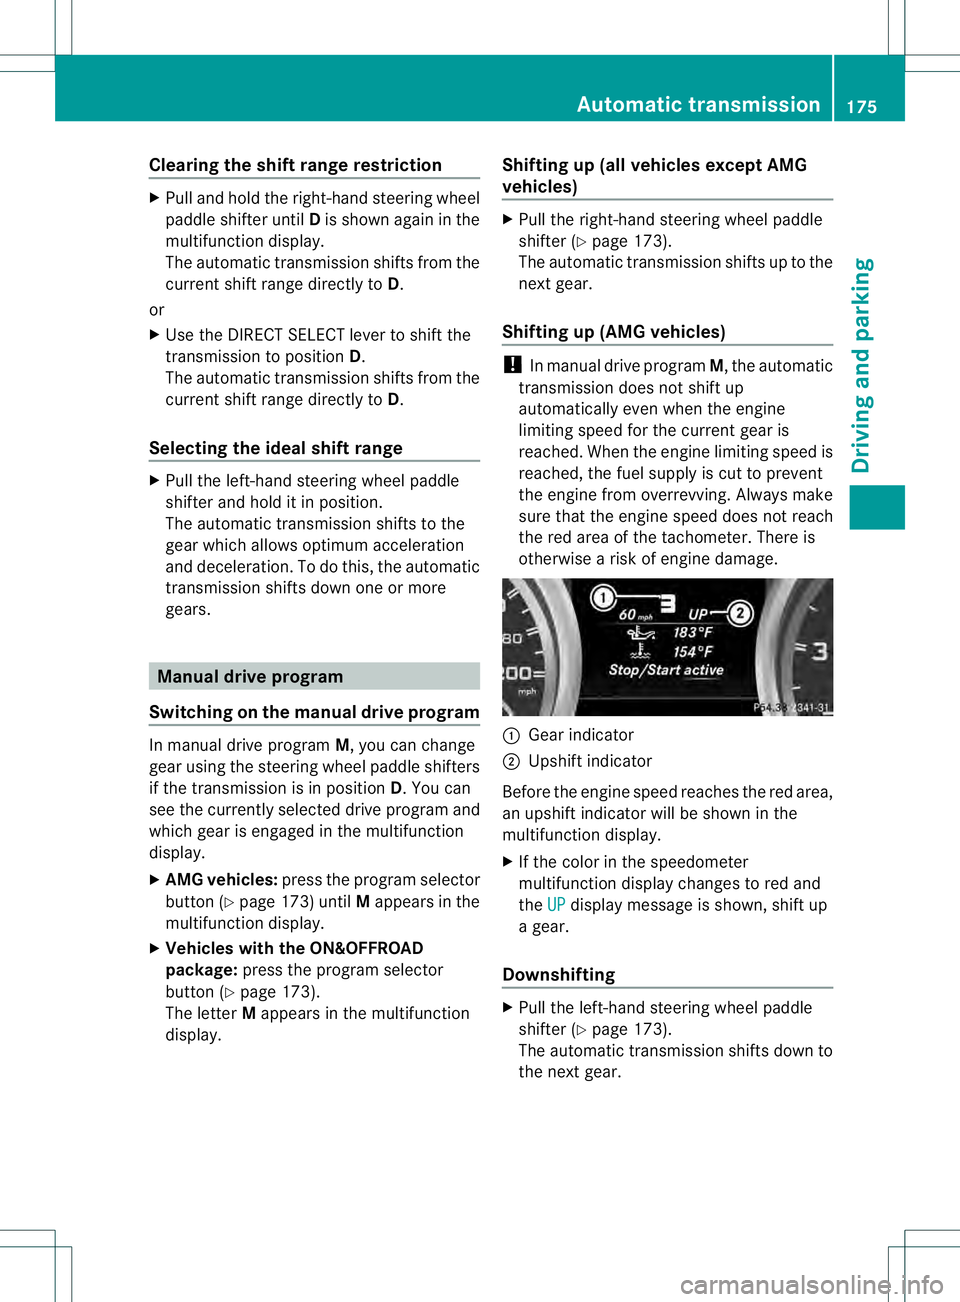
otherwise a risk of engine damage. 0002
Gear indicator
0003 Upshift indicator
Before the engine speed reaches the red area,
an upshift indicator will be shown in the
multifunction display.
X If the color in the speedometer
multifunction display changes to red and
the UP display message is shown, shift up
a gear.
Downshifting X
Pull the left-hand steering wheel paddle
shifter (Y page 173).
The automatic transmission shifts down to
the next gear. Automatic transmission
175Driving and parking Z
Page 178 of 454
Maximum acceleration
X
Pull the left-hand steering wheel paddle
shifter until the transmission selects the
optimum gear according to the speed.
i If you slow down or stop without shifting
down, the automatic transmission
automatically shifts down.
Kickdown You can also use kickdown for maximum
acceleration in manual drive program M.
X Depress the accelerator pedal beyond the
pressure point.
The automatic transmission shifts to a
lower gear depending on the engine speed.
X Shift back up once the desired speed is
reached.
i All vehicles (except AMG vehicles): if
you apply full throttle, the automatic
transmission shifts up to the next gear
when the maximum engine speed is
reached. This prevents the engine from
overrevving.
i AMG vehicles: it is not possible to use
kickdown in manual drive program M.
Switching off the manuald rive programX
AM Gvehicles: press the program selector
button (Y page 173) repeatedly until Cor
S appears in the multifunction display.
X Vehicles with the ON&OFFROAD
package: press the program selector
button (Y page 173).
The Mmessage in the multifunction display
goes out. 176
Automatic transmissionDriving and parking
Page 185 of 454
Closing the DEF filler cap
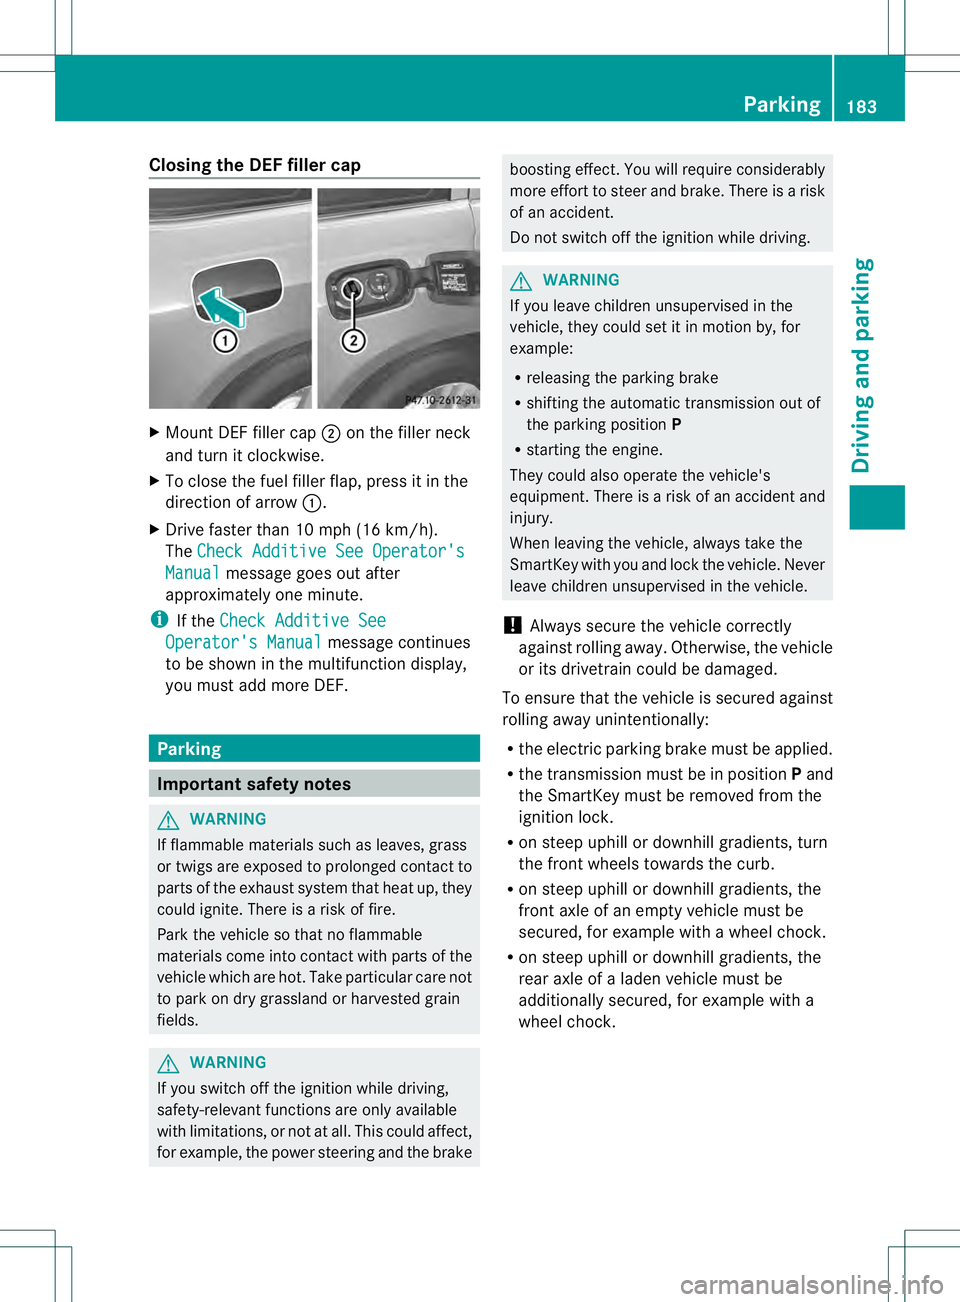
X
Mount DEF filler cap 0003on the filler neck
and turn it clockwise.
X To close the fuel fille rflap, press it in the
direction of arrow 0002.
X Drive faster than 10 mph (16 km/h).
The Check Additive See Operator's Manual message goes out after
approximately one minute.
i If the Check Additive See Operator's Manual message continues
to be shown in the multifunction display,
you must add more DEF. Parking
Important safety notes
G
WARNING
If flammable materials such as leaves, grass
or twigs are exposed to prolonged contac tto
parts of the exhaust system that heat up, they
could ignite. There is a risk of fire.
Park the vehicle so that no flammable
materials come into contact with parts of the
vehicle which are hot. Take particular care not
to park on dry grassland or harvested grain
fields. G
WARNING
If you switch off the ignition while driving,
safety-relevant function sare only available
with limitations, or not at all.T his could affect,
for example, the power steering and the brake boosting effect.Y
ou will require considerably
more effort to steer and brake. There is a risk
of an accident.
Do not switch off the ignition while driving. G
WARNING
If you leave children unsupervised in the
vehicle, they could set it in motion by, for
example:
R releasing the parking brake
R shifting the automatic transmission out of
the parking position P
R starting the engine.
They could also operate the vehicle's
equipment. There is a risk of an accident and
injury.
When leaving the vehicle, always take the
SmartKey with you and lock the vehicle. Never
leave children unsupervised in the vehicle.
! Always secure the vehicle correctly
against rolling away.O therwise, the vehicle
or its drivetrai ncould be damaged.
To ensure that the vehicle is secured against
rolling away unintentionally:
R the electric parking brake must be applied.
R the transmission must be in position Pand
the SmartKey must be removed from the
ignition lock.
R on steep uphill or downhill gradients, turn
the front wheels towards the curb.
R on steep uphill or downhill gradients, the
front axle of an empty vehicle must be
secured, for example with awheel chock.
R on steep uphill or downhill gradients, the
rear axle of a laden vehicle must be
additionally secured, for example with a
wheel chock. Parking
183Driving and parking Z
Page 195 of 454
X
Chec kwhether twigs or other parts of
plants have become trapped. These
increase the risk of fire and can damage
fuel pipes, brake hoses or the rubber
bellows of the axle joints and propeller
shafts.
X After the trip, examine without fail the
entire undercarriage, wheels, tires, brakes,
bodywork structure, steering, chassis and
exhaust system for damage.
X After driving for extended periods across
sand, mud, gravel, water or in similarly dirty
conditions, have the brake discs, wheels,
brake pads/linings and axle joints checked
and cleaned.
X If you detect strong vibrations after off-road
travel, check for foreign objects in the
wheels and drive train and remove them if
necessary. Foreign objects can disturb the
balance and cause vibrations.
Driving over rough terrain places greater
demands on your vehicle than driving on
normal roads. After driving off-road, check
the vehicle. This allows you to detect damage
promptly and reduce the risk of an accident
to yourself and other road users.
Driving on sand Observe the following rules when driving on
sand:
R vehicles with the AIRMATIC package:
select a raised vehicle level.
R avoid high engine speeds.
R select a shift range appropriate to the
terrain.
R drive quickly to overcome the rolling
resistance. Otherwise the vehicle's wheels
could become stuck in loose ground.
R drive in the tracks of other vehicles if
possible. Make sure that:
-the tire ruts are not too deep.
- the sand is sufficiently firm.
- the ground clearance of the vehicle is
sufficient. Tire ruts and gravel roads !
Check that the ruts are not too deep and
that your vehicle has sufficient clearance.
Otherwise, your vehicle could be damaged
or bottom out and get stuck.
Observe the following rules when driving
along ruts in off-road terrain or on roads with
loose gravel:
R vehicles with the AIRMATIC package:
select a raised vehicle level.
R avoid high engine speeds.
R select shift range 1.
R drive slowly.
R where ruts are too deep, drive with the
wheels of one side on the center grassy
area, if possible.
Driving over obstacles !
Obstacles could damage the floor of the
vehicle or components of the chassis. Ask
passengers for guidance when driving over
large obstacles. The passenger should
always keep a safe distance from the
vehicle when doing so in order to avoid
injury as a result of unexpected vehicle
movements. After driving off-road or over
obstacles, check the vehicle for possible
damage, especially to the underbody and
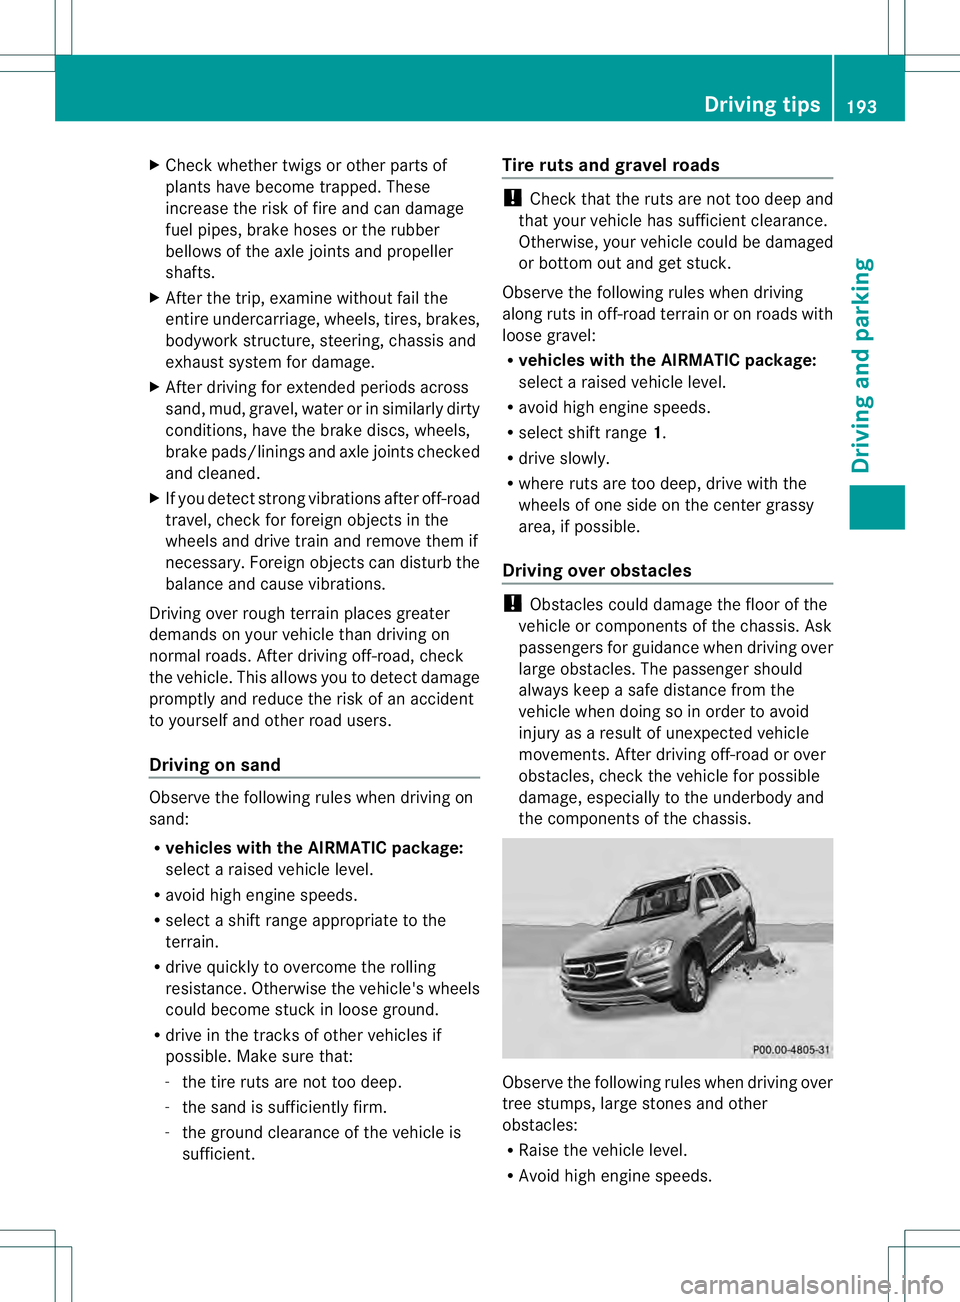
the components of the chassis. Observe the following rules when driving over
tree stumps, large stones and other
obstacles:
R
Raise the vehicle level.
R Avoid high engine speeds. Driving tips
193Driving and parking Z
Page 211 of 454
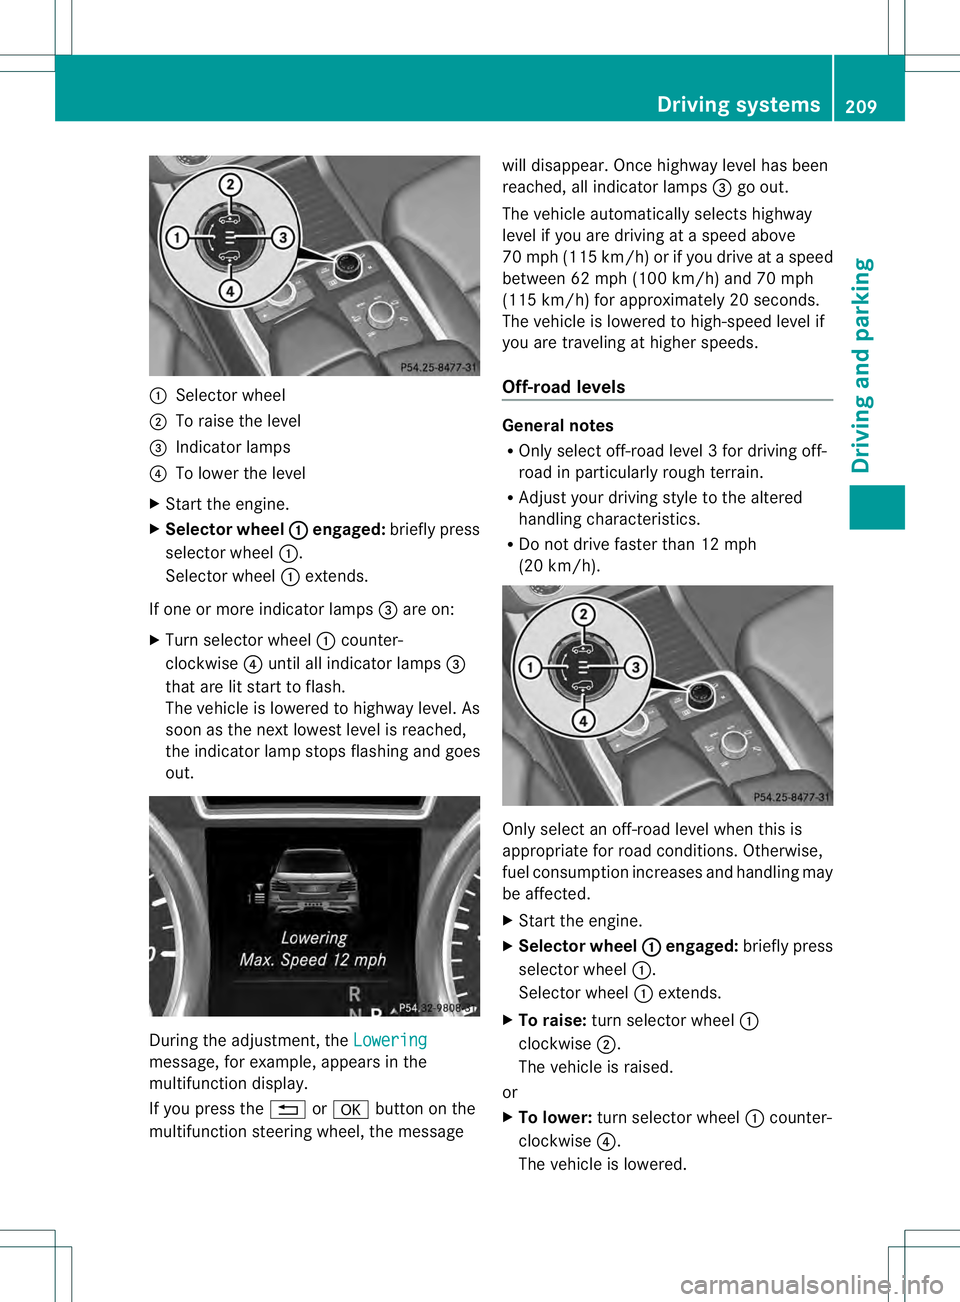
0002
Selector wheel
0003 To raise the level
0021 Indicato rlamps
0020 To lower the level
X Start the engine.
X Selector wheel 0002 engaged:
briefly press
selecto rwheel 0002.
Selector wheel 0002extends.
If one or more indicator lamps 0021are on:
X Turn selector wheel 0002counter-
clockwise 0020until all indicator lamps 0021
that are lit start to flash.
The vehicle is lowered to highway level. As
soon as the next lowest level is reached,
the indicator lamp stops flashing and goes
out. During the adjustment, the
Loweringmessage, for example, appears in the
multifunction display.
If you press the 0007or000B button on the
multifunction steering wheel, the message will disappear. Once highway level has been
reached, all indicator lamps
0021go out.
The vehicle automatically selects highway
level if you are driving at a speed above
70 mph (115 km/h) or if you drive at a speed
between 62 mph (100 km/h) and 70 mph
(115 km/h) for approximately 20 seconds.
The vehicle is lowered to high-speed level if
you are traveling at higher speeds.
Off-road levels General notes
R
Only select off-road level 3 for driving off-
road in particularly rough terrain.
R Adjust your driving style to the altered
handling characteristics.
R Do not drive faster than 12 mph
(20 km/h). Only select an off-road level when this is
appropriate for road conditions. Otherwise,
fuel consumption increases and handling may
be affected.
X
Start the engine.
X Selector wheel 0002 engaged:
briefly press
selector wheel 0002.
Selector wheel 0002extends.
X To raise: turn selector wheel 0002
clockwise 0003.
The vehicle is raised.
or
X To lower: turn selector wheel 0002counter-
clockwise 0020.
The vehicle is lowered. Driving systems
209Driving and parking Z
Page 212 of 454
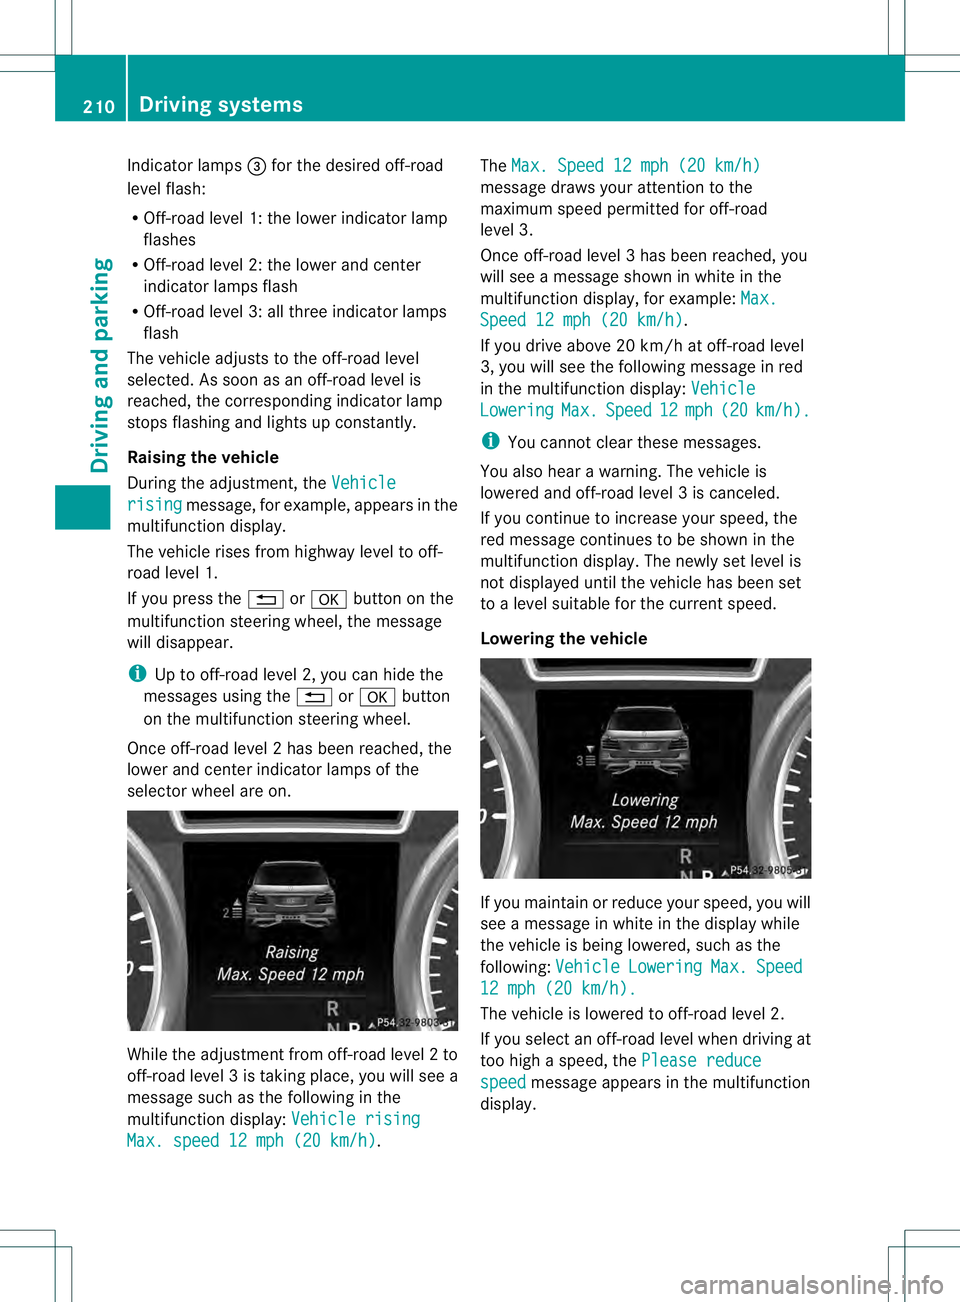
Indicator lamps
0021for the desired off-road
level flash:
R Off-road level 1: the loweri ndicatorlamp
flashes
R Off-road level 2: the lower and center
indicator lamps flash
R Off-road level 3: all three indicator lamps
flash
The vehicle adjusts to the off-road level
selected. As soon as an off-road level is
reached, the corresponding indicator lamp
stops flashing and lights up constantly.
Raising the vehicle
During the adjustment, the Vehiclerising message, for example, appears in the
multifunction display.
The vehicle rises from highway level to off-
road level 1.
If you press the 0007or000B button on the
multifunction steering wheel ,the message
will disappear.
i Up to off-road level 2, you can hide the
messages using the 0007or000B button
on the multifunction steering wheel.
Once off-road level 2has been reached, the
lower and cente rindicato rlamps of the
selecto rwheel are on. While the adjustment from off-road level
2to
off-road level 3is taking place, you will see a
message such as the following in the
multifunction display: Vehicle risingMax. speed 12 mph (20 km/h) .The
Max. Speed 12 mph (20 km/h) message draws your attention to the
maximum speed permitted for off-road
level 3.
Once off-road level
3has been reached, you
will see a message shown in white in the
multifunction display, for example: Max. Speed 12 mph (20 km/h) .
If you drive abov e20 km/h at off-road level
3, you will see the following message in red
in the multifunctio ndisplay: Vehicle Lowering Max. Speed 12 mph (20 km/h ).
i
You cannot clear these messages.
You also hear a warning. The vehicle is
lowered and off-road level 3is canceled.
If you continue to increase your speed, the
red message continues to be shown in the
multifunction display. The newly set level is
not displayed until the vehicle has been set
to a level suitable for the current speed.
Lowering the vehicle If you maintain or reduce your speed, you will
see a message in white in the display while
the vehicle is being lowered, such as the
following:
Vehicle Lowering Max. Speed
12 mph (20 km/h).
The vehicle is lowered to off-road level 2.
If you select an off-road level when driving at
too high a speed, the Please reduce speed message appears in the multifunction
display. 210
Driving systemsDriving and parking
Page 215 of 454
X
Press button 0002.
Indicator lamp 0003lights up. Sports
suspension tuning is selected. The vehicle
is lowered by 0.6 in (15 mm).
The firmer suspension tunin ginSport mode
ensures even better contact with the road.
Select this mode when employing a sporty
driving style, e.g. on winding country roads.
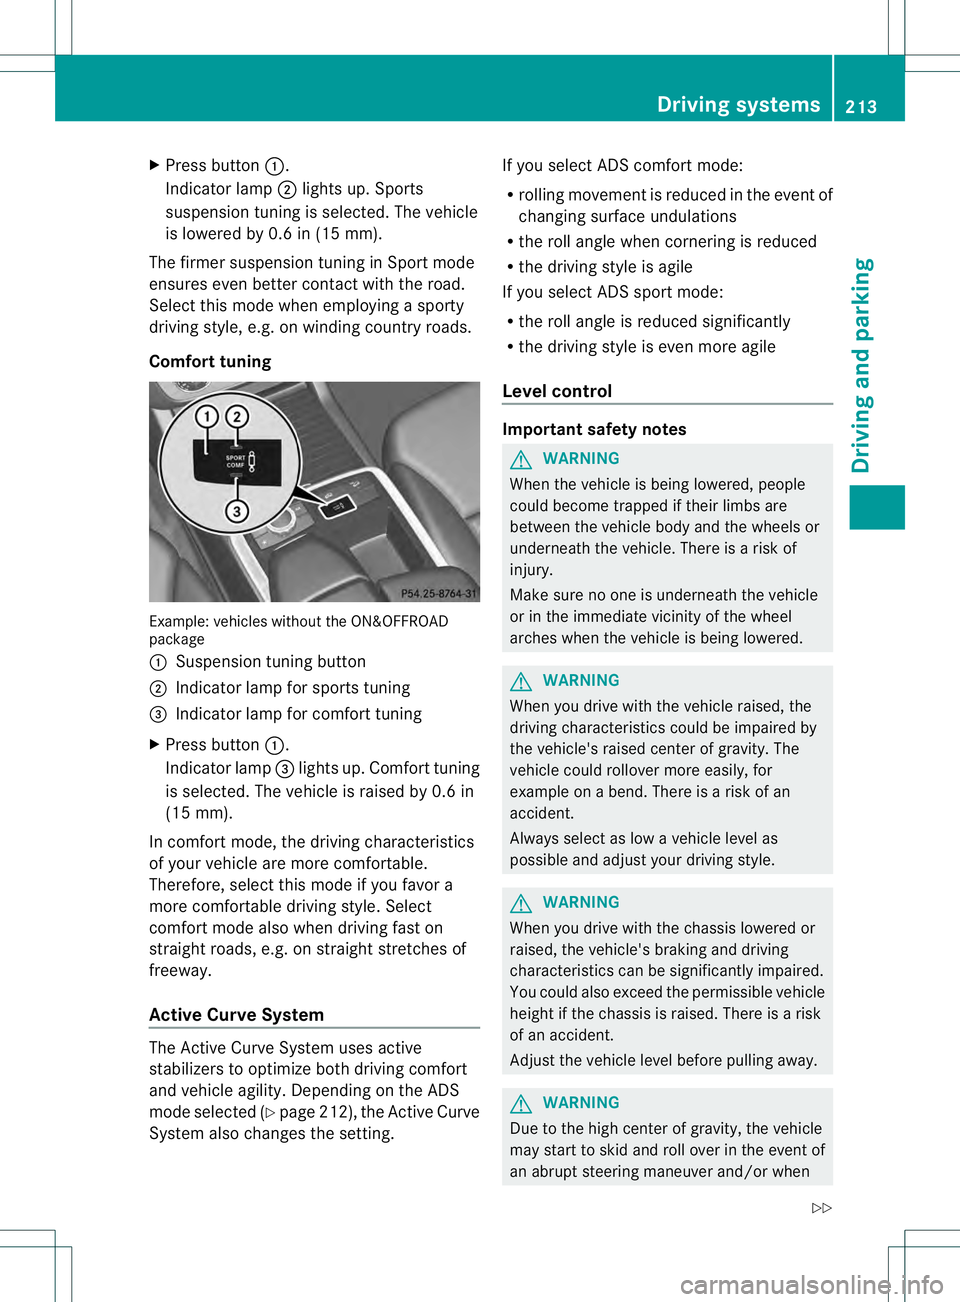
Comfort tuning Example: vehicles without the ON&OFFROAD
package
0002 Suspension tuning button
0003 Indicator lamp for sports tuning
0021 Indicator lamp for comfort tuning
X Press button 0002.
Indicator lamp 0021lights up. Comfort tuning
is selected. The vehicle is raised by 0.6 in
(15 mm).
In comfort mode, the driving characteristics
of your vehicle are more comfortable.
Therefore, select this mode if you favor a
more comfortable driving style. Select
comfort mode also when driving fast on
straight roads, e.g. on straight stretches of
freeway.
Active Curve System The Active Curve System uses active
stabilizers to optimize both driving comfort
and vehicle agility. Depending on the ADS
mode selected (Y page 212), the Active Curve
System also changes the setting. If you select ADS comfort mode:
R
rolling movement is reduced in the event of
changing surface undulations
R the roll angle when cornering is reduced
R the driving style is agile
If you select ADS sport mode:
R the roll angle is reduced significantly
R the driving style is even more agile
Level control Important safety notes
G
WARNING
When the vehicle is being lowered, people
could become trapped if their limbs are
between the vehicle body and the wheels or
underneath the vehicle. There is a risk of
injury.
Make sure no one is underneath the vehicle
or in the immediate vicinity of the wheel
arches when the vehicle is being lowered. G
WARNING
When you drive with the vehicle raised, the
driving characteristics could be impaired by
the vehicle's raised center of gravity. The
vehicle could rollover more easily, for
example on a bend. There is a risk of an
accident.
Always select as low a vehicle level as
possible and adjust your driving style. G
WARNING
When you drive with the chassis lowered or
raised, the vehicle's braking and driving
characteristics can be significantly impaired.
You could also exceed the permissible vehicle
height if the chassis is raised. There is a risk
of an accident.
Adjust the vehicle level before pulling away. G
WARNING
Due to the high center of gravity, the vehicle
may start to skid and roll over in the event of
an abrupt steering maneuver and/or when Driving systems
213Driving and parking
Z
Page 217 of 454
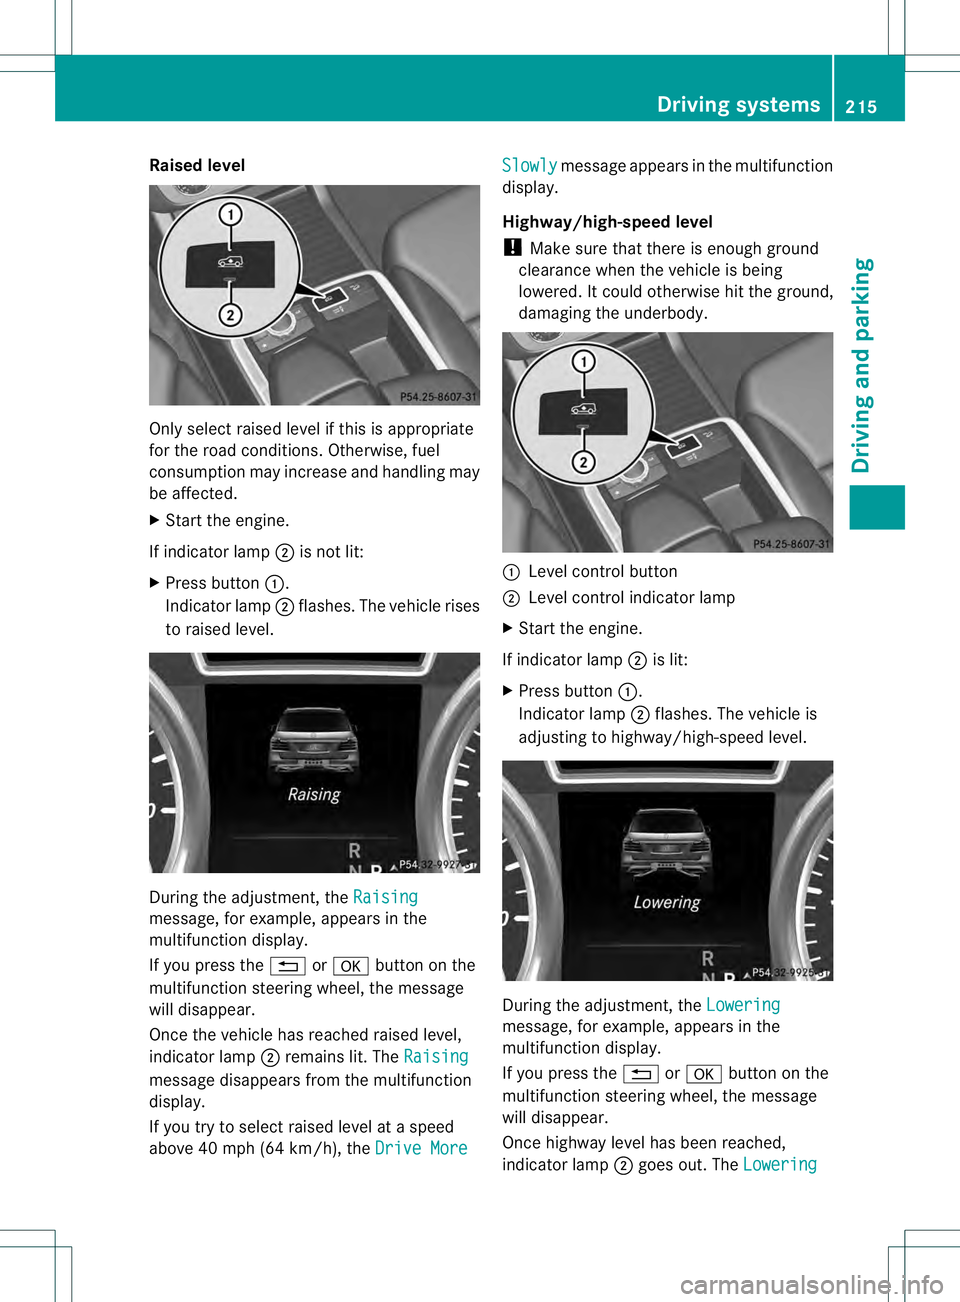
Raised level
Only select raised level if this is appropriate
for the road conditions
.Otherwise, fuel
consumption may increase and handling may
be affected.
X Start the engine.
If indicator lamp 0003is not lit:
X Press button 0002.
Indicator lamp 0003flashes. The vehicle rises
to raised level. During the adjustment, the
Raisingmessage, for example, appears in the
multifunctio ndisplay.
If you press the 0007or000B button on the
multifunction steering wheel, the message
will disappear.
Once the vehicle has reached raised level,
indicator lamp 0003remains lit. The Raising message disappears fro
mthe multifunction
display.
If you try to select raised level at a speed
above 40 mph (64 km/h), the Drive More Slowly message appears in the multifunction
display.
Highway/high-speed level
! Make sure that there is enough ground
clearance when the vehicle is being
lowered. It could otherwise hit the ground,
damaging the underbody. 0002
Level control button
0003 Level control indicator lamp
X Start the engine.
If indicator lamp 0003is lit:
X Press button 0002.
Indicator lamp 0003flashes. The vehicle is
adjusting to highway/high-speed level. During the adjustment, the
Lowering message, for example, appears in the
multifunction display.
If you press the
0007or000B button on the
multifunction steering wheel, the message
will disappear.
Once highway level has been reached,
indicator lamp 0003goes out. The Lowering Driving systems
215Driving and parking Z