2013 MERCEDES-BENZ GL reset
[x] Cancel search: resetPage 122 of 454
Parking position for the exterior
mirror on the front-passenger side
Setting and storing the parking position Using reverse gear
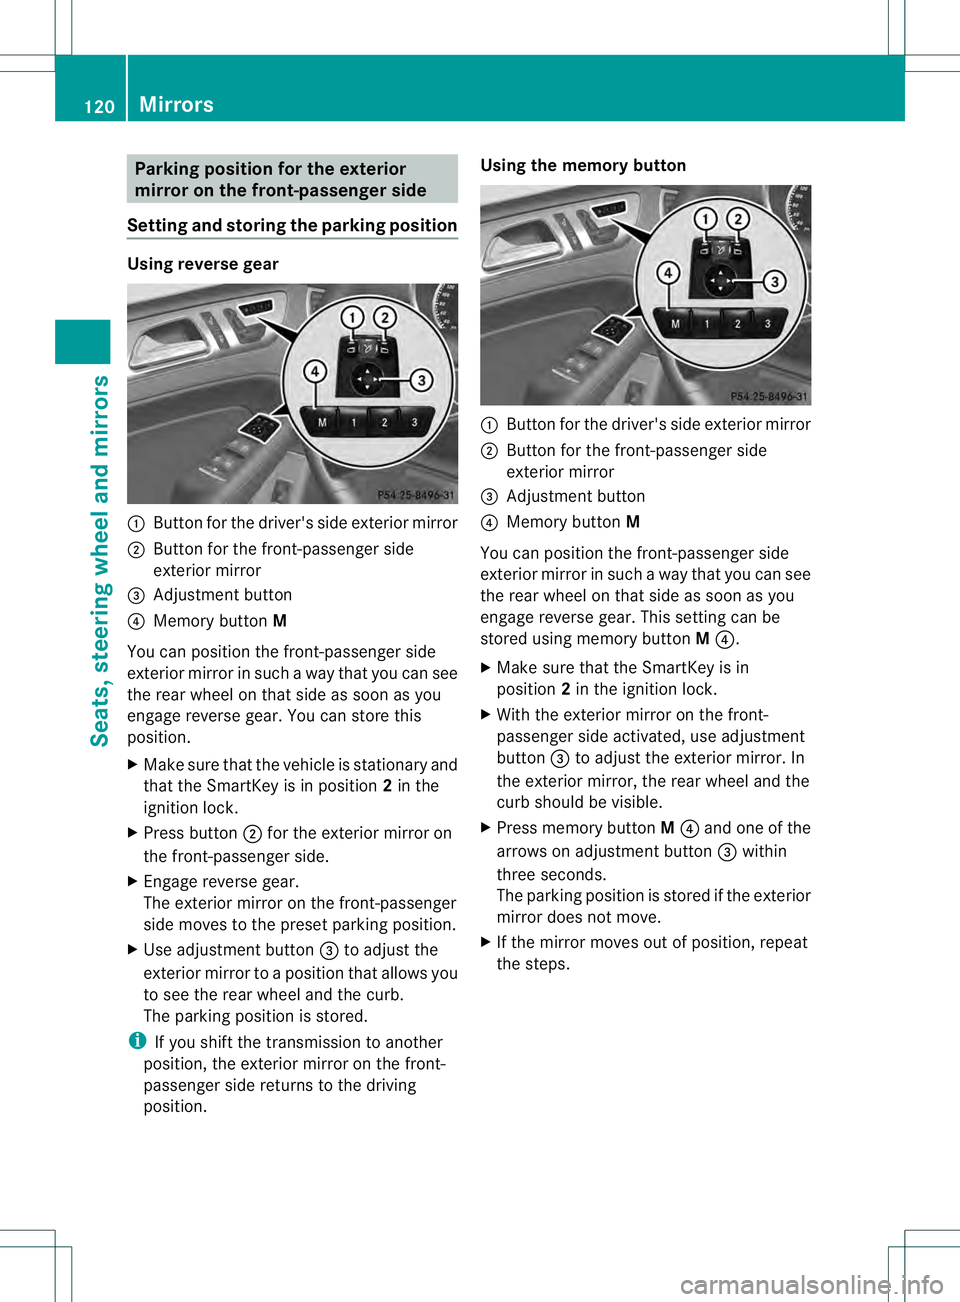
0002
Button for the driver's side exterior mirror
0003 Button for the front-passenger side
exterior mirror
0021 Adjustment button
0020 Memory button M
You can position the front-passenger side
exterior mirror in such a way that you can see
the rear wheel on that side as soon as you
engage reverse gear. You can store this
position.
X Make sure that the vehicle is stationary and
that the SmartKey is in position 2in the
ignition lock.
X Press button 0003for the exterior mirror on
the front-passenger side.
X Engage reverse gear.
The exterior mirror on the front-passenger
side moves to the preset parking position.
X Use adjustment button 0021to adjust the
exterior mirror to a position that allows you
to see the rear wheel and the curb.
The parking position is stored.
i If you shift the transmission to another
position, the exterior mirror on the front-
passenger side returns to the driving
position. Using the memory button
0002
Button for the driver's side exterior mirror
0003 Button for the front-passenger side
exterior mirror
0021 Adjustment button
0020 Memory button M
You can position the front-passenger side
exterior mirror in such a way that you can see
the rear wheel on that side as soon as you
engage reverse gear. This setting can be
stored using memory button M0020.
X Make sure that the SmartKey is in
position 2in the ignition lock.
X With the exterior mirror on the front-
passenger side activated, use adjustment
button 0021to adjust the exterior mirror. In
the exterior mirror, the rear wheel and the
curb should be visible.
X Press memory button M0020 and one of the
arrows on adjustment button 0021within
three seconds.
The parking position is stored if the exterior
mirror does not move.
X If the mirror moves out of position, repeat
the steps. 120
MirrorsSeats, steering wheel and mirrors
Page 123 of 454
Calling up a stored parking position
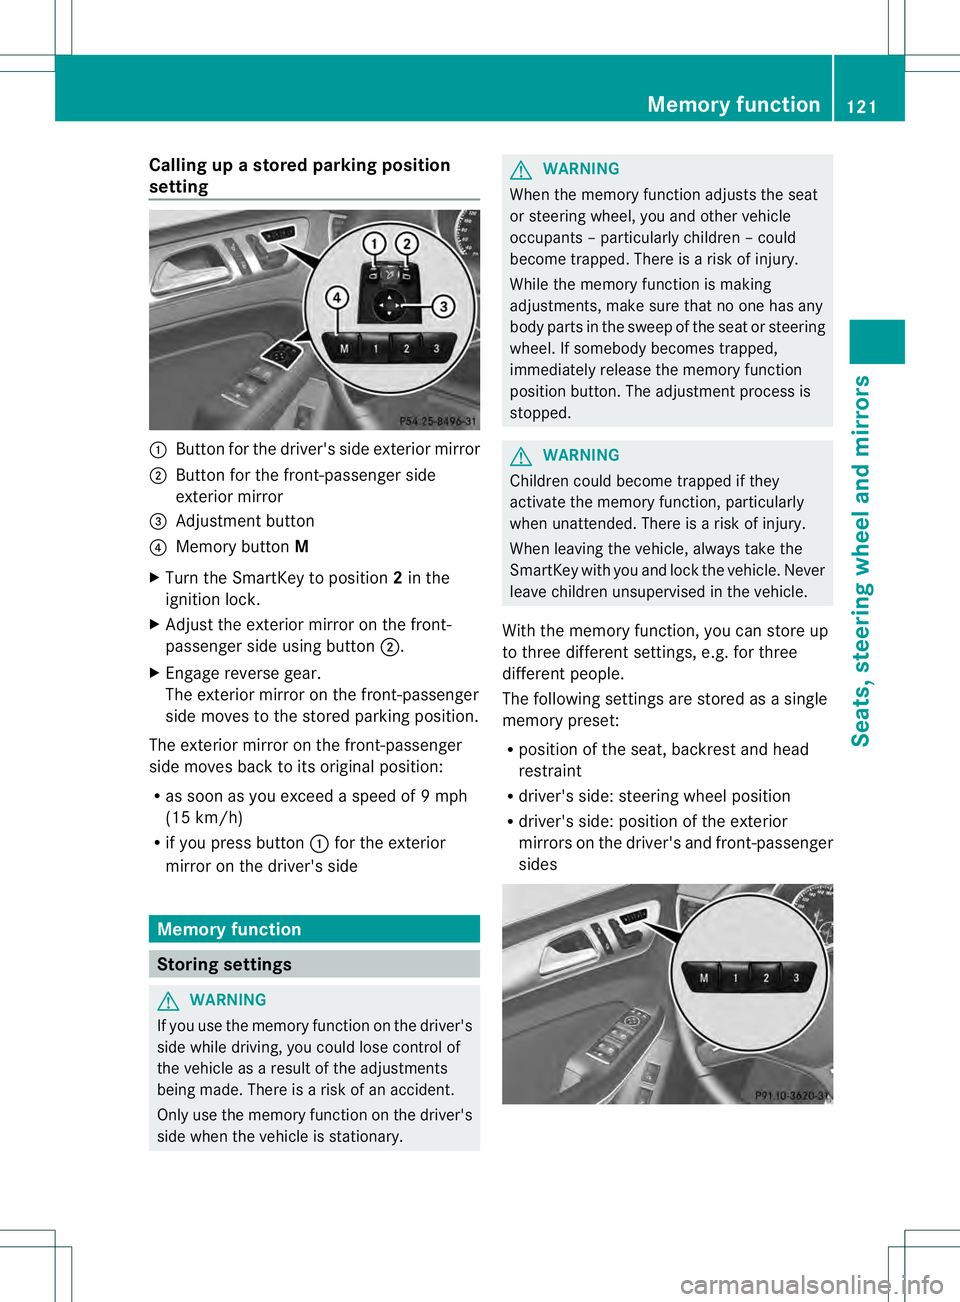
setting 0002
Butto nfor the driver's side exterior mirror
0003 Button for the front-passenger side
exterior mirror
0021 Adjustment button
0020 Memory button M
X Turn the SmartKey to position 2in the
ignition lock.
X Adjust the exterior mirror on the front-
passenger side using button 0003.
X Engage reverse gear.
The exterior mirror on the front-passenger
side moves to the stored parking position.
The exterior mirror on the front-passenger
side moves back to its original position:
R as soon as you exceed a speed of 9mph
(15 km/h)
R if you press button 0002for the exterior
mirror on the driver's side Memory function
Storing settings
G
WARNING
If you use the memor yfunctio nonthe driver's
side while driving, you could lose control of
the vehicle as a result of the adjustments
being made. There is a risk of an accident.
Only use the memory function on the driver's
side when the vehicle is stationary. G
WARNING
When the memory function adjusts the seat
or steering wheel, you and other vehicle
occupants –particularly childre n–could
become trapped. There is a risk of injury.
While the memory function is making
adjustments, make sure that no one has any
body parts in the sweep of the seat or steering
wheel. If somebody becomes trapped,
immediately release the memory function
position button .The adjustment process is
stopped. G
WARNING
Children could become trapped if they
activate the memory function, particularly
when unattended. There is arisk of injury.
When leaving the vehicle, always take the
SmartKey with you and lock the vehicle. Never
leave children unsupervised in the vehicle.
With the memory function, you can store up
to three different settings, e.g. for three
differen tpeople.
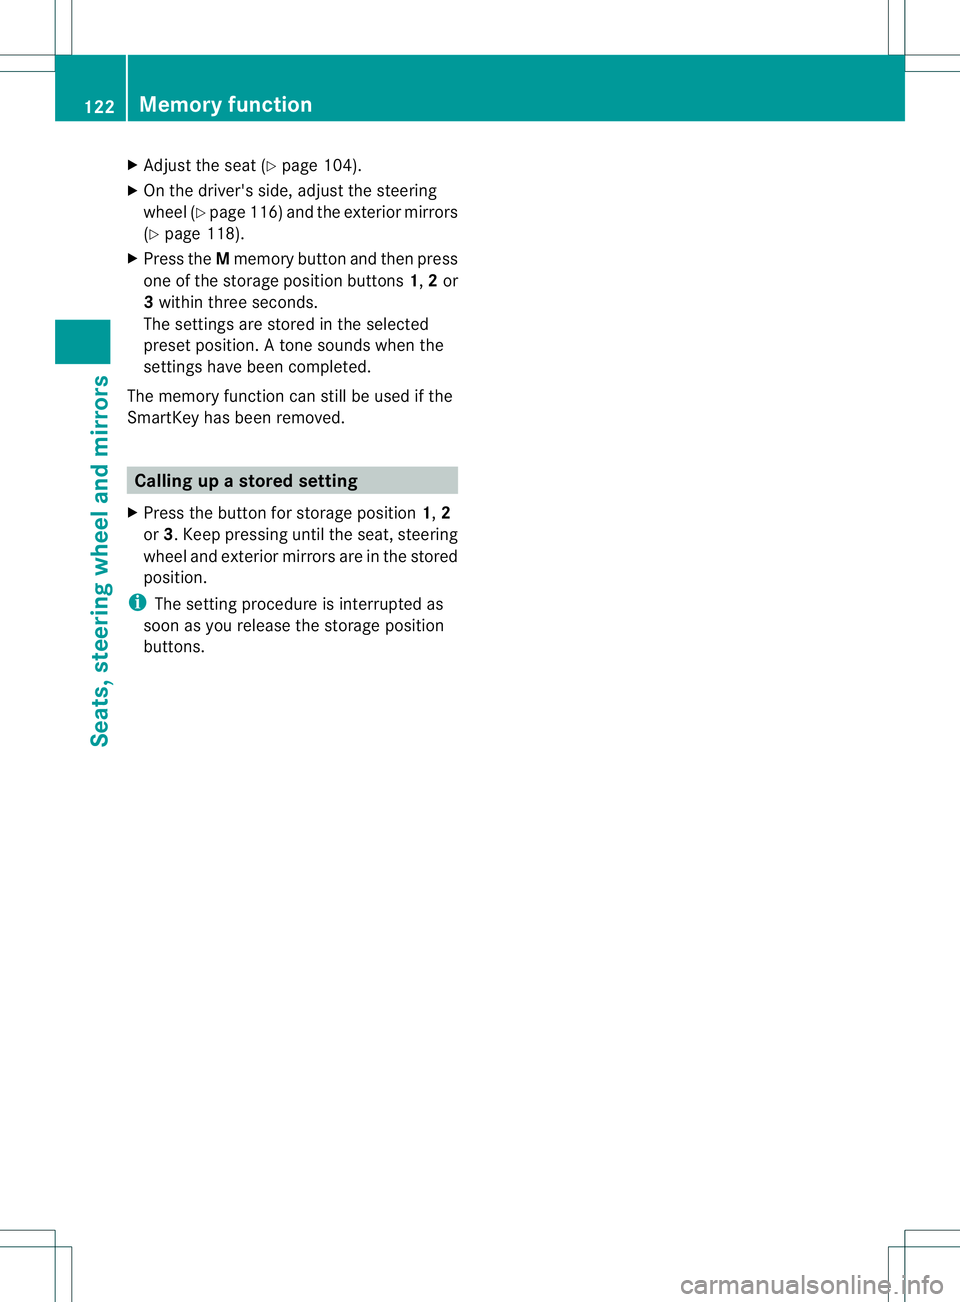
The following settings are stored as a single
memory preset:
R position of the seat, backrest and head
restraint
R driver's side: steering wheel position
R driver's side: position of the exterior
mirrors on the driver's and front-passenger
sides Memory function
121Seats, steering wheel and mirrors Z
Page 124 of 454
X
Adjust the sea t(Ypage 104).
X On the driver's side, adjust the steering
wheel (Y page 116 )and the exterio rmirrors
(Y page 118).
X Press the Mmemory button and the npress
one of the storage position buttons 1,2or
3 withi nthree seconds.
The settings are stored in the selected
preset position. Atone sounds when the
settings have been completed.
The memory function can still be used if the
SmartKey has been removed. Calling up
astore dsetting
X Press the button for storage position 1,2
or 3.K eep pressing until the seat, steering
wheel and exterior mirror sare in the stored
position.
i The setting procedure is interrupted as
soon as you release the storage position
buttons. 122
Memory functionSeats, steering wheel and mirrors
Page 131 of 454
The hazard warning lamps automatically
switch on if:
R
an air bag is deployed.
R the vehicle decelerates rapidly from a
speed of more than 45mph (70 km/h) and
comes to a standstill.
The hazard warning lamps switch off
automatically if the vehicle reaches a speed
of over 6mph (10km/h) again after a full
brake application.
i The hazard warning lamps still operate if
the ignition is switched off. Headlamp cleaning system
The headlamps are cleaned automatically if
the "Wipe with washer fluid" function is
operated five times (Y page 136) while the
lights are on and the engine is running. When
you switch off the ignition, the automatic
headlamp cleaning system is reset and
counting is resumed from 0. Active light function
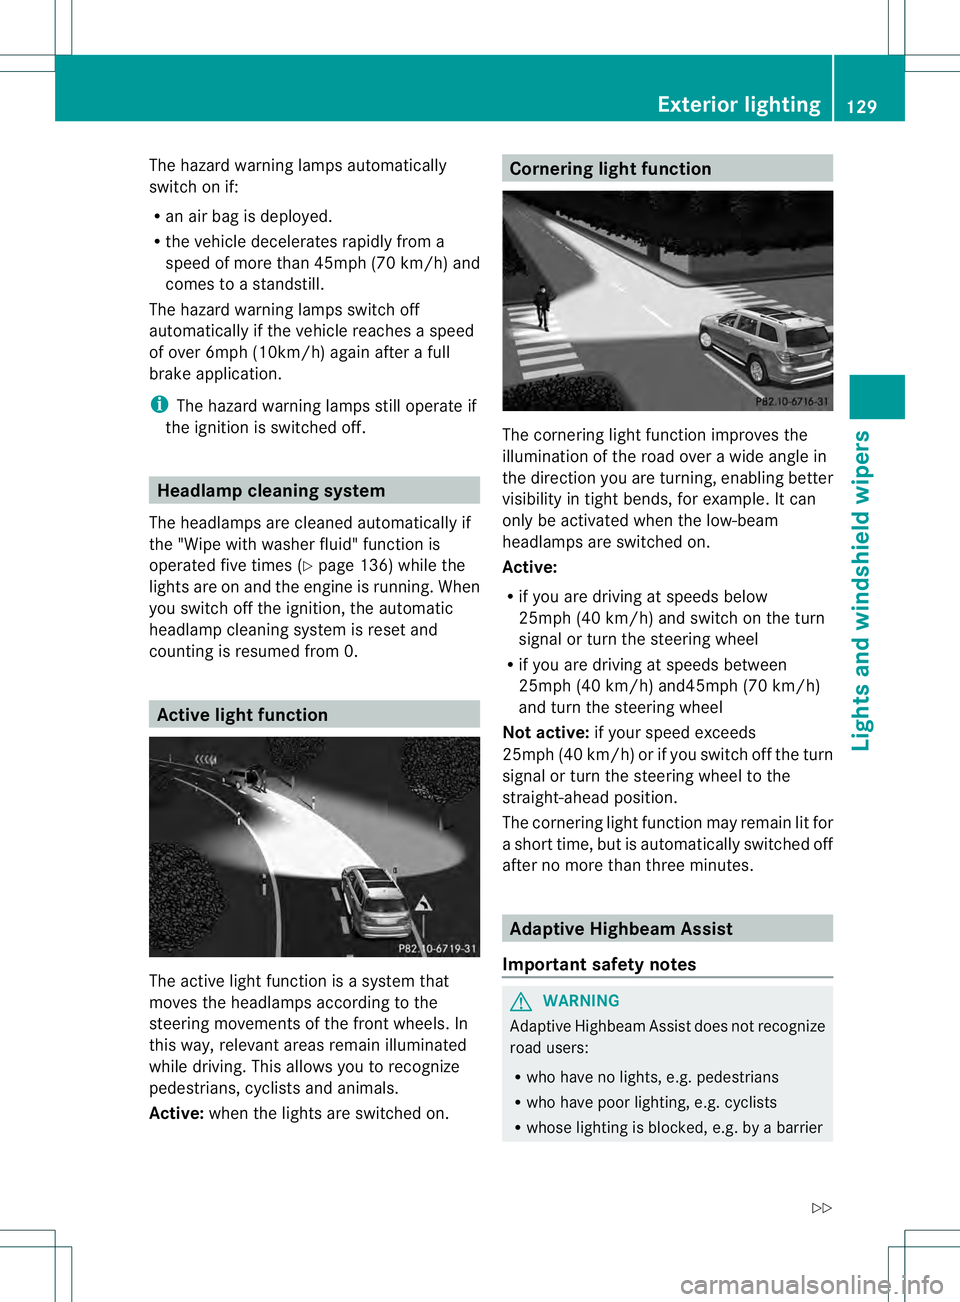
The active light function is a system that
moves the headlamps according to the
steering movements of the front wheels. In
this way, relevant areas remain illuminated
while driving. This allows you to recognize
pedestrians, cyclists and animals.
Active: whenthe lights are switched on. Cornering light function
The cornering light function improves the
illumination of the road over a wide angle in
the direction you are turning, enabling better
visibility in tight bends, for example. It can
only be activated when the low-beam
headlamps are switched on.
Active:
R
if you are driving at speeds below
25mph (40 km/h) and switch on the turn
signal or turn the steering wheel
R if you are driving at speeds between
25mph (40 km/h) and45mph (70 km/h)
and turn the steering wheel
Not active: if your speed exceeds
25mph (40 km/h) or if you switch off the turn
signal or turn the steering wheel to the
straight-ahead position.
The cornering light function may remain lit for
a short time, but is automatically switched off
after no more than three minutes. Adaptive Highbeam Assist
Important safety notes G
WARNING
Adaptive Highbeam Assist does not recognize
road users:
R who have no lights, e.g. pedestrians
R who have poor lighting, e.g. cyclists
R whose lighting is blocked, e.g. by a barrier Exterior lighting
129Lights and windshield wipers
Z
Page 201 of 454
front, for vehicle speed, for braking in good
time and for staying in you
rlane.
Do not use DISTRONIC PLUS:
R in road and traffic conditions which do not
allow you to maintain a constan tspeed e.g.
in heavy traffic or on winding roads
R on slippery road surfaces .Braking or
accelerating could cause the drive wheels
to lose traction and the vehicle could then
skid
R when there is poor visibility, e.g. due to fog,
heavy rain or snow
DISTRONIC PLUS may not detect narrow
vehicles driving in front, e.g. motorcycles, or
vehicles driving on a different line.
In particular, the detection of obstacles can
be impaired if:
R dirt on the sensors or anything else
covering the sensors
R snow or heavy rain
R interference by other rada rsources
R strong radar reflections, for example, in
parking garages
If DISTRONIC PLUS no longer detects a
vehicle in front, DISTRONIC PLUS may
unexpectedly accelerate the vehicle to the
stored speed.
This speed may:
R be too high if you are driving in a filter lane
or an exit lane
R be so high when driving in the right-hand
lane that you overtake vehicles in the left-
hand lane
R be so high when driving in the left-hand lane
that you overtake vehicles in the right-hand
lane
If there is a change of drivers, advise the new
driver of the speed stored.
General notes DISTRONIC PLUS regulates the speed and
automatically helps you maintain the
distance to the vehicle detected in front. DISTRONIC PLUS brakes automatically so
that the set speed is not exceeded.
On long and steep downhill gradients,
especially if the vehicle is laden or towing a
trailer, you must select shift range
1,2or 3
in good time. By doing so, you will make use
of the braking effect of the engine, This
relieves the load on the brake system and
prevents the brakes from overheating and
wearing too quickly.
If DISTRONIC PLUS detects a slower-moving
vehicle in front, your vehicle is braked in order
to maintain the preset distance to the vehicle
in front.
If DISTRONIC PLUS detects that there is a risk
of a collision, you will be warned visually and
acoustically. DISTRONIC PLUS cannot
prevent a collision without your intervention.
An intermittent warning tone will then sound
and the distance warning lamp will light up in
the instrument cluster. Brake immediately in
order to increase the distance to the vehicle
in front or take evasive action provided it is
safe to do so.
For DISTRONIC PLUS to assist you when
driving, the radar sensor system must be:
R activated (Y page 281)
R operational
If there is no vehicle in front, DISTRONIC
PLUS operates in the same way as cruise
control in the speed range between 20 mph
(Canada: 30 km/h) and120 mph (Canada:
200 km/h). If a vehicle is driving in front of
you, it operates in the speed range between
0 mph (0 km/h) and 120 mph (Canada:
200 km/h).
Do not use DISTRONIC PLUS while driving on
roads with steep gradients.
As DISTRONIC PLUS transmits radar waves,
it can resemble the radar detectors of the
responsible authorities. You can refer to the
relevant chapter in the Operator's Manual if
questions are asked about this.
i USA only: Driving systems
199Driving and parking Z
Page 237 of 454
ATTENTION ASSIST is reset when you
continue your journey and starts assessing
your tiredness agai nif:
R you switch off the engine.
R you take off you rseat belt and open the
driver's door, e.g. for a change of drivers or
to take a break. Night View Assist Plus
Important safety notes Night View Assist Plus is only an aid and is not
a substitute for attentive driving. Do not rely
on the Night View Assist Plus display. You are
responsible for the distance to the vehicle in
front, for vehicle speed and for braking in
good time. Drive carefully and always adapt
your driving style to suit the prevailing road
and traffic conditions.
The system may be impaired or may not
function if:
R there is poor visibility, e.g. due to snow,
rain, fog or spray
R the windshield is dirty, fogged up or
covered, for instance by a sticker, in the
vicinity of the camera
R on bends, on uphill gradient sordownhill
gradients
Pedestrian recognition may be impaired or
inoperative if:
R pedestrians are partially or entirely
obscured by objects, e.g. parked vehicles
R the silhouette of the pedestrian in the Night
View Assist Plus display is incomplete or
interrupted, e.g. by powerful light
reflections
R pedestrians do not contrast adequately
from the background
R pedestrians are not in an upright position,
e.g. sitting, squatting or lying General notes
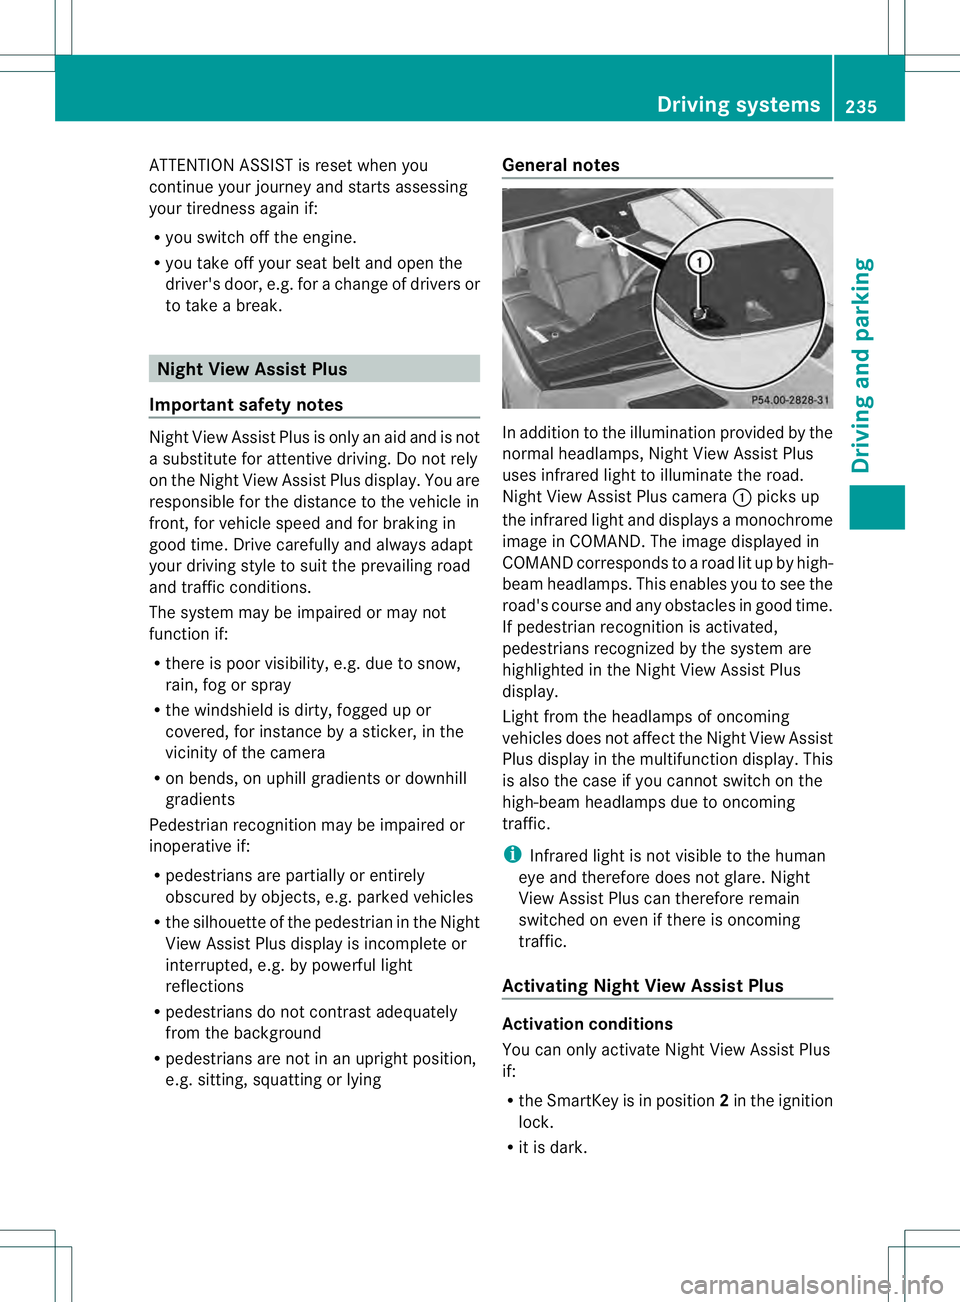
In addition to the illumination provided by the
normal headlamps, Night View Assist Plus
uses infrared light to illuminate the road.
Night View Assist Plus camera
0002picks up
the infrared light and displays a monochrome
image in COMAND. The image displayed in
COMAND corresponds to a road lit up by high-
beam headlamps. This enables you to see the
road's course and any obstacles in good time.
If pedestrian recognition is activated,
pedestrians recognized by the system are
highlighted in the Night View Assist Plus
display.
Light from the headlamps of oncoming
vehicles does not affect the Night View Assist
Plus display in the multifunction display .This
is also the case if you cannot switch on the
high-beam headlamps due to oncoming
traffic.
i Infrared light is not visible to the human
eye and therefore does not glare. Night
View Assist Plus can therefore remain
switched on even if there is oncoming
traffic.
Activating Night View Assist Plus Activation conditions
You can only activate Night View Assist Plus
if:
R
the SmartKey is in position 2in the ignition
lock.
R it is dark. Driving systems
235Driving and parking Z
Page 273 of 454
Trip computer "From Start" or "From
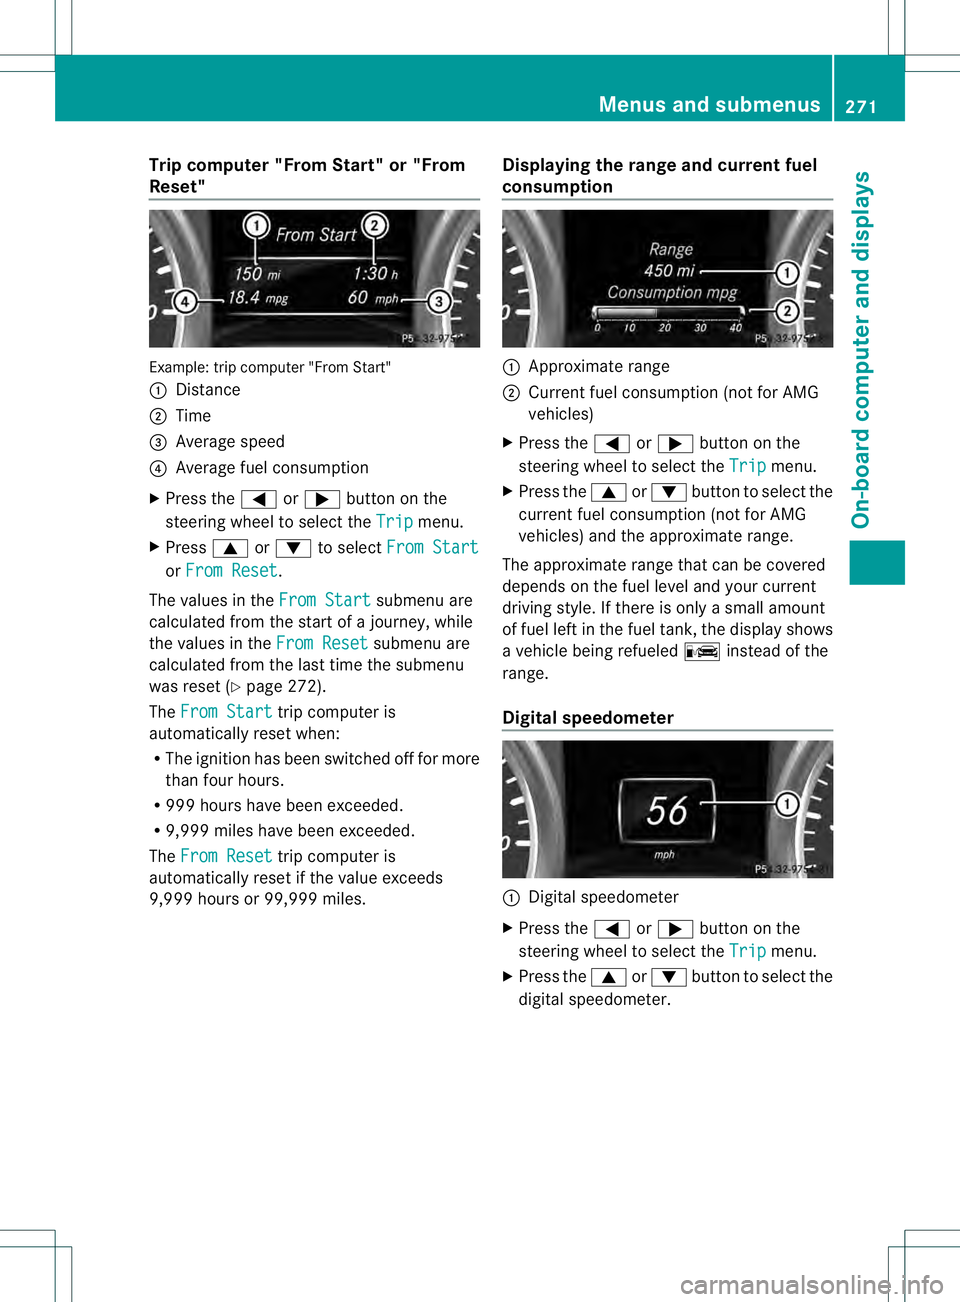
Reset" Example: trip computer "From Start"
0002
Distance
0003 Time
0021 Average speed
0020 Average fuel consumption
X Press the 0002or0005 button on the
steering wheel to select the Trip menu.
X Press 0003or0004 to select From Start or
From Reset .
The values in the From Start submenu are
calculated fro mthe start of a journey, while
the values in the From Reset submenu are
calculated from the last time the submenu
was reset (Y page 272).
The From Start trip computer is
automatically reset when:
R The ignition has been switched off for more
than four hours.
R 999 hours have been exceeded.
R 9,999 miles have been exceeded.
The From Reset trip computer is
automatically reset if the value exceeds
9,999 hours or 99,999 miles. Displaying the range and current fuel
consumption 0002
Approximate range
0003 Current fuel consumption (not for AMG
vehicles)
X Press the 0002or0005 button on the
steering wheel to select the Trip menu.
X Press the 0003or0004 button to select the
current fuel consumption (not for AMG
vehicles) and the approximate range.
The approximate range that can be covered
depends on the fuel level and your current
driving style. If there is only a small amount
of fuel left in the fuel tank, the display shows
a vehicle being refueled 000Ainstead of the
range.
Digital speedometer 0002
Digital speedometer
X Press the 0002or0005 button on the
steering wheel to select the Trip menu.
X Press the 0003or0004 button to select the
digital speedometer. Menus and submenus
271On-board computer and displays Z
Page 274 of 454
Resetting values
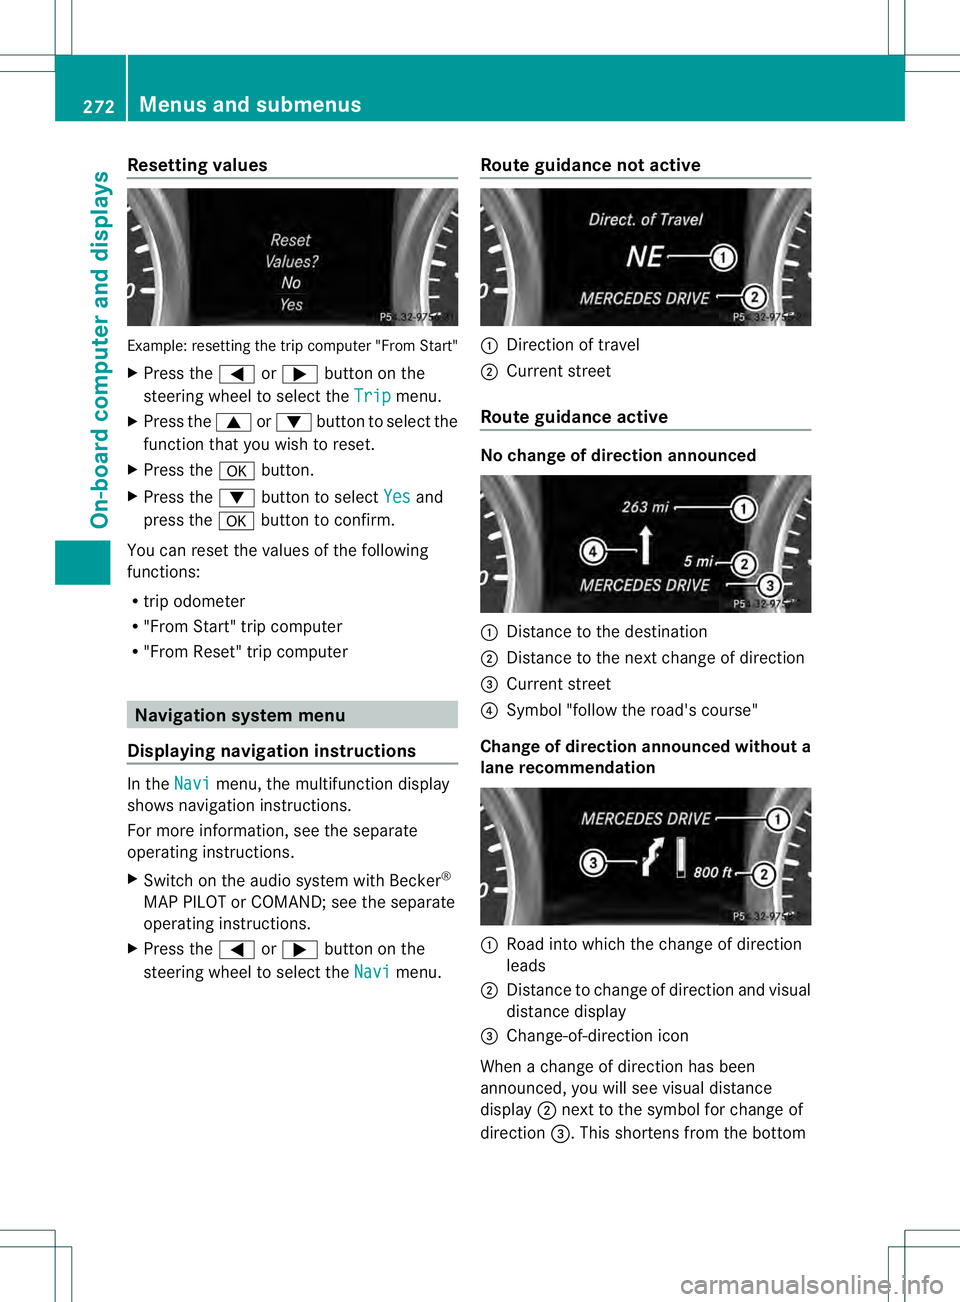
Example: resetting the trip computer "From Start"
X
Press the 0002or0005 button on the
steering wheel to select the Trip menu.
X Press the 0003or0004 button to select the
function that you wish to reset.
X Press the 000Bbutton.
X Press the 0004button to select Yes and
press the 000Bbutton to confirm.
You can reset the values of the following
functions:
R trip odometer
R "From Start" trip computer
R "Fro mReset" trip computer Navigation system menu
Displaying navigation instructions In the
Navi menu, the multifunction display
shows navigation instructions.
For more information, see the separate
operating instructions.
X Switch on the audio system with Becker ®
MAP PILOT or COMAND; see the separate
operating instructions.
X Press the 0002or0005 button on the
steering wheel to select the Navi menu.Route guidance not active 0002
Direction of travel
0003 Current street
Route guidance active No change of direction announced
0002
Distance to the destination
0003 Distance to the next change of direction
0021 Current street
0020 Symbol "follow the road's course"
Change of direction announced without a
lane recommendation 0002
Road into which the change of direction
leads
0003 Distance to change of direction and visual
distance display
0021 Change-of-direction icon
When a change of direction has been
announced, you will see visual distance
display 0003next to the symbol for change of
direction 0021.This shortens from the bottom 272
Menus and submenusOn-board computer and displays