2013 MERCEDES-BENZ GL cruise control
[x] Cancel search: cruise controlPage 206 of 454
Keep in mind that it may take a brief moment
until the vehicle has accelerated or braked to
the speed set.
X Press the cruise control lever up 0002for a
highe rspeed or down 0003for a lower speed.
X To adjust the set speed in 1 mph
increments (1 km/h increments): briefly
press the cruise control lever up 0002or
down 0003to the pressure point.
Every time the cruise control lever is
pressed up 0002or down 0003the last speed
stored is increased or reduced.
X To adjust the set speed in 5 mph
increments (10 km/h increments):
briefly press the cruise control lever
up 0002 or down 0003to the pressure point.
Every time the cruise control lever is
pressed up 0002or down 0003, the last speed
stored is increased or reduced.
i DISTRONIC PLUS is not deactivated if you
depress the accelerator pedal. If you
accelerate to overtake, DISTRONIC PLUS
adjusts the vehicle's speed to the last
speed stored after you have finished
overtaking.
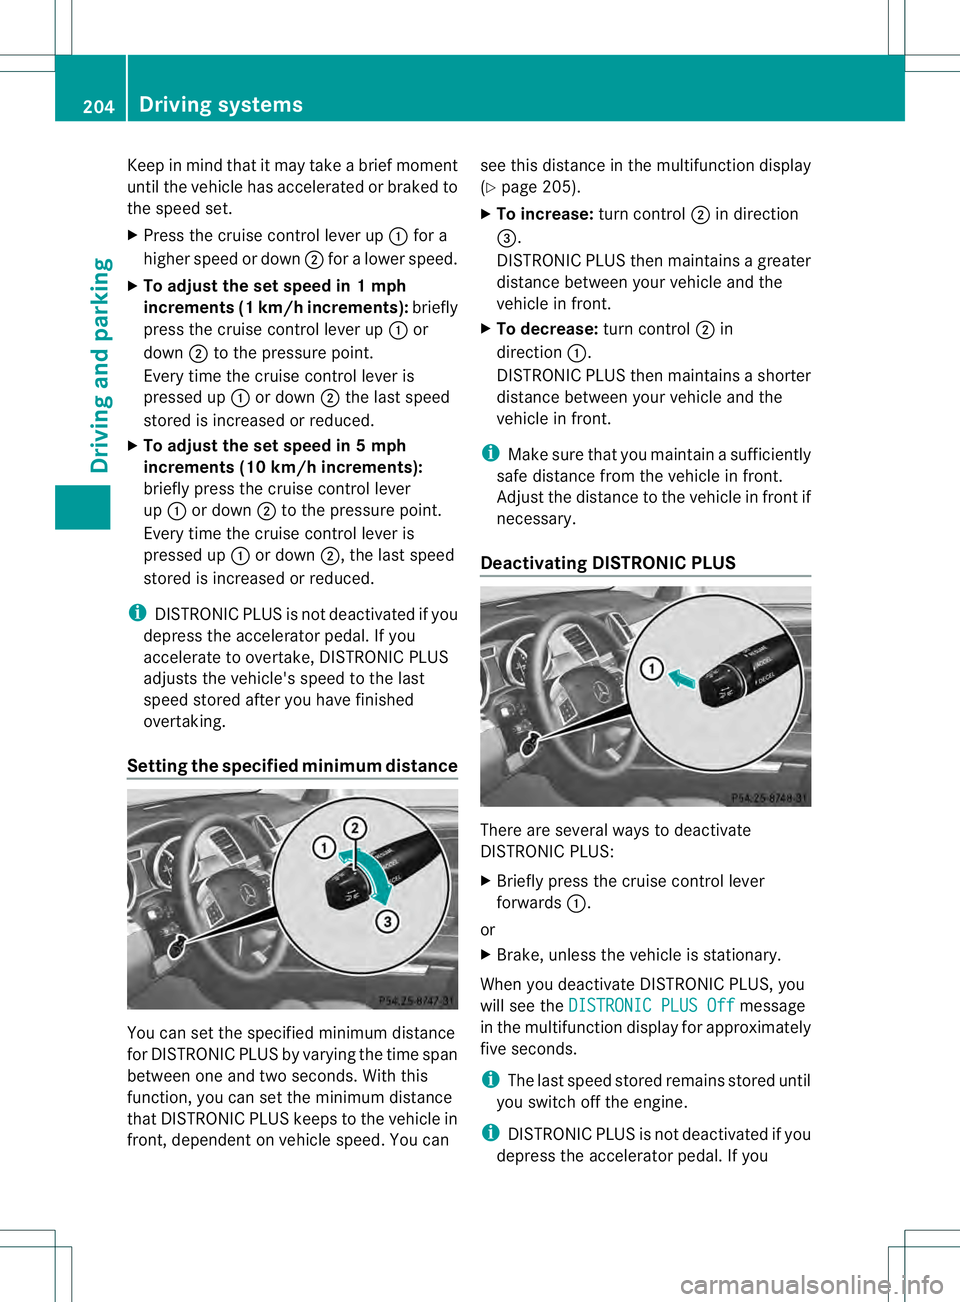
Setting the specified minimum distance You can set the specified minimum distance
for DISTRONIC PLUS by varying the time span
between one and two seconds. With this
function, you can set the minimum distance
that DISTRONIC PLUS keeps to the vehicle in
front, dependen
tonvehicle speed. You can see this distance in the multifunction display
(Y
page 205).
X To increase: turn control0003in direction
0021.
DISTRONIC PLUS then maintains a greater
distance between your vehicle and the
vehicle in front.
X To decrease: turn control0003in
direction 0002.
DISTRONIC PLUS then maintains a shorter
distance between your vehicle and the
vehicle in front.
i Make sure that you maintain a sufficiently
safe distance from the vehicle in front.
Adjust the distance to the vehicle in fron tif
necessary.
Deactivating DISTRONIC PLUS There are several ways to deactivate
DISTRONIC PLUS:
X
Briefly press the cruise control lever
forwards 0002.
or
X Brake, unless the vehicle is stationary.
Whe nyou deactivate DISTRONIC PLUS, you
will see the DISTRONIC PLUS Off message
in the multifunction display for approximately
five seconds.
i The last speed stored remains stored until
you switch off the engine.
i DISTRONIC PLUS is not deactivated if you
depress the accelerator pedal. If you 204
Driving systemsDriving and parking
Page 207 of 454
accelerate to overtake, DISTRONIC PLUS
adjusts the vehicle's speed to the last
speed stored after you have finished
overtaking.
DISTRONIC PLU Sis automatically
deactivated if:
R you engage the electric parking brake or if
the vehicle is automatically secured with
the electric parking brake
R you are driving slower than 15 mph
(25 km/h) and there is no vehicle in front,
or if the vehicle in front is no longer
detected
R ESP ®
intervenes or you deactivate ESP ®
R the transmission is in the P,Ror Nposition
R you switch off the radar sensor system
(Y page 281)
R you pull the cruise control lever towards
you in order to pull awaya nd the front-
passenge rdoor or one of the rear doors is
open
R you activate DSR
R you activate off-road program 2onvehicles
with the ON&OFFROAD package
R the vehicle has skidded
If DISTRONIC PLUS is deactivated, you will
hear a warning tone. You will see the
DISTRONIC PLUS Off message in the
multifunction display for approximately five
seconds. Displays in the instrument cluster Displays in the speedometer
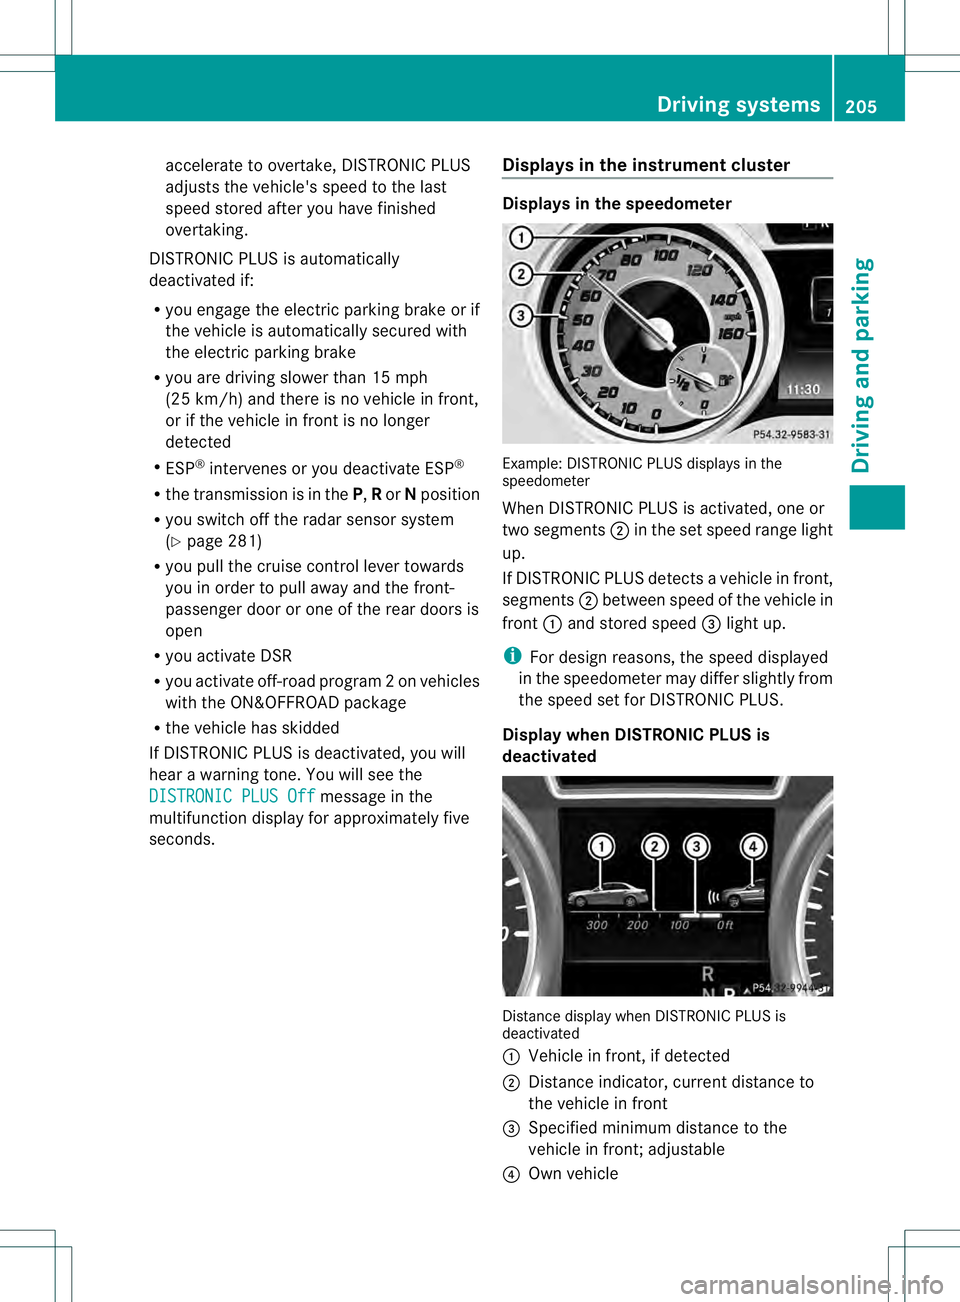
Example: DISTRONIC PLUS displays in the
speedometer
When DISTRONIC PLUS is activated, one or
two segments
0003in the set speed range light
up.
If DISTRONIC PLUS detects avehicle in front,
segments 0003between speed of the vehicle in
front 0002and stored speed 0021light up.
i For design reasons, the speed displayed
in the speedometer may differ slightly from
the speed set for DISTRONIC PLUS.
Display when DISTRONIC PLUS is
deactivated Distance display when DISTRONIC PLUS is
deactivated
0002
Vehicle in front, if detected
0003 Distance indicator, current distance to
the vehicle in front
0021 Specified minimum distance to the
vehicle in front; adjustable
0020 Own vehicle Driving systems
205Driving and parking Z
Page 254 of 454
X
To increase or decrease in 1 mph
increments (Canada: 1 km/h
increments): briefly press the cruise
control lever up 0002for a highe rset speed
or down 0003for a lower set speed.
The set speed appears in the multifunction
display with the 0001DSR symbol. It is also
displayed in status indicator 0021.
When DSR is activated, you can change the
set speed to a value between 1mph and
11 mph (Canada: between 2 km/h and
18 km/h).
i The DSR set speed is always changed in
1 mph increments (Canada: 1 km/h
increments). This is regardless of whether
you press the cruise control lever to or
beyond the pressure point.
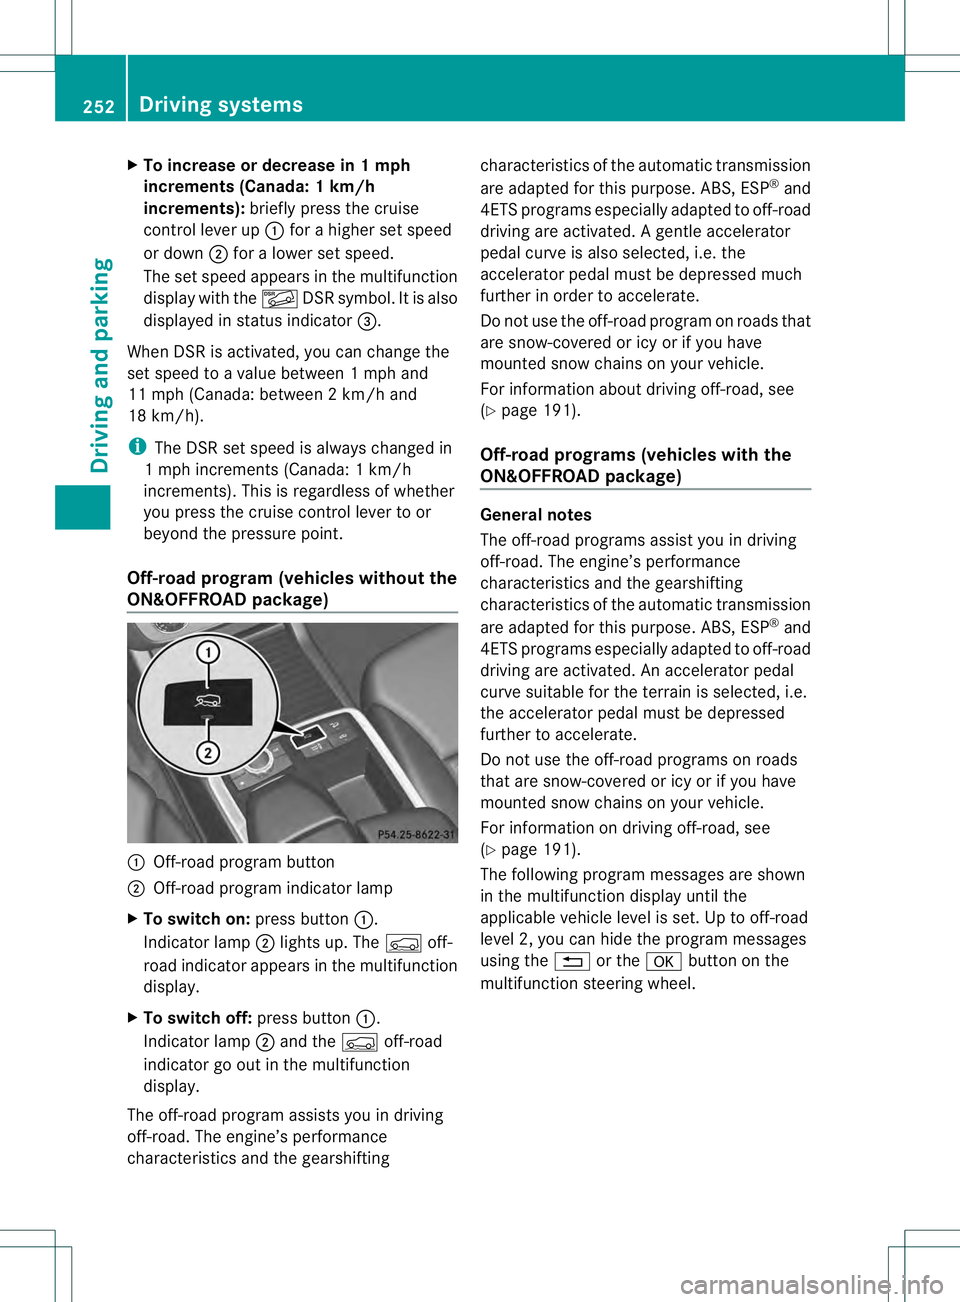
Off-road program (vehicles without the
ON&OFFROAD package) 0002
Off-road program button
0003 Off-road program indicator lamp
X To switch on: press button0002.
Indicator lamp 0003lights up. The 0006off-
road indicator appears in the multifunction
display.
X To switch off: press button0002.
Indicator lamp 0003and the 0006off-road
indicator go out in the multifunction
display.
The off-road program assists you in driving
off-road. The engine’s performance
characteristics and the gearshifting characteristics of the automatic transmission
are adapted for this purpose. ABS, ESP
®
and
4ET Sprograms especially adapted to off-road
driving are activated .Agentle accelerator
pedal curve is also selected, i.e. the
accelerator pedal must be depressed much
further in order to accelerate.
Do not use the off-road program on roads that
are snow-covered or icy or if you have
mounted snow chains on your vehicle.
For information about driving off-road, see
(Y page 191).
Off-road programs (vehicles with the
ON&OFFROAD package) General notes
The off-road programs assist you in driving
off-road. The engine’s performance
characteristics and the gearshifting
characteristics of the automatic transmission
are adapted for this purpose. ABS, ESP
®
and
4ETS programs especially adapted to off-road
driving are activated. An accelerator pedal
curve suitable for the terrain is selected, i.e.
the accelerator pedal must be depressed
further to accelerate.
Do not use the off-road programs on roads
that are snow-covered or icy or if you have
mounted snow chains on your vehicle.
For information on driving off-road, see
(Y page 191).
The following program messages are shown
in the multifunction display until the
applicable vehicle level is set. Up to off-road
level 2, you can hide the program messages
using the 0007or the 000Bbutton on the
multifunction steering wheel. 252
Driving systemsDriving and parking
Page 261 of 454
When towing a trailer, your vehicle's handling
characteristics will be differen tincomparison
with when driving without atrailer.
On long and steep downhill gradients, you
must select shift range 1,2or 3in good time.
i This also applies if you have activated
cruise control or DISTRONIC PLUS.
This will use the braking effect of the engine,
so that less braking will be required to
maintai nthe speed, This relieves the load on
the brake system and prevents the brakes
from overheating and wearing too quickly. If
you need additional braking, depress the
brake pedal repeatedly rather than
continuously.
Driving tips If the trailer swings from side to side:
X
Do not accelerate.
X Do not counter-steer.
X Brake if necessary.
R Maintain a greater distance from the
vehicle in front than when driving without a
trailer.
R Avoid braking abruptly. If possible, brake
gently at first to allow the trailer to run on.
Then, increase the braking force rapidly.
R The values given for gradient-climbing
capabilities from a standstill refer to sea
level. When driving in mountainous areas,
note that the power output of the engine
and, consequently, the vehicle's gradient-
climbing capability, decreases with
increasing altitude. Installing the ball coupling
G
WARNING
If the ball coupling is not installed and secured
correctly it can become detached while the
vehicle is in motion and fall onto the road.
There is a risk of accident and injury. Always install and secure the ball coupling as
described. Before every journey, ensure that
the ball coupling is secured with the bolt and
the corresponding spring cotter.
G
WARNING
If the ball coupling is not installed correctly or
not secured with the bolt provided and the
corresponding spring cotter, the trailer may
come loose. There is a risk of an accident.
Always install and secure the ball coupling as
described. Before every journey, ensure that
the ball coupling is secured with the bolt and
the corresponding spring cotter. G
WARNING
If the ball coupling is not installed and secured
correctly the trailer may come loose. There is
a risk of an accident.
Install and secure the ball coupling as
described in the ball coupling installation
instructions. Make sure that the ball coupling
is installed and secured correctly before every
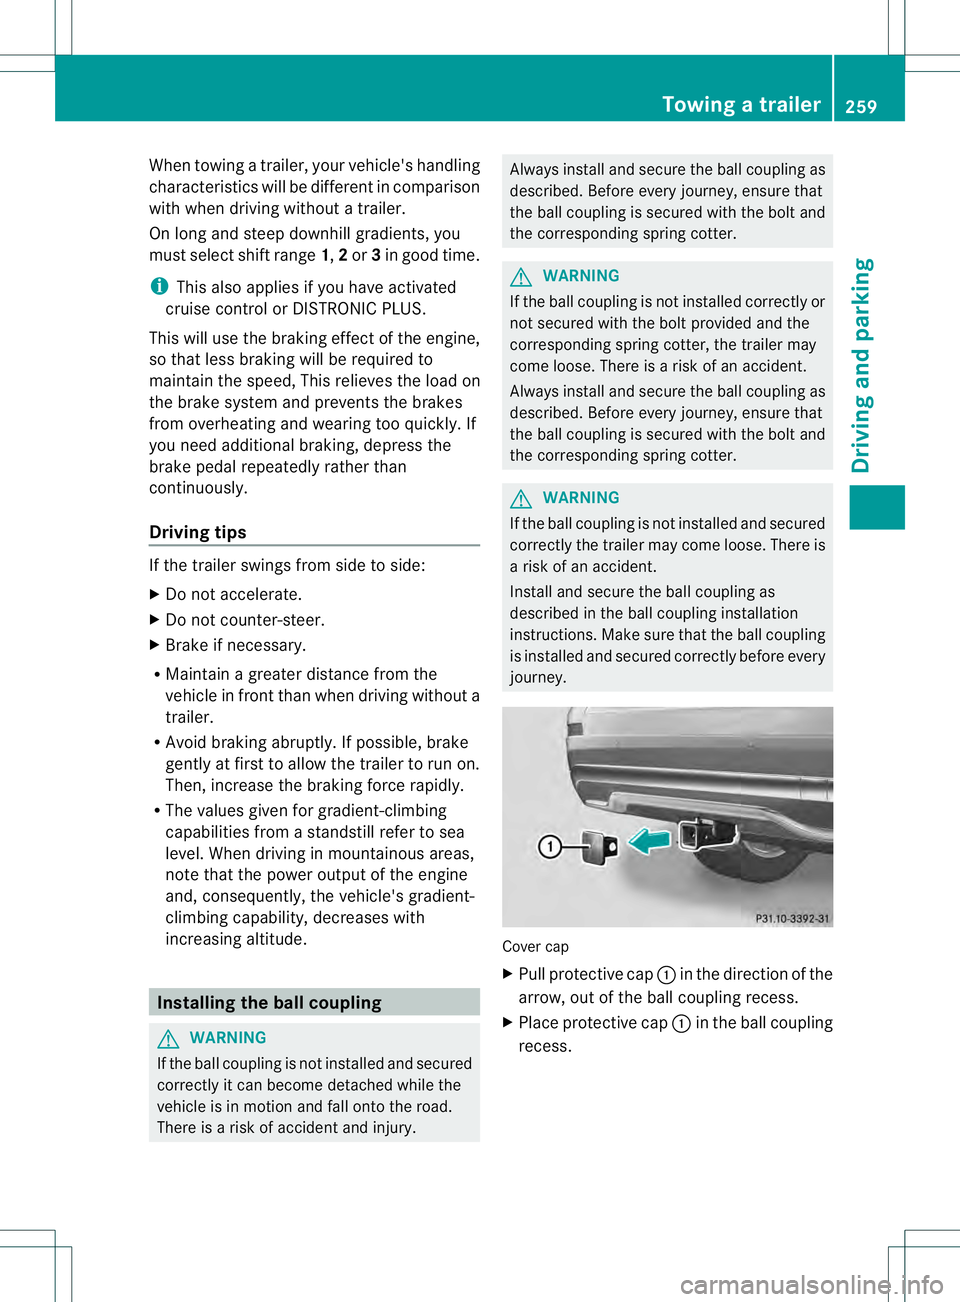
journey. Cover cap
X
Pull protective cap 0002in the direction of the
arrow, out of the ball coupling recess.
X Place protective cap 0002in the ball coupling
recess. Towing
atrailer
259Driving an d parking Z
Page 270 of 454
vehicle and do not stand near the vehicle until
the engine has cooled down.
! Adisplay message is shown if the coolant
temperature is too high.
If the coolant temperature is over
248 ‡(120 †), do not continue driving. The
engine will otherwise be damaged.
The coolan ttemperature gauge is in the
instrument cluster on the right-hand side
(Y page 33).
Under normal operating conditions and with
the specified coolant level, the coolant
temperature may rise to 248 ‡ (120 †). Tachometer
! Do not drive in the overrevving range, as
this could damage the engine.
The red band in the tachometer indicates the
engine's overrevving range.
The fuel supply is interrupted to protec tthe
engine when the red band is reached. Outside temperature display
You should pay special attention to road
conditions when temperatures are around
freezing point.
The outside temperature display is in the
multifunction display (Y page 269).
Changes in the outside temperature are
displayed after a short delay. Speedometer with segments
The segments in the speedometer indicate
which speed range is available.
R Cruise control activated (Y page 195):
The segments light up from the stored
speed to the maximum speed.
R DISTRONIC PLUS activated (Y page 198):One or two segments in the set speed
range light up.
R DISTRONIC PLUS detectsav ehicle in front:
The segments between the speed of the
vehicle in fron tand the stored speed light
up. Operating the on-board computer
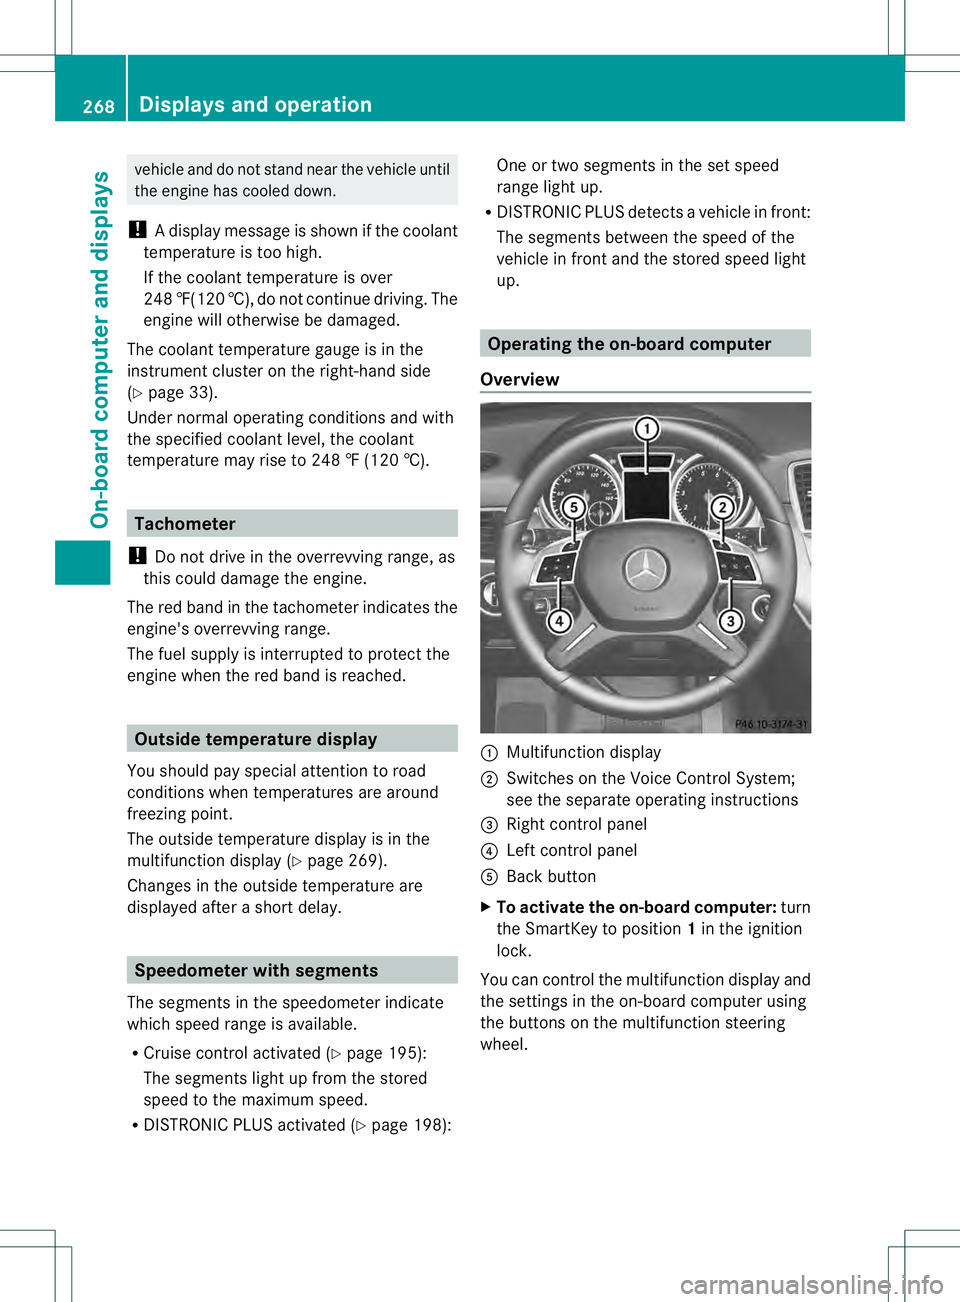
Overview 0002
Multifunctio ndisplay
0003 Switches on the Voice Control System;
see the separate operating instructions
0021 Right control panel
0020 Left control panel
001E Back button
X To activat ethe on-board computer: turn
the SmartKey to position 1in the ignition
lock.
You can control the multifunction display and
the settings in the on-board computer using
the buttons on the multifunction steering
wheel. 268
Displays and operationOn-board computer and displays
Page 272 of 454
001E
Drive program (Y page 169)
001F Transmission positio n(Ypage 169)
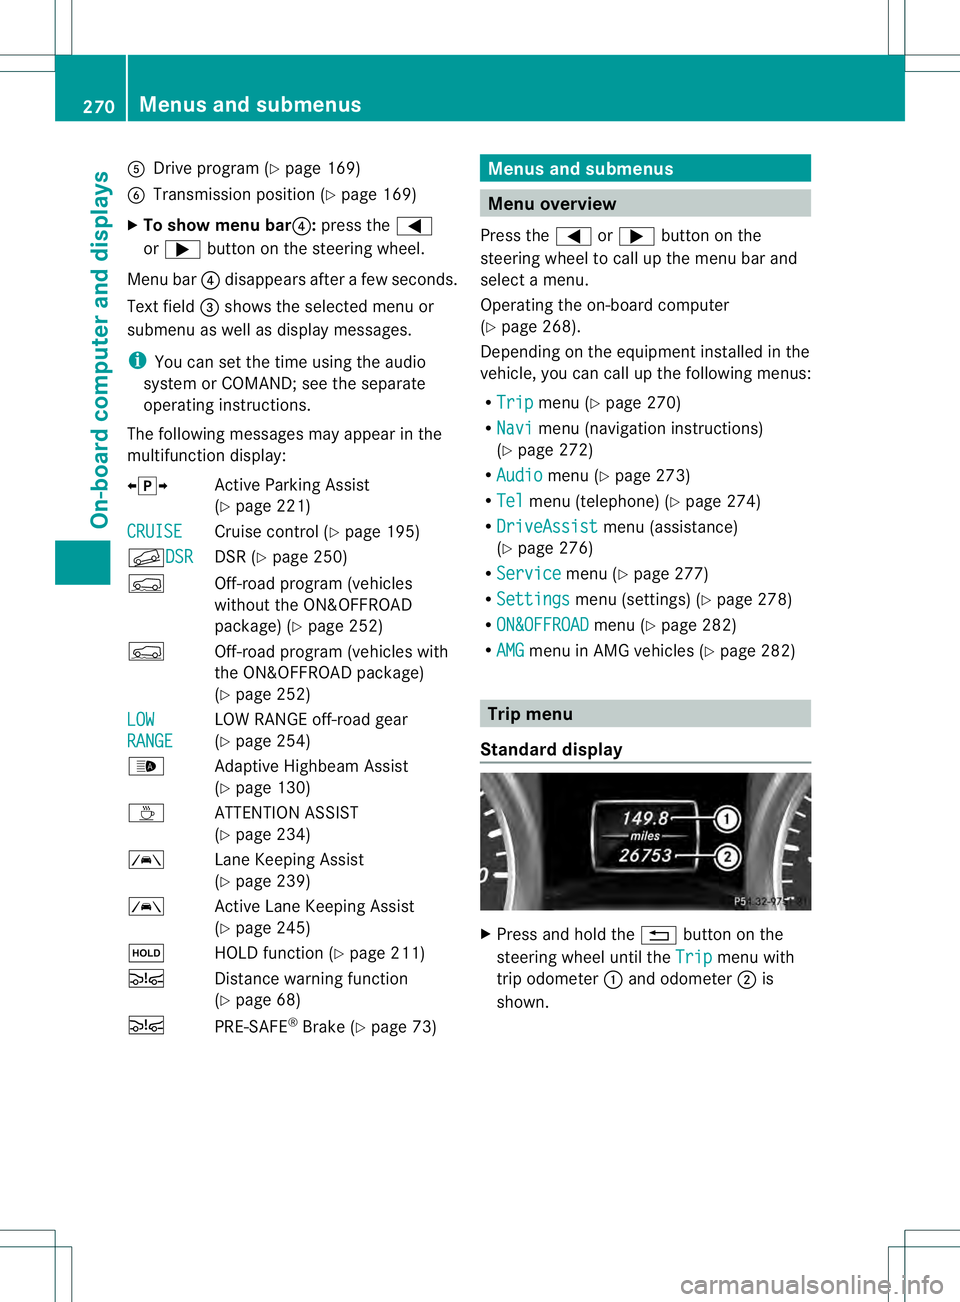
X To show menu bar 0020:press the 0002
or 0005 button on the steering wheel.
Menu bar 0020disappears after a few seconds.
Text field 0021shows the selected menu or
submenu as well as display messages.
i You can set the time using the audio
system or COMAND; see the separate
operating instructions.
The following messages may appear in the
multifunction display:
00090011000A Active Parking Assist
(Ypage 221)
CRUISE Cruise control (Y
page 195)
000BDSR DSR (Y
page 250)
0006 Off-road program (vehicles
without the ON&OFFROAD
package) (Y page 252)
0006 Off-road program (vehicles with
the ON&OFFROA Dpackage)
(Y page 252)
LOW RANGE LOW RANGE off-road gear
(Y
page 254)
0005 Adaptive Highbeam Assist
(Ypage 130)
0003 ATTENTION ASSIST
(Ypage 234)
0001 Lane Keeping Assist
(Ypage 239)
0001 Active Lane Keeping Assist
(Ypage 245)
0001 HOLD function (Y page 211)
0003 Distance warning function
(Ypage 68)
0003 PRE-SAFE®
Brake (Y page 73) Menus and submenus
Menu overview
Press the 0002or0005 button on the
steering wheel to call up the menu bar and
selec tamenu.
Operating the on-board computer
(Y page 268).
Depending on the equipment installed in the
vehicle, you can call up the following menus:
R Trip menu (Y
page 270)
R Navi menu (navigatio
ninstructions)
(Y page 272)
R Audio menu (Y
page 273)
R Tel menu (telephone) (Y
page 274)
R DriveAssist menu (assistance)
(Y page 276)
R Service menu (Y
page 277)
R Settings menu (settings) (Y
page 278)
R ON&OFFROAD menu (Y
page 282)
R AMG menu in AMG vehicles (Y
page 282) Trip menu
Standard display X
Press and hold the 0007button on the
steering wheel until the Trip menu with
trip odometer 0002and odometer 0003is
shown. 270
Menus and submenusOn-board computer and displays
Page 280 of 454
R
check the tire pressure electronically
(Y page 408)
R call up service due date (Y page 371)Settings menu
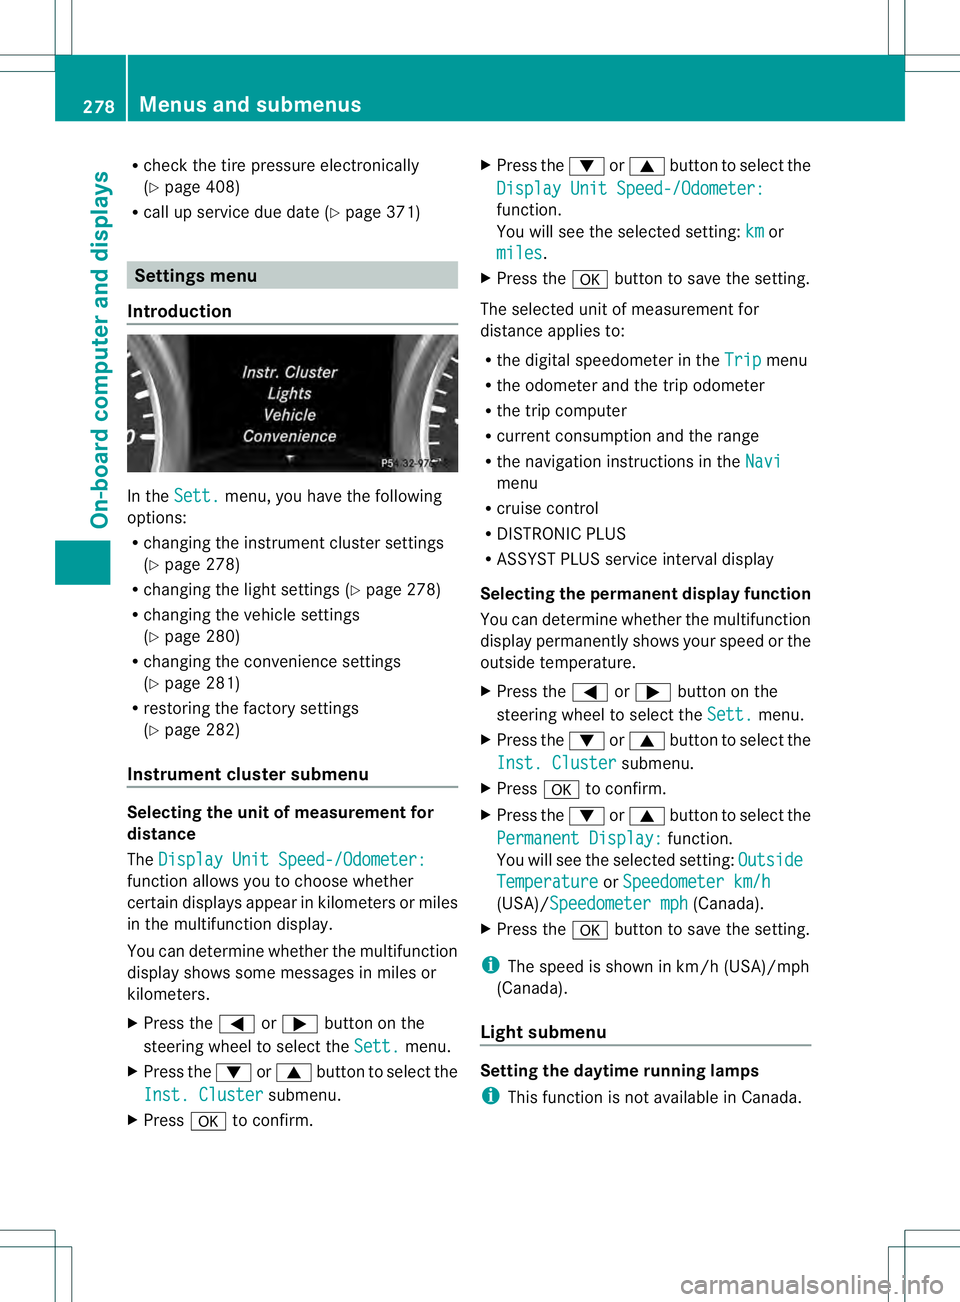
Introduction In the
Sett. menu, you have the following
options:
R changing the instrument cluster settings
(Y page 278)
R changing the light settings (Y page 278)
R changing the vehicle settings
(Y page 280)
R changing the convenience settings
(Y page 281)
R restoring the factory settings
(Y page 282)
Instrumen tcluster submenu Selecting the unit of measurement for
distance
The
Display Unit Speed-/Odometer: function allows you to choose whether
certain displays appear in kilometers or miles
in the multifunction display.
You can determine whether the multifunction
display shows some messages in miles or
kilometers.
X
Press the 0002or0005 button on the
steering wheel to selec tthe Sett. menu.
X Press the 0004or0003 button to select the
Inst. Cluster submenu.
X Press 000Bto confirm. X
Press the 0004or0003 button to select the
Display Unit Speed-/Odometer: function.
You will see the selected setting:
km or
miles .
X Press the 000Bbutton to save the setting.
The selected unit of measurement for
distance applies to:
R the digital speedometer in the Trip menu
R the odometer and the trip odometer
R the trip computer
R current consumption and the range
R the navigation instructions in the Navi menu
R cruise control
R DISTRONIC PLUS
R ASSYST PLUS service interval display
Selecting the permanent display function
You can determine whether the multifunction
display permanently shows your speed or the
outside temperature.
X Press the 0002or0005 button on the
steering wheel to select the Sett. menu.
X Press the 0004or0003 button to select the
Inst. Cluster submenu.
X Press 000Bto confirm.
X Press the 0004or0003 button to select the
Permanent Display: function.
You will see the selected setting: Outside Temperature or
Speedometer km/h (USA)/Speedometer mph (Canada).
X Press the 000Bbutton to save the setting.
i The speed is shown in km/h (USA)/mph
(Canada).
Light submenu Setting the daytime running lamps
i
This function is not available in Canada. 278
Menus and submenusOn-board computer and displays
Page 315 of 454
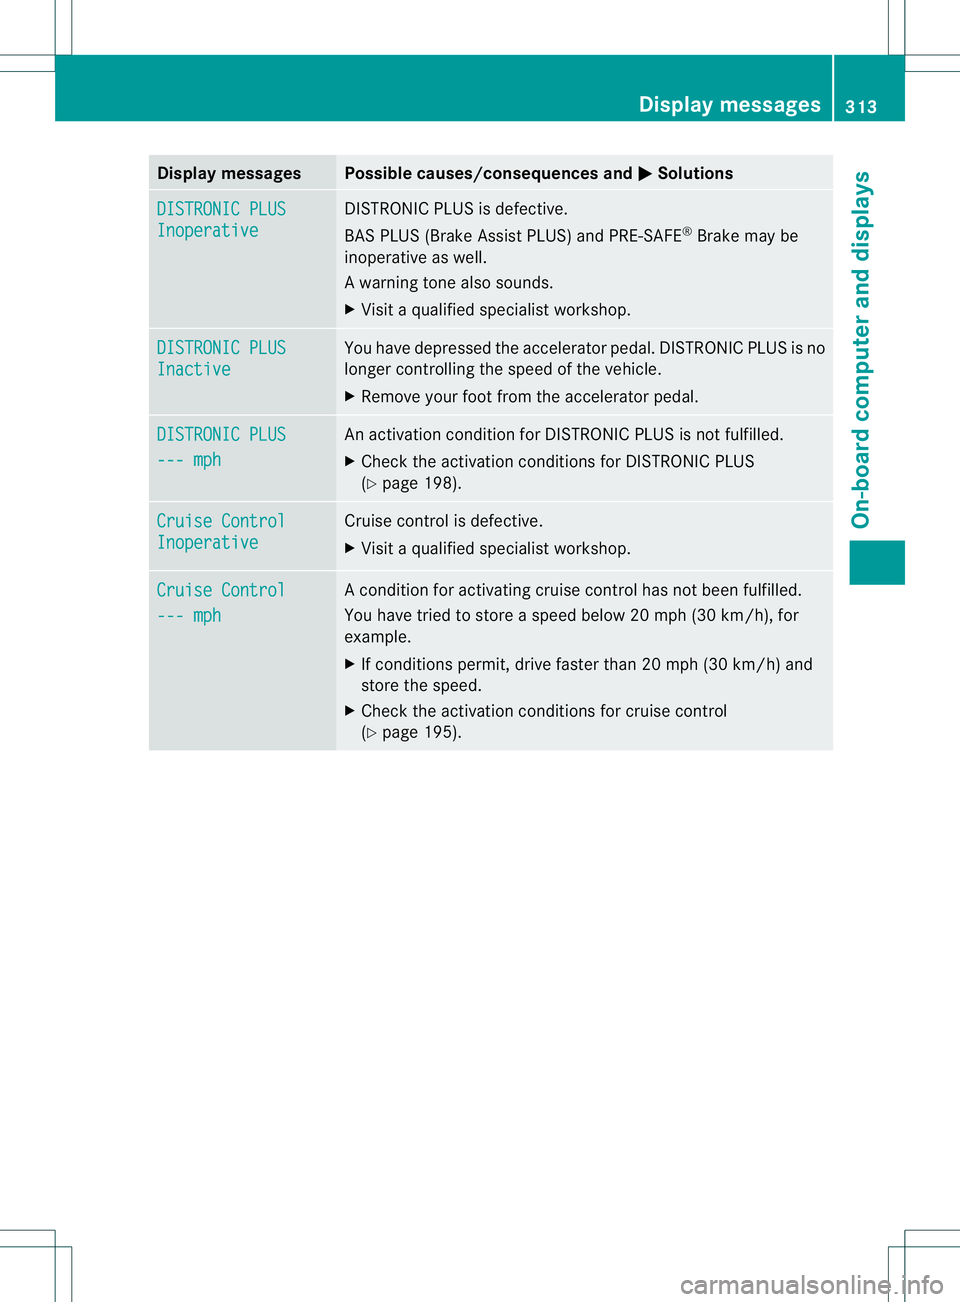
Display messages Possible causes/consequences and
0001 Solutions
DISTRONIC PLUS
Inoperative DISTRONIC PLUS is defective.
BAS PLUS (Brake Assist PLUS) and PRE-SAFE
®
Brake may be
inoperative as well.
Aw arning tone also sounds.
X Visi taqualified specialist workshop. DISTRONIC PLUS
Inactive You have depressed the accelerator pedal. DISTRONIC PLUS is no
longer controlling the speed of the vehicle.
X
Remove your foot from the accelerator pedal. DISTRONIC PLUS
--- mph An activation condition for DISTRONIC PLUS is not fulfilled.
X
Check the activation conditions for DISTRONIC PLUS
(Y page 198). Cruise Control
Inoperative Cruise control is defective.
X
Visit a qualified specialist workshop. Cruise Control
--- mph Ac
ondition for activating cruise control has not been fulfilled.
You have tried to store aspeed below 20 mph (30 km/h), for
example.
X If conditions permit, drive faster than 20 mph (30 km/h) and
store the speed.
X Check the activation conditions for cruise control
(Y page 195). Display messages
313On-board computer and displays Z