2013 MERCEDES-BENZ G-CLASS SUV low oil pressure
[x] Cancel search: low oil pressurePage 168 of 364
X
Engine oil level: check the engine oil level
and add oil if necessary.
Only then does the engine receive enough
oil when the vehicle is standing on a steep
incline.
X Tire-changing tool kit: check that the
jack
is working and make sure you have the lug
wrench, a robust tow cable and a folding
spade in the vehicle.
X Wheels and tires: check the tire tread
depth and tire pressure.
X Check for damage and remove any foreign
objects, e.g. small stones, from the
wheels/tires.
X Replace any missing valve caps.
X Replace dented or damaged wheels.
X Carry a sound spare wheel.
Checklist after driving off-road Driving over rough terrain places greater
demands on your vehicle than driving on
normal roads. After driving off-road, check
the vehicle. This
allows
you to detect damage
promptly and reduce the risk of an accident
to yourself and other road users.
X Shift the transfer case to HIGH
RANGE(Y page 199).
X Disengage the differential locks
(Y page 201).
X Clean the headlamps and rear lights and
check for damage.
X Clean the front and rear license plates.
X Clean the wheels and tires with a water jet
and remove any foreign objects.
X Clean the wheels, tires, wheel housings and
the vehicle underside with a water jet;
check for any foreign
objects and damage.
X Check whether twigs or other parts of
plants have become trapped. These
increase the risk of fire and can damage
fuel pipes, brake hoses or the rubber
bellows of the axle joints and propeller
shafts. X
After the trip, examine without fail the
entire undercarriage, wheels, tires,
brakes,
bodywork structure, steering, chassis and
exhaust system for damage.
X After driving for extended periods across
sand, mud, gravel, water
or in similarly dirty
conditions, have the brake discs, wheels,
brake pads/linings and axle joints checked
and cleaned.
X If you notice strong vibrations after off-road
driving, check for foreign objects in the
wheels and drive train and, if necessary,
remove them. Foreign objects can disturb
the balance and cause vibrations.
X Test the brakes.
Driving on sand Observe the following rules when driving on
sand:
R
Shift the transfer case to LOW
RANGE(Y page 199).
R Avoid high engine speeds.
R Limit the shift range of the automatic
transmission according to the off-road
conditions.
R Drive quickly to overcome the rolling
resistance. Otherwise, the vehicle
could dig
itself into the sand.
R Drive in the tracks of other vehicles if
possible. Make sure that the ruts are not
too deep, that the sand is firm enough and
that your vehicle has sufficient ground
clearance.
Tire ruts and gravel roads !
Check that the ruts are not too deep and
that your vehicle has sufficient clearance.
Otherwise, your vehicle could be damaged
or bottom out and get stuck.
Observe the following rules when driving
along ruts in off-road
terrain or on roads with
loose gravel: 166
Driving tips
Driving and parking
Page 239 of 364
Display messages Possible causes/consequences and
0050 Solutions00B2
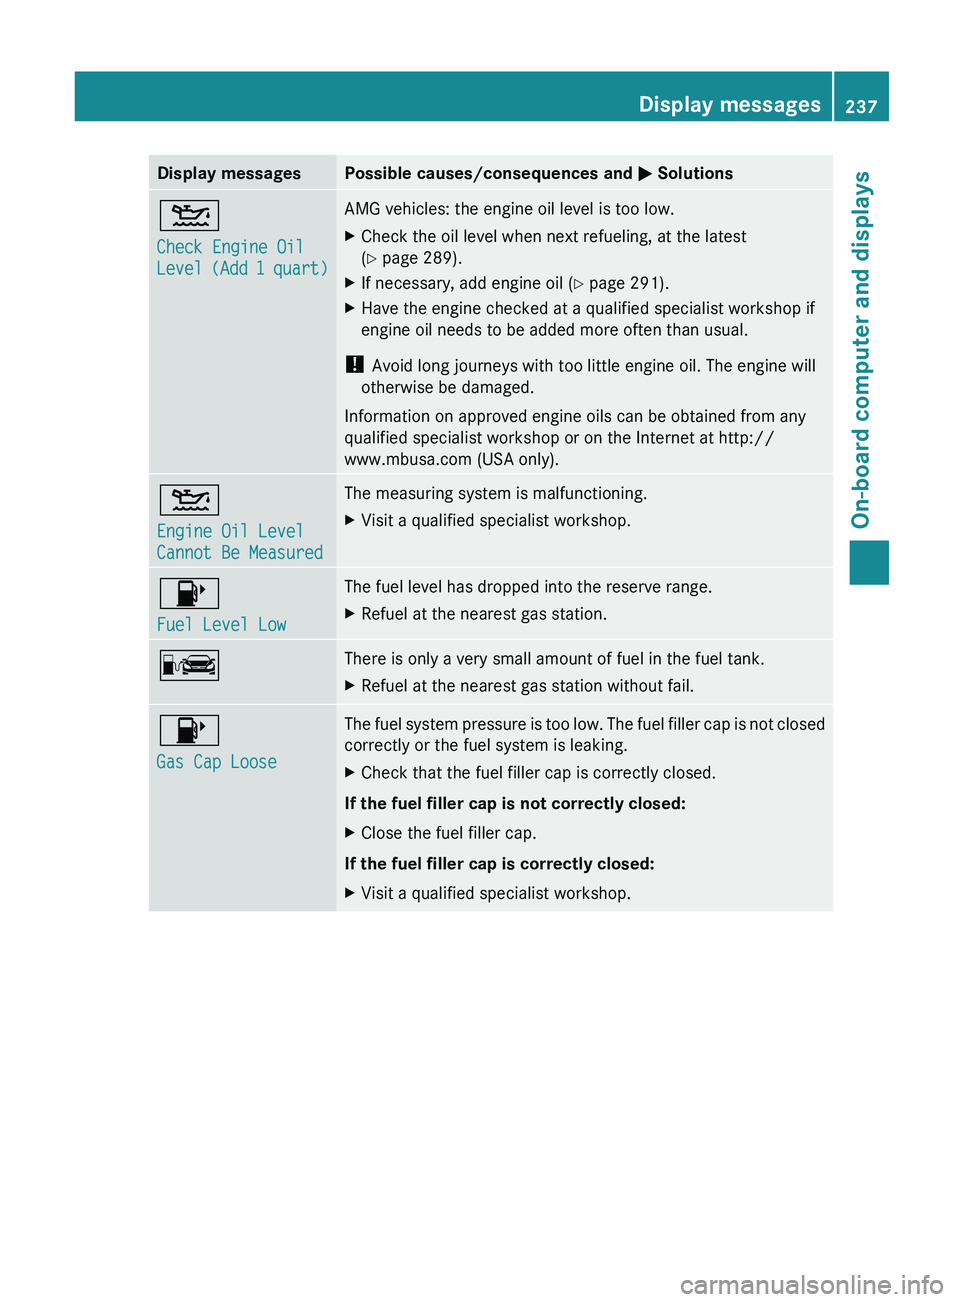
Check Engine Oil
Level (Add 1
quart) AMG vehicles: the engine oil level is too low.
X
Check the oil level when next refueling, at the latest
(Y page 289).
X If necessary, add engine oil ( Y page 291).
X Have the engine checked at a qualified specialist workshop if
engine oil needs to be added more often than usual.
! Avoid long journeys with too little engine oil. The engine will
otherwise be damaged.
Information on approved engine oils can be obtained from any
qualified specialist workshop or on the Internet at http://
www.mbusa.com (USA only). 00B2
Engine Oil Level
Cannot Be Measured The measuring system is malfunctioning.
X
Visit a qualified specialist workshop. 00B6
Fuel Level Low The fuel level has dropped into the reserve range.
X
Refuel at the nearest gas station. 00A8 There is only a very small amount of fuel in the fuel tank.
X
Refuel at the nearest gas station without fail. 00B6
Gas Cap Loose The fuel system pressure is too low. The fuel filler cap is not closed
correctly or the fuel system is leaking.
X
Check that the fuel filler cap is correctly closed.
If the fuel filler cap is not correctly closed:
X Close the fuel filler cap.
If the fuel filler cap is correctly closed:
X Visit a qualified specialist workshop. Display messages
237On-board computer and displays Z
Page 281 of 364
The vehicle data can now be sent to the
Customer Assistance center.
X
Press OK to confirm the message.
The voice connection with the Customer
Assistance center is terminated.
The Vehicle Diagnosis:
Transferring data... message
appears.
The vehicle data is sent to the Customer
Assistance center.
Depending on what the customer service
representative agreed with you, the voice
connection is re-established
after
the transfer
is complete. If necessary, you will be
contacted at a later time by another means,
e.g. by e-mail or phone.
Further functions of the vehicle remote
malfunction diagnosis include, for example:
R transfer of service data to the Customer
Assistance center. If a service is overdue,
the COMAND display shows a message
about various special offers at your
workshop.
R monthly status information e-mail on oil
level, air pressure, maintenance, brakes,
etc. If applicable, you will receive
information on special offers in the e-mail.
USA only: this information can also be
called up under "Owners Online" at http://
www.mbusa.com.
Information on the data stored in the vehicle
(Y page 24).
Information on Roadside Assistance
(Y page 22).
Downloading routes Downloading routes allows you to transfer
and save predefined routes in the navigation
system. To do
this,
an SD memory card must
be inserted into the COMAND system. If no
SD memory card is inserted, you must insert
the card into the card slot on the COMAND
system before saving.
A route can be prepared and sent either by a
customer service representative or via the mbrace portal on the Internet. Each route can
include up to
20
way points. When a route has
been received by the navigation system, the
'Route name' has been saved to
memory card. Do you want to start
route guidance? message appears on the
COMAND display. The route is saved to the
SD memory card.
X To start route guidance: select Yes.
An overview of the route is shown in the
display.
i If you select No, the saved route can be
called up later in the navigation menu.
X Select Start.
Route guidance is started.
i Downloaded and saved data
can be called
up again in COMAND. Further information
can be found in the "COMAND", "Online
and Internet services" and "Download
destination/route" sections.
Speed alert You can define the upper speed limit, which
must not be exceeded by the vehicle. If this
selected speed is exceeded by the vehicle, a
message will be sent to the Customer
Assistance center. The Customer Assistance
center then forwards this
information to you.
You can select the way in which you receive
this information beforehand. Possible options
include text message, e-mail or an automated
call.
The data which is sent to the Customer
Assistance center contains the following
information:
R the location where the speed limit was
exceeded
R the time at which the speed limit was
exceeded
R the selected speed limit which was
exceeded Features
279
Stowage and features Z
Page 293 of 364
Adding engine oil
H
Environmental note
When adding oil, take care not to spill any. If
oil enters the soil or waterways, it is harmful
to the environment.
! Only use engine oils and oil filters that
have been approved for vehicles with a
service system. You can
obtain a list of the
engine oils and oil filters tested and
approved in accordance with the
Mercedes-Benz Specifications for Service
Products at any Mercedes-Benz Service
center.
Damage to the engine or exhaust system is
caused by the following:
R using engine oils and oil filters that have
not been specifically approved for the
service system
R replacing engine oil and oil filters after
the interval for replacement specified by
the service system has been exceeded
R using engine oil additives.
! Do not add too much oil. If the oil level is
above the "max" mark on the dipstick, too
much oil has been added. This can lead to
damage to the engine or the catalytic
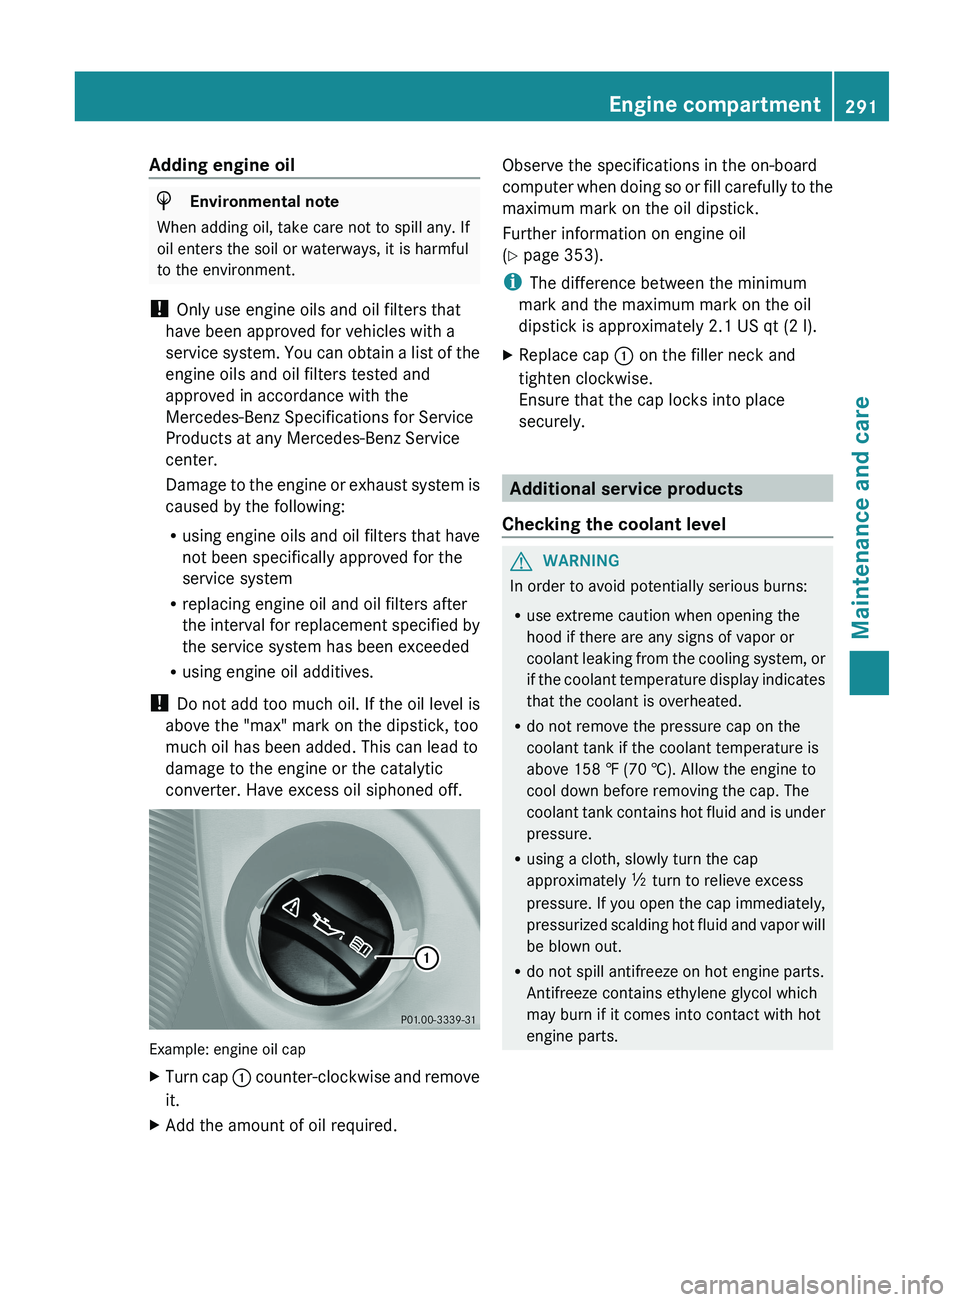
converter. Have excess oil siphoned off. Example: engine oil cap
X
Turn cap 0043 counter-clockwise and remove
it.
X Add the amount of oil required. Observe the specifications in the on-board
computer
when doing
so
or fill carefully to the
maximum mark on the oil dipstick.
Further information on engine oil
(Y page 353).
i The difference between the minimum
mark and the maximum mark on the oil
dipstick is approximately 2.1 US qt (2 l).
X Replace cap 0043 on the filler neck and
tighten clockwise.
Ensure that the cap locks into place
securely. Additional service products
Checking the coolant level G
WARNING
In order to avoid potentially serious burns:
R use extreme caution when opening the
hood if there are any signs of vapor or
coolant leaking from the
cooling system, or
if the coolant temperature display indicates
that the coolant is overheated.
R do not remove the pressure cap on the
coolant tank if the coolant temperature is
above 158 ‡ (70 †). Allow the engine to
cool down before removing the cap. The
coolant tank contains hot fluid and is under
pressure.
R using a cloth, slowly turn the cap
approximately 00C5 turn to relieve excess
pressure. If you open the cap immediately,
pressurized scalding hot fluid and vapor will
be blown out.
R do not spill antifreeze on hot engine parts.
Antifreeze contains ethylene glycol which
may burn if it comes into contact with hot
engine parts. Engine compartment
291
Maintenance and care Z
Page 343 of 364
Tire-mounting tools should not be used
near the valve. This could damage the
electronic components.
Only have tires changed at a qualified
specialist workshop.
Interchanging the front and rear wheels of
differing dimensions can render the general
operating permit invalid.
Always pay attention to the instructions and
safety notices in the section on "Changing a
wheel and mounting a spare wheel"
(Y page 341).
The wear patterns on the front and rear tires
differ, depending on the
operating conditions.
Rotate the wheels before a clear wear pattern
has formed on the tires. Front tires typically
wear more on the shoulders and the rear tires
in the center.
If your vehicle's tire configuration allows, you
can rotate the wheels according to the
intervals in the tire manufacturer's warranty
book in your vehicle documents. If no
warranty book is available, the tires should be
replaced every 3000 to
6000 miles(5000 to 10,000 km), or earlier if
tire wear necessitates it. Do not change the
direction of wheel rotation.
Clean the contact surfaces of the wheel and
the brake disc thoroughly every time a wheel
is interchanged. Check the tire pressure and
reactivate the tire pressure monitor
(Y page 325) if necessary. Direction of rotation
Tires with a specified direction of rotation
have additional benefits, e.g.
if there is a risk
of hydroplaning. You will only gain these
benefits if the correct direction of rotation is
observed.
An arrow on the sidewall of the tire indicates
its correct direction of rotation.
You may mount the spare wheel against the
direction of rotation. Adhere to the time
restriction on use as well as the speed
limitation specified on the spare wheel. Storing wheels
Store tires that are not being used in a cool,
dry and preferably dark place. Protect the
tires from oil, grease, gasoline and diesel. Cleaning the wheels
G
WARNING
Do not use power washers with circular-jet
nozzles (dirt grinders) to
clean your vehicle, in
particular the tires. You could otherwise
damage the tires and cause an accident. Mounting a wheel
Preparing the vehicle G
WARNING
You must remove the spare wheel from the
spare wheel carrier before lifting the vehicle.
Otherwise the vehicle could fall off the jack
and injure you or others.
X Prepare the vehicle as described
(Y page 304).
X Remove the vehicle tool kit and the jack
(Y page 302).
X Secure the vehicle to prevent it from rolling
away.
X Remove the spare wheel from the spare
wheel bracket ( Y page 303).
i Vehicles without a spare wheel or
emergency spare wheel are not equipped
with a tire-change tool
kit at the factory. For
more information on which tools are
required to perform a wheel change on your
vehicle e.g. lug wrench or jack, consult an
authorized Mercedes-Benz Center.
Securing the vehicle to prevent it from
rolling away X
On level ground: place chocks or other
suitable items under the front and rear of Changing a wheel
341
Wheels and tires Z
Page 354 of 364
!
To ensure the longevity and full
performance of the engine, only premium-
grade unleaded gasoline may be used.
If there is no premium-grade unleaded
gasoline available and regular unleaded
gasoline must be used,
please observe the
following precautions:
R only fill the fuel tank to half full with
regular unleaded gasoline and fill the rest
with premium-grade unleaded gasoline
as soon as possible.
R do not drive at the maximum speed.
R avoid sudden acceleration.
R if the vehicle is carrying a light load, e.g.
two passengers without luggage, do not
allow the engine to rev above 3000 rpm.
R if the vehicle is fully loaded or is being
operated in mountainous terrain, do not
depress the accelerator pedal further
than 00C3 of the pedal travel.
! Use a filter when refueling from a fuel can.
Otherwise, the fuel lines and/or injection
system could be blocked by particles from
the fuel can.
Only refuel using premium-grade unleaded
gasoline with a minimum octane rating of 91.
Reformulated Gasoline (RFG) and/or
unleaded gasoline with additives can be used.
The concentration of additives in the fuel,
however, must not exceed 10%, e.g.:
R Ethanol
R TAME
R ETBE
R IPA
R TBA
For MTBE, the concentration should not
exceed 15%.
The concentration of methanol in gasoline,
including other additives, must not exceed
3%.
Using mixtures of methanol and ethanol is not
permitted. Gasohol, a mixture of 10% ethanol
and 90% unleaded gasoline, may be used. All of these mix fuels must fulfill the fuel
requirements, e.g.:
R
knock resistance
R boiling point
R vapor pressure
You will usually find
information about the fuel
grade on the pump. If you cannot find the
label on the pump, ask the staff for
assistance.
i For further information, consult an
authorized Mercedes-Benz Center or on
the Internet at http://www.mbusa.com
(USA only).
Information on refueling (Y page 153).
AMG vehicles
! Only refuel using super-grade unleaded
gasoline with at least 98 RON/88 MON
that conforms to European standard
EN 228 or an equivalent specification.
You could otherwise impair engine output
or damage the engine.
! Premium-grade unleaded gasoline with
an octane rating of 95 RON/85 MON may
be used as a temporary measure if the
recommended fuel is not available. This
may reduce engine performance and
increase fuel consumption. Do not drive at
full throttle.
! Regular unleaded gasoline with an octane
rating of 91 RON/82.5 MON may also be
used as an emergency measure if the
recommended fuel is not available.
Doing so results in noticeably higher fuel
consumption, and the engine power output
is noticeably reduced. Avoid driving at full
throttle.
If only regular unleaded gasoline with an
octane rating of 91 RON/82.5 MON or
lower is available, you must have the
vehicle adapted to this fuel at a qualified
specialist workshop. 352
Service products and filling capacities
Technical data
Page 357 of 364
http://bevo.mercedes-benz.com. Or
contact a qualified specialist workshop.
! Always use a suitable coolant mixture,
even in countries where
high temperatures
prevail.
Otherwise, the engine cooling system is not
sufficiently protected from corrosion and
overheating.
The coolant is a mixture of water and
antifreeze/corrosion inhibitor. It performs
the following tasks:
R corrosion protection
R antifreeze protection
R raising the boiling point
If the coolant has antifreeze protection down
to -35 ‡ (-37 †), the boiling point of the
coolant in the pressure system is
approximately 266 ‡ (130 †).
The antifreeze/corrosion inhibitor
concentration in the engine cooling system
should:
R be at least 50%. This will protect the engine
cooling system against freezing down to
approximately -35 ‡ (-37 †).
R not exceed 55% (antifreeze protection
down to -49 ‡ [-45 †]). Otherwise, heat
will not be dissipated as effectively.
If the vehicle has lost coolant, add equal
amounts of water and antifreeze/corrosion
inhibitor. Mercedes-Benz recommends an
antifreeze/corrosion inhibitor in accordance
with MB Specifications for Service Products
310.1.
The coolant is checked with every
maintenance interval at a qualified specialist
workshop.
i When the vehicle is first delivered, it is
filled with a coolant mixture that ensures
adequate antifreeze and corrosion
protection.
The engine cooling system is filled with
coolant at the factory; this coolant contains
antifreeze/corrosion inhibitor that ensures protection down to approximately -35 ‡
(-37 †).
Your vehicle has a range of aluminum
components. Aluminum components in the
engine make it necessary to use antifreeze/
corrosion inhibitor that has been specifically
formulated to protect the aluminum parts.
Using other antifreeze/corrosion inhibitors
without these characteristics affects the
service life.
The coolant must be
used throughout the year
in order to maintain the necessary corrosion
protection and to provide protection from
overheating. In the Maintenance Booklet, you
can find information on the intervals for
renewal.
The renewal interval is determined by the
coolant type and the engine cooling system
design. The renewal interval in the
Maintenance Booklet is only valid if the
coolant is renewed or added to with
Mercedes-Benz approved products.
Therefore, only use MB 326.0 antifreeze/
corrosion inhibitor or another Mercedes-Benz
approved product of the same specification.
Information on other products with the same
specifications that are approved by
Mercedes-Benz can be obtained at an
authorized Mercedes-Benz Center or on the
Internet at
http://bevo.mercedes-benz.com.
If the coolant level is too low, MB 325.0
antifreeze/corrosion inhibitor should be
added. Have the engine cooling system
checked for possible leaks. Service products and filling capacities
355
Technical data Z