2013 MERCEDES-BENZ G-CLASS SUV dashboard
[x] Cancel search: dashboardPage 11 of 364
Engine electronics
Problem (malfunction) ...................144
Engine oil
Adding ........................................... 291
Additives ........................................ 354
Checking the oil level ..................... 289
Display message ............................ 236
Filling capacity
............................... 353
Notes about oil grades ................... 353
Temperature (on-board computer) . 222
Viscosity ........................................ 354
Environmental protection
Note ................................................. 20
ESP ®
(Electronic Stability
Program) AMG menu (on-board computer) ... 222
Deactivating/activating ................... 63
Display message ............................ 226
Function/notes ................................ 62
Important safety information ........... 62
Trailer stabilization ........................... 64
Warning lamp ................................. 252
Exhaust check ................................... 159
Exhaust tail pipe (cleaning
instructions) ...................................... 298
Exterior lighting see Lights
Exterior mirrors
Adjusting ......................................... 93
Dipping (automatic) .........................94
Folding in/out (automatically) ......... 94
Folding in/out (electrically) ............. 93
Folding in when locking (on-board
computer) ...................................... 221
Out of position (troubleshooting) .....94
Setting ............................................. 93
Storing settings (memory
function) .......................................... 95
Storing the parking position ............. 94 F
Filler cap see Fuel filler flap
First-aid kit ......................................... 302
Flat tire Preparing the vehicle .....................304
Floormat ............................................. 284Fog lamps
Switching on/off ........................... 101
Folding the seat backrest (rear)
forwards/back
.................................. 265
Front fog lamp (display message) ...233
Front fog lamps Switching on/off ........................... 101
Fuel
Additives ........................................ 353
Consumption statistics ..................213
Displaying the current
consumption .................................. 213
Displaying the range ...................... 213
Fuel gauge ..................................... 209
Grade (gasoline) ............................ 351
Important safety notes .................. 351
Notes for AMG vehicles ................. 352
Premium-grade unleaded gasoline . 351
Problem (malfunction) ...................156
Refueling ........................................ 153
Tank content/reserve fuel .............351
Fuel/water separator
Service ........................................... 294
Fuel consumption
Notes ............................................. 159
Fuel filler flap
Emergency release ........................ 155
Opening/closing ............................ 154
Fuel level
Calling up the range (on-board
computer) ...................................... 213
Fuel tank
Capacity ........................................ 351
Problem (malfunction) ...................156
Fuse allocation chart ........................313
Fuse box Battery case ................................... 315
Dashboard ..................................... 314
Front-passenger footwell ...............314
Transmission tunnel ....................... 314
Fuse extractor ................................... 313
Fuses Allocation chart ............................. 313
Before changing ............................. 313
Dashboard fuse box ....................... 314
Fuse allocation chart ..................... 313
Fuse box in the front-passenger
footwell .......................................... 314 Index
9
Page 42 of 364
Safety guidelines for seat belts,
Emergency Tensioning Devices (ETDs)
and air bags
G
WARNING
R Damaged seat belts or
seat belts that have
been subjected to stress in an accident
must be replaced. Their anchoring points
must also be checked. Only use seat belts
installed or supplied by an authorized
Mercedes-Benz Center.
R Air bags and pyrotechnic Emergency
Tensioning Devices (ETDs) contain
perchlorate material, which may require
special handling and regard for the
environment. Check your national disposal
guidelines. California residents, see
www.dtsc.ca.gov/HazardousWaste/
Perchlorate/index.cfm.
R Air bags and ETDs are designed to function
on a one-time-only basis. An air bag or ETD
that has deployed must be replaced.
R Do not pass seat belts over sharp edges.
They could tear.
R Do not make any modification that could
change the effectiveness of the seat belts.
R Do not bleach or dye seat belts as this may
severely weaken them. In a crash they may
not be able to provide adequate protection.
R No modifications of any kind may be made
to any components or wiring of the SRS.
R Do not change or remove any component
or part of the SRS.
R Do not install additional trim material, seat
covers, badges, etc. over the steering
wheel hub, front-passenger front air bag
cover, outer sides of the seat backrests,
door trim panels, or door frame trims.
R Do not install additional electrical/
electronic equipment on or near SRS
components and wiring.
R Keep area between air bags and occupants
free of objects (e.g. packages, purses,
umbrellas, etc.). R
Do not hang items such as coat hangers
from the coat hooks or handles over the
door. These items may
be thrown around in
the vehicle and cause head and other
injuries when the window curtain air bag is
deployed.
R Air bag system components will be hot after
an air bag has inflated. Do not touch them.
R Never place your feet on the instrument
panel, dashboard, or on the seat. Always
keep both feet on the floor in front of the
seat.
R Improper repair work on the SRS creates a
risk of rendering the SRS inoperative or
causing unintended air bag deployment.
Work on the SRS must therefore only be
performed by qualified technicians.
Contact an authorized Mercedes-Benz
Center.
R For your protection and the protection of
others, when scrapping the air bag unit or
ETD, our safety instructions must be
followed. These instructions are available
from any authorized Mercedes-Benz
Center.
R Given the considerable deployment speed,
required inflation volume, and the material
of the air bags, there is the possibility of
abrasions or other, potentially more serious
injuries resulting from air bag deployment.
If you sell your vehicle, Mercedes-Benz
strongly recommends that you inform the
subsequent owner that the vehicle is
equipped with SRS. Also, refer them to the
applicable section in the Operator's Manual. 40
Occupant safety
Safety
Page 43 of 364
Air bags
Important safety notes G
WARNING
Air bags are designed to reduce the potential
of injury and fatality in certain
R frontal impacts (front air bags)
R side impacts (window curtain air bags)
However, no system available today can
completely eliminate injuries and fatalities.
Deployment of the air bags temporarily
releases a small amount of dust from the air
bags. This dust, however, is neither harmful
to your health, nor
does it indicate a fire in the
vehicle. The dust might cause some
temporary breathing difficulty for people with
asthma or other breathing trouble. To avoid
this, you may wish to get out of the vehicle as
soon as it is safe to do so. If you have any
breathing difficulty but cannot get out of the
vehicle after the air bag inflates, then get fresh
air by opening a window or door. G
WARNING
To reduce the risk of injury when the front air
bags inflate, it
is
very important for the driver
and front passenger to always be in a properly
seated position and to wear their respective
seat belt.
For maximum protection in the event of a
collision always be in normal seated position
with your back against the seat backrest.
Fasten your seat belt and make sure it is
properly positioned on your body. Since the air bag inflates with considerable
speed and force, a proper seating position
and correct positioning of the hands on the
steering wheel will
help
to keep you at a safe
distance from the air bag. Occupants who are
not wearing their seat belt, are not seated
properly or are too close to the air bag can be
seriously injured or killed by an air bag as it
inflates with great force instantaneously:
R Sit with the seat belt properly fastened in a
position that is as upright as possible with
your back against the seat backrest.
R Move the driver's seat as far back as
possible, still permitting proper operation
of vehicle controls. The distance from the
center of the driver's chest to the center of
the air bag cover on the steering wheel
must be at least 10 inches (25 cm) or more.
You should be able to accomplish this by
adjusting the seat and steering wheel. If
you have any difficulties, please contact an
authorized Mercedes-Benz Center.
R Do not lean your head or chest close to the
steering wheel or dashboard.
R Keep hands on the outside of the steering
wheel rim. Placing hands and arms inside
the rim can increase the risk and potential
severity of hand/arm injury when the driver
front air bag inflates.
R Adjust the front passenger seat as far as
possible rearward from the dashboard
when the seat is occupied.
R Occupants, especially children, should
never place their bodies or lean their heads
in the area of the door where the window
curtain air bag inflates. This could result in
serious injuries or death should the window
curtain air bag be deployed. Always sit as
upright as possible, wear the seat belt
properly and use an appropriately sized
infant restraint, toddler restraint, or
booster seat recommended for the size and
weight of the child.
R Children 12 years old and under must never
ride in the front seat, except in a Mercedes-
Benz authorized BabySmart™ compatible Occupant safety
41
Safety
Z
Page 52 of 364
abdomen, it could cause serious injuries in
the event of an impact.
R Never route the seat belt over rigid or
fragile objects in or on your clothing, such
as eyeglasses, pens, keys
etc, as this could
cause injuries.
R Always ensure that the seat belt is routed
correctly. This is particularly important if
you are wearing loose clothing.
R Only one person should use each seat belt
at any one time. Never use a seat belt to
restrain more than one person or route the
belt around additional objects.
R Never wear seat belts when they are
twisted. Otherwise, in the event of an
impact, the full width of the seat belt is
unavailable to distribute the force of the
impact. The twisted seat belt routed across
your body could cause injuries.
R Pregnant women should also wear a three-
point seat belt. The lap belt must always
pass across your lap as low down as
possible, i.e. across your hips; not across
your abdomen.
R The seat backrest should be set as close to
vertical as possible.
R Check the seat belt during the journey in
order to make sure that it is correctly
positioned.
R Never rest your feet on the dashboard or
the seat. Always keep both feet on the floor
in front of the seat.
R When using a seat belt to secure an infant
restraint system, child restraint system or
a child on a booster seat, always follow the
child seat manufacturer's instructions. G
WARNING
Do not pass seat belts over sharp edges. They
could tear.
Do not allow the
seat belt to get caught in the
door or in the seat adjustment mechanism.
This could damage the seat belt. Never attempt to make modifications to seat
belts. This could impair the effectiveness of
the seat belts.
Fastening seat belts Important safety notes
G
WARNING
According to accident statistics, children are
safer when properly restrained on the rear
seats than on the
front-passenger seat. Thus,
we strongly recommend that children be
placed in the rear seat whenever possible.
Regardless of seating position, children 12
years old and under must be seated and
properly secured in an appropriately sized
child restraint system or booster seat
recommended for the size and weight of the
child. For additional information, see the
"Children in the vehicle" section.
A child's risk of serious or fatal injuries is
significantly increased if the child restraints
are not properly secured in the vehicle and/
or the child is not properly secured in the child
restraint. G
WARNING
Children 12 years old and under must never
ride in the front seat, except in a Mercedes-
Benz authorized BabySmart™ compatible
child seat, which operates with the
BabySmart™ system installed in the vehicle
to deactivate the
front
passenger front air bag
when it is installed properly. Otherwise they
will be struck by the air bag when it inflates in
a crash. If this happens, serious or fatal injury
will result. 50
Occupant safety
Safety
Page 94 of 364
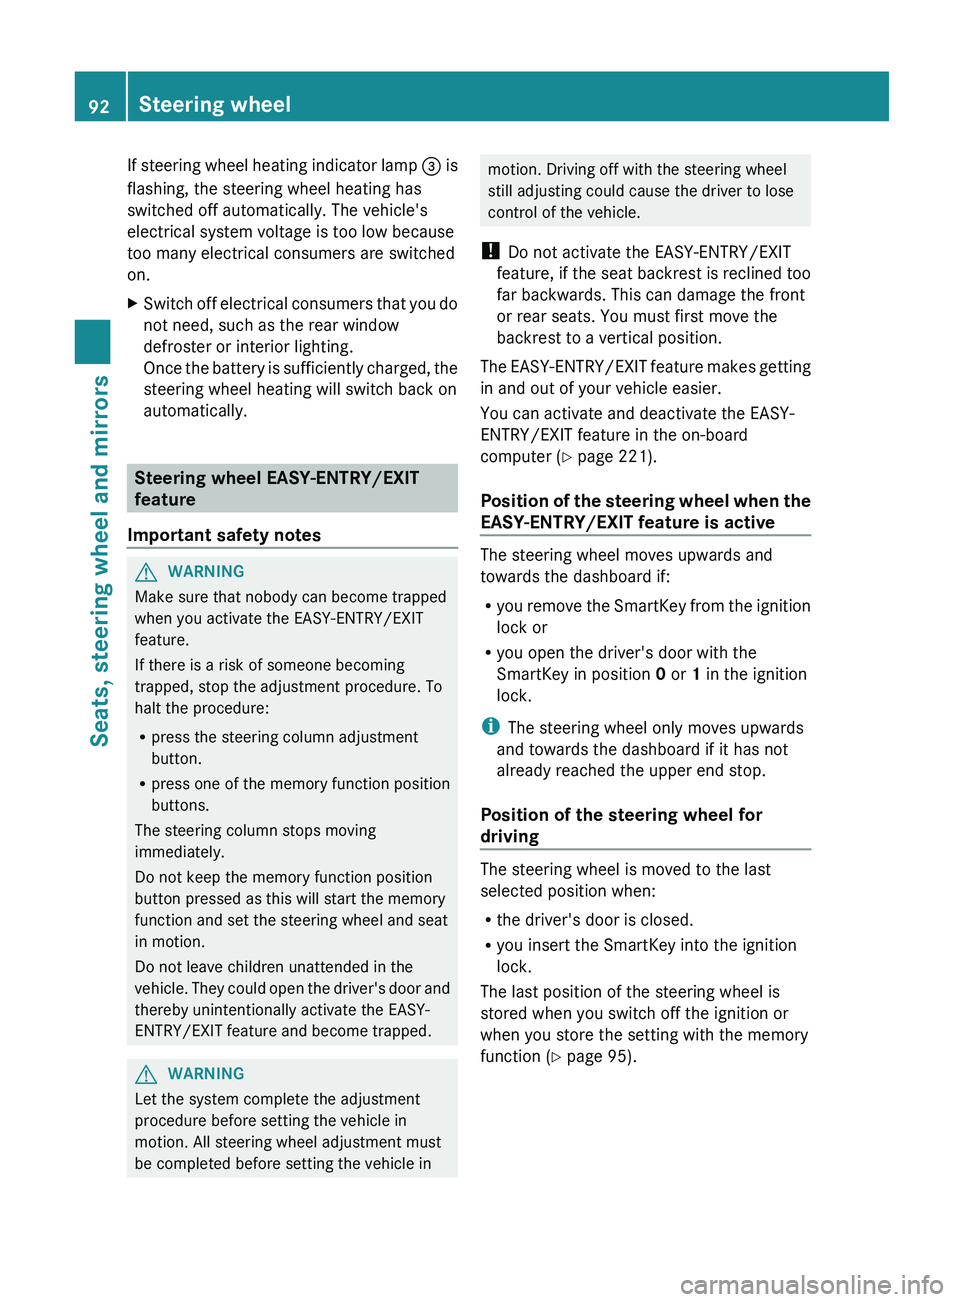
If steering wheel heating indicator lamp
0087 is
flashing, the steering wheel heating has
switched off automatically. The vehicle's
electrical system voltage is too low because
too many electrical consumers are switched
on.
X Switch off electrical
consumers that you do
not need, such as the rear window
defroster or interior lighting.
Once the battery is
sufficiently charged, the
steering wheel heating will switch back on
automatically. Steering wheel EASY-ENTRY/EXIT
feature
Important safety notes G
WARNING
Make sure that nobody can become trapped
when you activate the EASY-ENTRY/EXIT
feature.
If there is a risk of someone becoming
trapped, stop the adjustment procedure. To
halt the procedure:
R press the steering column adjustment
button.
R press one of the memory function position
buttons.
The steering column stops moving
immediately.
Do not keep the memory function position
button pressed as this will start the memory
function and set the steering wheel and seat
in motion.
Do not leave children unattended in the
vehicle. They could open
the driver's door and
thereby unintentionally activate the EASY-
ENTRY/EXIT feature and become trapped. G
WARNING
Let the system complete the adjustment
procedure before setting the vehicle in
motion. All steering wheel adjustment must
be completed before setting the vehicle in motion. Driving off with the steering wheel
still adjusting could cause the driver to lose
control of the vehicle.
! Do not activate the EASY-ENTRY/EXIT
feature, if the seat
backrest is reclined too
far backwards. This can damage the front
or rear seats. You must first move the
backrest to a vertical position.
The EASY-ENTRY/EXIT feature makes getting
in and out of your vehicle easier.
You can activate and deactivate the EASY-
ENTRY/EXIT feature in the on-board
computer (Y page 221).
Position of the steering wheel when the
EASY-ENTRY/EXIT feature is active The steering wheel moves upwards and
towards the dashboard if:
R
you remove the SmartKey
from the ignition
lock or
R you open the driver's door with the
SmartKey in position 0 or 1 in the ignition
lock.
i The steering wheel only moves upwards
and towards the dashboard if it has not
already reached the upper end stop.
Position of the steering wheel for
driving The steering wheel is moved to the last
selected position when:
R
the driver's door is closed.
R you insert the SmartKey into the ignition
lock.
The last position of the steering wheel is
stored when you switch off the ignition or
when you store the setting with the memory
function ( Y page 95).92
Steering wheel
Seats, steering wheel and mirrors
Page 197 of 364

Top view
The sensors must be free from dirt, ice or
slush. Otherwise, they may not function
correctly. Clean the
sensors
regularly, taking
care not to scratch or damage them
(Y page 297).
Front sensors Center Approximately 40 in
(approximately 100 cm
from brush guard)
Corners Approximately 24 in
(approximately 60cm)
Rear sensors
Center Approximately 36 in
(approximately 90 cm)
from spare wheel
Corners Approximately 32 in
(approximately 80 cm)
Minimum distance
Center Approximately 8 in
(approximately 20 cm)
Corners Approximately 8 in
(approximately 20 cm)
If there is an obstacle within this range, the
relevant warning displays light up and a
warning tone sounds. If the distance falls
below the minimum, the distance may no
longer be shown. Warning displays
Warning display for the front area
0043
Segments on the left-hand side of the
vehicle
0044 Segments on the right-hand side of the
vehicle
0087 Segments showing operational readiness
The warning displays show the distance
between the sensors and the obstacle. The
warning display for the front area is located
on the
dashboard above
the center air vents.
The warning display for the rear area is
located on the headliner in the rear
compartment.
The warning display for each side of the
vehicle is divided into five yellow and two red
segments. PARKTRONIC is operational if
yellow segments showing operational
readiness 0087 light up.
The selected transmission position and the
direction in which the vehicle is rolling
determine which warning display is active
when the engine is running. Transmission
position Warning display
D
Front area activated
R, N or the vehicle
is rolling
backwards Rear and front areas
activated
P
No areas activatedDriving systems
195
Driving and parking Z
Page 300 of 364

X
Clean sensors 0043 of the driving systems
with water, car shampoo and a soft cloth.
Cleaning the rear view camera !
Do not clean the
camera lens and the area
around the rear view camera with a power
washer. X
Use clear water and a soft cloth to clean
camera lens 0043. Cleaning chrome parts !
Do not clean the exhaust pipe with acid-
based cleaning agents such as sanitary
cleansers or wheel cleaners.
Impurities combined with the effects of road
grit and corrosive environmental
factors may
cause flash rust to form on the surface. You
can restore the original shine of the chrome
parts by cleaning them regularly, especially in
winter and after washing.
X Clean the chrome parts with a chrome care
product tested and approved
by Mercedes-
Benz. Interior care
Cleaning the display !
For cleaning, do not use any of the
following:
R alcohol-based thinner or gasoline
R abrasive cleaning agents
R commercially-available household
cleaning agents
These may damage the
display surface. Do
not put pressure on the display surface
when cleaning. This could lead to
irreparable damage to the display.
X Before cleaning the display, make sure that
it is switched off and has cooled down.
X Clean the display surface using a
commercially available microfiber cloth
and TFT/LCD display cleaner.
X Dry the display surface using a dry
microfiber cloth.
Cleaning the plastic trim G
WARNING
When cleaning the steering wheel boss and
dashboard, do not use cockpit sprays or
cleaning agents containing solvents.
Cleaning
agents containing solvents cause the surface
to become porous, and as a result, plastic 298
Care
Maintenance and care
Page 316 of 364
The fuses are located in various fuse boxes:
R
Main fuse box on the driver's side of the
dashboard
R Fuse box in the front-passenger footwell
R Fuse box in the transmission tunnel
R Fuse box in the battery case
The fuse allocation chart
and the spare fuses
are in the main fuse box on the dashboard
(Y page 314).
You will find the fuse removal device in the
vehicle tool kit (Y page 302). Dashboard fuse box
! Do not use a pointed object such as a
screwdriver to open the cover in the
dashboard. You could damage the
dashboard or the cover.
! Make sure that no
moisture can enter the
fuse box when the cover is open.
! When closing the cover, make sure that it
is lying correctly on the fuse box. Moisture
seeping in or dirt could otherwise impair
the operation of the fuses. X
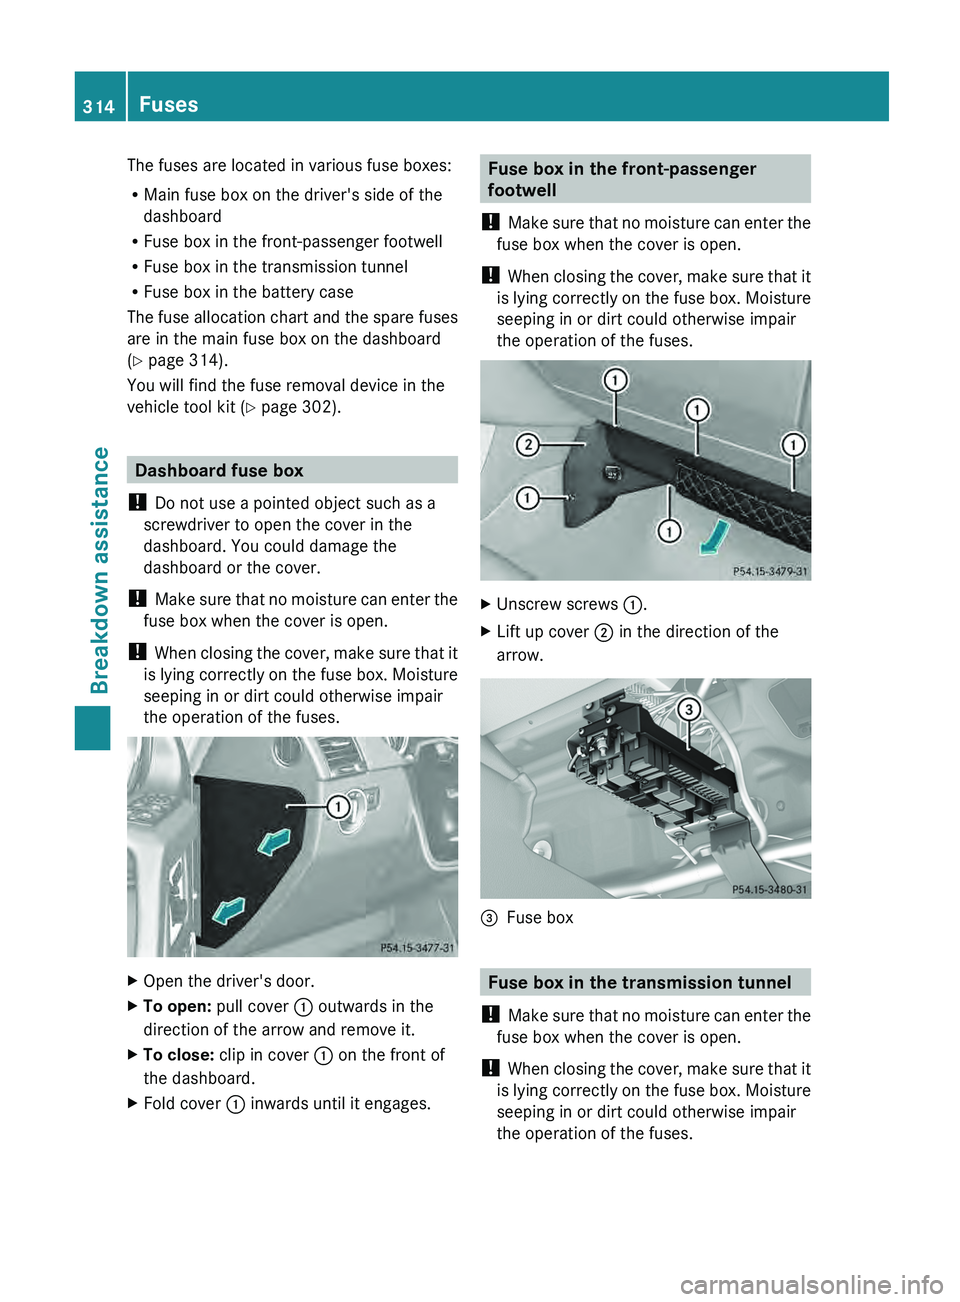
Open the driver's door.
X To open: pull cover 0043 outwards in the
direction of the arrow and remove it.
X To close: clip in cover 0043 on the front of
the dashboard.
X Fold cover 0043 inwards until it engages. Fuse box in the front-passenger
footwell
! Make sure that no
moisture can enter the
fuse box when the cover is open.
! When closing the cover, make sure that it
is lying correctly on the fuse box. Moisture
seeping in or dirt could otherwise impair
the operation of the fuses. X
Unscrew screws 0043.
X Lift up cover 0044 in the direction of the
arrow. 0087
Fuse box Fuse box in the transmission tunnel
! Make sure that no
moisture can enter the
fuse box when the cover is open.
! When closing the cover, make sure that it
is lying correctly on the fuse box. Moisture
seeping in or dirt could otherwise impair
the operation of the fuses. 314
Fuses
Breakdown assistance